

Dam Battlegrounds
surface · 96 overview areasShow on map
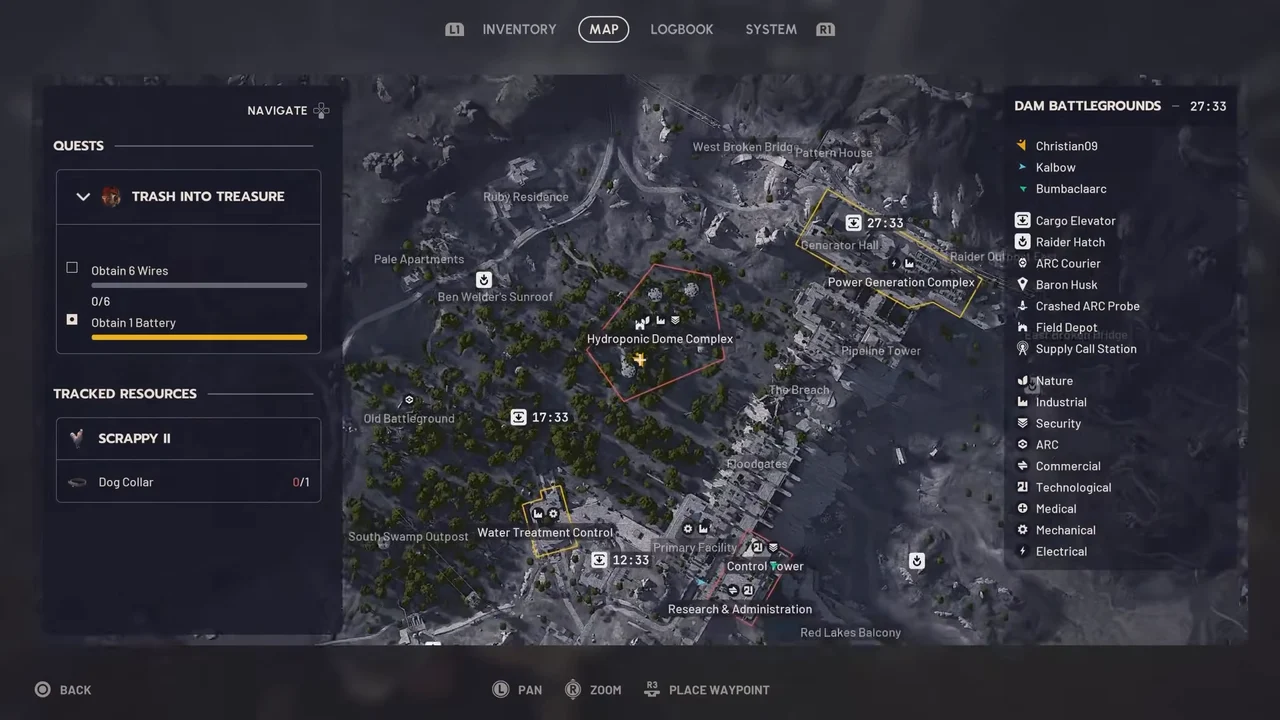
Use the map to locate a building, then check its objective and access notes before moving. Resource zones show places to search, not items that are guaranteed to be present. Use area markers as search guides, then follow the objective prompt when you arrive. Dam uses one map view, but buildings still have multiple floors.
Every POI on Dam Battlegrounds
Read the area by landmark: Power Generation Complex anchors the industrial route, Water Treatment Control borders the swamp, and Research and Administration provides a separate indoor quest stop. A straight line between markers can still cross exposed ground or end on the wrong floor.
Find the Right Building Before Climbing
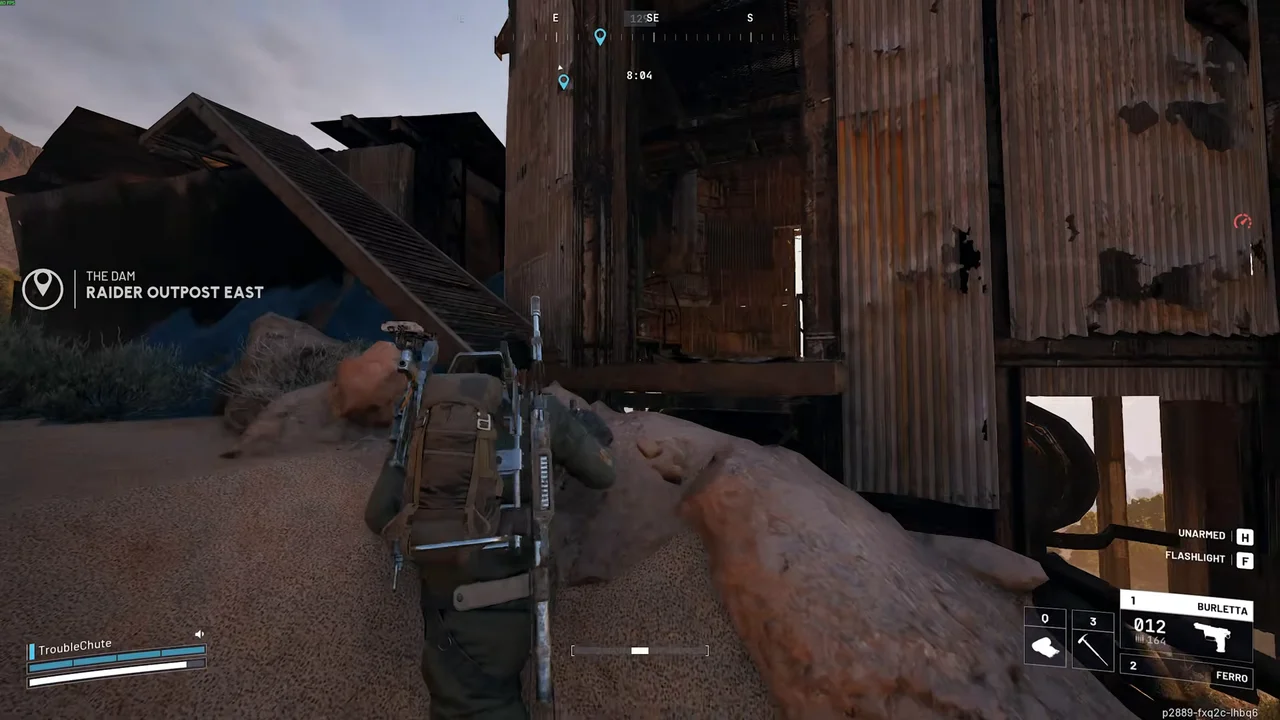
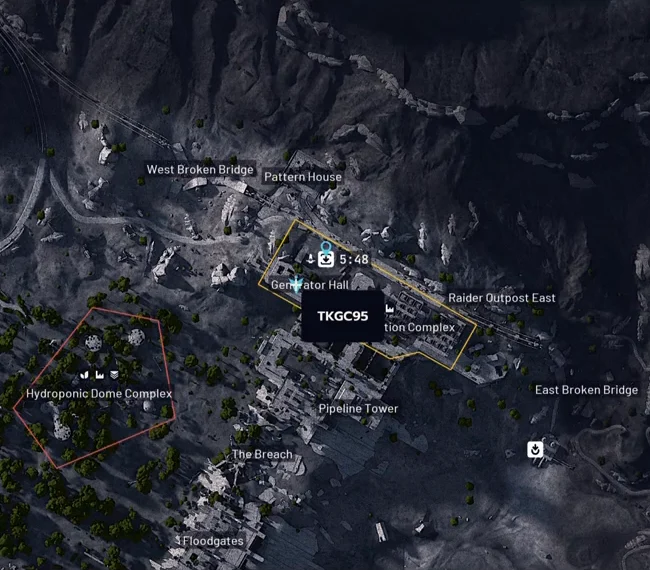
Zoom in around Pattern House to find the tall, patterned building used by Our Presence Up There. Also zoom in for Raider Outpost East. That is the outpost described as northern in Celeste's Journals, not a reason to search for a second building named Northern Outpost.
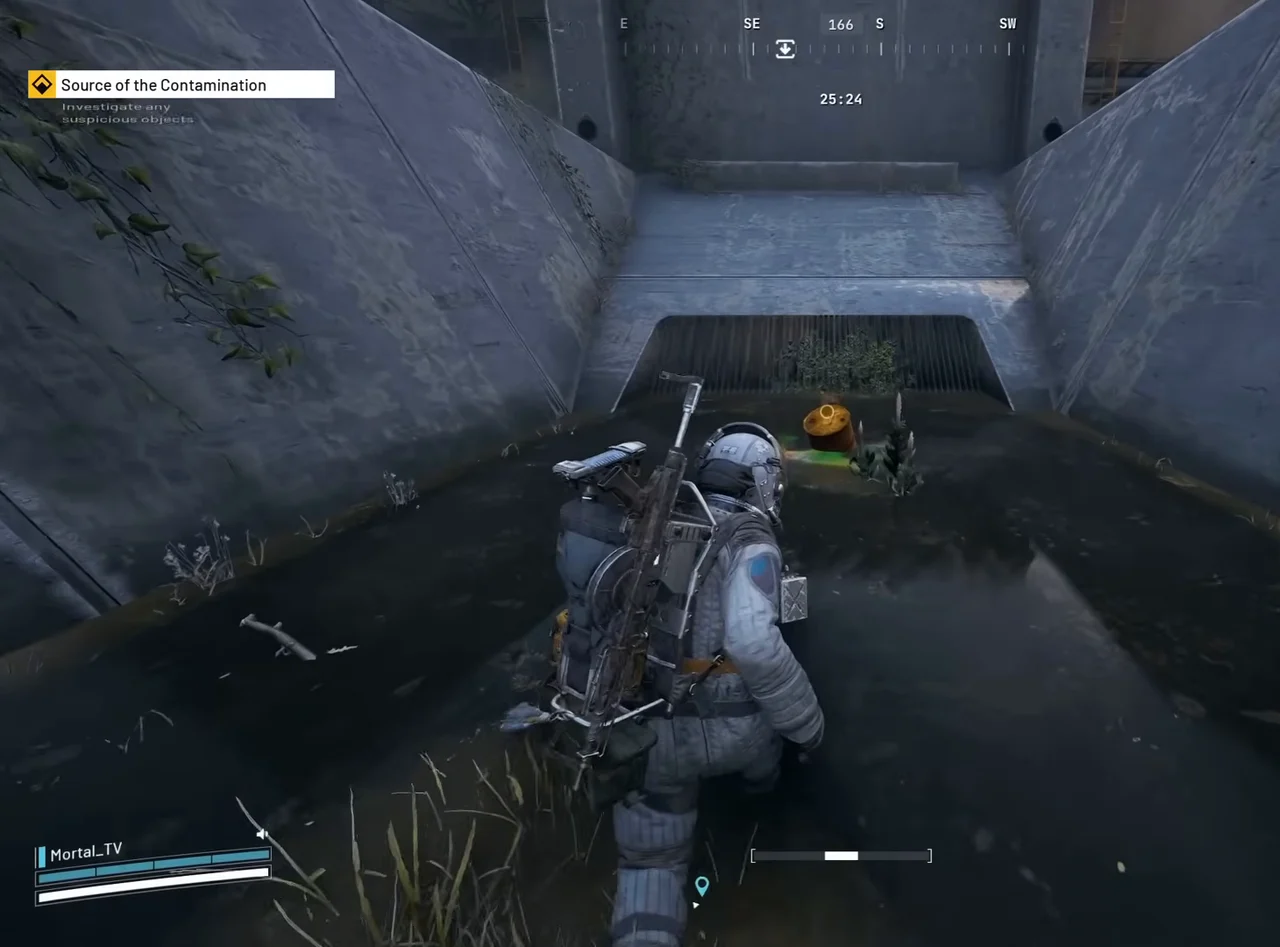
At Water Treatment Control, separate the locked interior used by Greasing Her Palms from the Flood Spill Intake outside. For Source of the Contamination, find the concrete pool and leaking barrel along the north exterior. You do not need to enter the building to reach that interaction.
Keep Room Objectives Separate
Research and Administration contains Lab 1 for A Balanced Harvest and a medical room identified by a white cross on green for Medical Merchandise. Its upper electrical loot route is a different stop again. Check the room and prompt instead of assuming that reaching the building ticks every objective.
Ruby Residence is the destination to follow for The Major's Footlocker. Pale Apartments is useful residential loot context, but it is not a confirmed alternative memento spawn in this guide. Do not choose an apartment floor from conflicting floor numbers alone.
Keep Formicai Outpost’s flag objective separate from the Raider Outpost East journal route. References to red water do not establish that the two outposts overlook the same named lake. The POI table retains these distinct destinations rather than merging them.
| POI | Area and layer | What it is | Quest walkthroughs |
|---|---|---|---|
| The Dam / Alcantara Power PlantShow area on map | Recorded The Dam / Alcantara Power Plant area. Exact objects are described separately.Surface | Use the dam as a landmark, but follow the Dam Control Tower for Eyes in the Sky, not Spaceport's Control Tower A6. | Eyes in the Sky |
| Control TowerShow area on map | Recorded Control Tower area. Exact objects are described separately.Surface | Scout the interior zipline for the scanner route and keep this tower and its keys separate from Spaceport's Control Tower A6. | Trash into Treasure Eyes in the Sky |
| Water Treatment Control / Water Treatment BuildingShow area on map | Recorded Water Treatment Control / Water Treatment Building area. Exact objects are described separately.Surface | Keep the locked interior and ENELICA objectives separate from Flood Spill Intake outside, with ARC encounters dependent on actual targets. | Source of the Contamination Greasing Her Palms Celeste's Journals Paving the Way The Right Tool A Toxic Trail |
| Flood Spill IntakeShow area on map | Recorded Flood Spill Intake area. Exact objects are described separately.Surface | Find the concrete pool and leaking barrel outside, as Source of the Contamination and A Toxic Trail use separate objective checks. | Source of the Contamination A Toxic Trail |
| Power Generation ComplexShow area on map | Recorded Power Generation Complex area. Exact objects are described separately.Surface | Keep the generator, ENELICA and Controlled Access Zone steps separate from material searches and the foreman's apartment on Buried City. | Our Presence Up There Trash into Treasure Celeste's Journals Flickering Threat After Rain Comes Paving the Way A Rising Tide |
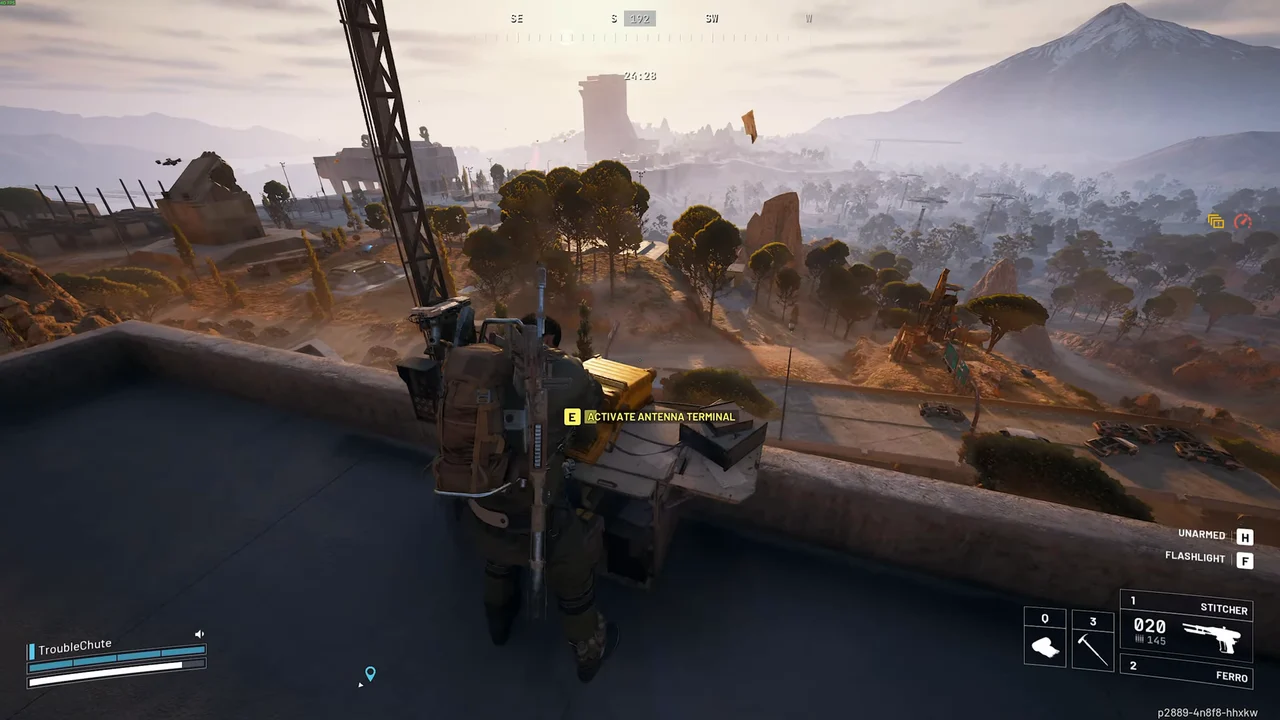
| Pattern HouseShow area on map | Recorded Pattern House area. Exact objects are described separately.Surface | Zoom in for the patterned facade and follow the power-switch and rooftop-antenna route, while Back On Top remains only a lead. | Our Presence Up There |
| Hydroponic Dome ComplexShow area on map | Recorded Hydroponic Dome Complex area. Exact objects are described separately.Surface | Follow Untended Garden's journal to the archive dome. Straight Record uses a separate nearby switch route. | Straight Record Untended Garden |
| Research and AdministrationShow area on map | Recorded Research and Administration area. Exact objects are described separately.Surface | Use the white cross on green for the medical room, keeping Lab 1 and the upper electrical area separate from supply searches and ARC encounters. | Medical Merchandise Trash into Treasure A Balanced Harvest Doctor's Orders The Right Tool |
| Testing AnnexShow area on map | Recorded Testing Annex area. Exact objects are described separately.Surface | Search medical containers and lab drawers. For Great Mullein, search west of Hydroponic Domes rather than relying on the Annex pool. | Doctor's Orders Espresso |
| Old BattlegroundShow area on map | Recorded Old Battleground area. Exact objects are described separately.Surface | Check the Baron Husk quest prompt before breaching, as this wreckage is not the Untended Garden archive at Hydroponic Dome Complex. | A New Type of Plant Dormant Barons |
| Formicai OutpostShow area on map | Recorded Formicai Outpost area. Exact objects are described separately.Surface | Use the reported flagpole and backpack-on-bed cues without treating the red-water reference as proof of a Raider Outpost East alias. | A Symbol of Unification |
| Formicai Hills / The WreckageShow area on map | Recorded Formicai Hills / The Wreckage area. Exact objects are described separately.Surface | Check the helmet prompt around the wreckage before a Scrap Yard detour, as an unavailable interaction does not prove raid-wide permanent loss. | Keeping The Memory |
| Scrap YardShow area on map | Recorded Scrap Yard area. Exact objects are described separately.Surface | Search the Broken Monument points and collect dropped items, keeping the separate Formicai Hills helmet stop out of the scrapyard search. | Broken Monument |
| Raider Outpost EastShow area on map | Recorded Raider Outpost East area. Exact objects are described separately.Surface | The journal route uses the circular building and collapsed-bed room at Raider Outpost East. A nearby hatch does not establish the Pump House alias. | Celeste's Journals |
| South Swamp OutpostShow area on map | Recorded South Swamp Outpost area. Exact objects are described separately.Surface | Look for the dome-topped building and bedroll on the journal route, without counting the unconfirmed nearby Baron Husk as another distinct wreck. | Celeste's Journals |
| Red LakesShow area on map | Recorded Red Lakes area. Exact objects are described separately.Surface | Use the lakes for journal-route orientation without assuming Formicai Outpost's red water marks another Red Lakes site or the same outpost. | Celeste's Journals |
| Generator HallShow area on map | Recorded Generator Hall area. Exact objects are described separately.Surface | Use Generator Hall as a landmark for Celeste's Journals, then follow the journal pickup route rather than searching the building at random. | Celeste's Journals |
| Electrical SubstationShow area on map | Recorded Electrical Substation area. Exact objects are described separately.Surface | Search electrical containers for materials, keeping the reported Field Depot between here and Water Towers separate from the substation. | Trash into Treasure Off The Radar |
| Water TowersShow area on map | Recorded Water Towers area. Exact objects are described separately.Surface | Photograph the goal and check behind it for the football and by the bicycle for the pump, with any depot search separate from the towers. | Off The Radar The League |
| Ruby ResidenceShow area on map | Recorded Ruby Residence area. Exact objects are described separately.Surface | Follow The Major's Footlocker journal to the room. Residential searches may supply Espresso or The League, but drops are not guaranteed. | The Major's Footlocker The League Espresso |
| Pale ApartmentsShow area on map | Recorded Pale Apartments area. Exact objects are described separately.Surface | Search for Espresso or The League supplies. For mementos, follow the Ruby Residence quest route rather than the Footlocker route. | The League Espresso |
| Ben Welder's SunroofShow area on map | Recorded Ben Welder's Sunroof area. Exact objects are described separately.Surface | Use this landmark to approach Ruby Residence, without treating the nearby Sunroof Hatch lead as an exact exit position. | The Major's Footlocker |
| Victory RidgeShow area on map | Recorded Victory Ridge area. Exact objects are described separately.Surface | Check the separate Straight Record switch and Echoes of Victory Ridge patch interactions, as reaching the ridge alone completes neither. | Echoes of Victory Ridge Straight Record |
| The BreachShow area on map | Recorded The Breach area. Exact objects are described separately.Surface | Use this as an additional Baron Husk search area for Dormant Barons, rather than counting it as a separate wreck. | Dormant Barons |
| Pipeline TowerShow area on map | Recorded Pipeline Tower area. Exact objects are described separately.Surface | The tower is a recorded landmark. The reported Call Station east of it remains a route lead, not an exact station coordinate. | A Better Use |
| Central Swamp LiftShow area on map | Recorded Central Swamp Lift area. Exact objects are described separately.Surface | Check this possible return route on the raid map, keeping it separate from Water Treatment Elevator rather than treating it as a required quest exit. Check the cargo-elevator route between Old Battleground and Hydroponic Dome Complex, as availability and closure depend on your raid. | Source of the Contamination The Major's Footlocker Untended Garden |
| North Complex ElevatorShow area on map | Cargo-exit area directly north of Generator Hall, near Power Generation Complex.Surface | Approach the cargo exit north of Generator Hall near Power Generation Complex. Check its symbol and status on your raid map. | The Major's Footlocker |
| Sunroof HatchShow area on map | Recorded Sunroof Hatch area. Exact objects are described separately.Surface | Bring a Raider Hatch Key for this Ruby Residence exit option and check the hatch marker and prompt before diverting with the mementos. Bring a Raider Hatch Key to the hatch at Ben Welder's Sunroof and confirm that the exit is available in your raid. | The Major's Footlocker |
| Raider Hatch (south of Raider Outpost East)Show area on map | Recorded Raider Hatch (south of Raider Outpost East) area. Exact objects are described separately.Surface | Check the hatch marker and Raider Hatch Key prompt to identify the exit. Do not assume its name is Pump House Hatch. The recorded hatch icon south of the outpost does not establish a Pump House alias or current availability. | Celeste's Journals |
Plotted locations and overview areas
| Location | Layer | Precision | What it is |
|---|---|---|---|
| Swamp | surface | POI area | Use this western district as an overview, not a guaranteed resource spawn or exact extraction marker. |
| Primary Facility | surface | Recorded building area | This recorded footprint identifies the building area, not an exact door or guaranteed interaction. |
| Electrical Tower | surface | Recorded building area | This recorded footprint identifies the building area, not an exact door or guaranteed interaction. |
| Red Lakes Raider Hatch | surface | Recorded Raider Hatch icon | Check the recorded hatch location east of Control Tower with a Raider Hatch Key and confirm the current terminal state. |
| Testing Annex Cargo Elevator | surface | Recorded Cargo Elevator icon | Check the Cargo Elevator beside Testing Annex against your raid map, as the recorded countdown is not a live closure time. |
| East Broken Bridge Raider Hatch | surface | Recorded Raider Hatch icon | This recorded hatch on the East Broken Bridge approach is not a verified replacement for the separately named Raider Outpost East hatch. |
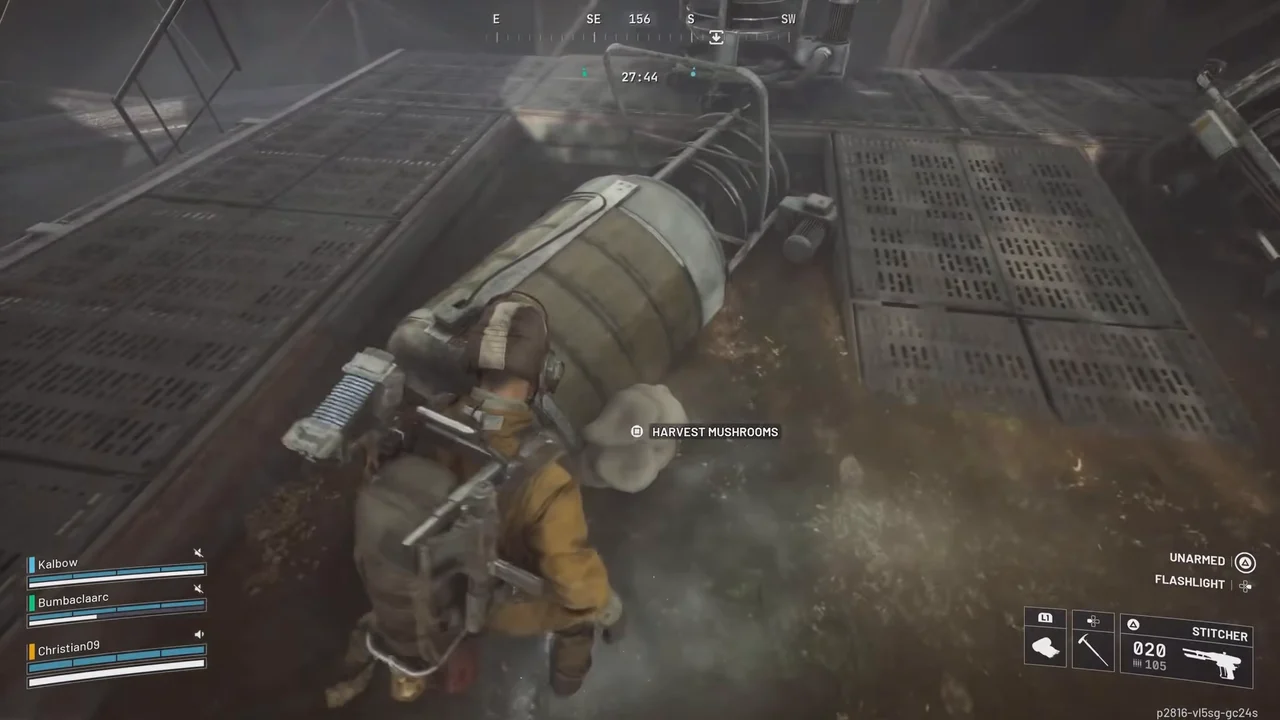
| Mushroom search area at Hydroponic Domes | surface | Recorded search area, not fixed spawn | The Harvest Mushrooms prompt was recorded on large pipes at Hydroponic Dome Complex, whose outline marks a broad search area, not guaranteed spawns. |
| Water Treatment Control roof Call Station | surface | Recorded native station tooltip | Use the rooftop Supply Call Station shown in the recording to request a drop, then follow it and collect the loot. |
| Fruit and basket search: Old Battleground | surface | Recorded search area, not a spawn boundary | Search the wooded Old Battleground approach for fruit and Lush Blooms baskets. The shaded area is a search aid, not a guaranteed tree or basket spawn. |
| Great Mullein: wooded drainage channel | surface | Recorded approach area, not a spawn boundary | Follow the wooded drainage channel west of Hydroponic Domes. The recording shows a Great Mullein harvest, not guaranteed plants at every shaded point. |
| Prickly Pear: north Generator Hall approach | surface | Recorded cactus approach, not a spawn boundary | Check the cactus patch on the north Generator Hall approach. Native Prickly Pear pickup is shown before this map view. Individual fruit spawns vary. |
| Prickly Pear: north of Hydroponic Domes | surface | Recorded cactus approach, not a spawn boundary | Look for the cactus patch north of Hydroponic Domes, east of Ruby Residence. Match the native pickup prompt rather than assuming every cactus has fruit. |
| Raider Cache search: Electrical Tower approach | surface | Recorded cache-search approach, not fixed spawn | Search the Electrical Tower approach east of Testing Annex. The recorded Hurricane route finds caches, but does not guarantee a cache at this pin. |
| Weapon Case search: Power Generation Complex | surface | Recorded container approach, not fixed spawn | Check the recorded Power Generation Complex approach for Weapon Cases. This is a candidate search area, not a guaranteed container or weapon drop. |
| Weapon Case search: Research and Administration | surface | Visible building search footprint, not exact case | Search Research and Administration's recorded exterior and interior case areas. The footprint locates the building, not an exact or guaranteed Weapon Case. |
| Weapon Case search: Hydroponic Domes | surface | Visible complex search footprint, not exact case | Search the Hydroponic Dome Complex for the recorded Weapon Case candidates. The complex footprint is not a guarantee that every dome contains a case. |
| Sentinel search: The Breach | surface | Guide-documented building area, not exact enemy | Check the elevated structure at The Breach. The guide shows a Sentinel candidate there. Its exact perch and presence are not guaranteed in your raid. |
| Sentinel search: Floodgates | surface | Guide-documented building area, not exact enemy | Check the Floodgates structure below The Breach. The guide's second Dam approach is a candidate, not a promise of a Sentinel or Firing Core drop. |
| Sentinel search: Research and Administration | surface | Guide-documented building area, not exact enemy | Check the exterior staircase at Research and Administration. The recorded guide shows this candidate area, not guaranteed current enemy or loot availability. |
| Field Depot: Power Generation / Raider Outpost | surface | Historical footage area | Search beside the Raider Outpost route at Power Generation Complex, as the historical building location does not guarantee an active depot. |
| Field Depot: Hydroponic Dome Complex | surface | Historical footage area | Between the Hydroponic Domes, check the antenna or inside machine for your task rather than treating the area marker as proof of activity. |
| Field Depot: South Swamp | surface | Historical footage area | Search the wooded route near South Swamp Outpost west of Water Treatment Control, as the recorded building does not guarantee a usable prompt. |
| Field Depot: Water Towers / Electrical Substation | surface | Historical footage area | Look between Water Towers and Electrical Substation, using the building as a landmark and checking the interaction on arrival. |
| Field Depot: Primary Facility / Loading Bay approach | surface | Historical footage area | Use the recorded depot area between Water Treatment's cargo elevator and Primary Facility, not an exact terminal or proof of availability. |
| Field Depot: Red Lakes Balcony | surface | Historical footage area | Look at Red Lakes Balcony toward Testing Annex, keeping the depot building separate from the nearby extraction terminal. |
| Dam Staff Room Key · Research and Administration | surface | Building access area, not exact door | Approach Research and Administration and match the Dam Staff Room Key prompt, as the marker is not an exact door or loot guarantee. |
| Dam Surveillance Key · Water Treatment Control | surface | Building access area, not exact door | Approach Water Treatment Control and match the Dam Surveillance Key prompt, as the marker is not an exact door or loot guarantee. |
| Dam Control Center Tower Key · Control Tower | surface | Building access area, not exact door | Approach Control Tower and match the Dam Control Center Tower Key prompt, as the marker is not an exact door or loot guarantee. |
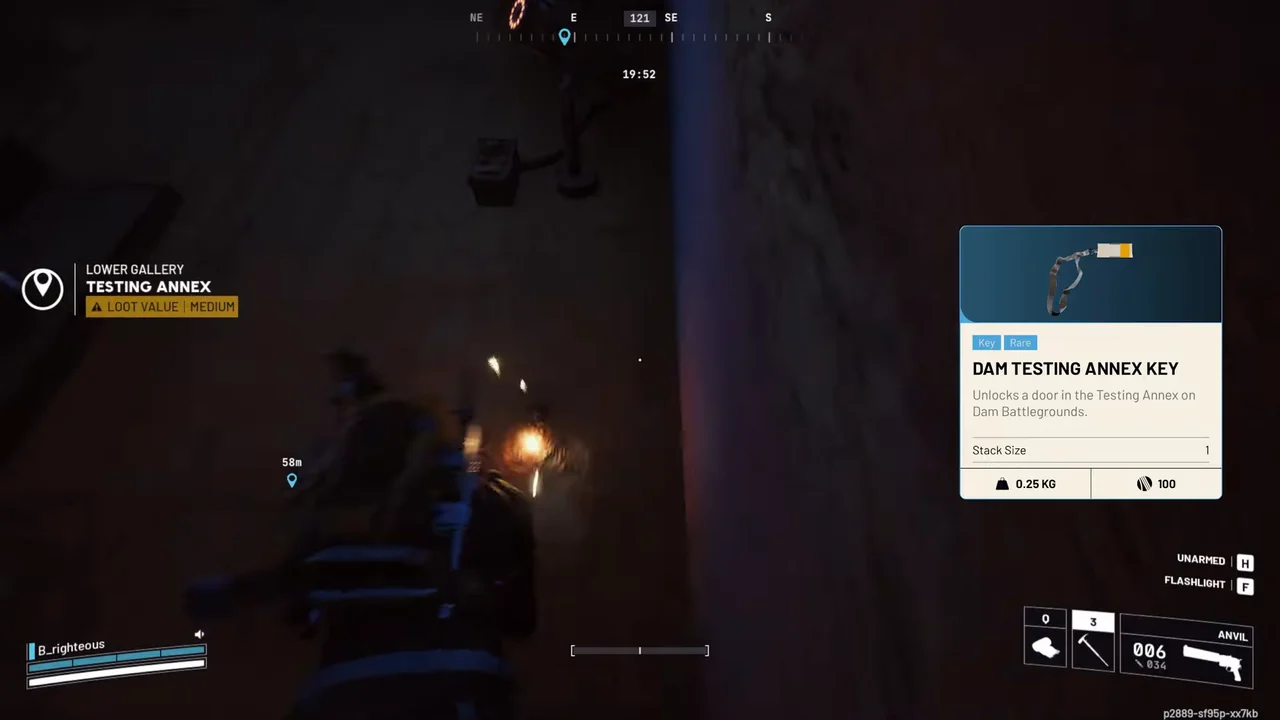
| Dam Testing Annex Key · Testing Annex | surface | Building access area, not exact door | Approach Testing Annex and match the Dam Testing Annex Key prompt, as the marker is not an exact door or loot guarantee. |
| Echoes of Victory Ridge · Victory Ridge | surface | Objective area, not exact interactable | Use the Major Aiva's Patch interaction at Victory Ridge. |
| Keeping The Memory · Formicai Hills | surface | Objective area, not exact interactable | Follow the Formicai Hills and Wreckage route to the helmet. |
| Broken Monument · Scrap Yard | surface | Objective area, not exact interactable | Search the Scrap Yard and collect the dropped quest items. |
| Eyes in the Sky · Control Tower | surface | Objective area, not exact interactable | Reach the scanner installation prompt at Control Tower. |
| Source of the Contamination · Flood Spill Intake | surface | Objective area, not exact interactable | Use the barrel at Flood Spill Intake on Water Treatment Control's north exterior. |
| A Toxic Trail · Flood Spill Intake | surface | Objective area, not exact interactable | Approach Flood Spill Intake, then follow the quest to the barrel truck. |
| Medical Merchandise · Research and Administration | surface | Objective area, not exact interactable | Search the medical-room containers in Research and Administration. |
| Trash into Treasure · Research and Administration | surface | Objective area, not exact interactable | Search Research and Administration or another electrical loot area for quest materials. |
| A Balanced Harvest · Research and Administration | surface | Objective area, not exact interactable | Find Lab 1 inside Research and Administration. |
| Doctor's Orders · Testing Annex | surface | Objective area, not exact interactable | Use Testing Annex as a gathering option for Syringe, Antiseptic, Durable Cloth and Great Mullein. |
| Untended Garden · Hydroponic Dome Complex | surface | Objective area, not exact interactable | Use the Hydroponic Dome Complex archive terminal, then upload at a Field Depot. |
| Source of the Contamination · Water Treatment Control | surface | Objective area, not exact interactable | Use the barrel at Flood Spill Intake on Water Treatment Control's north exterior. |
| Greasing Her Palms · Water Treatment Control | surface | Objective area, not exact interactable | Reach the locked room in Water Treatment Control. |
| Paving the Way · Water Treatment Control | surface | Objective area, not exact interactable | Use qualifying ENELICA routes at Water Treatment Control or Power Generation Complex. |
| Celeste's Journals · South Swamp Outpost | surface | Objective area, not exact interactable | Follow the journal route through South Swamp Outpost and Raider Outpost East. |
| A New Type of Plant · Old Battleground | surface | Objective area, not exact interactable | Follow the Baron Husk route at Old Battleground. |
| The League · Water Towers | surface | Objective area, not exact interactable | Photograph the Water Towers goal and collect the football behind it and pump by the bicycle. |
| The Major's Footlocker · Ruby Residence | surface | Objective area, not exact interactable | Find the memento interaction at Ruby Residence. |
| Our Presence Up There · Pattern House | surface | Objective area, not exact interactable | Complete the power and antenna steps at Pattern House. |
| Flickering Threat · Power Generation Complex | surface | Objective area, not exact interactable | Repair the generator at Power Generation Complex. |
| Paving the Way · Power Generation Complex | surface | Objective area, not exact interactable | Use qualifying ENELICA routes at Water Treatment Control or Power Generation Complex. |
| A Rising Tide · Power Generation Complex | surface | Objective area, not exact interactable | Follow the quest route at Power Generation Complex and the Controlled Access Zone. |
| A Symbol of Unification · Formicai Outpost | surface | Objective area, not exact interactable | Complete the flag interaction at Formicai Outpost. |
| Celeste's Journals · Raider Outpost East | surface | Objective area, not exact interactable | Follow the journal route through South Swamp Outpost and Raider Outpost East. |
| A Better Use · Water Treatment Control roof Call Station | surface | Objective area, not exact interactable | Call a drop from a usable Call Station and collect it. |
| Doctor's Orders · Great Mullein: wooded drainage channel | surface | Objective area, not exact interactable | Use Testing Annex as a gathering option for Syringe, Antiseptic, Durable Cloth and Great Mullein. |
| Off The Radar · Field Depot: Power Generation / Raider Outpost | surface | Objective area, not exact interactable | Use a Field Depot's roof antenna for the quest. |
| Untended Garden · Field Depot: Power Generation / Raider Outpost | surface | Objective area, not exact interactable | Use the Hydroponic Dome Complex archive terminal, then upload at a Field Depot. |
| Off The Radar · Field Depot: Hydroponic Dome Complex | surface | Objective area, not exact interactable | Use a Field Depot's roof antenna for the quest. |
| Untended Garden · Field Depot: Hydroponic Dome Complex | surface | Objective area, not exact interactable | Use the Hydroponic Dome Complex archive terminal, then upload at a Field Depot. |
| Off The Radar · Field Depot: South Swamp | surface | Objective area, not exact interactable | Use a Field Depot's roof antenna for the quest. |
| Untended Garden · Field Depot: South Swamp | surface | Objective area, not exact interactable | Use the Hydroponic Dome Complex archive terminal, then upload at a Field Depot. |
| Off The Radar · Field Depot: Water Towers / Electrical Substation | surface | Objective area, not exact interactable | Use a Field Depot's roof antenna for the quest. |
| Untended Garden · Field Depot: Water Towers / Electrical Substation | surface | Objective area, not exact interactable | Use the Hydroponic Dome Complex archive terminal, then upload at a Field Depot. |
| Off The Radar · Field Depot: Primary Facility / Loading Bay approach | surface | Objective area, not exact interactable | Use a Field Depot's roof antenna for the quest. |
| Untended Garden · Field Depot: Primary Facility / Loading Bay approach | surface | Objective area, not exact interactable | Use the Hydroponic Dome Complex archive terminal, then upload at a Field Depot. |
| Off The Radar · Field Depot: Red Lakes Balcony | surface | Objective area, not exact interactable | Use a Field Depot's roof antenna for the quest. |
| Untended Garden · Field Depot: Red Lakes Balcony | surface | Objective area, not exact interactable | Use the Hydroponic Dome Complex archive terminal, then upload at a Field Depot. |
Key Rooms on Dam Battlegrounds
Match your key to its named building on Dam Battlegrounds before choosing a route. The keys and keycards guide covers drops, storage and consumption. Here, the important distinction is which doorway you are trying to reach.
Dam Staff Room Key
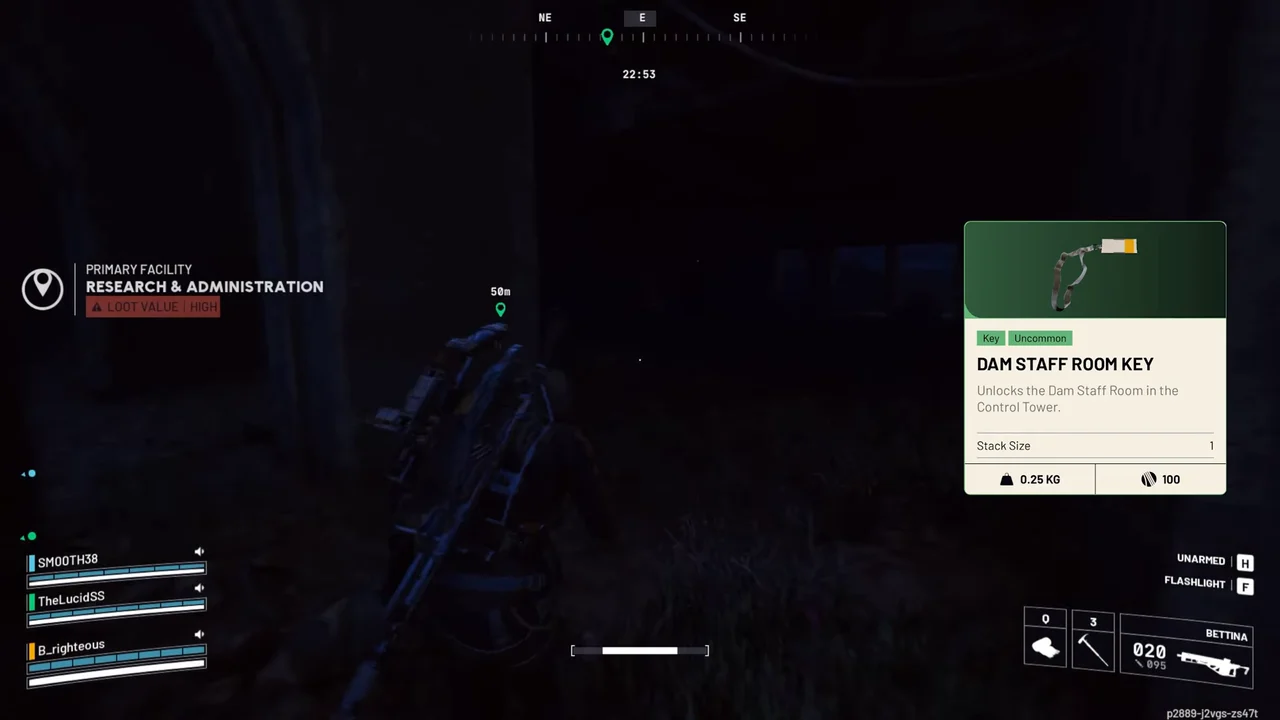
A Staff Room search can start at Research and Administration, the large two-wing building. Check for a staff-room entrance and read its key requirement before committing to an unlock. A staff-only sign or visible lockers are not enough to identify the matching door.
Keep this search separate from the central Control Tower route below. Do not make a tower detour solely because you have seen a staff-room doorway mentioned in a tower walkthrough.
The Stench of Corruption rewards the Dam Staff Room Key. That quest takes place on Spaceport, but its Staff Room reward is for a later Dam visit, not another door along the Spaceport quest route.
Dam Surveillance Key
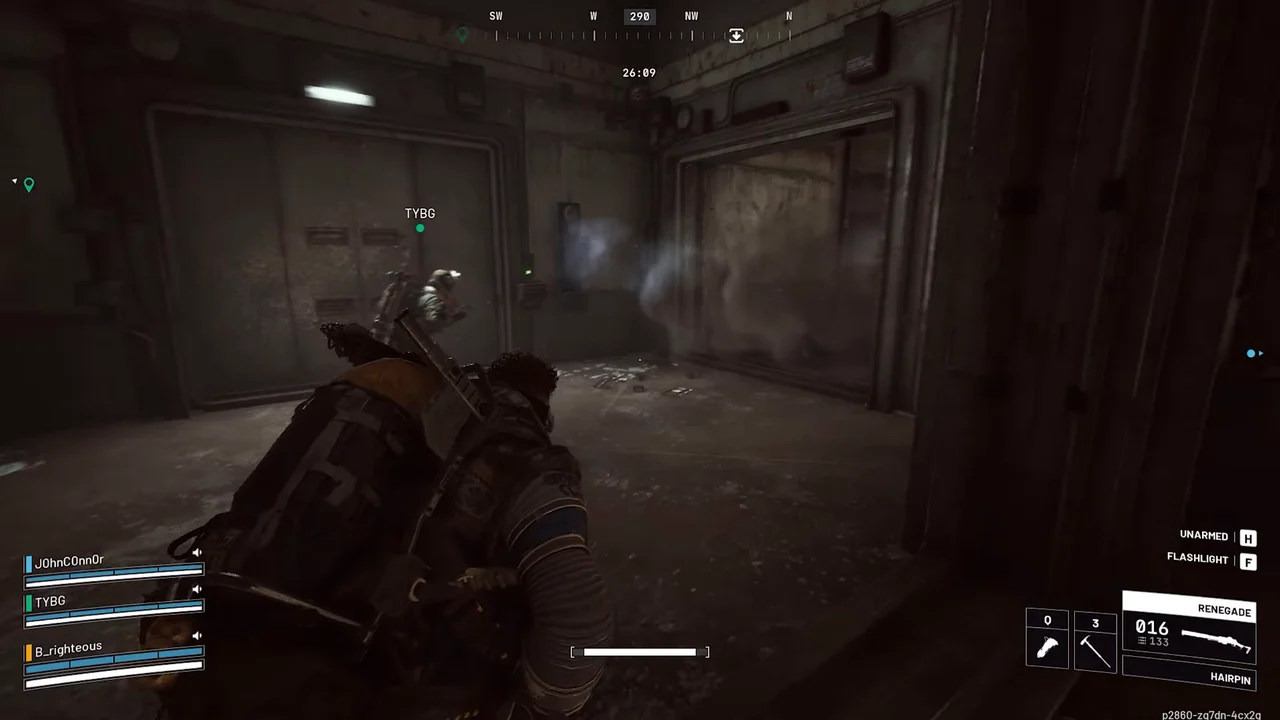
The Dam Surveillance Key opens the locked surveillance room inside Water Treatment Control. Use the named building facing the swamp as your landmark, then take the interior route and look for the door requesting this key.
Do not follow the outside waterline expecting it to lead to the lock. The Flood Spill Intake on the building's exterior is a separate destination for Source of the Contamination. Its concrete pool identifies the outdoor objective, not the surveillance-room entrance.
Greasing Her Palms from Celeste supplies the Surveillance Key as an access grant, rather than a completion reward. Follow that walkthrough for the locked-room objective. An exterior contamination stop can share the building visit, but it does not replace entering the quest's room.
Dam Control Center Tower Key
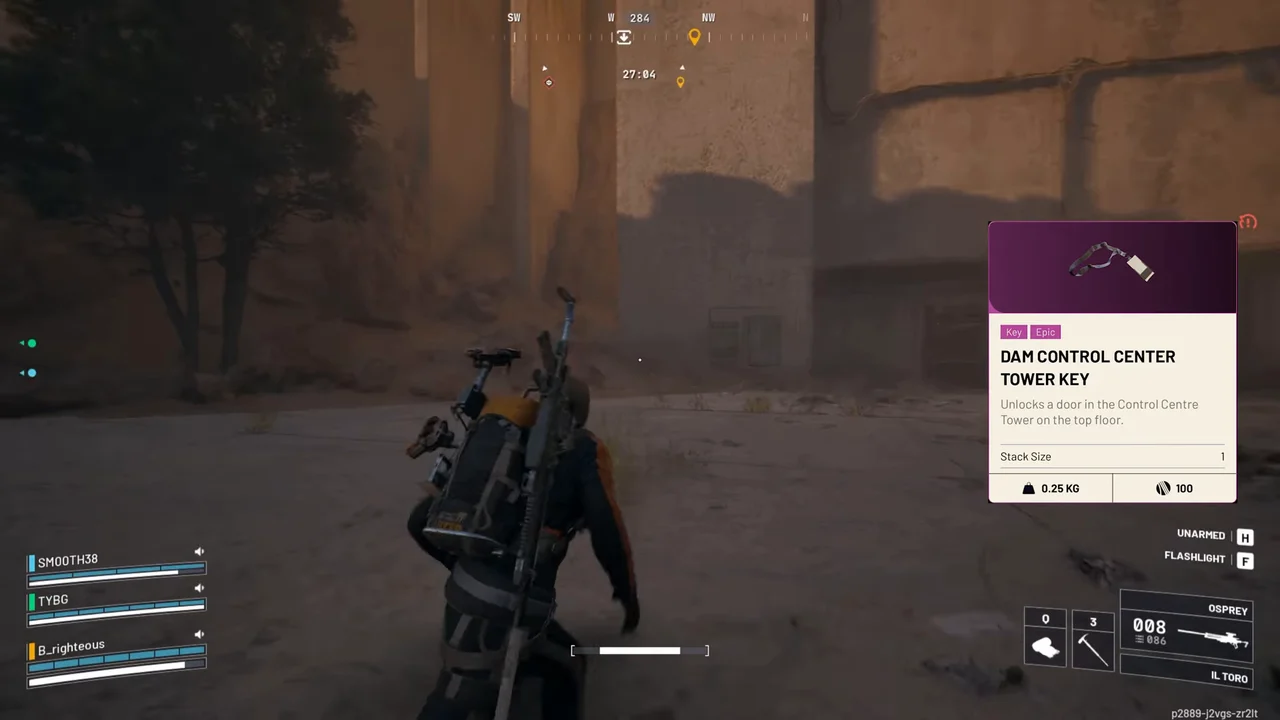
Look for Dam Control Tower Key in your inventory. That is the item name corresponding to the Dam Control Center Tower Key wording. Head to the Control Tower on the dam structure and look for its key-locked access, not the surveillance room in Water Treatment Control.
Read the interaction at each doorway along the climb. A breachable door is not the same access point as a door requesting the tower key. Keep the climb toward a rooftop objective separate from your search for the matching lock.
This is not Control Tower A6 on Spaceport. The Spaceport Control Tower Key and the Lost in Transmission route belong to that other tower.
The Trifecta rewards the Dam Control Tower Key. A Dam tower visit can also fit an Eyes in the Sky route, but opening a door does not replace the scanner objective described in that walkthrough.
Dam Testing Annex Key
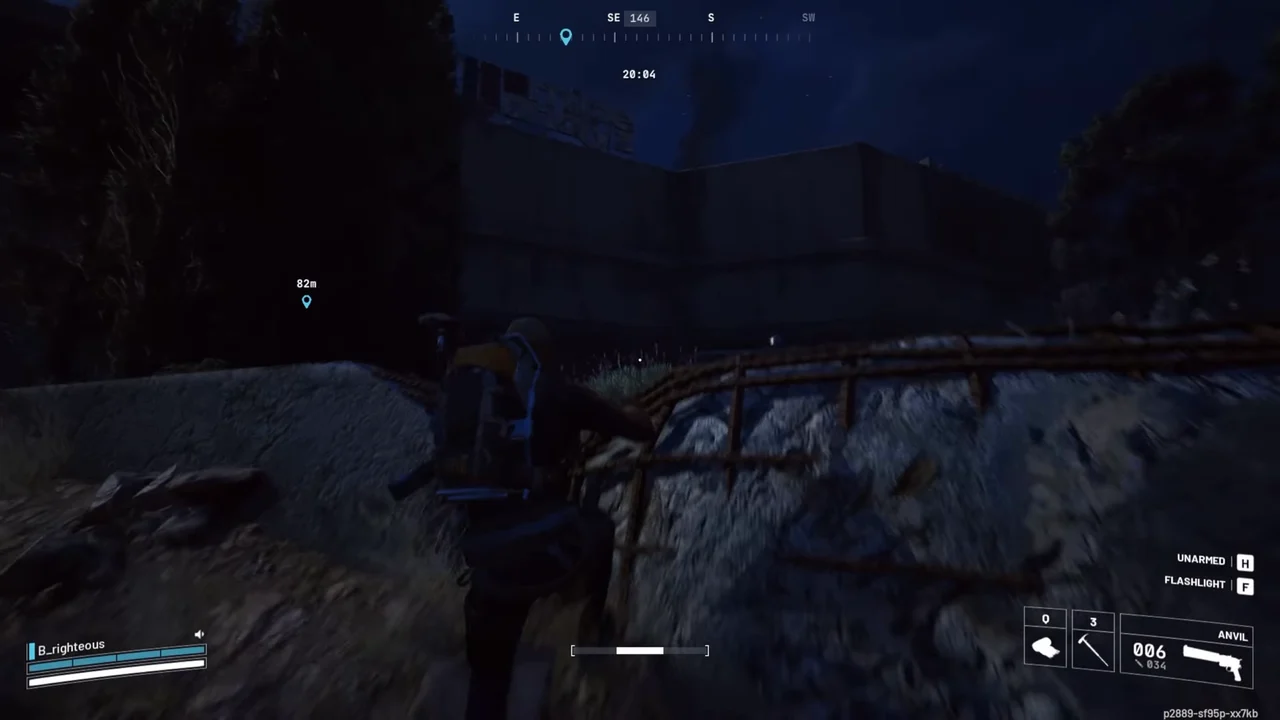
The Dam Testing Annex Key opens a locked room in Testing Annex, not Research and Administration. Recognise the Annex by its multi-level laboratory interior, with lab equipment and blue drawers on the upper levels and a flooded area below.
Use those features to orient yourself, then check the interior doors for the Testing Annex key requirement. The lower pool is a building landmark, not a marker for the keyed door. Do not descend to it simply because you are searching for the key room.
A Lay of the Land from Shani rewards this key after a Spaceport quest. Bring it to Dam for the Annex visit rather than searching Spaceport for a matching laboratory door.
For a medical-material search alongside the key-room visit, check your remaining Doctor's Orders requirements. Treat that as a separate search through the building, not a promise that the locked room contains every item you need.
Resource Locations on Dam Battlegrounds
Field Depots
Use these approach images to recognise the six depot buildings. Check for the active depot prompt when you arrive.
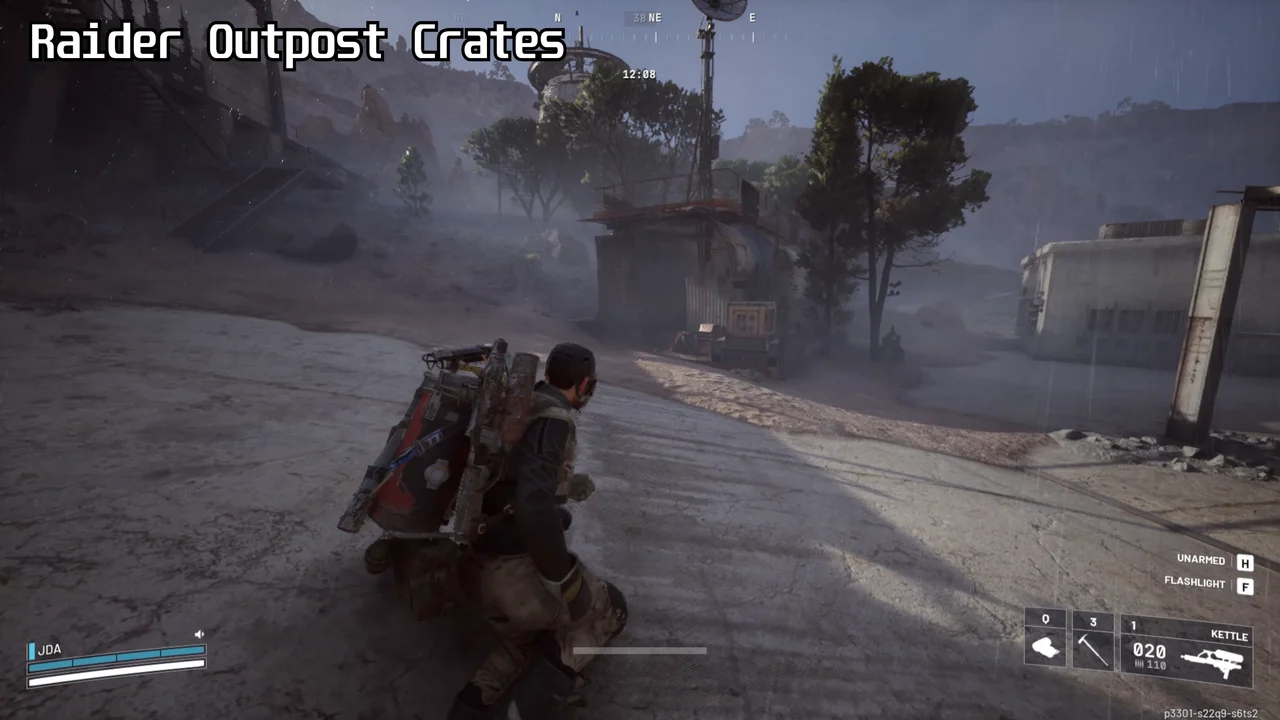
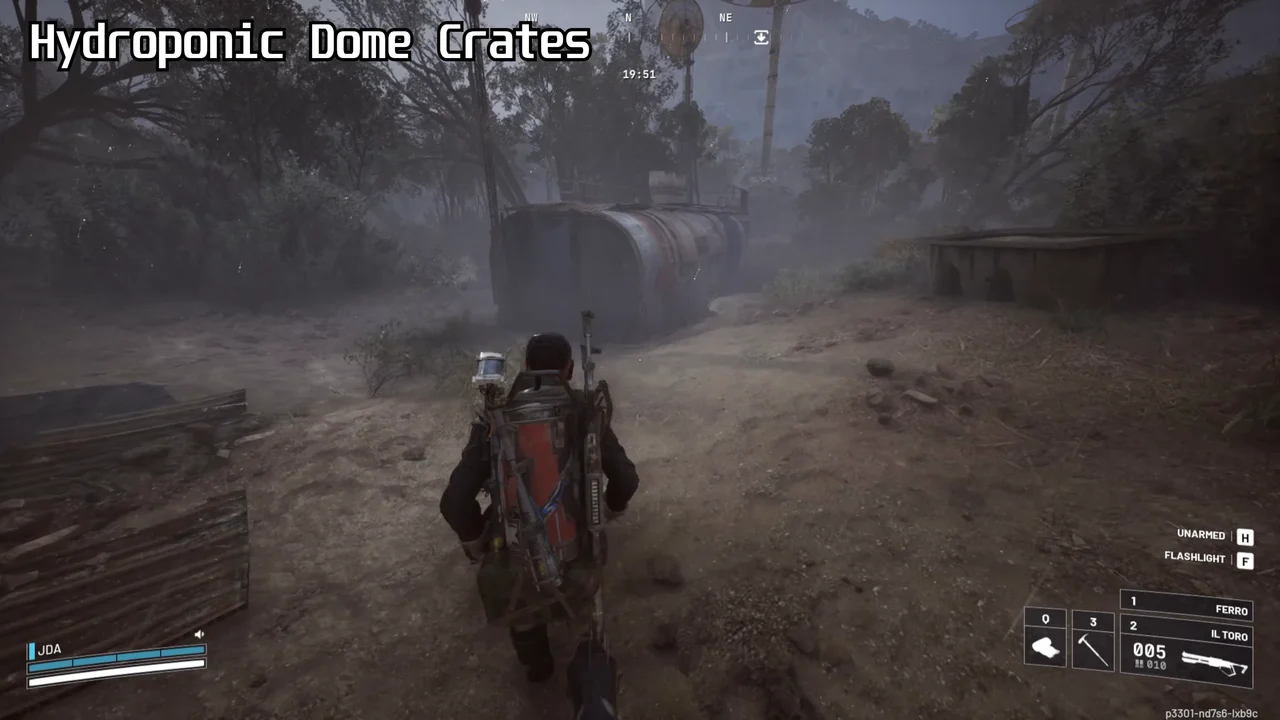
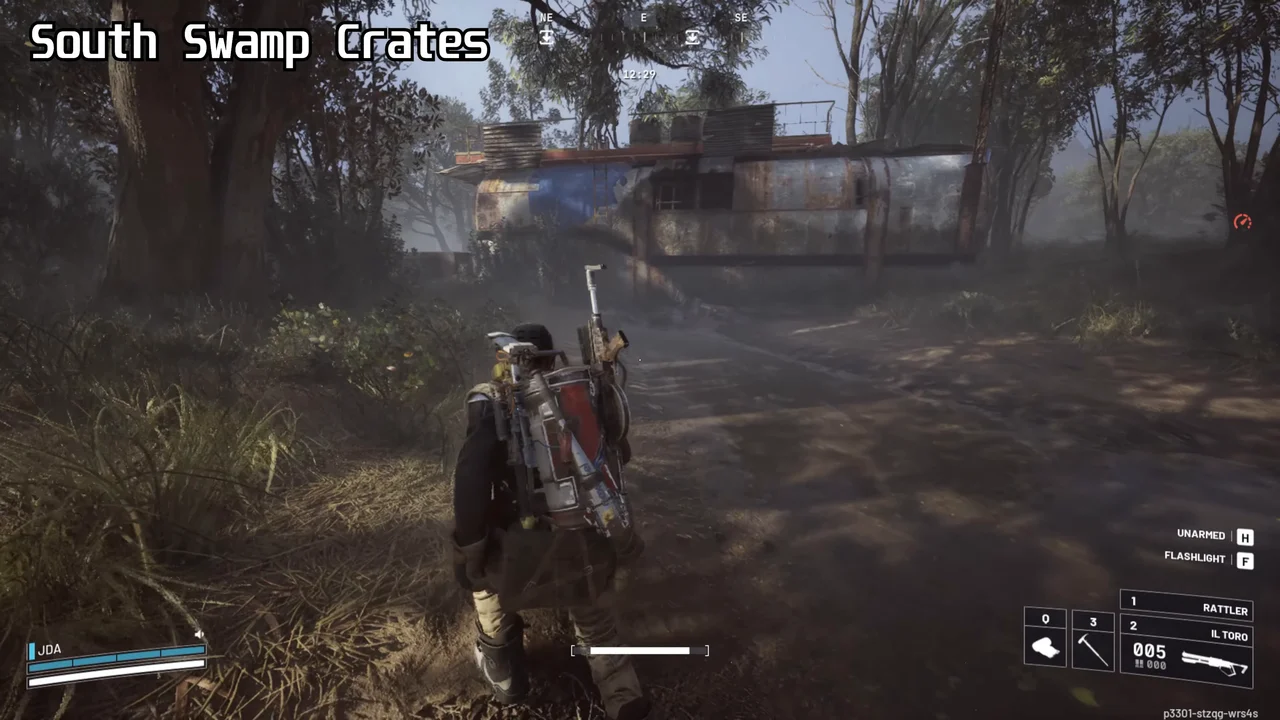
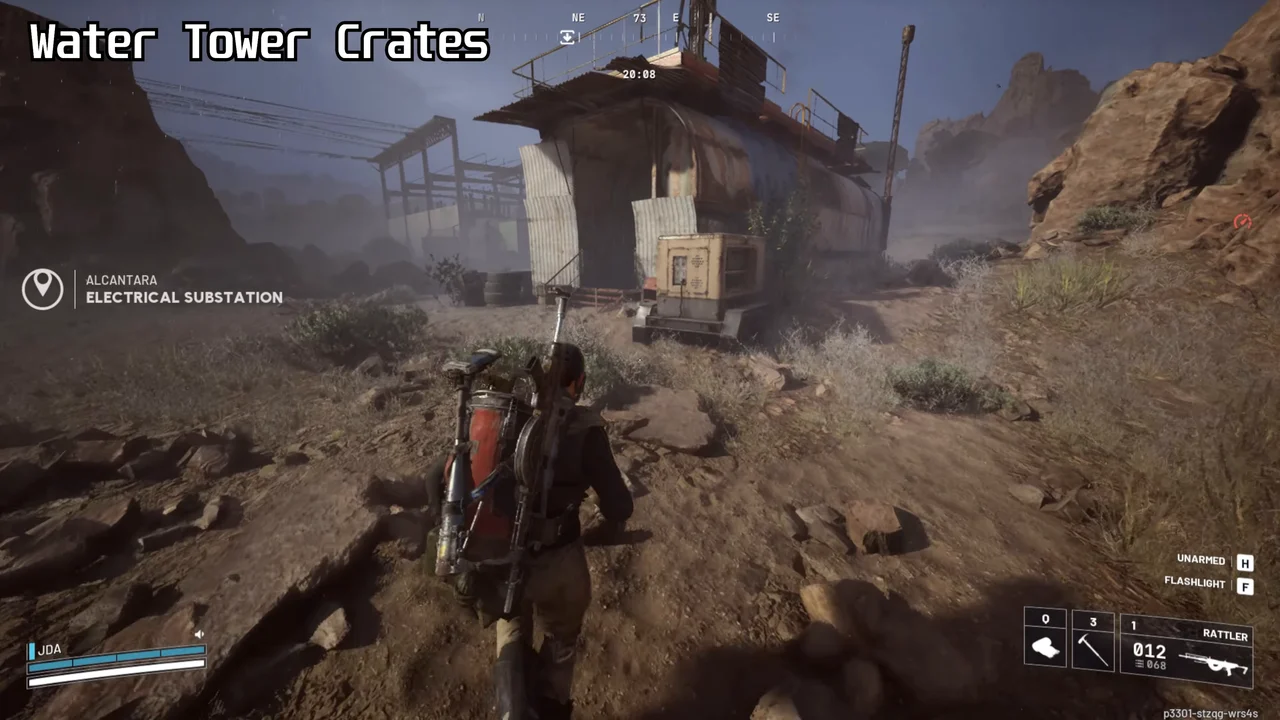
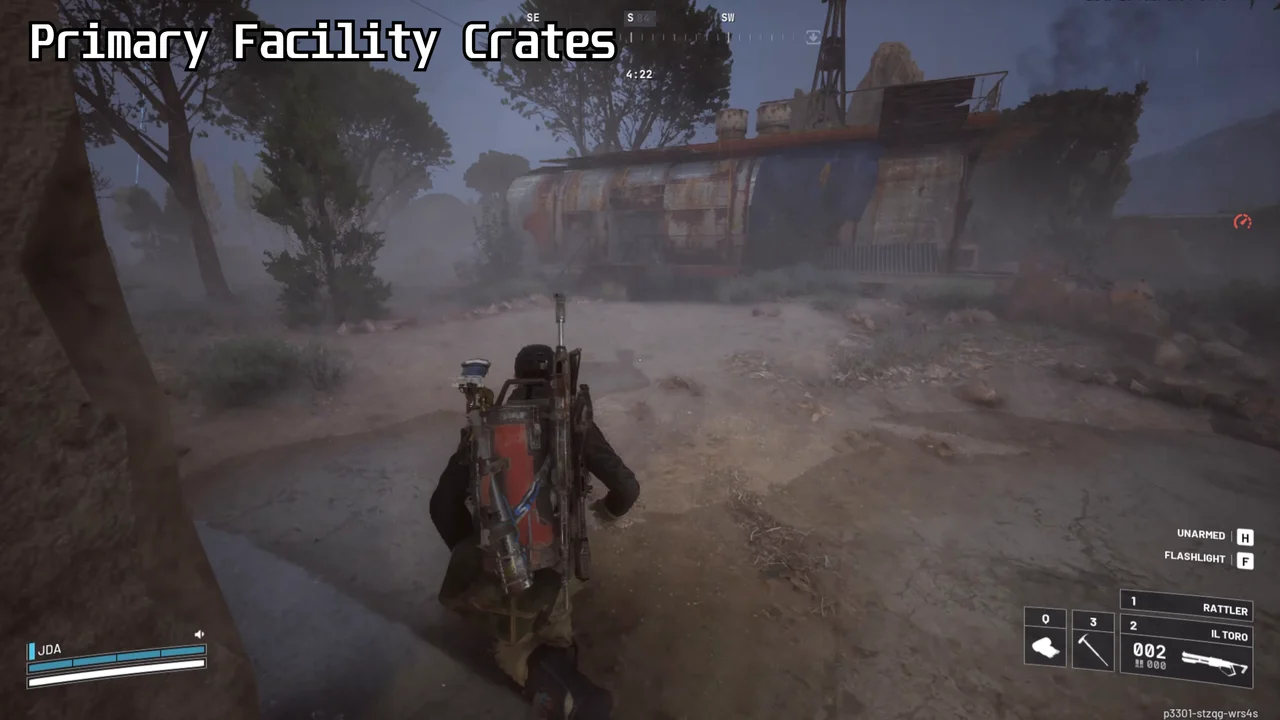
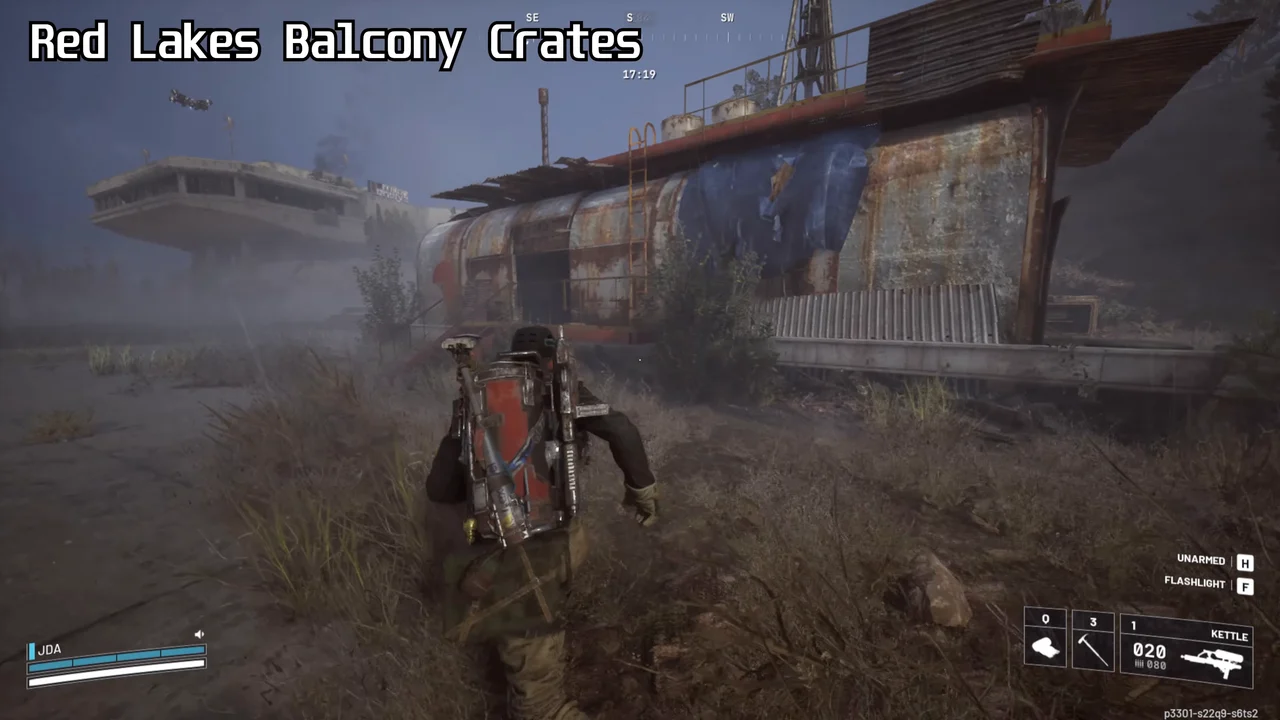
Look for rectangular metal Field Depots with a small rooftop antenna and blue tarp, rather than a large blue tent. Six documented search areas give you alternatives when your first approach is blocked.
| Search Area | Landmark Route |
|---|---|
| Water Towers corridor | Look between Water Towers and Electrical Substation. |
| Water Treatment to central facilities | Search between Water Treatment Control and the Research and Administration / Control Tower area. |
| Red Lakes Balcony approach | Check the route between Testing Annex and the central Research and Administration / Control Tower area. |
| South Swamp Outpost | Search west of Water Treatment Control and south of Old Battleground. |
| Hydroponic Dome Complex | Look within the dome complex rather than treating every nearby structure as a depot. |
| Power Generation Complex | Check the eastern approach toward Raider Outpost East. |
For Off The Radar, the roof antenna is the objective. For Untended Garden, check the upload interaction inside. A missing prompt does not, by itself, prove the entire depot is inactive. Check the correct terminal and active quest before moving to another site.
A Field Crate is carried to the depot’s delivery machine, not stored like ordinary backpack loot. Plan the return path before lifting it, and do not confuse delivery with the antenna repair.
Used by: Off The Radar, Untended Garden and Down to Earth. Compare their different interactions in the Field Depots guide.
Lemons and Apricots
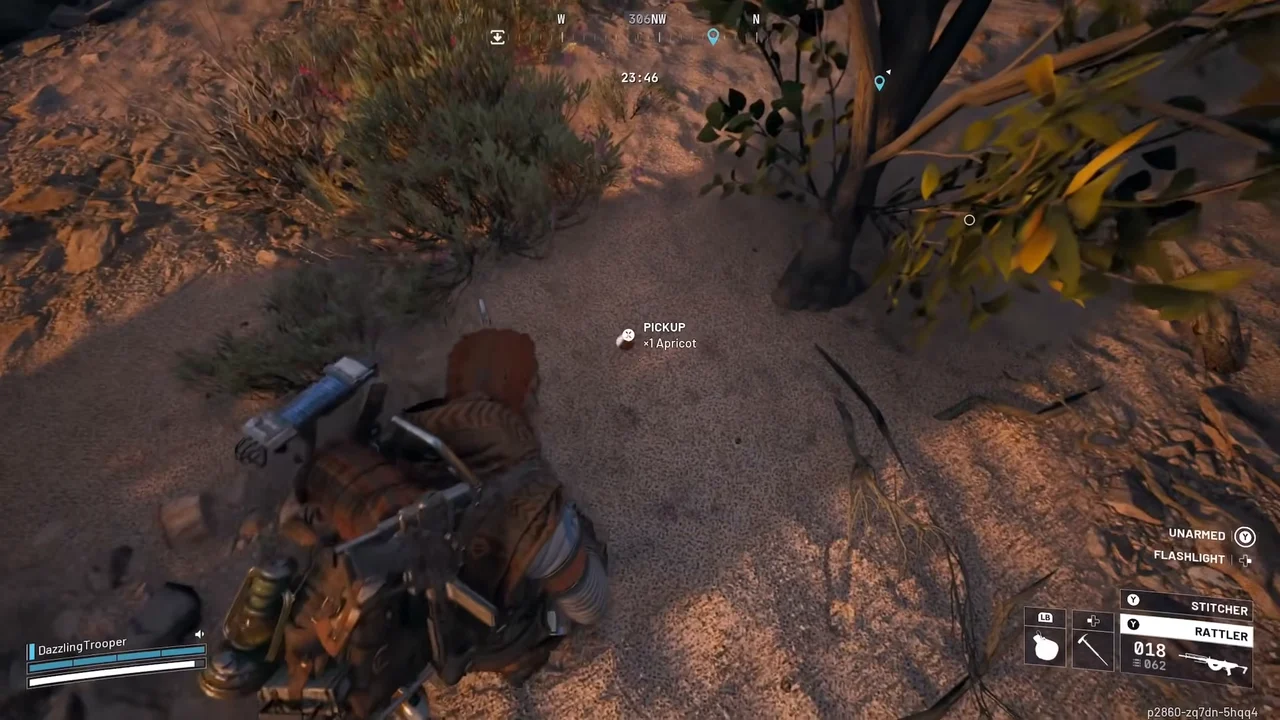
Check residential wicker baskets for Lemons and Apricots while passing through Ruby Residence and Pale Apartments. Fruit is not guaranteed, so keep these stops optional instead of planning a raid around a single basket or tree.
Where you find a fruiting tree, check the ground around it and use the available interaction, then collect the dropped fruit. Move on when the tree or basket is empty. For a fruit-led trip, compare Olive Grove on The Blue Gate instead of repeatedly circling Dam’s industrial buildings.
Used by: Scrappy training. Keep the fruit you need for the upgrade before consuming or recycling the rest.
Recorded search areas on the map
- Fruit and basket search: Old BattlegroundRecorded search area, not a spawn boundary
Mushrooms
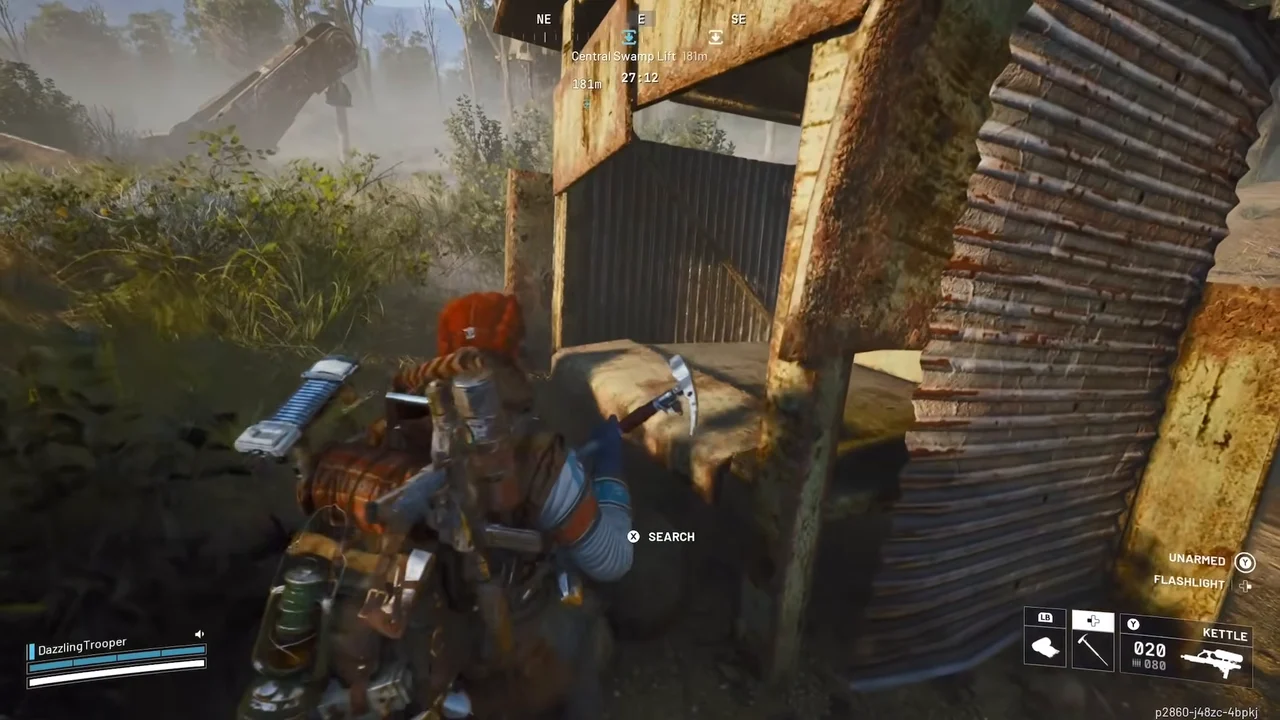
Search for Mushrooms around Hydroponic Dome Complex, on trees near Central Swamp Lift and along the pipes at Water Treatment Control. Check the growth itself, not just loose items on the ground.
- Start at the nearest of those landmarks and sweep the accessible tree trunks, pipes and shaded edges.
- Collect visible mushrooms before entering a busy building for optional loot.
- Continue toward an available swamp-side exit instead of retracing the entire route for empty spots.
Used by: Scrappy V training, which calls for 12 Mushrooms. They are consumable healing items too, so keep upgrade stock separate from anything you use during the raid.
Recorded search areas on the map
- Mushroom search area at Hydroponic DomesRecorded search area, not fixed spawn
Call Stations and Supply Drops
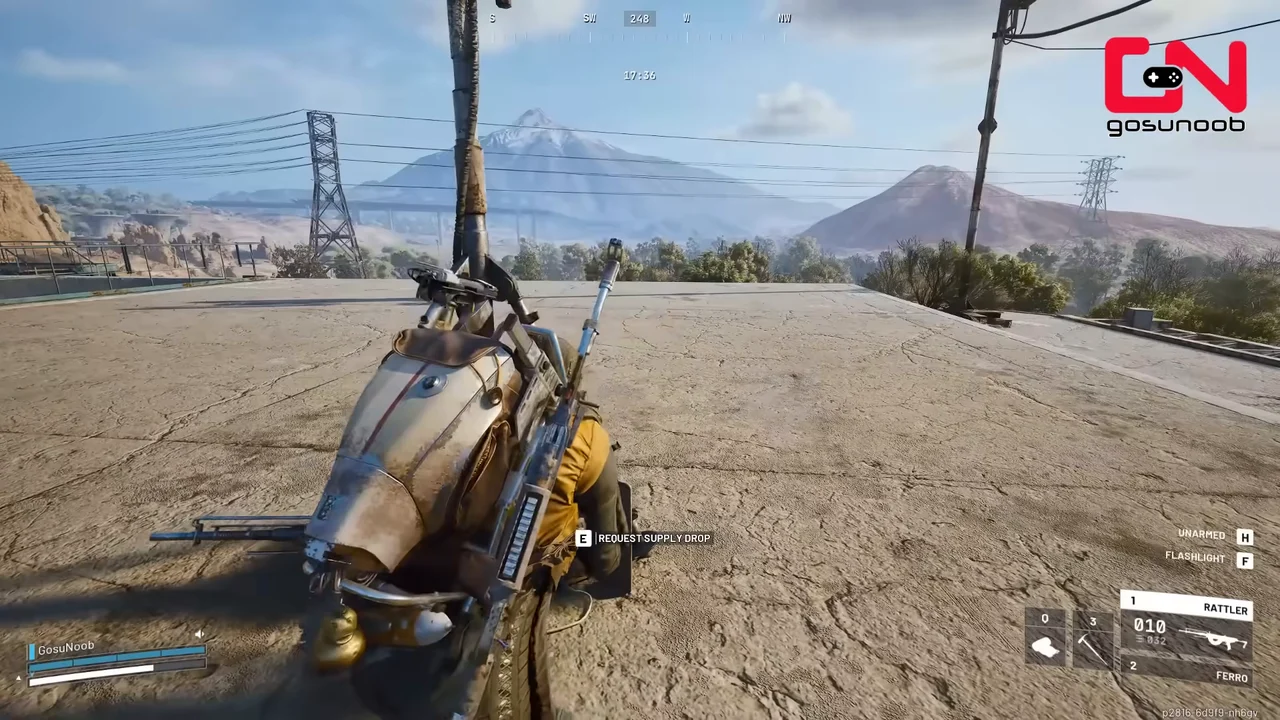
Check open ground around Hydroponic Dome Complex, the Central Swamp Lift approach and the Research and Administration area for Call Stations. These are supply-drop callers, not Field Depot delivery machines.
Inspect the station’s interaction prompt before treating it as usable. Calling a drop sends a visible signal that can attract other Raiders, so choose nearby cover and a way out before committing. A marked station does not mean an unclaimed drop is already there.
Do not wait at an exact pin for a promised arrival time or rely on a specified flare colour. Watch the actual signal and landing area instead. Treat the reported hum as an extra clue, not a substitute for finding the device.
Used by: A Better Use. The Call Stations guide keeps calling a drop separate from collecting its contents.
Sentinels
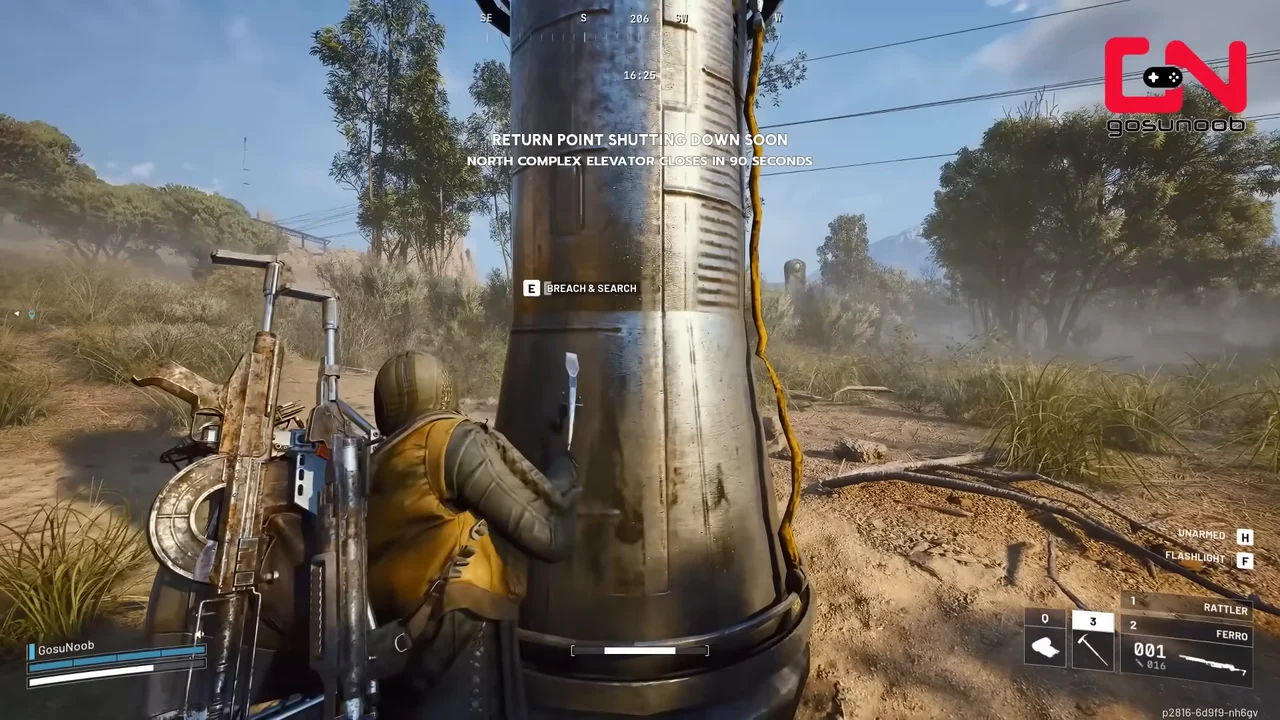
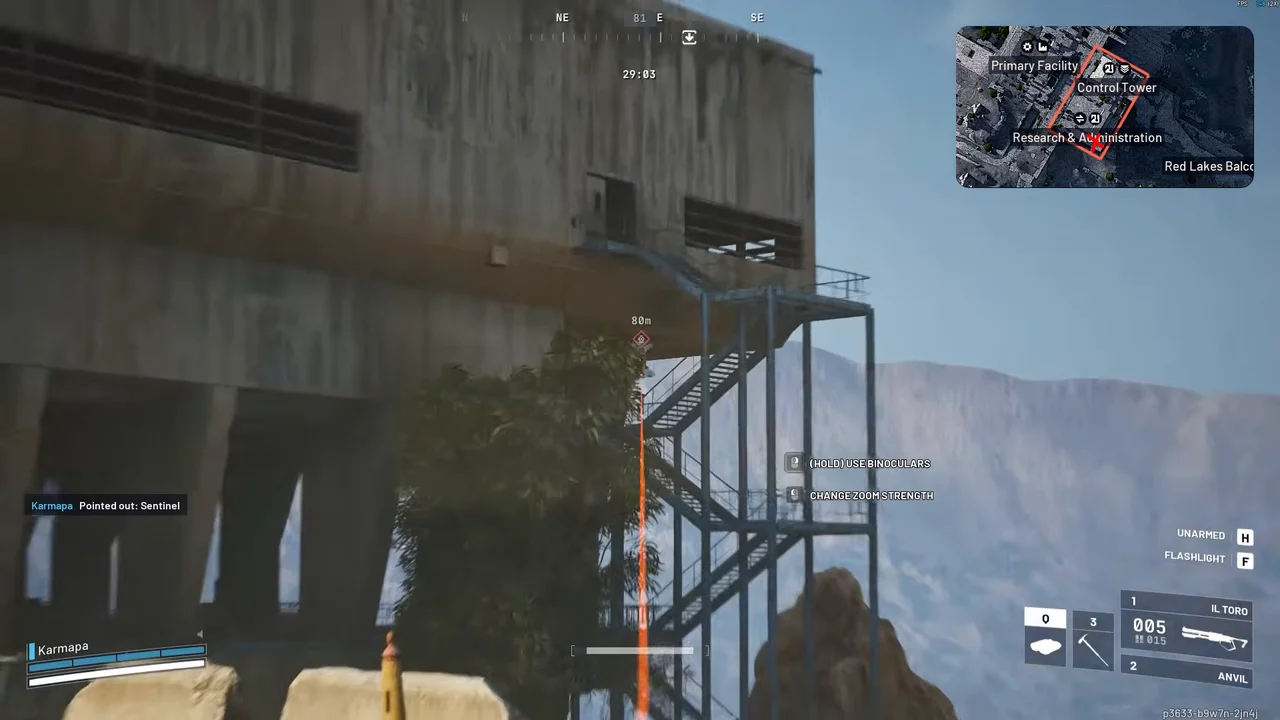
Look upward for Sentinels when checking Dam’s industrial roofs and raised structures, rather than searching the swamp floor for a resource node. The Sentinel Firing Core comes from a destroyed Sentinel, not from a guaranteed ordinary crate.
The recorded guide shows candidate Sentinel structures at The Breach, Floodgates and the exterior staircase of Research and Administration. The map shades those building search areas, not exact enemy coordinates. Identify the firing position from cover and check whether the Sentinel is present in your raid.
Used by: the Gunsmith III upgrade. Keep needed Sentinel Firing Cores before recycling them, and distinguish a Sentinel from the different ARC targets in The Right Tool.
Recorded search areas on the map
- Sentinel search: The BreachGuide-documented building area, not exact enemy
- Sentinel search: FloodgatesGuide-documented building area, not exact enemy
- Sentinel search: Research and AdministrationGuide-documented building area, not exact enemy
Raider Caches
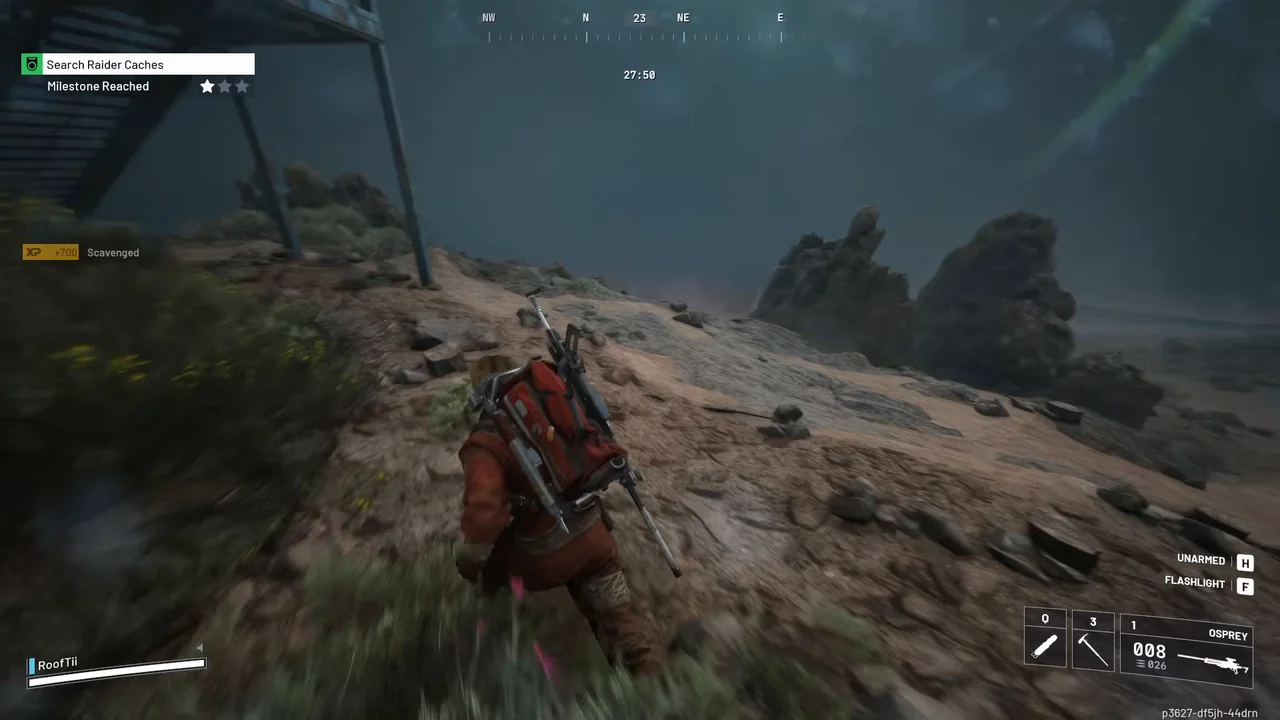
Search the ground and small covered recesses along your existing Dam route for Raider Caches, using the reported ticking sound as a reason to stop and look. They are small loot containers, not the large Field Depots with rooftop antennas.
A recorded Hurricane route searches the Electrical Tower approach east of Testing Annex. Use the shaded approach as a candidate sweep, not a fixed cache spawn or live event indicator. Follow the cache sound and check nearby cover rather than expecting the same container in every raid.
Used by: general equipment and material gathering. Retain electrical finds needed by Trash into Treasure instead of treating every cache item as sale stock.
Recorded search areas on the map
- Raider Cache search: Electrical Tower approachRecorded cache-search approach, not fixed spawn
Weapon Crates
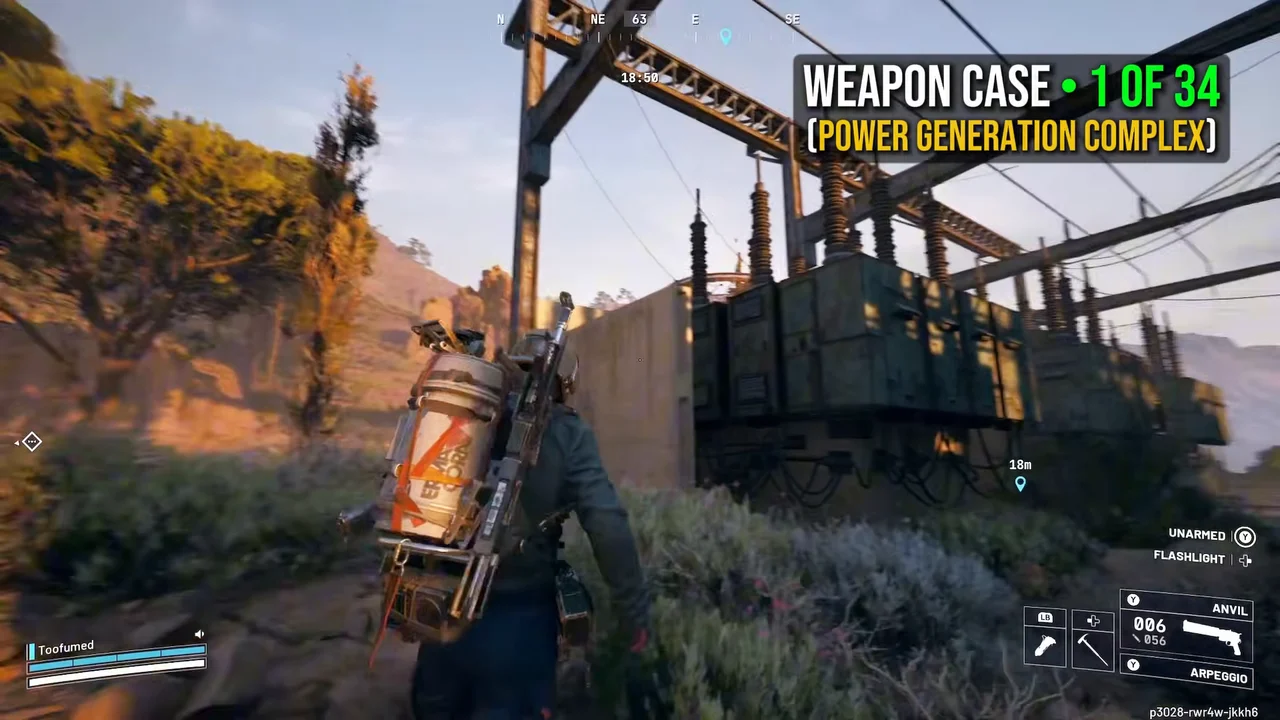
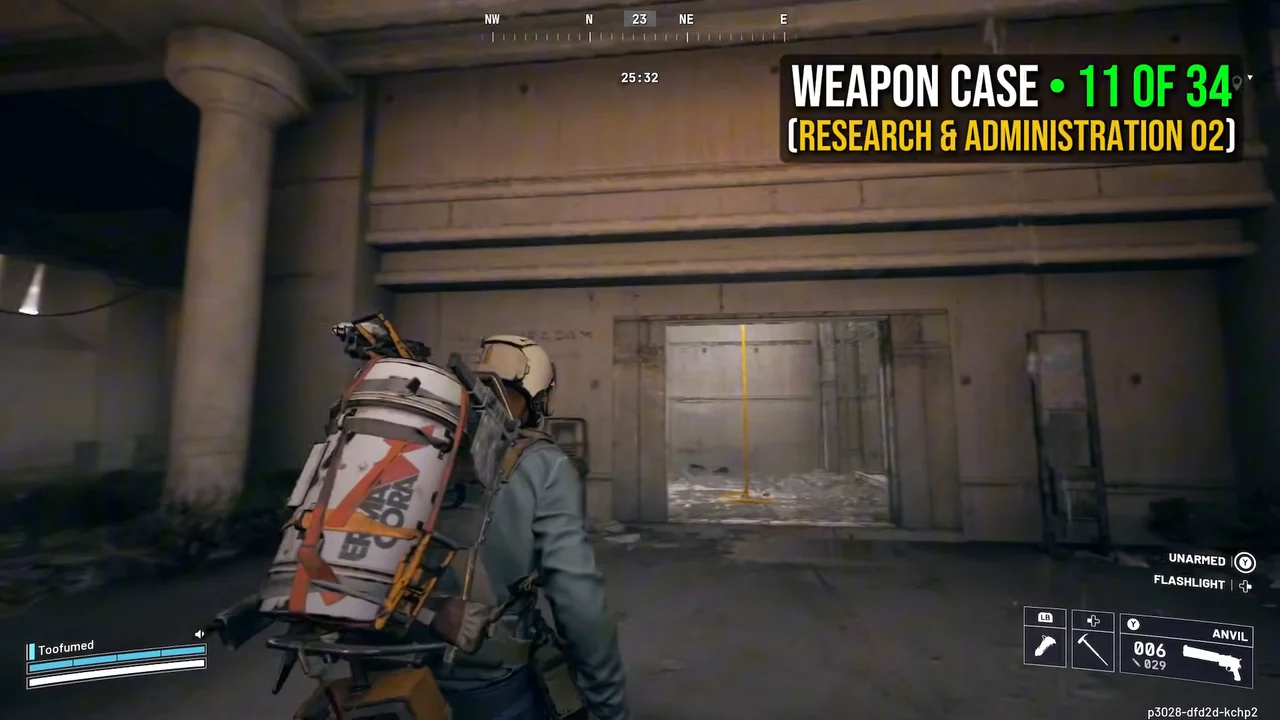
Recorded Weapon Case searches cover Power Generation Complex, Research and Administration and Hydroponic Dome Complex. The shaded map areas locate the approaches or building footprints, not every case. Search accessible rooms and containers without treating the recording as guaranteed weapon loot.
At the Control Tower, the documented interior approach passes the Dam Staff Room door, turns toward a breachable door and reaches a vertical zipline. Check above the ascent for a Turret before committing. That route does not establish that every locked room can be entered without its own key.
Used by: equipment upgrades for your loadout. Check the key guide before taking a room-specific key, and keep an extraction route when looting above ground level.
Recorded search areas on the map
- Weapon Case search: Power Generation ComplexRecorded container approach, not fixed spawn
- Weapon Case search: Research and AdministrationVisible building search footprint, not exact case
- Weapon Case search: Hydroponic DomesVisible complex search footprint, not exact case
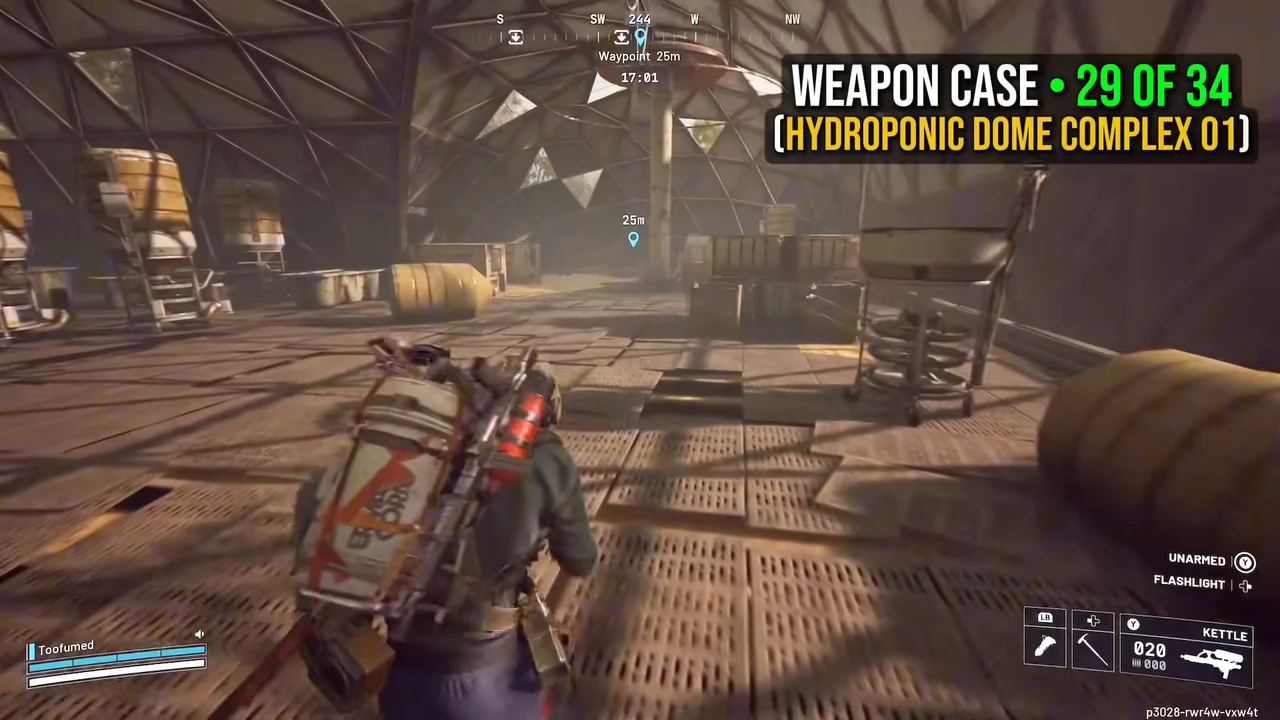
Prickly Pear
Prickly Pear comes from fruiting cacti, so check dry, exposed ground on the edges of Dam’s industrial routes rather than the flooded mushroom areas. Look at the cactus for a harvest prompt and inspect the ground for fruit.
Native Prickly Pear pickups are shown on the north Generator Hall approach and north of Hydroponic Domes, east of Ruby Residence. Check the cactus patches along those two recorded approaches and match the pickup prompt. These are search areas, not an exhaustive cactus route or guaranteed fruit spawns.
Used by: Scrappy training. Keep the required fruit before consuming or selling it.
Recorded search areas on the map
- Prickly Pear: north Generator Hall approachRecorded cactus approach, not a spawn boundary
- Prickly Pear: north of Hydroponic DomesRecorded cactus approach, not a spawn boundary
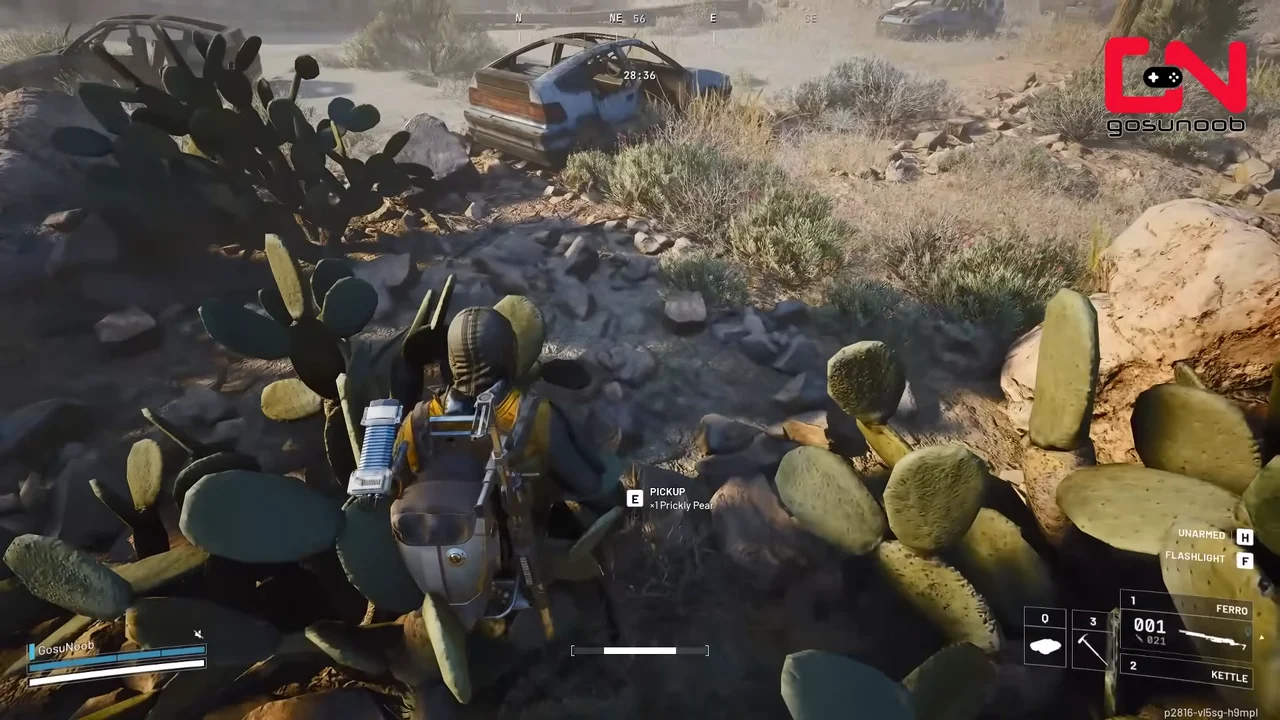
Great Mullein
The recorded Great Mullein route follows the wooded drainage channel west of Hydroponic Domes. Look for the native Harvest Great Mullein prompt along that approach. The footage does not establish a plant spawn inside the Testing Annex pool.
For Doctor's Orders, you also need a Syringe, Antiseptic and Durable Cloth. The building offers appropriate places to look, not a guarantee that all four items remain in one raid. Check containers and the plant prompt rather than expecting a fixed number of flowers.
Used by: Doctor's Orders, Antiseptic crafting at the Refiner and Herbal Bandage crafting at the Medical Lab. Check the current crafting or upgrade screen before setting aside a larger stock.
Recorded search areas on the map
- Great Mullein: wooded drainage channelRecorded approach area, not a spawn boundary
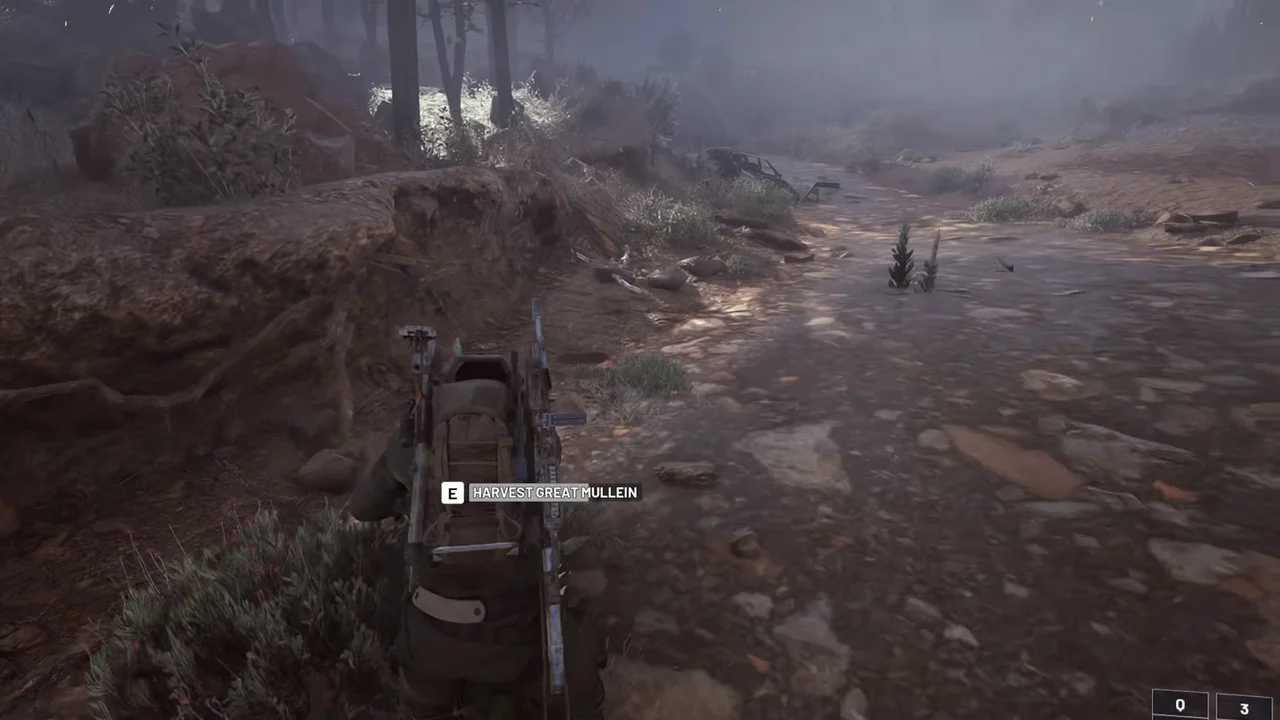
Wires and Batteries
Search electrical containers, computer areas and server equipment at Research and Administration, Power Generation Complex, Control Tower and Electrical Substation for Wires and Batteries. Choose the nearest suitable facility rather than visiting all four by default.
Electrical Substation is a smaller alternative when the central buildings are inconvenient. At Research and Administration, check the upper route reached from behind reception, but listen before using a zipline that commits you to a room.
Bring four Wires before starting Flickering Threat. Finding replacement materials mid-raid is a fallback, not a reliable preparation plan. For Trash into Treasure, follow the distinction between looting and merely owning an item rather than assuming a purchased stack will register.
Used by: Trash into Treasure, Flickering Threat and the requirements explained in After Rain Comes, Eyes On the Prize and Clamoring for Attention. The latter quests are not all Dam objectives.
Lush Blooms
Lush Blooms is a map condition, not a permanent plant location. When you select that condition, natural resources and baskets become relevant to your gathering plan, but a normal-raid marker does not promise the same opportunity.
Used by: nature-resource and Scrappy gathering. Check the condition guide before choosing a fruit route.
Baron Husks and ARC Materials
Old Battleground and the area northwest of Water Treatment Control are documented starting points for Baron Husk searches. A husk is the large wreck itself, not a small ARC patrol or ordinary cache.
When breaching a husk produces fire, step away and wait for the hazard to finish before trying to loot. An already searched wreck may still offer an interaction, but do not assume it will satisfy your particular quest until the objective updates.
The Breach and South Swamp are additional search leads. Start with a wreck you can identify rather than making a full-map detour to reach a particular husk count.
Used by: Dormant Barons and A New Type of Plant. Keep useful ARC Powercells for requirements such as A Prime Specimen and ARC Alloy for Clearer Skies.
Extraction Points on Dam Battlegrounds
Calling a cargo extraction makes a distinctive sound that nearby Raiders can hear. Clear the approach, identify cover and keep watching the entrances after you call, rather than treating the wait as the end of the raid.
The table gives four documented cargo exits and four hatch route areas. It does not mean all eight are usable in your current raid, and two hatch labels still differ between references. Read the live extraction marker before committing to the final approach.
| Exit or Route Area | Type | Key Requirement | Approach Note |
|---|---|---|---|
| Central Swamp Lift | Cargo lift | No Raider Hatch Key | Swamp route north of Water Treatment Control. Check the approaches before calling it. |
| North Complex Elevator | Cargo elevator | No Raider Hatch Key | Northern industrial route near Power Generation Complex and Generator Hall. |
| Red Lakes Balcony Lift | Cargo lift | No Raider Hatch Key | Testing Annex and Red Lakes Balcony approach. Do not assume it stays open longest. |
| Water Treatment Elevator | Cargo elevator | No Raider Hatch Key | Water Treatment Control area. Distinguish its marker from the Central Swamp Lift. |
| Sunroof Hatch | Raider hatch | Raider Hatch Key | Ben Welder’s Sunroof area near the residential route. |
| Pump House Hatch | Raider hatch | Raider Hatch Key | Eastern outpost route. Match the current client marker before committing to the hatch approach. |
| Eastern Red Lakes hatch area | Raider hatch | Raider Hatch Key | Listed as Red Lakes Hatch or Spillway Hatch in different references. Use the current in-game name. |
| Southwestern Baron hatch area | Raider hatch | Raider Hatch Key | Near the outer Electrical Substation route. References differ between Good Old Baron’s and Dead Old Baron’s Hatch. |
- Open the in-game map and choose an exit that is available with enough time left to reach it.
- Check that a planned hatch is allowed in the selected condition and that you actually brought a Raider Hatch Key.
- Use cover while the cargo extraction is being called and watch for a second approach or another player’s call.
- Confirm the return completes before treating your carried loot or quest items as secured.
This page does not assign universal closure minutes to these exits. A timed shutdown shown by your client takes priority over any route description. For Broken Monument, collecting the items is not the finish line: keep the one-round collection and successful-extraction requirement together.
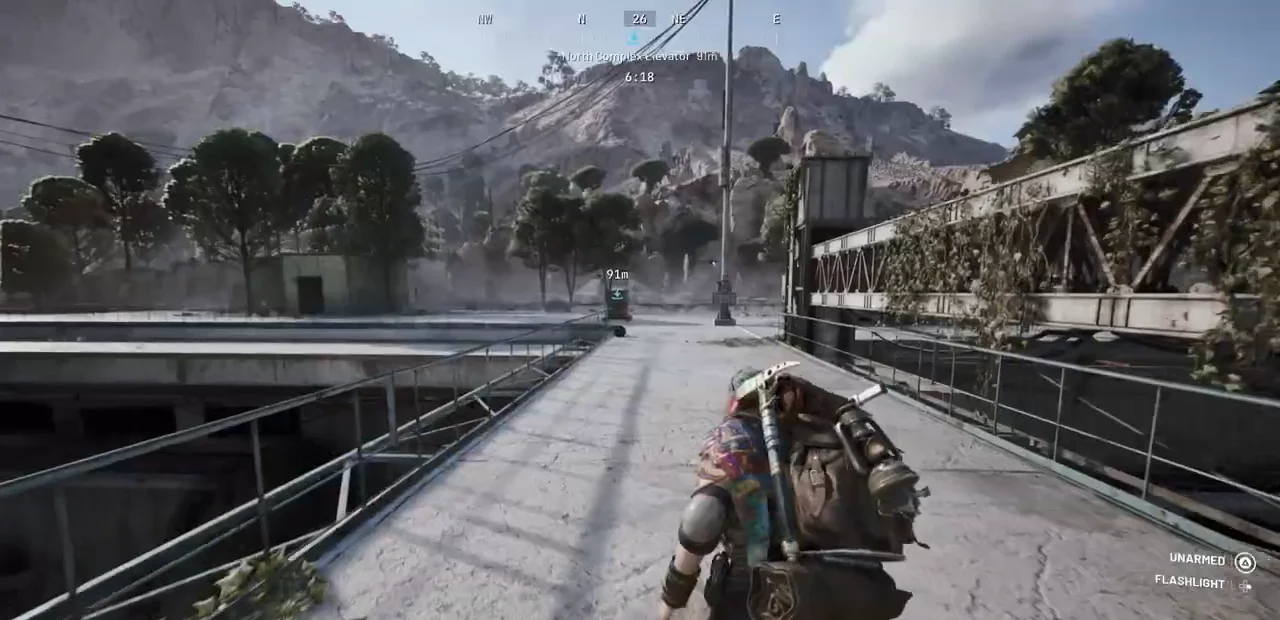
Quests on Dam Battlegrounds
The quest list covers 29 Dam routes and flexible objectives, with several sharing a building. It includes both dedicated Dam tasks and objectives that can be completed on more than one map, so the number is a coverage count rather than a limit on what you can progress here.
A Rising Tide includes a Dam leg at Power Generation Complex’s Controlled Access Zone. Its foreman’s apartment belongs to Buried City. Do not move that apartment onto Dam just because the same quest appears in this table.
Check your quest walkthrough for the exact item, single-round and extraction requirement. Gathering materials, visiting a landmark and completing a named interaction are listed separately rather than being treated as interchangeable quest credit.
| Quest | Trader | Objective location | Round and extraction | Route note |
|---|---|---|---|---|
| Broken Monument | Tian Wen | Search the Scrap Yard and collect the dropped quest items.Show Scrap Yard on map | One round: Required Extraction: Required | Complete the full set and extract in the same round. |
| Keeping The Memory | Celeste | Follow the Formicai Hills and Wreckage route to the helmet.Show Formicai Hills on map | One round: Check quest journal Extraction: Not required | Check the helmet interaction before taking a long collection detour. |
| Flickering Threat | Celeste | Repair the generator at Power Generation Complex.Show Power Generation Complex on map | One round: Check quest journal Extraction: Check quest journal | Bring four Wires before attempting the repair. |
| A Balanced Harvest | Celeste | Find Lab 1 inside Research and Administration.Show Research and Administration on map | One round: Required Extraction: Not required | Reaching the building alone does not complete the Lab 1 objective. |
| Straight Record | Celeste | Follow the switch route through Victory Ridge and the quest's other locations. | One round: Check quest journal Extraction: Not required | Complete each switch interaction rather than stopping at the ridge label. |
| Echoes of Victory Ridge | Celeste | Use the Major Aiva's Patch interaction at Victory Ridge.Show Victory Ridge on map | One round: Required Extraction: Check quest journal | Check that the Patch interaction registers in your quest progress. |
| Water Troubles | Celeste | Find the submerged pipe along the quest route. | One round: Required Extraction: Not required | Use the iridescent water sheen to locate the pipe. |
| Greasing Her Palms | Celeste | Reach the locked room in Water Treatment Control.Show Water Treatment Control on map | One round: Not required Extraction: Check quest journal | Bring the matching Dam Surveillance Key and protect it. |
| A Rising Tide | Celeste | Follow the quest route at Power Generation Complex and the Controlled Access Zone.Show Power Generation Complex on map | One round: Not required Extraction: Check quest journal | The foreman's apartment is a Buried City step, not a Dam destination. |
| A New Type of Plant | Lance | Follow the Baron Husk route at Old Battleground.Show Old Battleground on map | One round: Required Extraction: Required | Stand clear if breaching the husk produces fire. |
| Celeste's Journals | Celeste | Follow the journal route through South Swamp Outpost and Raider Outpost East.Show South Swamp Outpost on mapShow Raider Outpost East on map | One round: Required Extraction: Required | The "northern outpost" clue means Raider Outpost East. |
| The Major's Footlocker | Tian Wen | Find the memento interaction at Ruby Residence.Show Ruby Residence on map | One round: Required Extraction: Required | Follow the memento prompt to the correct apartment. |
| Our Presence Up There | Shani | Complete the power and antenna steps at Pattern House.Show Pattern House on map | One round: Required Extraction: Check quest journal | Zoom in to locate Pattern House before following its objectives. |
| A Symbol of Unification | Celeste | Complete the flag interaction at Formicai Outpost.Show Formicai Outpost on map | One round: Check quest journal Extraction: Not required | Clear the approach before stopping for the flag interaction. |
| Untended Garden | Celeste | Use the Hydroponic Dome Complex archive terminal, then upload at a Field Depot.Show Hydroponic Dome Complex on mapShow Field Depot: Power Generation / Raider Outpost on mapShow Field Depot: Hydroponic Dome Complex on mapShow Field Depot: South Swamp on mapShow Field Depot: Water Towers / Electrical Substation on mapShow Field Depot: Primary Facility / Loading Bay approach on mapShow Field Depot: Red Lakes Balcony on map | One round: Required Extraction: Not required | The archive interaction does not replace the separate upload. |
| Source of the Contamination | Celeste | Use the barrel at Flood Spill Intake on Water Treatment Control's north exterior.Show Flood Spill Intake on mapShow Water Treatment Control on map | One round: Required Extraction: Not required | Stay outside for the barrel interaction rather than entering the building. |
| A Toxic Trail | Shani | Approach Flood Spill Intake, then follow the quest to the barrel truck.Show Flood Spill Intake on map | One round: Required Extraction: Required | The intake stage uses proximity, not the previous quest's barrel prompt. |
| Doctor's Orders | Lance | Use Testing Annex as a gathering option for Syringe, Antiseptic, Durable Cloth and Great Mullein.Show Testing Annex on mapShow Great Mullein: wooded drainage channel on map | One round: Check quest journal Extraction: Check quest journal | Do not assume all requested supplies remain available at Testing Annex. |
| Off The Radar | Shani | Use a Field Depot's roof antenna for the quest.Show Field Depot: Power Generation / Raider Outpost on mapShow Field Depot: Hydroponic Dome Complex on mapShow Field Depot: South Swamp on mapShow Field Depot: Water Towers / Electrical Substation on mapShow Field Depot: Primary Facility / Loading Bay approach on mapShow Field Depot: Red Lakes Balcony on map | One round: Required Extraction: Check quest journal | The internal crate-delivery machine is not the roof antenna objective. |
| Dormant Barons | Shani | Find a Baron Husk with the required quest interaction. | One round: Check quest journal Extraction: Check quest journal | Wait out the breach hazard before checking that the interaction registers. |
| The League | Apollo | Photograph the Water Towers goal and collect the football behind it and pump by the bicycle.Show Water Towers on map | One round: Not required Extraction: Required | Check the photo and pickup steps separately rather than stopping at the goal. |
| Medical Merchandise | Lance | Search the medical-room containers in Research and Administration.Show Research and Administration on map | One round: Not required Extraction: Not required | Check your objective counter rather than assuming every container search counts. |
| Trash into Treasure | Shani | Search Research and Administration or another electrical loot area for quest materials.Show Research and Administration on map | One round: Not required Extraction: Required | Owned or bought materials may not satisfy a looting objective. |
| The Right Tool | Tian Wen | Find the required ARC enemy types, with the central facilities as a route option. | One round: Check quest journal Extraction: Check quest journal | Small ARC types are not interchangeable for the quest's required targets. |
| Paving the Way | Apollo | Use qualifying ENELICA routes at Water Treatment Control or Power Generation Complex.Show Water Treatment Control on mapShow Power Generation Complex on map | One round: Not required Extraction: Check quest journal | Not every building on Dam qualifies as an ENELICA objective. |
| Eyes in the Sky | Shani | Reach the scanner installation prompt at Control Tower.Show Control Tower on map | One round: Not required Extraction: Not required | Scout the zipline ascent before committing to the climb. |
| Into the Fray | Shani | Find an actual Leaper encounter for the quest. | One round: Check quest journal Extraction: Check quest journal | A fixed marker does not guarantee a Leaper patrol. |
| A Better Use | Tian Wen | Call a drop from a usable Call Station and collect it.Show Water Treatment Control roof Call Station on map | One round: Check quest journal Extraction: Not required | Calling the drop does not complete the separate collection step. |
| What We Left Behind | Tian Wen | Complete the Dam portion of the multi-map quest route. | One round: Not required Extraction: Not required | Do not substitute the Buried City or Spaceport objectives for the Dam stage. |
Stacking Quests on Dam Battlegrounds
Power Generation and Pattern House
Pair Flickering Threat with Paving the Way when both are active, then add Our Presence Up There at Pattern House only if your exit plan still works. The first needs four Wires, while the Pattern House route includes its own power and antenna interactions.
The Controlled Access Zone step of A Rising Tide can be another industrial stop. Electrical looting for Trash into Treasure or After Rain Comes is preparation, not proof that those quests have a dedicated objective at every building in the complex.
Research and Administration With Testing Annex
Combine A Balanced Harvest in Lab 1 with the medical-container searches in Medical Merchandise. Add electrical looting upstairs for Trash into Treasure, then use Testing Annex for the plant and medical supplies in Doctor's Orders if the route remains manageable.
Nearby Fireballs may make The Right Tool relevant, but do not turn a supply run into a hunt for every enemy type. Search by room and keep the exit route clear before adding another floor.
Water Treatment and the Swamp
Group Source of the Contamination, A Toxic Trail and Paving the Way around Water Treatment Control. The contamination quest uses the outside barrel interaction, while A Toxic Trail first uses proximity at the intake before sending you onward.
Add the locked interior for Greasing Her Palms only after checking the key and active objective. A nearby Field Depot can serve Off The Radar or the upload after Untended Garden, but these use different parts of the depot.
The Southern Collection Route
Pair Broken Monument at Scrap Yard with Keeping The Memory around Formicai Hills when your spawn and exit make that practical. After searching a collection point, look for the dropped item and confirm it enters your inventory.
Check the helmet interaction early. If it is unavailable, do not sacrifice a carried Broken Monument collection to repeated attempts at a shared-object problem. A Symbol of Unification is another southern objective, but its stationary flag interaction deserves a cleared approach rather than a rushed add-on.
Match the Remaining Tasks to Your Spawn
The Water Towers route can advance The League through its goal photo, Deflated Football behind the goal and Bicycle Pump by the bicycle. Water Troubles and What We Left Behind need their own named destination, so check those walkthroughs before treating nearby scenery as the objective.
A northern or residential route can instead pair Straight Record and Echoes of Victory Ridge with a later visit to Ruby Residence for The Major's Footlocker. Celeste's Journals crosses between separate outposts, so avoid adding it casually to a short loot run.
Take Eyes in the Sky into account before climbing Control Tower. Add Dormant Barons, A New Type of Plant, Into the Fray or A Better Use only when you find the required husk, Leaper or Call Station on a route you can still finish.
A Pattern House visit may also fit Back On Top. Follow its active objective rather than assuming that every visit to the roof counts.
Dam Battlegrounds Threats
Industrial Buildings and Open Approaches
The Control Tower ascent is a commitment point: check the documented Turret position above the zipline before climbing. Around Power Generation Complex and Hydroponic Dome Complex, scan for ARC and other Raiders before crossing between buildings.
Fireballs, Wasps and Hornets are relevant threats on Dam routes. Keep room entrances and retreat paths in view rather than assuming small ARC cannot follow you indoors. A Rocketeer reported near Central Swamp Lift is a reason to scan the sky, not a promise that it patrols there every raid.
Do Not Treat a Quiet Route as a Safe Route
The centre, Ruby Residence and the dome complex combine valuable loot with quest traffic. Water Treatment Control is not a guaranteed quiet route either. Stay alert to other players, your spawn timing and nearby objectives.
Bring healing for combat and traversal mistakes. The polluted appearance of the swamp is not evidence that ordinary rain or every pool passively drains health. React to an actual hazard indicator rather than assuming all water is toxic damage terrain.
Matriarch and Other Condition Threats
Matriarch is a condition-dependent boss encounter, not a permanent enemy waiting at a normal-raid pin. Harvester, Husk Graveyard and Night Raid can also change the reason to visit an area and the risks of staying there.
Read the active condition’s rules before following a boss or event marker. Keep an ordinary gathering run separate from a boss attempt unless your loadout and available exit support the change of plan.
FAQ
Where are the Field Depots on Dam Battlegrounds?
Six documented search areas cover Water Towers, the Water Treatment to central-facility corridor, Red Lakes Balcony, South Swamp Outpost, Hydroponic Dome Complex and the eastern Power Generation approach. Look for a rectangular metal building with blue tarp and a small roof antenna. Check the correct quest interaction rather than assuming every depot is active.
Where do you find mushrooms on Dam Battlegrounds?
Search the Hydroponic Dome Complex surroundings, trees near Central Swamp Lift and pipes at Water Treatment Control. Mushrooms can grow on surfaces rather than lying loose on the ground. Keep 12 for the Scrappy V requirement and treat empty spots as a reason to continue the route, not evidence that the quest is broken.
How many extraction points does Dam Battlegrounds have?
This route list covers four cargo exits and four hatch areas. It is not a guarantee of eight usable exits in your raid, and the eastern and southwestern hatch names still differ between references. Use the current in-game markers for availability and closure warnings, and bring a Raider Hatch Key for a permitted hatch.
Is Dam Battlegrounds the first map?
Yes. Dam Battlegrounds, also called the Alcantara Power Plant, is the first map you unlock. It has one map view, but that does not make every objective ground-level. Use the dam as a landmark, zoom in for smaller labels and check the room or floor before following an indoor objective.
Where are the Baron Husks on Dam Battlegrounds?
Start with Old Battleground and the area northwest of Water Treatment Control. The Breach and South Swamp offer additional search leads, not a guaranteed four-wreck circuit. If a breach ignites the wreck, back away and wait before looting, then check whether your quest actually registered the required interaction.
Finish the Dam Run You Planned
Use the route that fits your active quests and leave room for extraction. For help with quest completion, explore the quest boost. For a map-focused run, review the Dam Battlegrounds raid boost.
Gameplay Image Credits
Gameplay images adapted from the following creators. Captures have been cropped or resized for this guide.
- Dam Battlegrounds surface, Dam Battlegrounds location photos: gameplay capture by Mortal TV. Cropped or resized for this guide.
- Dam Battlegrounds location photos: gameplay capture by Shrubby13. Cropped or resized for this guide.
- Dam Battlegrounds location photos: gameplay capture by iDentity. Cropped or resized for this guide.
- Dam Battlegrounds location photos: gameplay capture by TroubleChute Basics. Cropped or resized for this guide.
- Dam Battlegrounds location photos: gameplay capture by TroubleChute Basics. Cropped or resized for this guide.
- Dam Battlegrounds location photos: gameplay capture by GosuNoob. Cropped or resized for this guide.
- Dam Battlegrounds location photos: gameplay capture by TroubleChute Basics. Cropped or resized for this guide.
- Dam Battlegrounds location photos: gameplay capture by TheNoGearGuy. Cropped or resized for this guide.
- Dam Battlegrounds location photos: gameplay capture by BeVe Gaming. Cropped or resized for this guide.
- Dam Battlegrounds location photos: gameplay capture by GosuNoob. Cropped or resized for this guide.
- Dam Battlegrounds location photos: gameplay capture by Gracemire. Cropped or resized for this guide.
- Dam Battlegrounds location photos: gameplay capture by RoofTii. Cropped or resized for this guide.
- Dam Battlegrounds location photos: gameplay capture by TooFumed. Cropped or resized for this guide.
- Dam Battlegrounds depot approach images: gameplay capture by JDA. Cropped or resized for this guide.