

What a Call Station Looks Like
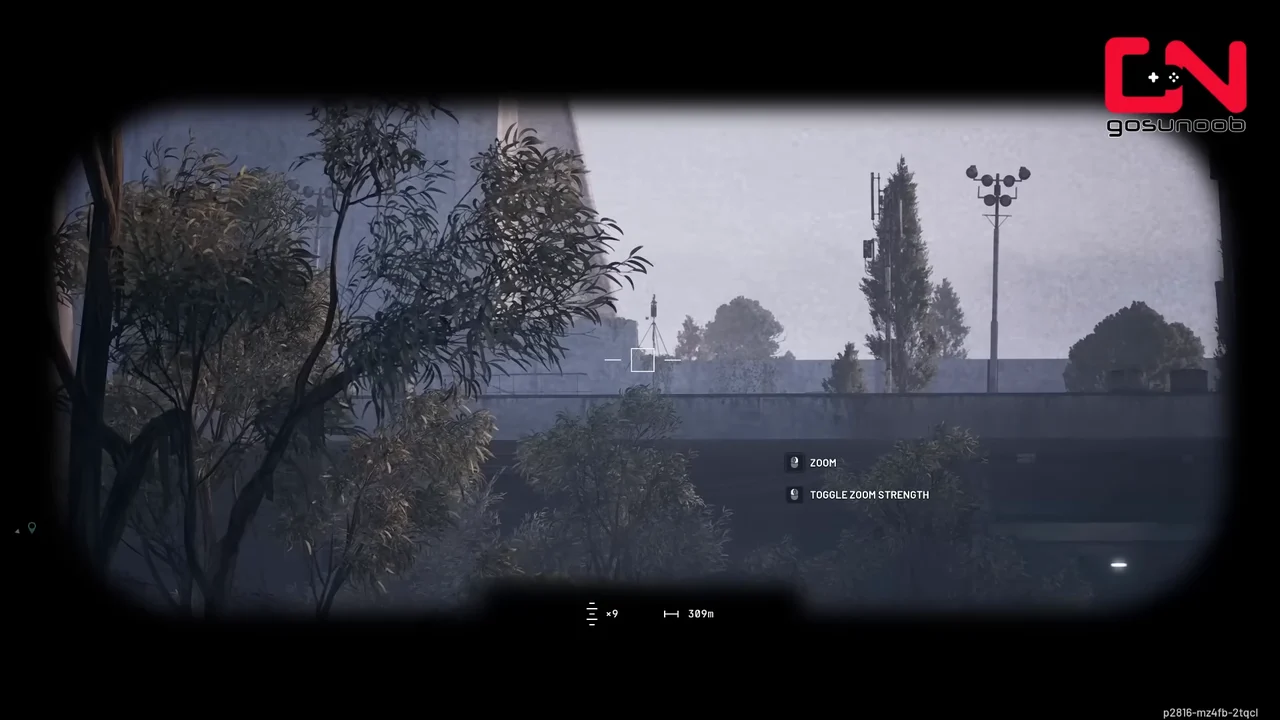
A Call Station looks like a narrow metal pole with three downward-pointing prongs near the top and a small flashing white light. The interaction is at the electrical box near its base, not up on the antenna. It is also called a Supply Call Station or Supply Drop Call Station.
In daylight, look for the forked silhouette against the sky or a lighter building behind it. At night, the blinking light is the better starting cue. Confirm the pole and base before approaching because an isolated light is not enough to identify a station.
The station requests the Supply Drop, which is a separate container that arrives under a balloon. You activate one object and later breach and loot another. A crate already on the ground is not a station, and standing beside the pole does not collect the reward.
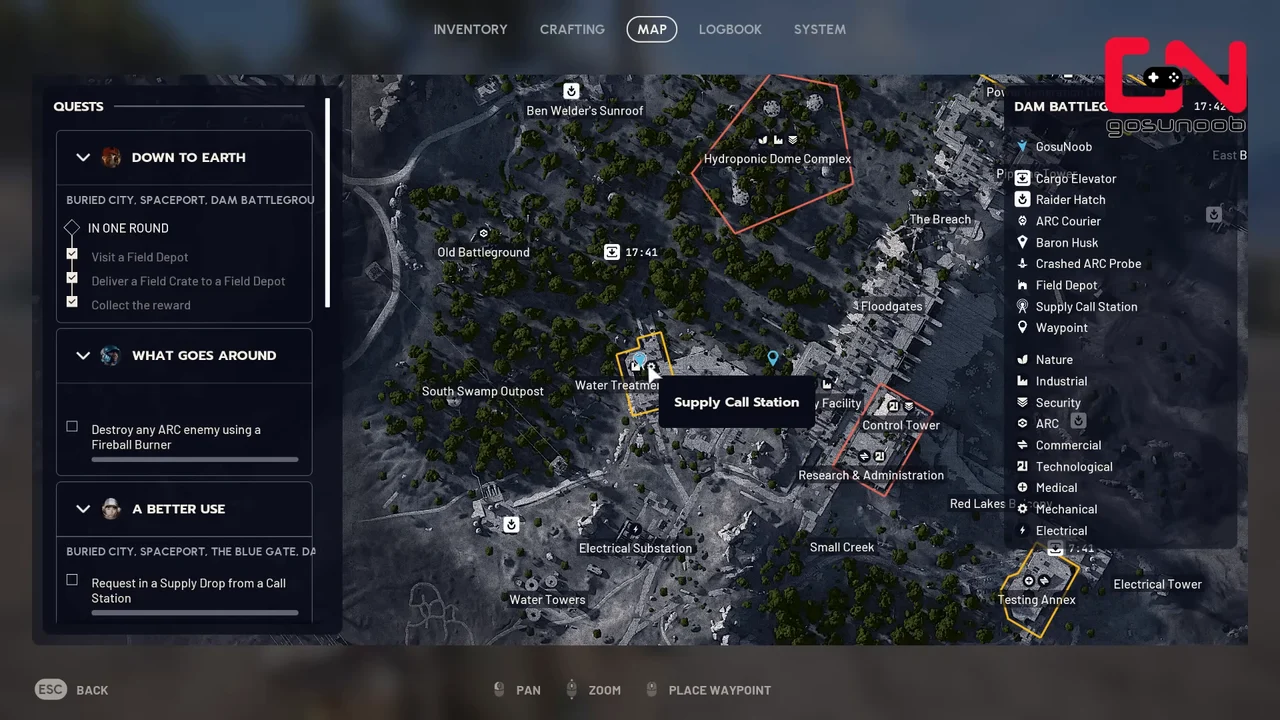
Like Field Depots, station icons become useful only when you are close: a Field Depot processes what you bring, while a Call Station summons something. Use the antenna icon as local confirmation rather than expecting every station to be visible from your spawn.
How to Find a Call Station
Find a Call Station by scanning a sensible search area, moving close enough to reveal its icon, and pinging that icon to keep the destination marked. On a multi-level map, the waypoint tells you where to head, but you still need to choose the correct stairs, roof access or ground route.
- Choose a nearby search area from the map tables and use safe high ground only when the climb fits your route.
- Scan for the three-pronged pole in daylight or the flashing white light in darkness, using Binoculars if you already carry them.
- Watch for another raider’s flare and descending balloon without assuming the landing area is unoccupied.
- Check the full map again as you move through the area so that a newly revealed antenna icon is not missed.
- Ping the station icon to keep a waypoint while you identify the correct height and access route.
- Approach the electrical box and look for Request supply drop before committing to a wait nearby.
Community guides also describe a low hum. Treat sound as a supporting cue, not a measured detection radius or a substitute for the pole, marker and prompt. Rain, machinery and combat can make a sound-led search a poor choice.
When the Marker Is There but the Station Is Not Obvious
First check height. A roof corner can sit almost directly above the street waypoint, and a pole can blend into railings or scaffolding when you approach from below. Change your viewing angle before committing to another building.
Next check the interaction. A possible station site is not a promise that you can call from it in this raid, and a station used by someone else may no longer offer the request. Do not infer a full active-or-inactive rule from its light alone. If the correct base has no usable prompt, move to another search area instead of camping a presumed refresh timer.
Use a Flare as Information, Not an Invitation
Another raider’s flare gives you a direction to inspect and warns that someone has just used the area. The balloon can be easier to track than the flare once the drop is coming down. Choose cover overlooking the landing approach before deciding whether to contest or avoid it.
For a search-based Trial, a drop called by another player can still be relevant. That does not give you ownership of the container or make a direct rush sensible. For a quest that explicitly requires you to request a drop, do not assume looting somebody else’s crate replaces the request objective.
How to Call and Collect a Supply Drop
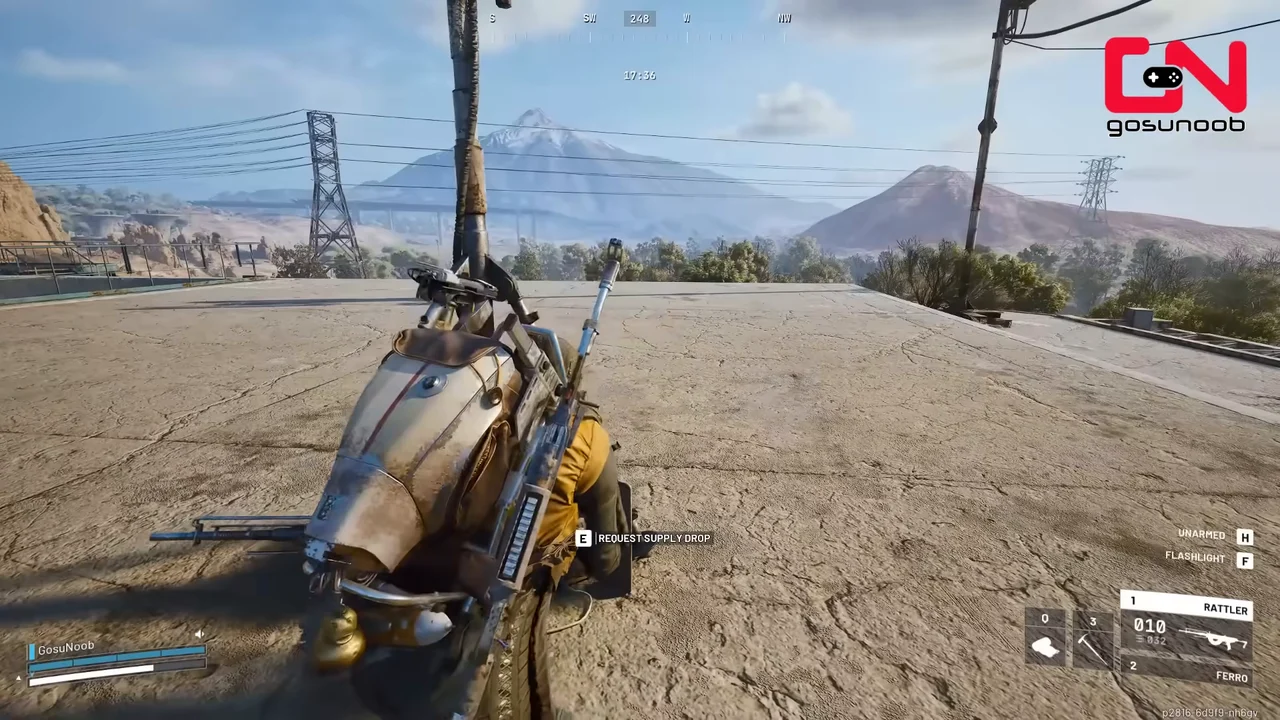
Request the Supply Drop at the station’s electrical box, track the balloon to its landing place, then breach and search the container. The call makes your activity easier to notice, so decide where you will wait and how you will leave before activating it.
- Check nearby cover, the approach behind you and the route toward an available extraction before touching the box.
- Interact with Request supply drop at the base of the Call Station.
- Move to a defensible observation position while keeping the flare direction and descending balloon in view.
- Follow the actual landing rather than waiting for the container to appear directly on the station.
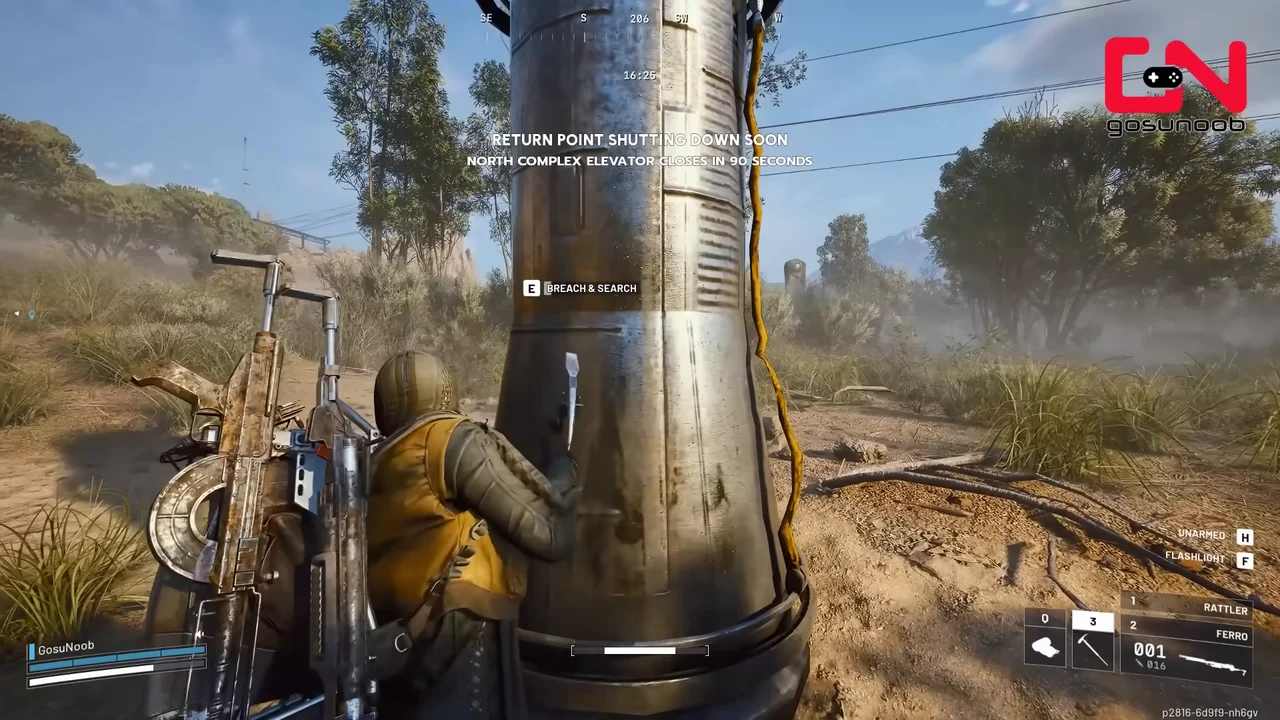
- Approach the landed tube-shaped container only after checking the ground and elevated angles around it.
- Breach the container, search it and take the useful supplies before leaving or choosing another station.
Use the balloon and landing animation instead of a fixed stopwatch target. A station-to-ground journey also depends on how far you must move to the drop. Do not leave cover just because an old guide’s countdown has elapsed.
What Is Worth Taking
Supply Drops are primarily a restocking opportunity. Reported categories include ammunition, healing and other quick-use equipment, grenades and weapons. Check the contents you receive rather than treating a drop as a rare-equipment promise or expecting it to replace your whole loadout.
| Situation | Priority |
|---|---|
| You are short on ammunition | Take ammunition that fits your carried weapon before considering a weapon swap. An unsuitable ammo stack does not solve the immediate shortage. |
| You have spent your healing | Restock useful treatment items and reassess whether you can still reach an exit. Do not call another drop simply because the first one made continuing possible. |
| Your bag is full | Choose what you need before standing over the opened container. Keep an important quest item ahead of an optional restocking item. |
| Someone else is approaching | Leave the nonessential contents. A Supply Drop is not worth defending automatically, particularly after the search objective has registered. |
Does Heavy ARC Presence Make a Station Safer?
Not reliably. Some community advice favours stations near ARC because other players may avoid the area, and the Hydroponic Dome Complex is often used as that example. The same machines can also trap you away from the drop or force you into the open.
Use the tactic only as a judgment about the raid in front of you. A visible drone, a large ground machine or incoming fire is a reason to change your waiting position, not proof of protection from players. Keep enough ammunition and healing to leave after the search, especially when a Trial is the real goal.
Supply Drops and the Weekly Trial
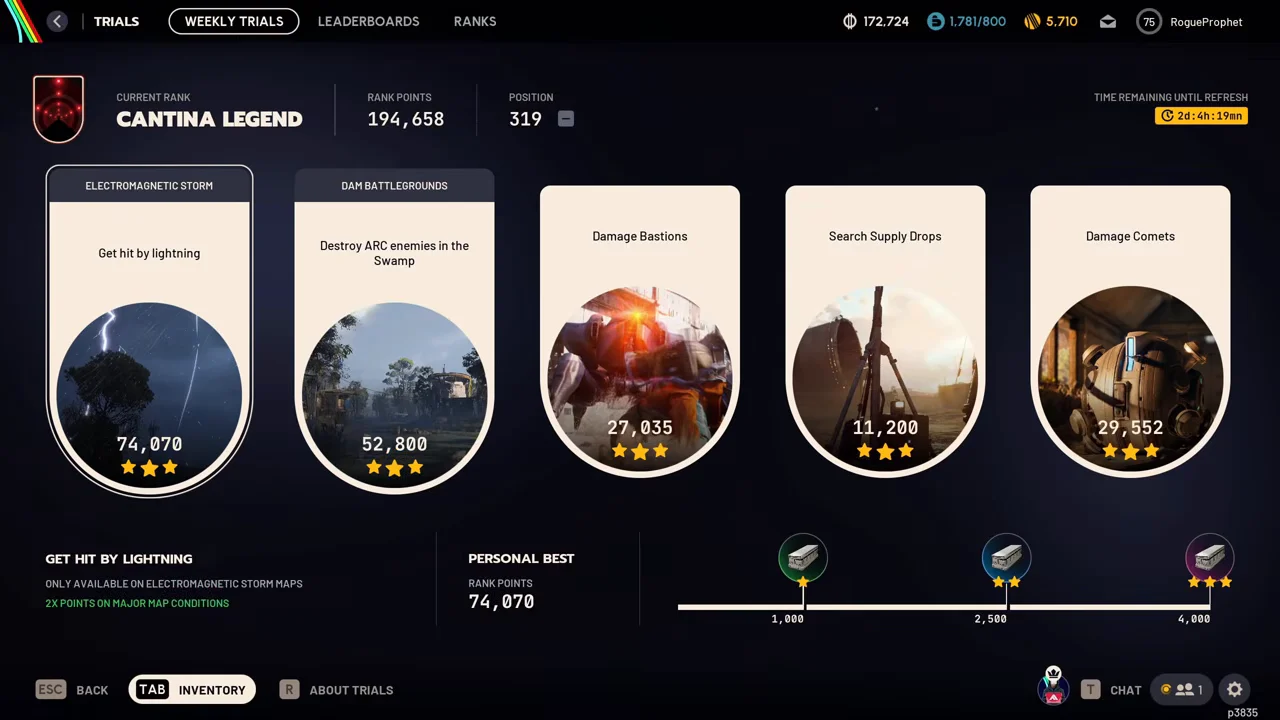
Search Supply Drops is a recorded recurring objective in the Weekly Trials rotation. That does not mean it appears every week or is available today. Open its active card and read the exact scoring action, eligible conditions and any extraction requirement before building a route.
Requesting a drop at a Call Station, watching the balloon land, breaching or searching the container, and checking the displayed score are separate steps. Do not treat the request or arrival alone as proof that points were awarded. Follow the action named on your trial card rather than assuming every step scores.
| Before the run | At the station and drop | Check afterward |
|---|---|---|
| Select Search Supply Drops and note the displayed score. Read its action, conditions and refresh information. | Check the station prompt, follow the landing and inspect the container prompts. Keep requesting, breaching and searching distinct. | Check the displayed trial score and result. Confirm whether its rules require extraction rather than assuming either outcome. |
The selected detail panel matters. A double-points message for Get hit by lightning does not establish a bonus for Search Supply Drops. Use which condition to play for to plan your route, then check the relevant trial's own rules.
A personal best is not a per-container value. Do not calculate a guaranteed score from planned stops or carry an old refresh countdown into a new rotation.
Every Call Station by Map
Buried City has the clearest rooftop search routes, while Dam offers more open-ground recognition practice. Treat the entries below as reported station areas and deliberately labelled connecting routes, not a claim that every position is active at once. Some maps have better-documented station positions than others.
Buried City
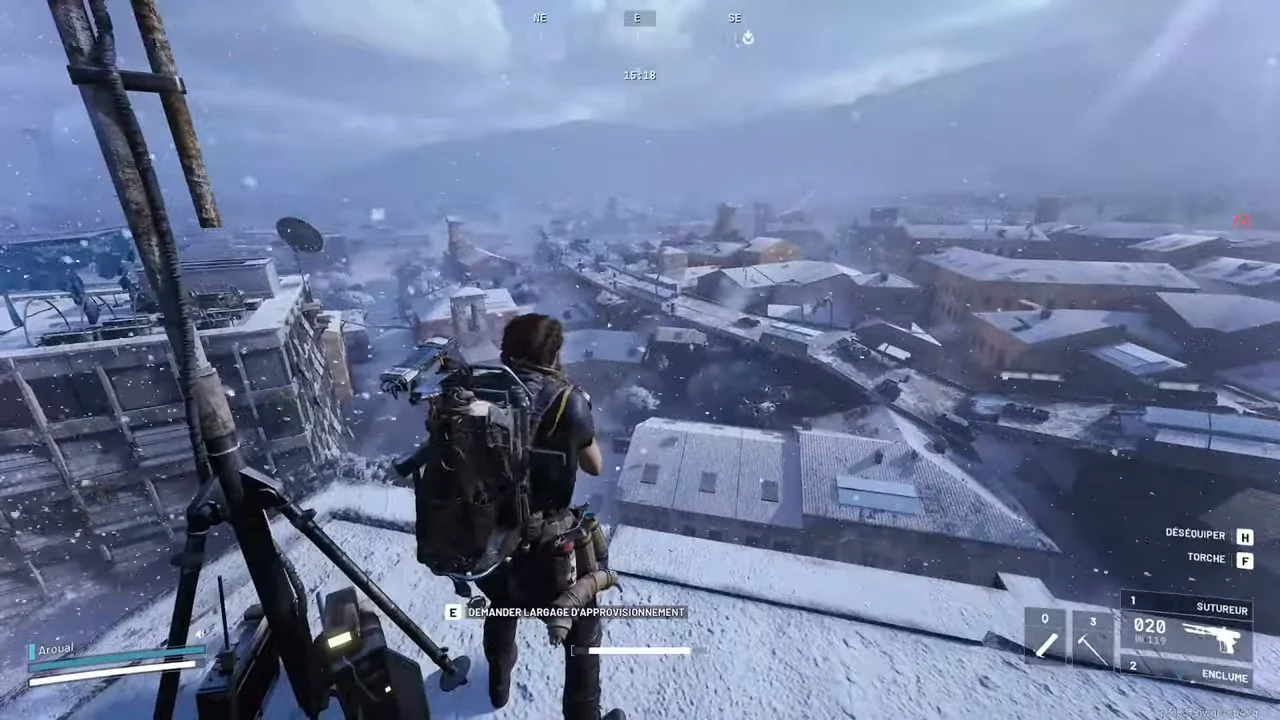
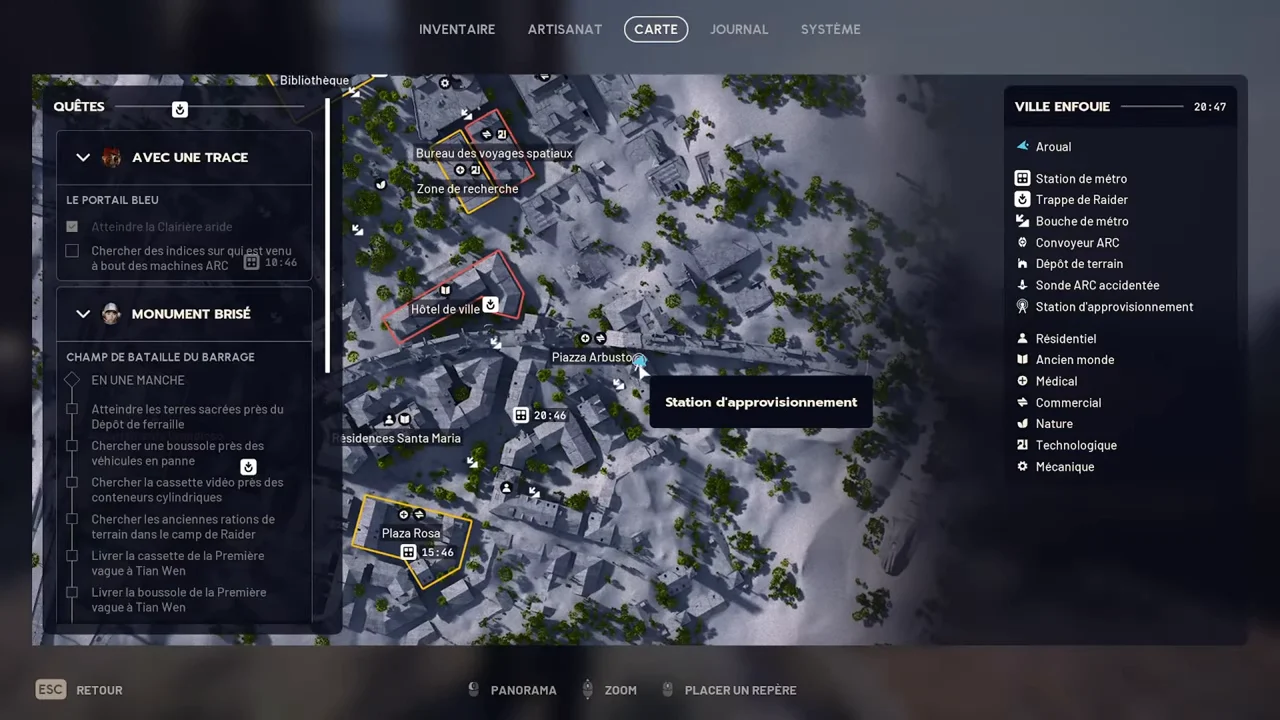
These are nine recorded Call Station areas on Buried City, not a complete current inventory. Seven markers use rooftop player positions connected to a station approach, while the Piazza Arbusto and Plaza Rosa markers use native station icons. The records span different raids and conditions, so they do not show all nine active together.
| Station area | Recorded approach | Map precision and raid check |
|---|---|---|
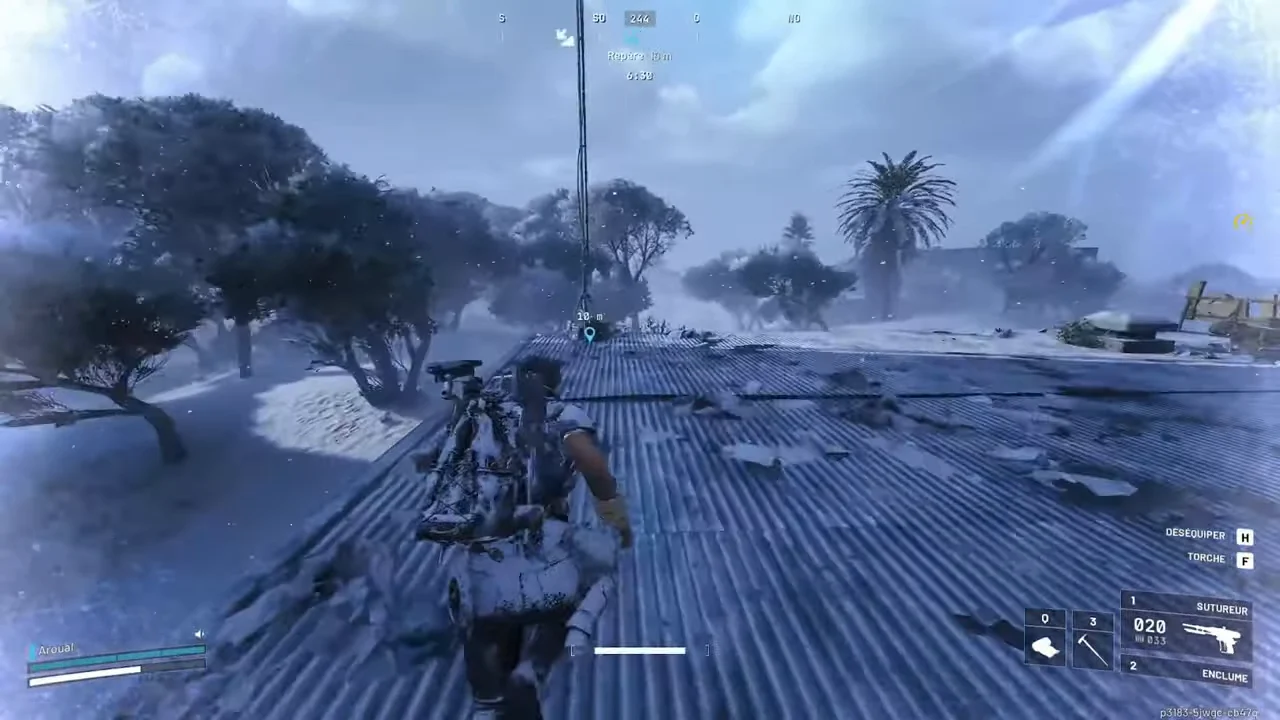
| Gas Station roof Call Station area | Reach the station on the corrugated roof north of the Hospital. | Approximate rooftop player position, not exact pole coordinates. Check the station prompt in your raid. |
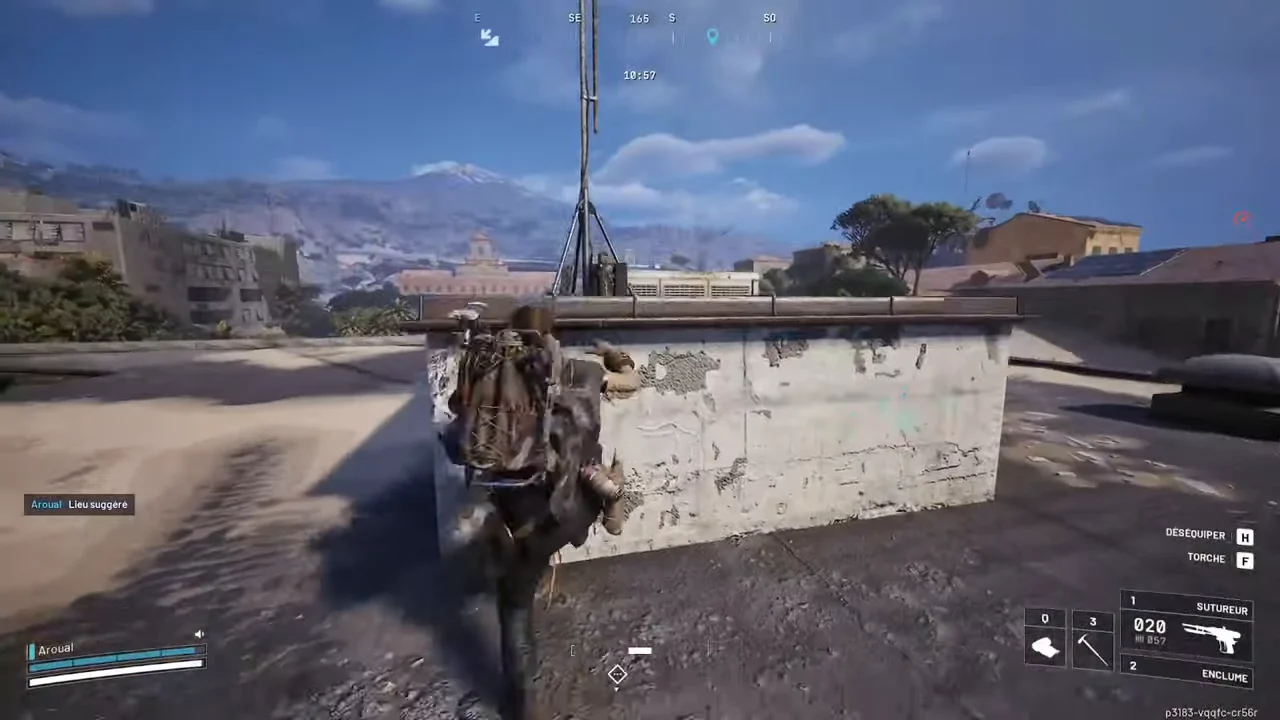
| Library roof Call Station area | Take the interior stairs, then the exterior yellow ladder to the pole beyond the roof lip. Keep this detour separate from the Building a Library quest route. | Approximate rooftop player position, not the blue southwest waypoint or exact pole coordinates. Check the station prompt in your raid. |
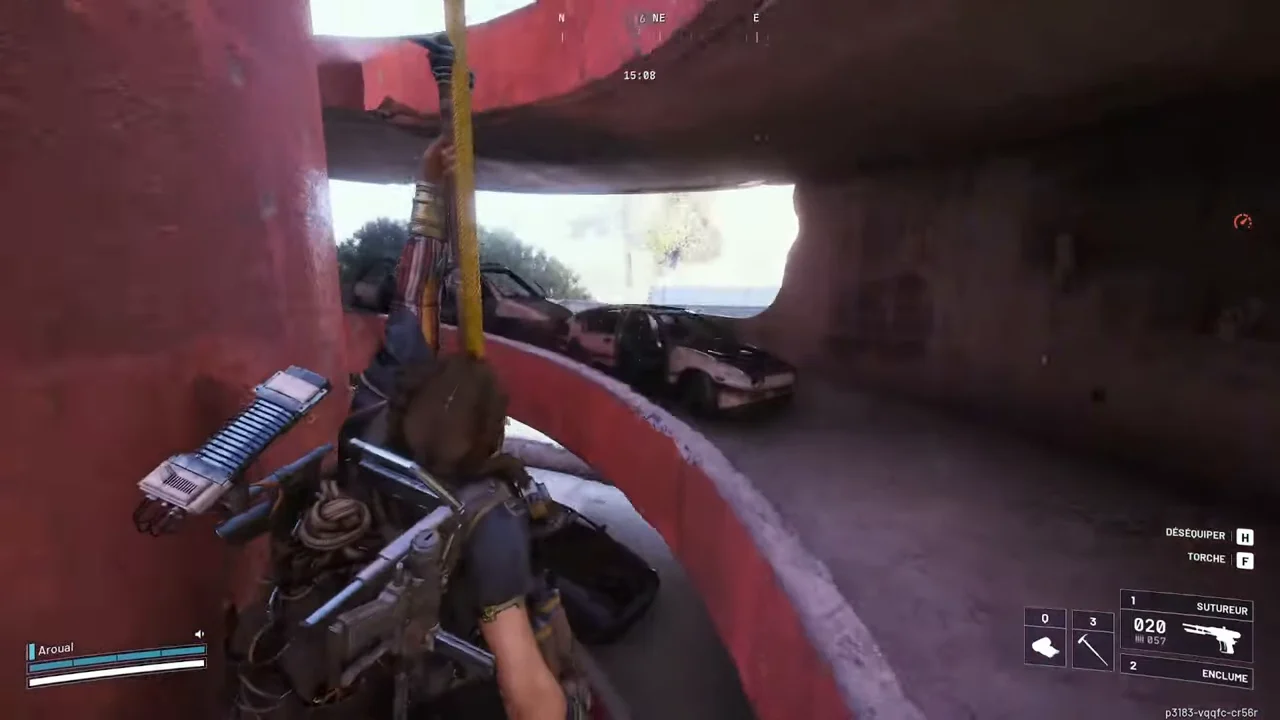
| Parking Garage roof Call Station area | Follow the spiral parking ramp and yellow zipline to the station on the upper circular roof. | Approximate rooftop player position, not exact pole coordinates. Check the station prompt in your raid. |
| Piazza Roma roof Call Station area | Take the exterior zipline beside the courtyard to the roof pole. This is Piazza Roma, not Plaza Rosa. | Approximate rooftop player position, not exact pole coordinates. Check the station prompt in your raid. |
| Research roof Call Station area | Find the station on the raised roof beside the Space Travel building. | Approximate rooftop player position, not exact pole coordinates. Check the station prompt in your raid. |
| Grandioso Apartments roof Call Station area | Follow the interior ascent and upper stairs to the roof station. Keep the Unexpected Initiative quest route separate from the station stop. | Approximate rooftop player position, not exact pole coordinates. Check the station prompt in your raid. |
| Corso da Vinci roof Call Station area | Reach the roof beside the elevated road and look for the station pole. | Approximate rooftop player position, not exact pole coordinates. Check the station prompt in your raid. |
| Piazza Arbusto roof Call Station area | Reach the roof beside the elevated road near the church tower. | Native Supply Call Station icon with a readable tooltip. It does not establish current activation, so check the prompt. |
| Plaza Rosa roof Call Station area | Follow the connected roof approach to the pole, with the native icon at the northeast roof edge. This is Plaza Rosa, not Piazza Roma. | Native Supply Call Station icon, not a player-position approximation. Check the station prompt in your raid. |
West Village and New District/Security station leads have not been reconciled with these records, so they should not be counted as aliases or additional plotted stations. Raider's Refuge is on The Blue Gate, not Buried City.
Dam Battlegrounds
| Reported Station Area | Approach and Height | What to Watch |
|---|---|---|
| Hydroponic Dome Complex | Scan the open spaces around the centre of the dome complex for the pronged pole before walking between structures. | ARC can interrupt the call or landing approach. Untended Garden has a separate data objective here. |
| Central Swamp Lift area | Check the shallow-water area near the central swamp extraction approach. | Keep the call and extraction decisions separate. A transport arriving nearby does not turn the whole area into safe cover. |
| Pipeline Tower, eastern shallow water | Use Pipeline Tower as the landmark and scan the shallow-water side to its east. | Look for a route back to solid cover before the call rather than waiting in the water. |
| Water Treatment Control roof | Check the roof height when a nearby antenna icon appears over the building. | A station check can follow Paving the Way or Source of the Contamination, but those ground or interior tasks do not require you to call a drop. |
| Research and Administration surroundings | Scan the outer approaches, including the south side, rather than assuming the pole is inside the building. | After Medical Merchandise or A Balanced Harvest, decide whether the bag and exit route still justify making a visible call. |
| Control Tower approaches | Inspect the open approaches around the tower and use the nearby icon to resolve the station’s actual height. | Community sightings here are useful search context, not proof that a specific approach is currently active or quiet. |
The Blue Gate
| Search Area or Route | How to Use It |
|---|---|
| The Checkpoint | The Checkpoint is a reported station area. Scan the surface approaches for the pole before dropping into the tunnel system. |
| Village to Checkpoint surface leg | Use a surface trip you already need as a scan, not as proof of another station. Keep the Call Station search separate from the Village key door or Clamoring for Attention interactions. |
| Pilgrim’s Peak return route | After Outstanding Balance or Groundbreaking, inspect accessible surface areas while leaving. Do not descend through another layer just to chase an unexplained antenna waypoint. |
The Blue Gate’s most important distinction is surface versus tunnel travel. A station hunt should not pull you through a gate puzzle or into a key room you did not prepare for. Use a visible surface station when it fits the route, and move on when the request prompt is unavailable.
Spaceport
Spaceport supports Call Stations, but its large industrial shapes can hide the thin pole. The following are search circuits, not a claimed complete set of fixed station coordinates. Follow a circuit that matches your spawn and other tasks, then let the nearby icon identify the actual device.
| Search Circuit | How to Move and Scan |
|---|---|
| Arrival and Departure outer approaches | Use the western facility approaches and scan the spaces outside the large buildings. Complete an interior task before moving toward a flare or balloon. |
| Control Tower A6 and adjoining open ground | Inspect the exposed approaches from cover and check height when an icon appears. The tower’s quest antenna is not automatically a Supply Drop Call Station. |
| Container Storage and Vehicle Maintenance side | Scan between the cargo structures without following every narrow aisle. Leave the locked-room route out of the plan unless you brought its key and intended to use it. |
| Rocket Assembly-side perimeter | Use the outer industrial approach as an observation route after a nearby task. Keep the balloon in sight before crossing the open ground toward a landing. |
Do not mistake Hidden Bunker antennas or the sensors used by Waking the Grid for a station. The decisive check is Request supply drop at the base. A tall mast by itself does not tell you which activity you have found.
Riven Tides
Community mapping reports Call Stations around the Seaside Elevator approach. Use that as a search area rather than an exact spawn promise. The coast gives you a broad view of a balloon, but a clear skyline does not tell you whether the landing route is clear of other raiders.
| Route Choice | What to Do |
|---|---|
| Seaside Elevator approach | Scan the approach for a pronged pole and check the nearby marker before treating it as a station. Plan how to leave the landing area without relying on the extraction being immediately available. |
| Hotel or port return leg | After Safe Harbor or Battening Down, decide whether a station search fits the remaining journey. Follow a visible device or balloon rather than rerouting through every container yard. |
Stella Montis
Do not choose Stella Montis as the default map for the outdoor pole-and-balloon route described here. A supply container in an indoor complex does not establish a callable station beside it. For A Better Use, the quest’s named maps are Dam Battlegrounds, Buried City, The Blue Gate and Spaceport.
| Goal | Useful Map Decision |
|---|---|
| Restocking during an indoor run | Use ordinary containers along your existing Lobby, Medical Research or Assembly route and keep track of the correct extraction layer. That is resupply, not proof of Call Station quest progress. |
| Completing a station request next | Choose a rooftop station search on Buried City or a familiar Dam route. Look for the antenna icon before committing to an indoor detour. |
The A Better Use Quest
A Better Use asks you to request a Supply Drop and loot it for Tian Wen. The quest text can make stations sound visible on the map from the start, but the nearby-only antenna icon is the reason many players open the map and find nothing.
The walkthrough follows The Right Tool in the quest chain. You do not need to spend an expensive key to request a drop. Choose a permitted loadout with enough supplies for the approach, activation and return, then use the station’s own prompt.
| Action | What It Establishes |
|---|---|
| Request the drop | Completes the calling part of the task when the objective registers. It does not collect the container. |
| Follow the landing | Gets you to the Supply Drop, which can land away from or below the station. |
| Breach and loot | Completes the collection task once the required interaction registers. |
| Check the tracker | Confirms which objectives remain. Dying before looting leaves that work unfinished, while the completed quest does not require a further extraction after looting. |
Do not transfer that last survival rule to a Trial or your backpack. Quest completion, Trial scoring and keeping ordinary loot are different outcomes. Once the task has registered, leaving with what you already have is often a better decision than starting another visible call.
FAQ
What does a Call Station look like?
Look for a thin metal pole with three downward-pointing prongs near the top and a flashing white light. The request box is at the base. In daylight, the silhouette is usually the useful cue. At night, start with the light, then confirm the pole and interaction prompt.
Why can't I see Call Stations on the map?
The antenna icon appears only when you are close enough to the station. It is local confirmation rather than a complete map-wide locator from your spawn. Move through a reported search area, check again, then ping the icon and identify whether the station is on the street or roof.
How do you find a Call Station fast?
Use a familiar search route, scan from safe high ground, and look for the pole or white light before checking the nearby map icon. Ping it to keep a waypoint. Other players’ flares can reveal activity, but the landing area may already be occupied and is not automatically worth contesting.
Does the flare give away your position?
The flare and descending balloon can draw attention from raiders with a view of the area. That does not mean every player necessarily sees them. Check cover and your return route before activating, then wait somewhere you can watch the landing without standing exposed beside the station.
What is in a Supply Drop?
Supply Drops provide random restocking loot such as ammunition, healing and other quick-use equipment, grenades and weapons. They are not a reliable promise of rare gear. Take what supports your current loadout and exit plan, and do not risk an important quest item merely to finish clearing the container.
Prepare for the Next Supply Run
A Supply Drop is useful restocking, not a way to order a particular reward. Review the available materials service for a specific resource requirement, or the quest service for help with progression. Keep your loadout and extraction plan separate from what a random drop might contain.
Gameplay Image Credits
Gameplay images adapted from the following creators. Captures have been cropped or resized for this guide.
- Buried City location photos: gameplay capture by RogueProphet. Cropped or resized for this guide.
- Buried City location photos: gameplay capture by Aroual. Cropped or resized for this guide.
- Dam Battlegrounds location photos: gameplay capture by GosuNoob. Cropped or resized for this guide.