

What a Field Depot Looks Like
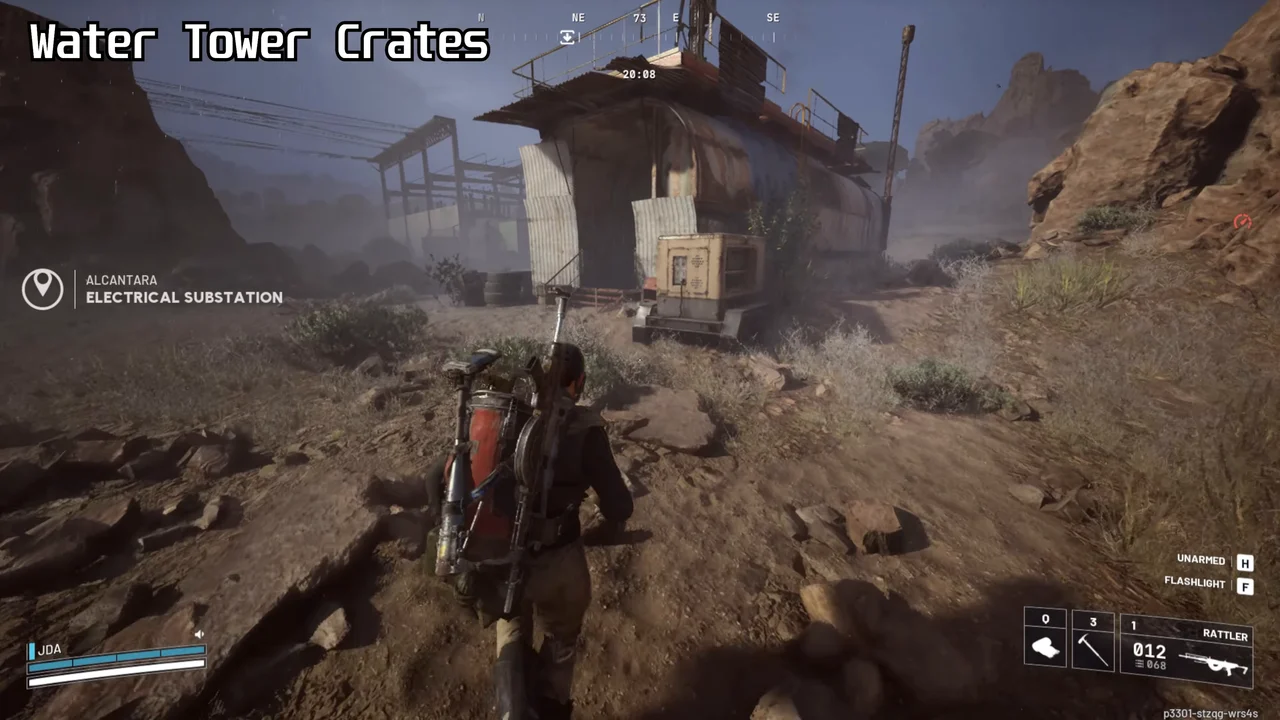
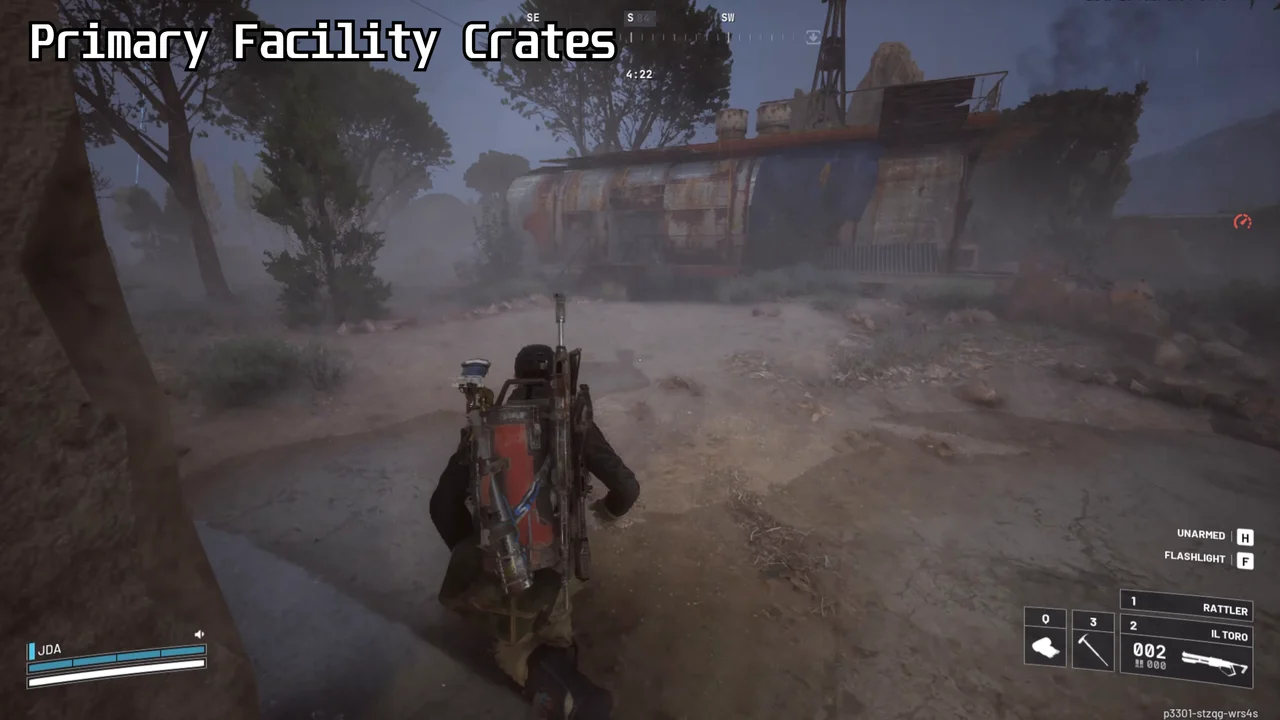
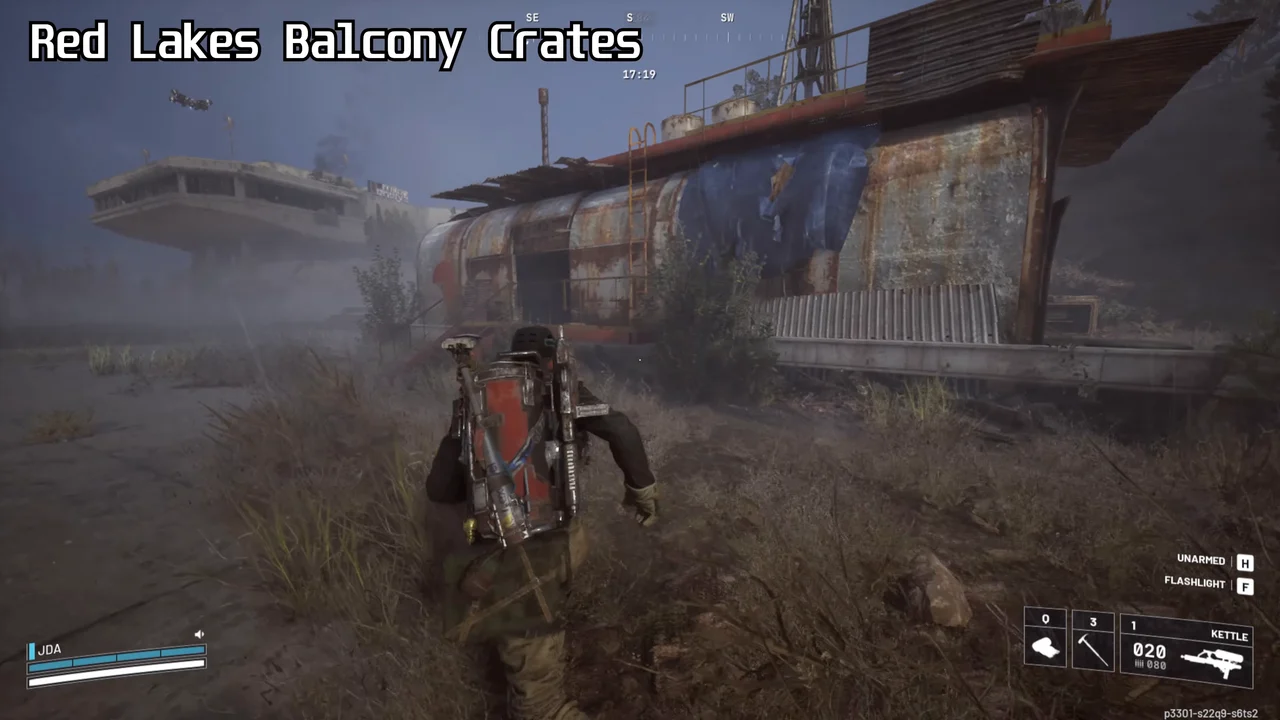
A Field Depot is a low, elongated metal shelter with a roof antenna and blue fabric draped over its side. Look for the combination of a container-like body, a roof-mounted mast and the small entrance, not a freestanding blue camping tent.
The “blue tent” clue in Off The Radar describes the fabric more helpfully than the building. At a distance, scan the edge of the skyline for the antenna, then confirm the metal shelter beneath it. From the side, the tarp and exterior ladder can be easier to recognise than the front entrance.
The nearby-only marker behaviour is shared with Call Stations: a Call Station summons a drop, while a Field Depot processes what you bring. An empty map is not proof that no depot is close. Move into the area before checking for its symbol again.
Inside and on the Roof
| Part of the Depot | What You Use It For | What Can Go Wrong |
|---|---|---|
| Supply Station | Deliver a Field Crate and collect the processed reward. | A computer screen elsewhere in the shelter is not the crate slot. |
| Quest computer | Upload data for Untended Garden after completing its collection step. | A visible computer is not enough. Look for the objective-specific interaction and confirm that you are carrying the required data. |
| Roof antenna | Repair the antenna for Off The Radar. | The roof exposes you while the interaction runs. Finish the repair prompt rather than only climbing onto the roof. |
| Reward compartment | Collect the loot produced by the crate delivery. | The delivery interaction and the loot pickup are separate actions. Do not leave before checking what opened. |
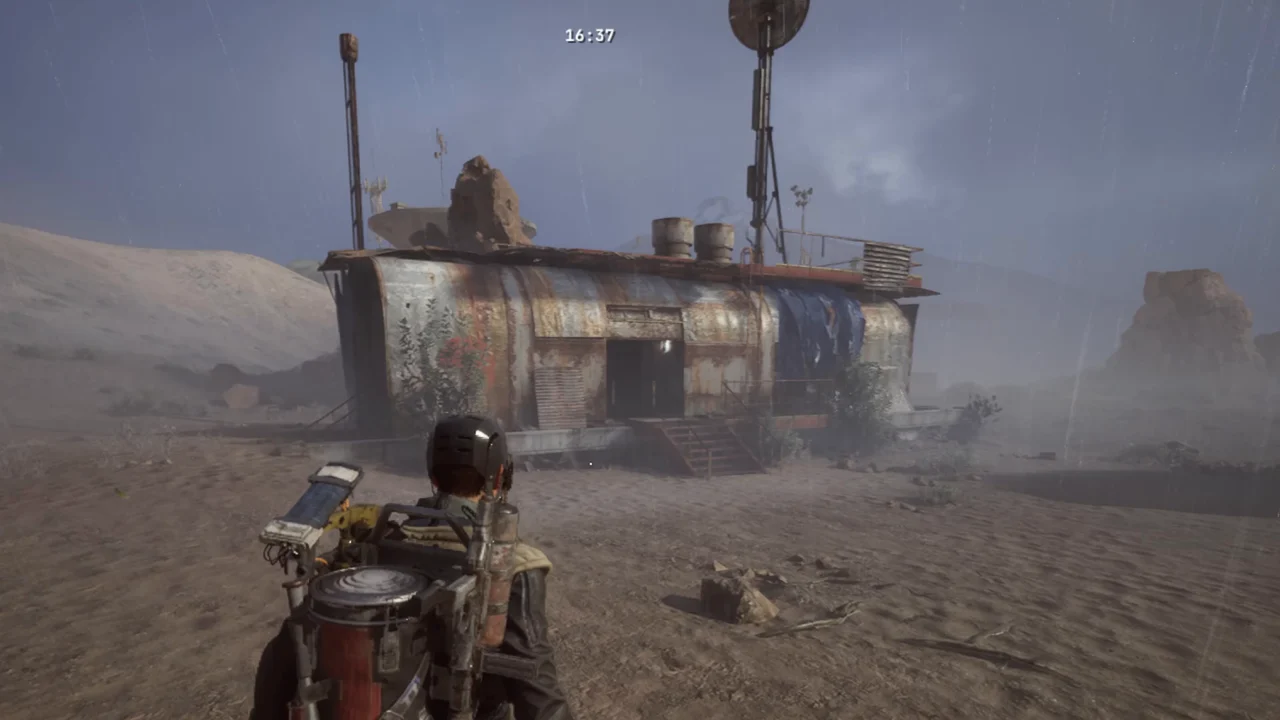
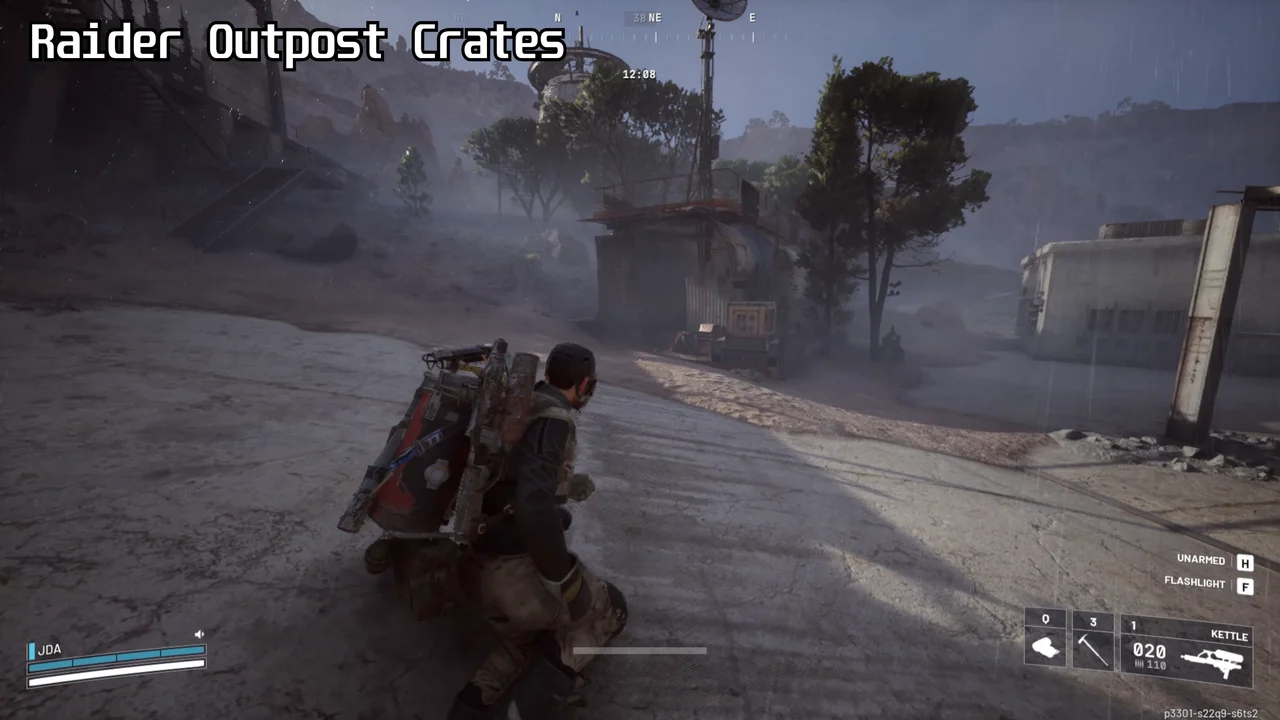
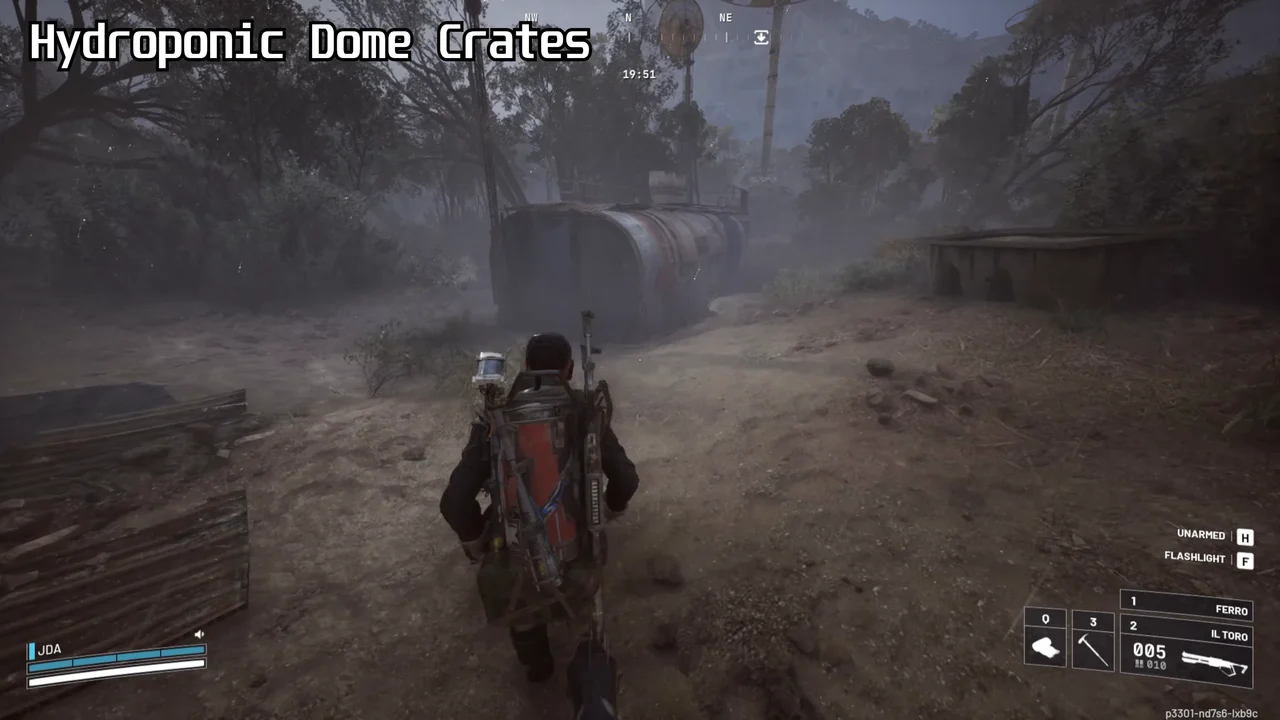
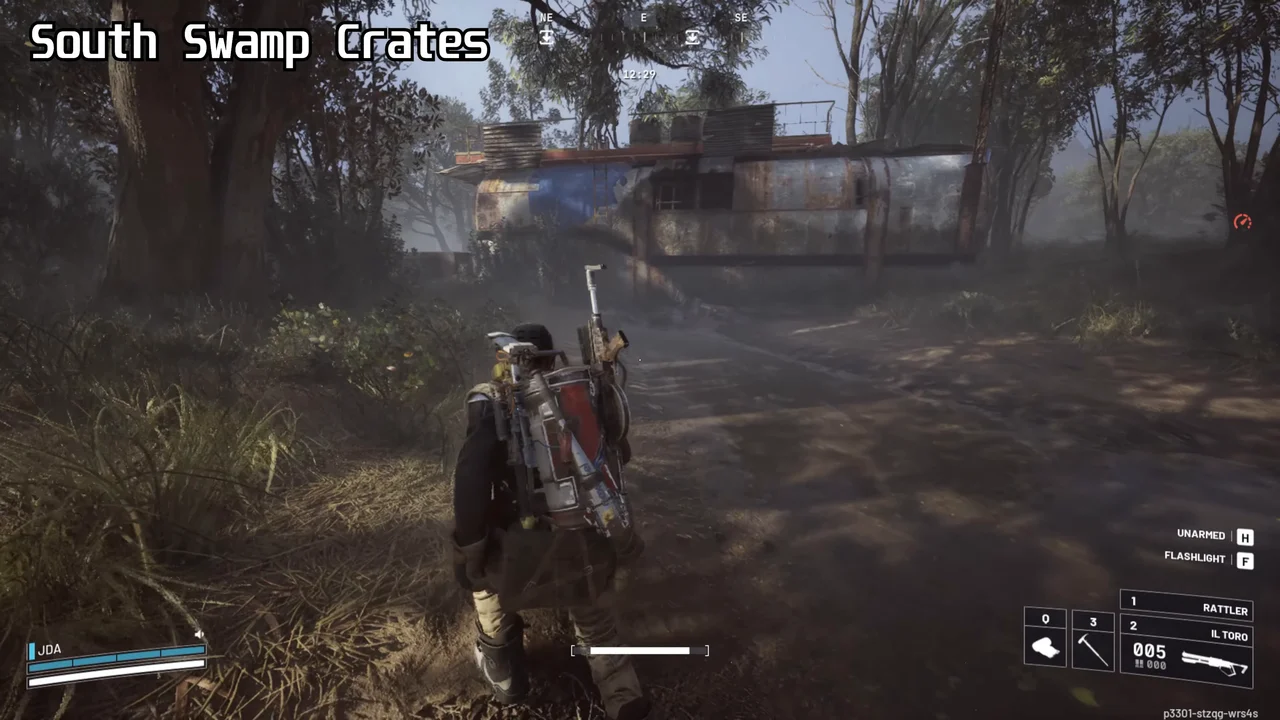
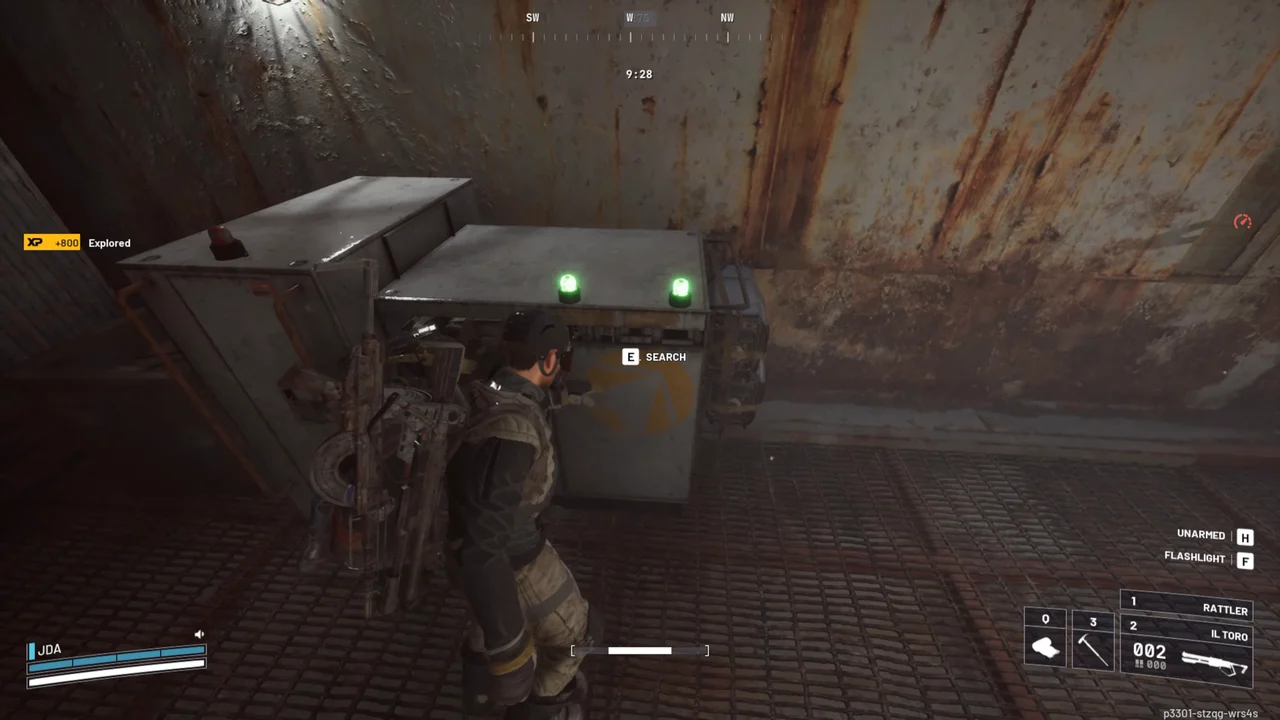
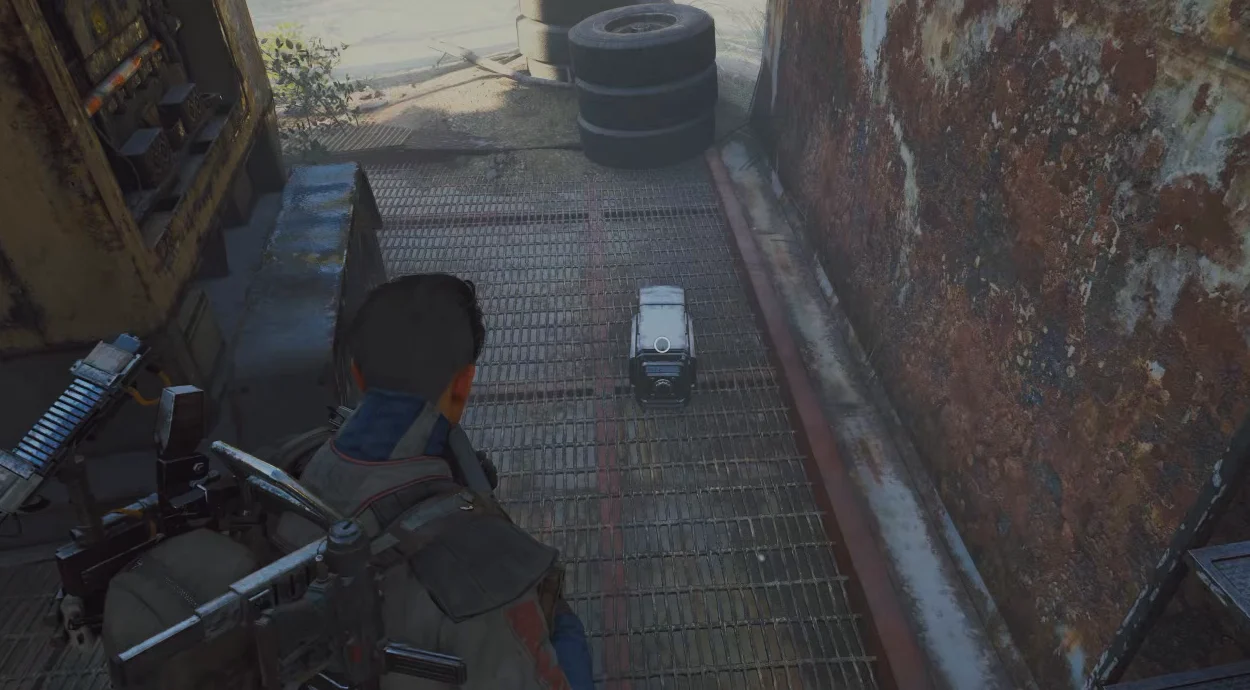
Use these approach images to recognise the six depot buildings. Check for the active depot prompt when you arrive.
How Field Crate Deliveries Work
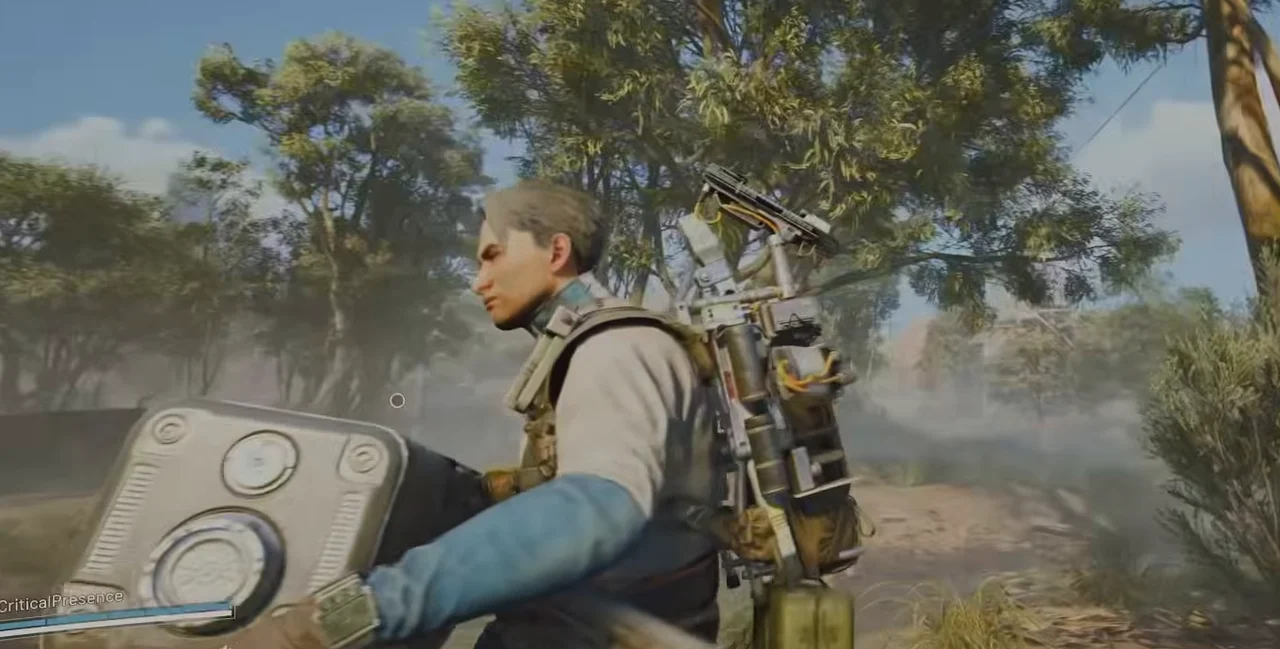
Delivering a Field Crate exchanges the carried box for a random bundle of loot from the Supply Station. Find and check the depot first, then search the nearby area for a crate so you do not have to wander with both hands occupied.
- Locate a Field Depot and check the interior for the crate delivery slot before sweeping nearby buildings and open ground for a Field Crate.
- Clear a short return route, then pick up the crate with both hands and drop it again before fighting, healing or using another item.
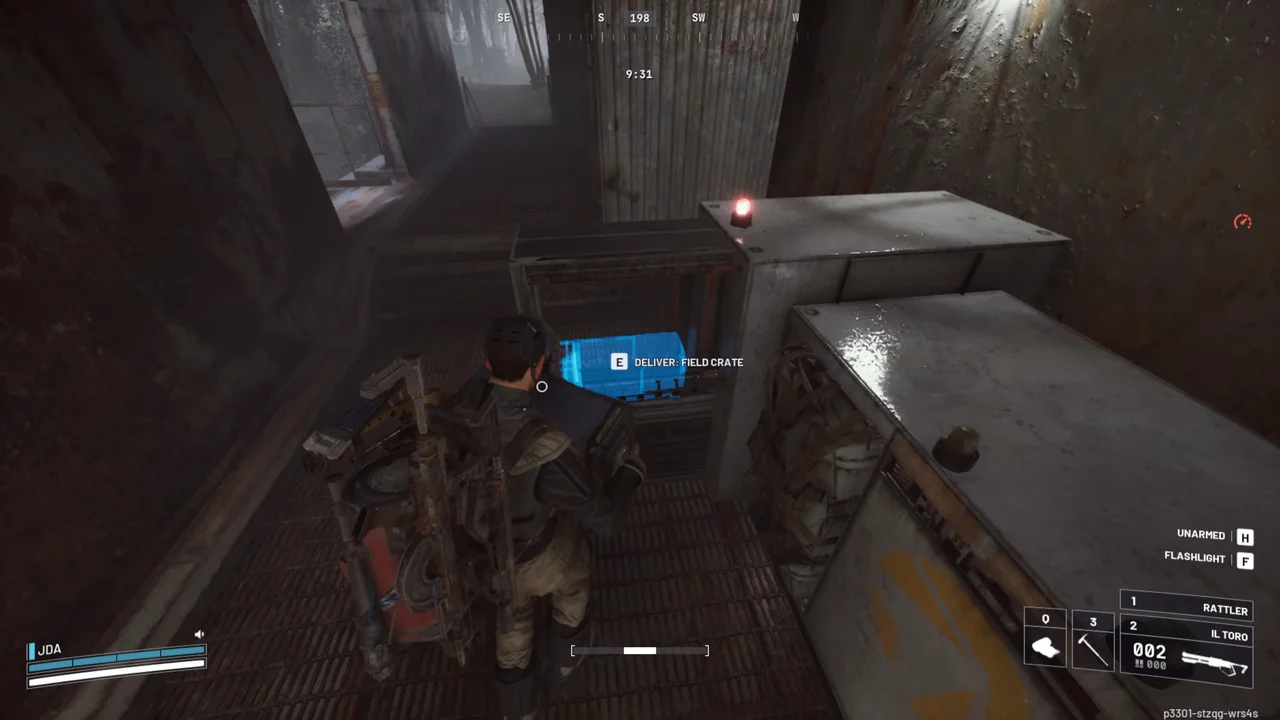
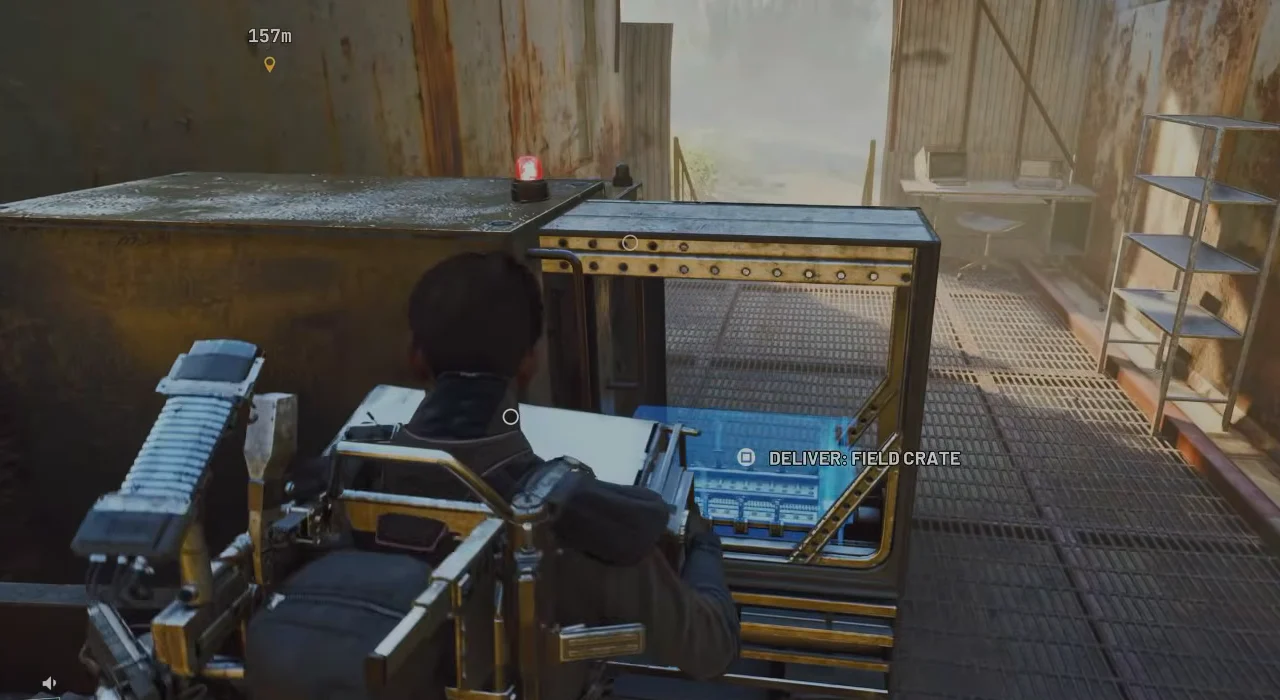
- Carry the crate to the Supply Station and follow the placement prompt or blue hologram to insert it.
- Let the processing finish, then open the reward compartment on the right and collect the items you actually need.
- Repeat with another available crate only while the area, your bag space and the remaining extraction time still support another trip.
This is the loop taught by Down To Earth. Carrying the crate is not the same as collecting a small inventory item. The broad handling lesson also applies to the carried fuse in Power Out: learn the destination before picking up the bulky object.
What the Crate Can Give You
Community delivery reports include ammunition, healing, grenades, mines, crafting materials and other equipment, with weapons also reported. Those are possible reward categories, not a guaranteed bundle or a fixed loot table. A single delivery is not evidence that a depot is permanently better or worse than another.
| Your Immediate Need | How to Handle the Reward |
|---|---|
| Enough supplies to leave | Take useful healing and ammunition before spending time comparing optional equipment. Check that any ammunition suits the weapon you are carrying. |
| Materials for progression | Keep the components that match your actual workshop or quest requirement. Compare their inventory space with loot already in your bag. |
| A stronger loadout | Inspect a weapon before switching to it. A weapon without suitable ammunition may be less useful than your existing kit. |
| A profitable second delivery | Choose another crate only after the first reward is collected and the route is still manageable. Nearby loot is finite and other raiders can reach it first. |
Why the Water Towers Route Is a Useful Starting Point
The depot between Water Towers and Electrical Substation on Dam Battlegrounds is a community favourite because the surrounding ground lets you look over the carry route before committing. Search in and around the Water Towers area, then return by the route you have just checked rather than taking an unscouted shortcut with the crate.
Open ground is a visibility advantage, not protection. Another raider can also see you crossing it, and a drone can arrive while you are carrying. Drop the crate behind cover before reacting to a threat. Do not keep walking simply because the delivery station is close.
Know When to Stop
Pick an available extraction before beginning the loop. After each delivery, check the bag and raid timer again. A roof repair or data upload can register separately from survival, but the unprotected loot in your backpack still needs to leave the raid with you. Read the individual quest’s completion rules instead of treating delivery rewards as automatically banked.
A squadmate can cover the carrier or watch the approach while the reward is collected. Solo, keep the route short enough to retreat to a position you already checked. Trading your remaining healing for another uncertain loot roll is a poor reason to stay.
Which Depots Are Active
Walk inside and check the relevant interaction before treating a Field Depot as usable. The building’s location and the availability of a specific quest or delivery prompt are different questions. The roof antenna, computer and Supply Station also serve different objectives, so one missing prompt does not diagnose the whole depot.
For Untended Garden, collect the required data first and look for the upload interaction at the quest computer. Do not mistake the crate machine’s controls for that terminal. Where another screen is present, check the prompt rather than assuming either screen must work.
For a crate delivery, approach the placement slot with the Field Crate and use the on-screen prompt as the check. If the interaction does not appear, set the crate down somewhere you can defend, check the object and position, then choose another depot or abandon the detour. Do not wait for a supposed delivery window or assume a roof light proves that a machine is active.
A map of fixed depot sites is useful for navigation, but it is not a live status board. Your raid’s usable interaction is the deciding information, not a claim that a particular depot is always active or always inactive.
Every Field Depot by Map
Use the nearest sensible depot route, not the nearest symbol in a straight line. The routes below distinguish established depot sites from map-specific planning cautions. A listed site does not promise a working quest prompt, an untouched crate or a clear approach in your raid.
Dam Battlegrounds
The documented Dam circuit contains the following six depot areas. Water Treatment’s woodland-side depot and the depot toward the central facilities are different stops, which is easy to miss when a guide calls both “near Water Treatment”.
| Depot Area | Route and Crate Search | What Changes the Decision |
|---|---|---|
| Water Towers and Electrical Substation | Check the shelter between those landmarks, then sweep the Water Towers surroundings before lifting a crate. | The open view helps you inspect the crossing, but it also exposes the carrier. The League gives a separate reason to visit the Water Towers area. |
| Water Treatment to the central facilities | Use the depot between Water Treatment Control and the Research and Administration or Control Tower side, near the Loading Bay approach. | Check the facility-facing angles before carrying. This is not the wooded South Swamp Outpost stop. |
| Red Lakes Balcony | Use the balcony-area depot between Testing Annex and the Research and Administration or Control Tower side. | Judge the climb and return route before picking up a crate. Do not route by the lake name alone. |
| South Swamp Outpost side | Search west of Water Treatment Control, on the South Swamp Outpost side of the Old Battleground area. | Vegetation can interrupt sightlines in both directions. Finish a Source of the Contamination or A Toxic Trail visit before adding a carry loop. |
| Hydroponic Dome Complex | Find the depot within the dome complex and check its interior before collecting crates from the surrounding area. | This is the natural depot check after the Untended Garden data objective. Do not carry through the domes while an ARC threat is already tracking you. |
| Power Generation Complex, eastern side | Use the depot east of Power Generation Complex, on the approach below Raider Outpost East. | Separate the depot task from industrial-building objectives. Flickering Threat has its own repair requirements and does not become complete through a crate delivery. |
For an antenna-only run, compare the roof’s exposure before choosing a depot. For a crate run, the available boxes and carry path matter more. The same site can be a sensible repair stop and a poor loot loop in the particular raid you have entered.
Buried City
Buried City makes vertical access more important than map distance. The established depot areas sit around the city edges, so finish the relevant street or building objective before taking a box away from cover.
| Depot Area | Useful Route | Carry and Exit Caution |
|---|---|---|
| Northern Outskirts, above New District | Use the northern edge as a depot stop when your route already takes you around the Hospital and Outskirts side of the city. | Return to street level before collecting a crate. A rooftop shortcut is not automatically a workable two-handed carry route. |
| Eastern city edge | Check the roadside depot area east of the built-up New District side, then search the immediately surrounding structures. | Use building corners to inspect the street before crossing. Keep the city-side return route available rather than chasing crates deeper into exposed ground. |
| Southern Old Town edge | Use the southern edge as the depot leg of an Old Town or Grandioso-side run, instead of doubling back through the entire city. | Complete the roof objective before collecting a crate on a Unexpected Initiative run. The building ascent and delivery loop should be separate legs. |
The city’s enclosed streets can conceal a player who never appeared in your roof scan. After depositing, listen before stepping straight back through the entrance for another box. A short successful loop is worth more than repeatedly crossing a street that has become contested.
Spaceport
Spaceport’s established depot pattern wraps around the facility approaches and southern perimeter. Use buildings as route anchors, then identify the small depot structure outside them. Do not confuse a Field Depot with the named Fuel Depot.
| Depot Area | Useful Route | Why This Stop Differs |
|---|---|---|
| Northwest Arrival Building approach | Check the roadside depot beyond the Arrival Building side of the perimeter before working back toward the western facilities. | This suits a western approach better than a cross-map trip to the eastern cargo side. |
| Southwest Departure Building approach | Use the depot outside the Departure side, west of the Control Tower A6 area, after finishing an interior objective. | Keep a crate outside the building route for Prescriptions of the Past. Carrying it through rooms only adds an avoidable obstacle. |
| Rocket Assembly, southeast perimeter | Check the roadside depot beyond the Rocket Assembly side of the facility and sweep the local perimeter for a crate. | Finish an industrial objective such as Worth Your Salt first, then decide whether there is time for another exposed crossing. |
| Southern perimeter, Vehicle Maintenance side | Use the western part of the southern depot circuit when travelling below the Vehicle Maintenance area. | Do not walk a crate toward the central Launch Towers just because a map label looks closer than the visible depot. |
| Southern perimeter, Container Storage side | Check the southern roadside depot beyond the Container Storage side of the perimeter. | This is a different southern stop. Inspect the wall crossing before committing to a return trip with both hands full. |
Spaceport’s cargo, generator and quest delivery devices are not interchangeable. Power Out requires its own carried fuse, while Dust on the Wires has its own quest instructions. Follow the object name and delivery prompt rather than putting every bulky item into the Field Crate loop.
The Blue Gate
Do not plan a Blue Gate Field Crate run around an unconfirmed underground delivery point. A power-unit or capacitor puzzle can also involve carrying something to a machine, but that does not make the machine a Field Depot or establish that it completes Down To Earth.
| Your Situation | Practical Route Decision |
|---|---|
| Already at the Checkpoint or underground | Check the actual item and machine prompt before transporting anything farther through the tunnels. An unexplained marker on another layer is not enough reason to carry a box across the map. |
| Choosing a map for the depot quest | Use the established Water Towers and Electrical Substation depot route rather than relying on an unconfirmed Blue Gate hand-in. Keep the Blue Gate run for its own active objectives. |
Riven Tides
The recorded Transfer Depot building area is not evidence of a Field Crate delivery mechanic. Do not plan a crate carry or Off The Radar objective around the Transfer Depot building name alone. Use an established depot route on Dam Battlegrounds until a native depot interaction is confirmed.
Stella Montis
Stella Montis has no documented Field Depot route. Its indoor facilities are not a reason to treat every computer or supply container as one. Complete depot-specific objectives on a map with an established depot instead.
| Map Decision | What to Do Instead |
|---|---|
| Staying on Stella Montis | Carry the supplies needed for the room route and leave through an available extraction. Do not reserve time for a Field Crate conversion stop. |
| Running a depot objective next | Choose a documented city-edge depot route, or return to a familiar Dam or Spaceport depot, rather than searching Stella’s layers for a nonexistent roof antenna. |
Quests That Use Field Depots
Down To Earth teaches the delivery loop, while Off The Radar and Untended Garden use other parts of a depot. The same building can support different tasks, but using one device does not automatically complete the others.
| Quest | Trader | What to Do | Completion Check |
|---|---|---|---|
| Down To Earth | Shani | Carry a Field Crate to the Supply Station and deposit it. | Check the delivery objective, then collect the separate reward compartment. |
| Off The Radar | Shani | Visit a Field Depot, climb the exterior ladder and repair the roof antenna. | Wait for the repair interaction to finish and the objective to register before leaving the roof. |
| Untended Garden | Celeste | Collect the data at Hydroponic Dome Complex, then upload it using a depot’s quest computer. | Use the upload prompt rather than the Supply Station’s crate controls. A visit by itself is not an upload. |
Stack Nearby Tasks Without Mixing Their Requirements
At Hydroponic Dome Complex, the data objective gives Untended Garden a natural depot follow-up. At Water Treatment Control, Paving the Way and A Toxic Trail can give a depot detour a purpose beyond loot. At Electrical Substation, Trash into Treasure is a separate reason to inspect electrical materials.
Choose the order before collecting a crate: finish the interior search, use the quest device, then make a short delivery loop if it still fits. After an upload or antenna repair, read the objective tracker and the linked walkthrough for the quest’s survival rules. Keep ordinary loot extraction separate from whether an interaction has already registered.
FAQ
What is a Field Depot in ARC Raiders?
A Field Depot is a metal shelter containing a Supply Station that exchanges carried Field Crates for random equipment and resources. The pneumatic system sends the crate to Speranza. The same building also has a roof antenna and quest interactions, so it remains useful beyond the tutorial delivery task.
Where are the Field Depots on Dam Battlegrounds?
The documented depot areas are Water Towers and Electrical Substation, the central Water Treatment approach, Red Lakes Balcony, South Swamp Outpost, Hydroponic Dome Complex and the eastern Power Generation approach. Choose the one that fits your route. A fixed depot site does not promise available crates or a clear approach.
Why can't I find the Field Depot?
Look for a long metal shelter, blue tarp and roof antenna rather than a freestanding tent. The map symbol appears only when you are nearby, so a blank map does not settle the question. Search the named depot area, then confirm the shelter and the interaction you need.
Why isn't the Field Depot working?
Check the device, objective and carried item before assuming the whole depot is inactive. The crate slot, roof antenna and upload computer have different jobs. For Untended Garden, collect the data first. For a delivery, approach the Supply Station with a Field Crate and follow its placement prompt.
What do you get from Field Crates?
Field Crate rewards are random. Community reports include ammunition, healing, crafting materials, grenades, mines and other equipment, with weapons also reported. Collect the opened reward compartment after depositing. Further available crates can support another delivery, but neither the contents nor the number of remaining boxes is guaranteed.
Stock Up for Your Next Raid
Use depot deliveries when the carry route fits your run. For a specific materials requirement, review the available materials service rather than relying on a random reward cabinet. For the depot quests themselves, review the quest service and its stated scope.
Gameplay Image Credits
Gameplay images adapted from the following creators. Captures have been cropped or resized for this guide.
- Dam Battlegrounds depot approach images: gameplay capture by JDA. Cropped or resized for this guide.
- Dam Battlegrounds location photos: gameplay capture by Gamers Heroes. Cropped or resized for this guide.