

Stella Montis
upper · 24 overview areasShow on map
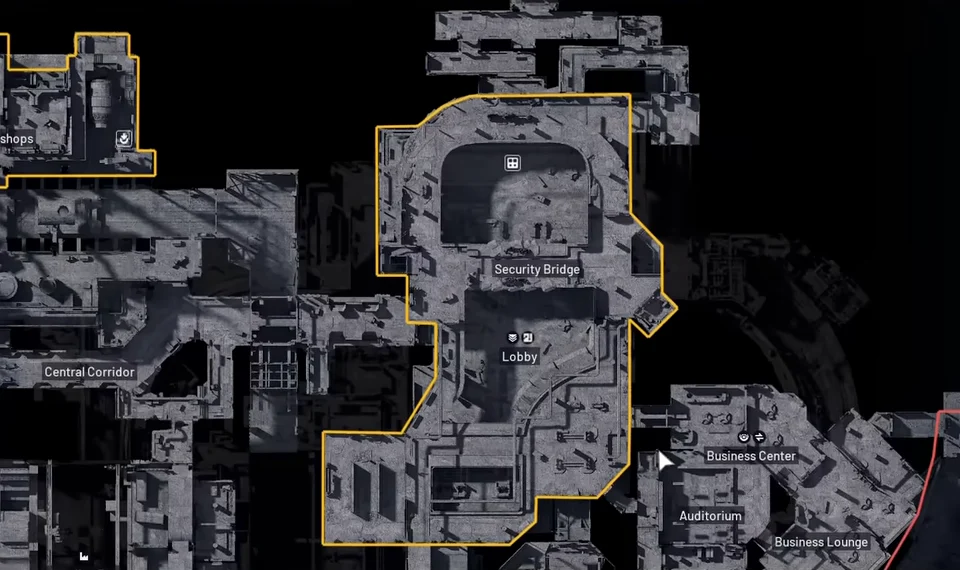
Use the layer selector before following a room marker. The facility plan and the lower tunnel plan overlap, while buildings such as Security Bridge contain additional local floors that do not correspond one-for-one with those map layers.
How Stella Montis Is Laid Out
Stella Montis has two main navigation layers, but its rooms also have their own floors, stairs, and raised walkways. Open the map and use the displayed layer selector when the tunnel or facility room you need is not visible. Do not count a map-layer change as moving one floor inside a building.
Use the Lobby and Security Bridge as orientation landmarks, not as a promise about where you spawn. The facility layer connects the research, assembly, business, and cultural areas. The lower transport and sandbox routes include the Eastern Tunnel and Seed Vault. Confirm the connecting stair, ramp, or shaft before following a marker that appears directly above you.
| Area | Navigation Layer or Relationship | What Prevents a Wrong Turn |
|---|---|---|
| Lobby, Security Bridge, Security Checkpoint | Main facility and its internal upper floors | Security Bridge floor numbers describe the building, not the whole map. |
| Assembly and Assembly Workshops | Northwestern facility area with stacked workspaces | The workshops and control rooms overlook lower assembly spaces. |
| Medical Research | Southwestern facility area with more than one internal level | Identify North Wing and the relevant staircase before searching a door. |
| Business Center, Business Lounge, Cafeteria | Facility-side routes | Use room signs to reach the cultural wing rather than dropping into a tunnel. |
| Cultural Archives and Storage Room | Eastern facility-side route | The Archives Key door is at the edge of this wing, not the Seed Vault gate. |
| Robotic Sandbox A and B, Control Room, Conduit Backrooms | Lower sandbox network and its raised control-room space | The control room overlooks the sandboxes rather than sitting on their open floors. |
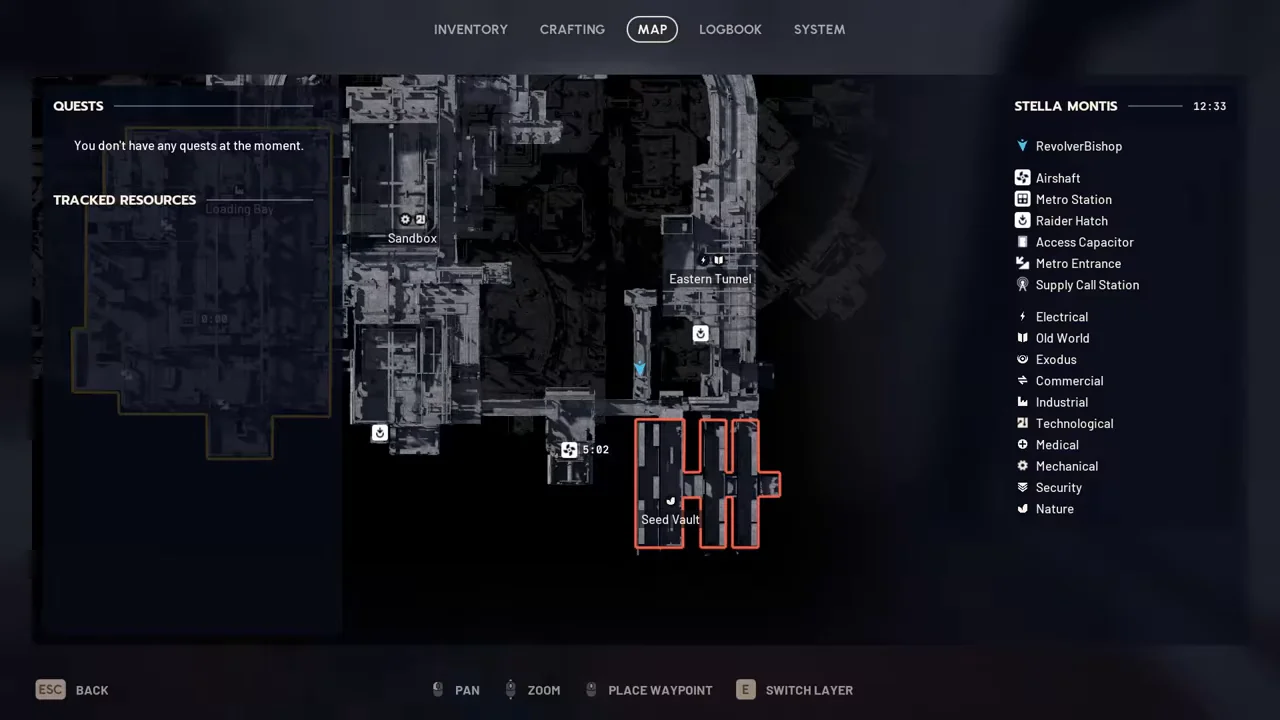
| Eastern Tunnel and Seed Vault | Lower southeastern route | The powered vault entrance is separate from the Archives Key storage door. |
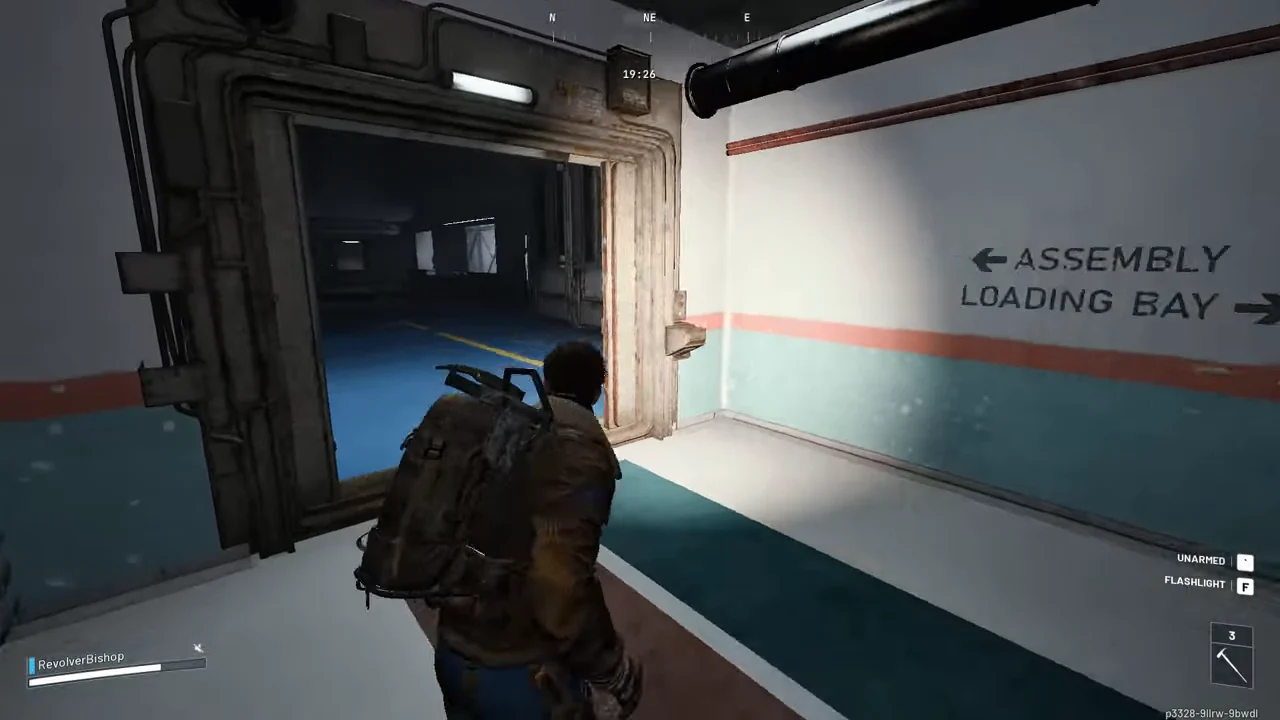
| Loading Bay, Metro Admin, Atrium connections | Local stairs and access routes connect different heights | Follow the destination sign and quest prompt instead of assigning an entire multi-level space to one floor. |
A useful rule is to settle three questions before moving: which wing, which map layer, and which local floor or landing. When a route names floor 3 or floor 4 at Security Bridge, those numbers are not alternative names for the upper and lower map views.
Stella Montis Key Rooms
Match the item name to the door prompt before using a key. Keys are single-use, and carrying one does not guarantee a particular blueprint or a profitable raid. Protect the key in a safe pocket when your augment supports it, and decide which containers you actually have inventory space to search.
The Security Checkpoint is a useful choice for a security-container route, while the other keys fit different wings and quest approaches. There is no verified universal best room or fixed blueprint drop rate to build a loadout around. Use the ARC Raiders keys guide to compare access requirements across maps.
Archives Key
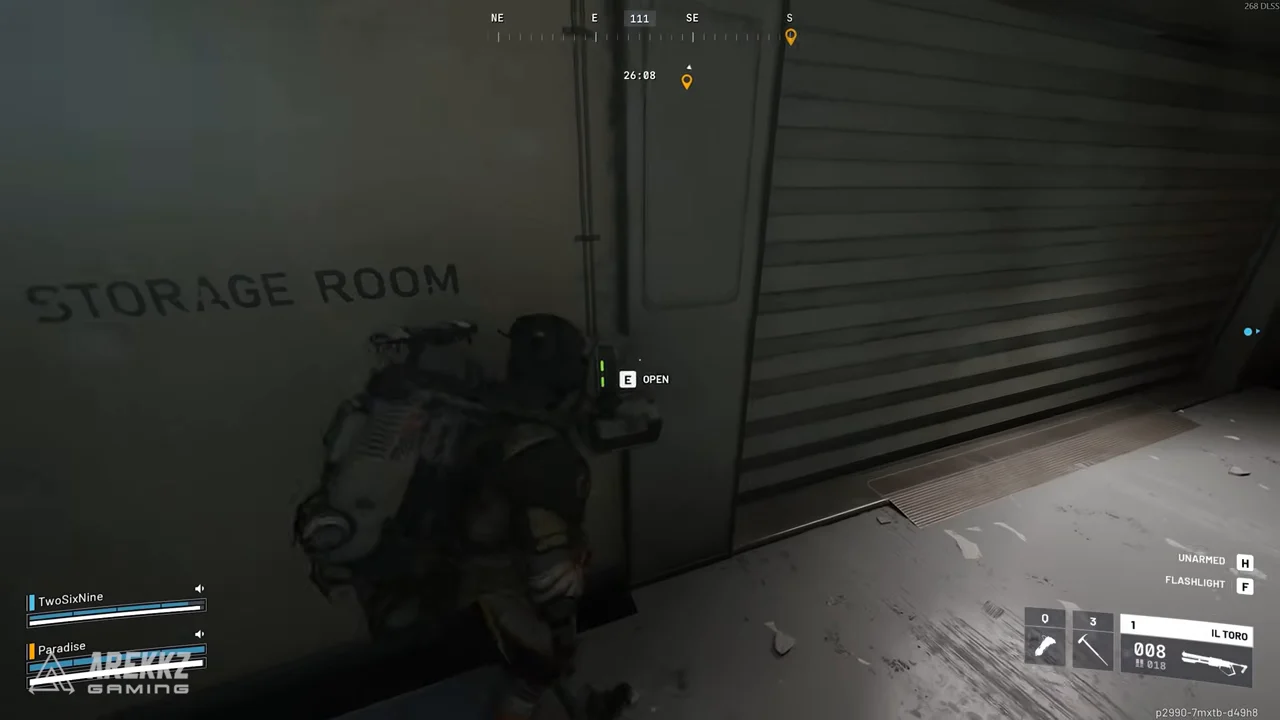
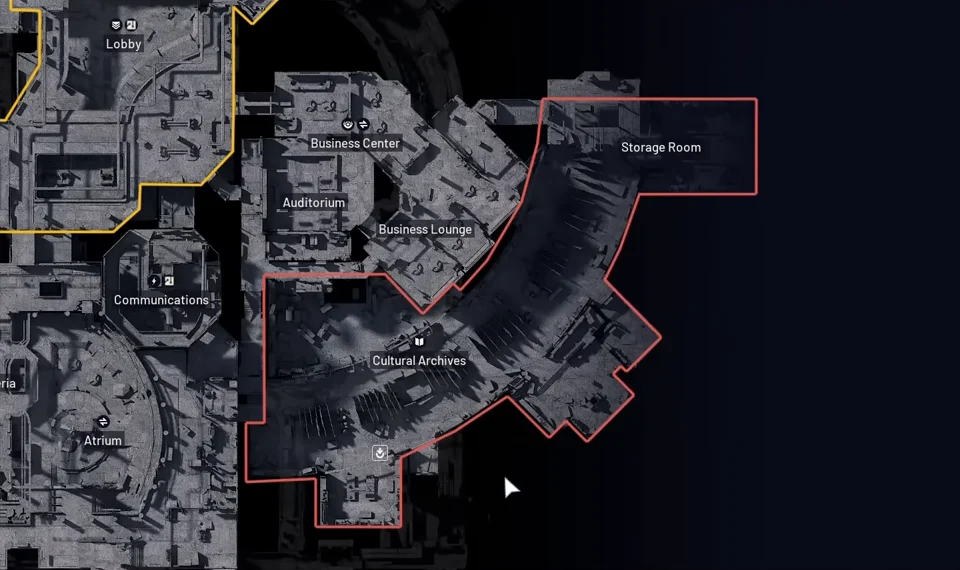
The Stella Montis Archives Key opens the signed Storage Room at the eastern edge of Cultural Archives, not the powered Seed Vault door. Do not follow an Eastern Tunnel route to the Seed Vault simply because an older description puts the key there.
Use the facility view that shows Cultural Archives and the adjoining Storage Room. Reach the large storage shutter at the wing's far northeastern edge, then read its unlock panel. The decisive confirmation is the panel requesting the Archives Key, not the presence of shelves or a room with archive-related scenery.
Check the approach for a Shredder or another raider before starting the unlock. The room is optional for the surrounding cultural-wing quests. Neither the Seed Vault's Fuel Cell nor the key for its deposit box is a substitute for this access key.
Security Checkpoint Key
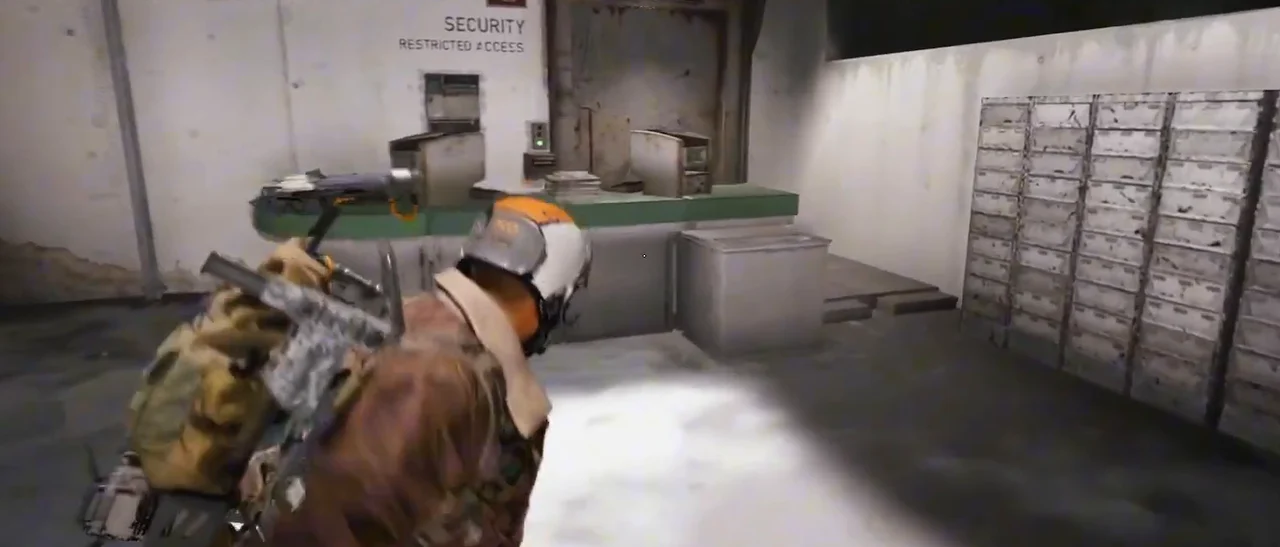
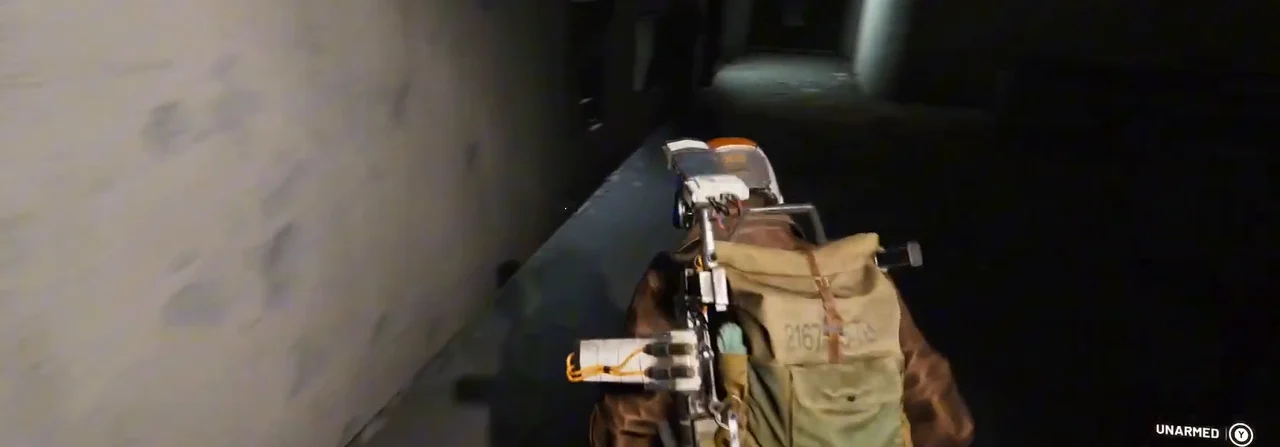
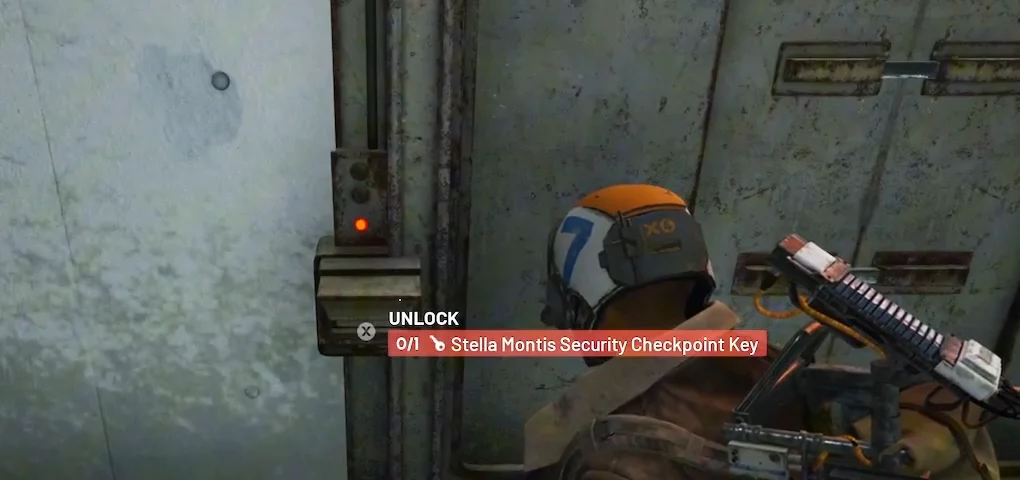
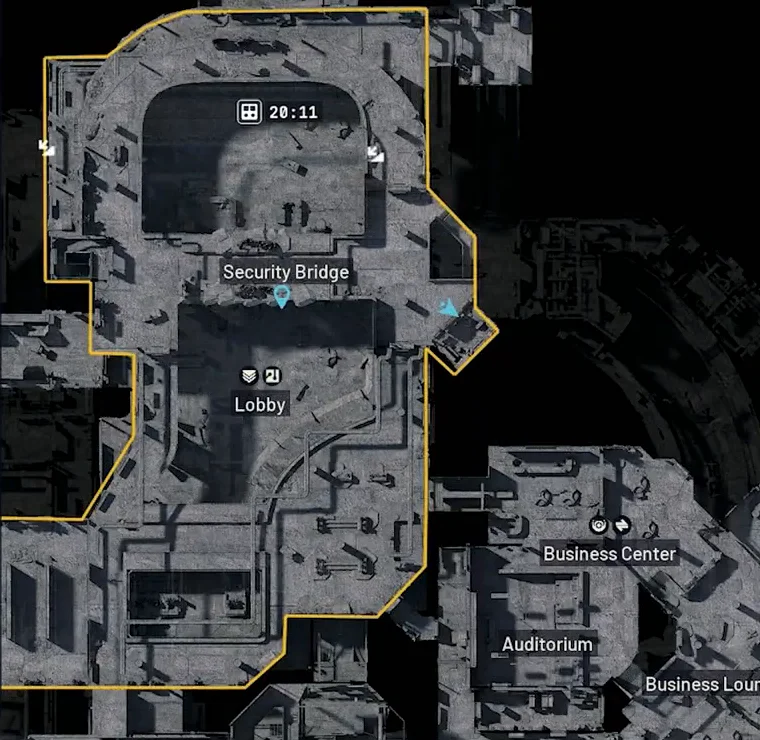
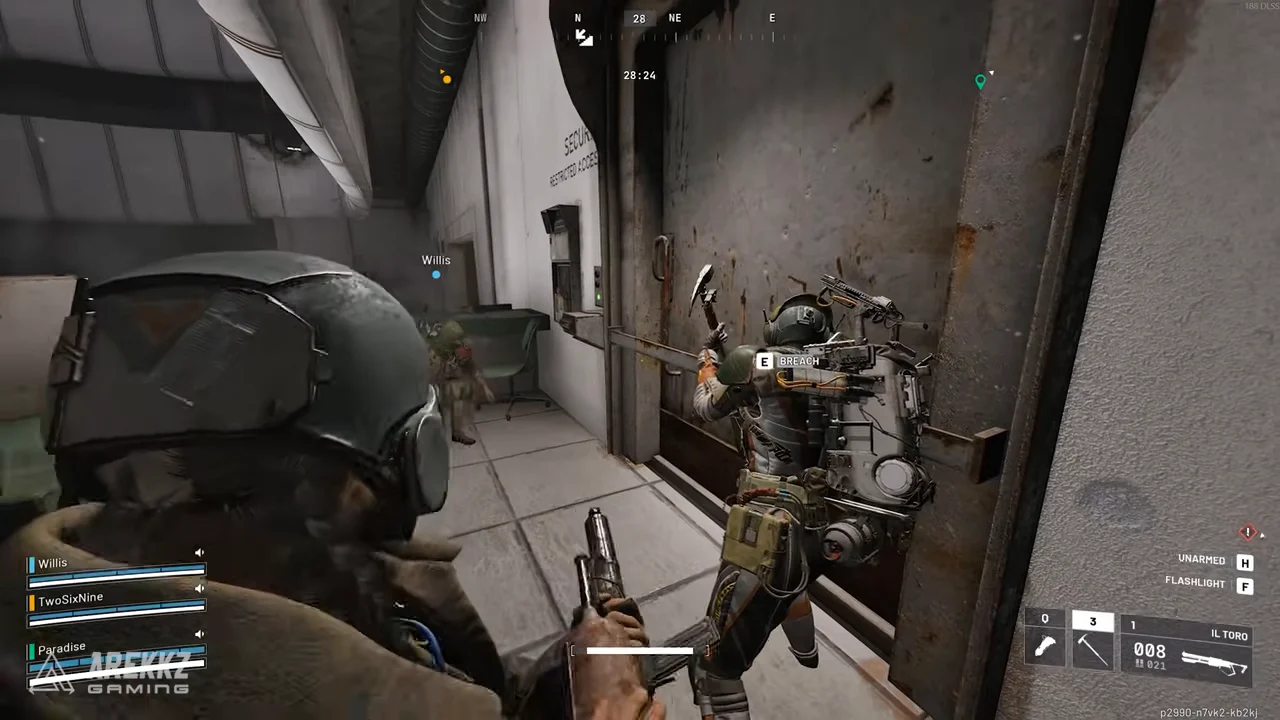
The Stella Montis Security Checkpoint Key opens the locked room in the Security Checkpoint, north of the Lobby area. Find the security entrance and reception area first. A barricaded outer entrance and the keyed inner door are separate obstacles.
At the northern Lobby, approach the east-wall entrance labelled SECURITY RESTRICTED ACCESS. Beyond that outer entrance, turn right into the corridor beside the stairs, then continue through the next doorway into the room marked 2.
Check the inner locked door for the Stella Montis Security Checkpoint Key prompt. Room 2 is an interior label, not a map layer. The outer security entrance and inner keyed door are separate, so an outer-barrier bypass does not unlock the inner door.
The surrounding containers can support an Exodus-material search for Snap and Salvage, even before you decide to use the key. This is not the Blue Gate Security Checkpoint used by Armored Transports.
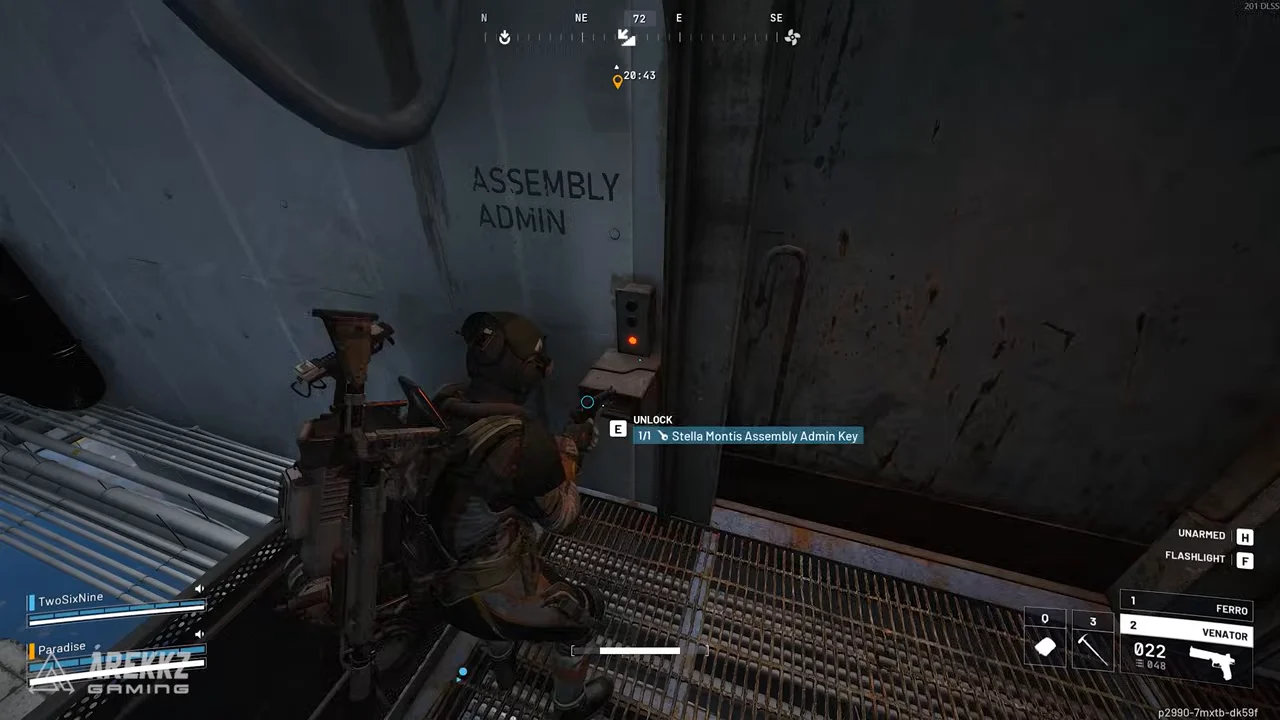
Assembly Admin Key
The Stella Montis Assembly Admin Key opens the admin room in Assembly, below the Assembly Workshops area. Use the conveyor line, ramp, and central corridor as your approach landmarks rather than assuming an office above the work floor is the keyed destination.
Locate the admin door and confirm its key prompt before changing levels again. An apparent route from above may lead to an adjacent platform rather than the locked room, so do not plan a keyless shortcut from the map alone.
With A View uses a separate workshop control-room interaction, and Snap and Salvage can use materials gathered in the assembly area. The shared building makes the key room an optional detour, not a prerequisite for every Assembly quest.
Medical Storage Key
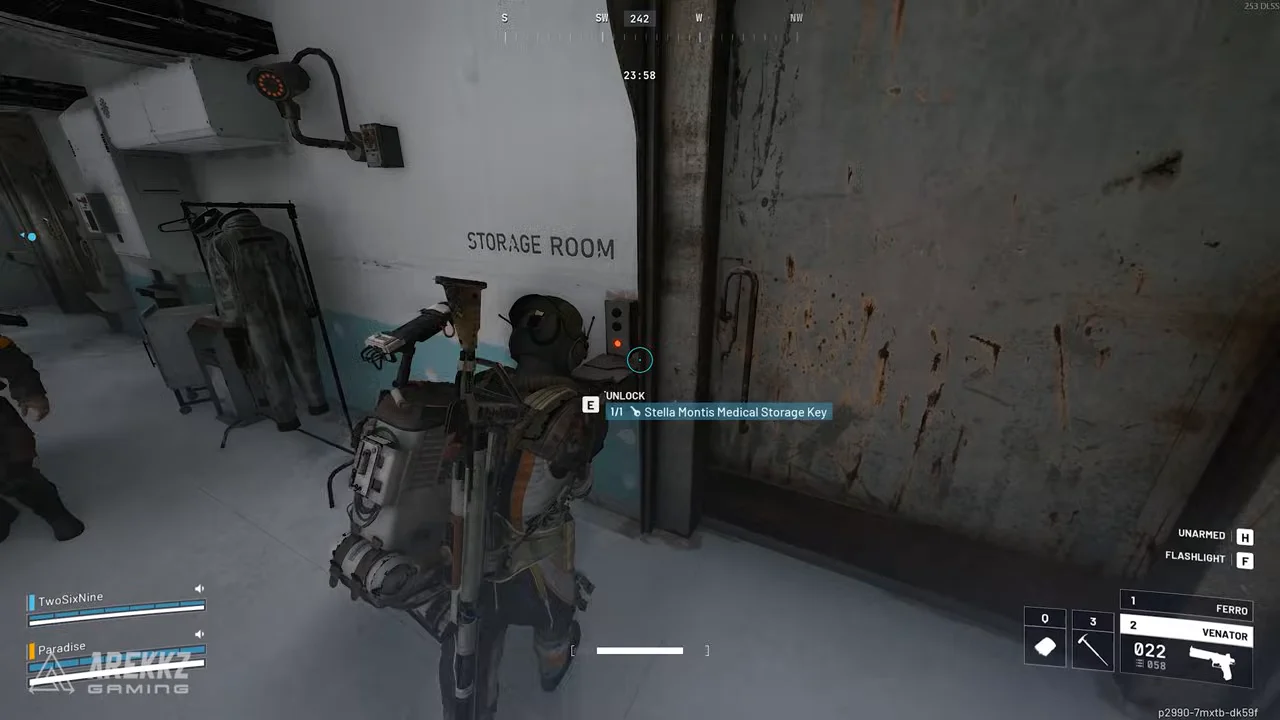
The Stella Montis Medical Storage Key belongs to the storage door in Medical Research North Wing. Reach North Wing, use its staircase into the equipment area, and check the storage-door prompt. The main Medical Research label covers more than one level and does not identify the door by itself.
Nearby quests use different objects: In My Image searches suitable androids, Furtive Meetings photographs a meeting spot, and With A View needs the relevant Exodus materials. None should be marked complete simply because you opened Medical Storage.
See the ARC Raiders keys service for access-item options. Keep the key stop separate from the item or interaction your quest actually requires.
The Seed Vault Door
Power the Seed Vault entrance with a nearby world Fuel Cell when the gate's terminal requires power. The Archives Key does not open this gate, and an inventory Battery is not automatically the same object as the cell carried to its socket.
Inspect the written console state as well as its lights. A blue or red panel is not enough on its own to tell you that the gate can be opened, that a lockout has cleared, or that another key is required. Search the adjacent rooms and airshaft corridor for the power object, bring it to the machine beside the entrance, and recheck the door state after insertion.
For Last Entry, begin at the workstation outside the vault, up the short staircase. The hidden Seed Vault Box Key is in the adjacent room's hazmat-suit rack, also outside the gated vault. It opens the quest's Seed Deposit Box inside, not the main entrance.
In My Image and Furtive Meetings can bring you through the same southeastern neighborhood. That does not make their android or photo objectives part of Last Entry's power sequence. The full Last Entry walkthrough separates the workstation, hidden key, powered gate, documentation pickup, and same-round extraction.
This is the Stella Montis Seed Vault POI, not the park-facing seed-vault room in The Root of the Matter on Buried City. Check the map name before following a seed-vault marker.
Every POI on Stella Montis
Use the POI table to choose the correct wing and approach. A single named area can span stairs, mezzanines, and lower rooms, so treat local floor labels as part of the objective rather than assuming every marker in a wing shares one height.
Lobby and Security Bridge
The Lobby is an orientation hub with reception and security access. Above it, Security Bridge contains the Stable Housing route. The safe and notice-board stop are on the building's floor 3, while the card-printer stage is on floor 4.
The printer's failure is part of that quest sequence, not a reason to abandon the route immediately. Follow the notice-board clue and the safe objective instead of repeatedly trying the same failed print action.
Assembly and Medical Research
Assembly contains the work-floor machinery and conveyor route. Assembly Workshops adds the offices and control rooms above. Keep the material search separate from the yellow control-room switch used by With A View.
Medical Research has distinct wings and local floors. The staircase used for a Furtive Meetings photo, the North Wing storage door, android search positions, and research computers are different destinations within the same larger POI.
Business and Cultural Wing
Business Center, Business Lounge, and the Cafeteria support a route through the facility side of the complex. On Deaf Ears starts with reception records associated with the business area, then follows lecture notes and prototype information before the printed shipping logs in Assembly Workshops.
Cultural Archives contains shelves, server areas, the service backroom used for Fragmented Logs, and the adjoining Archives Key Storage Room. The general archives, its quest terminal, and the locked storage door are separate targets.
Sandboxes, Conduits, and Eastern Tunnel
Robotic Sandbox A and Robotic Sandbox B sit around a raised Control Room. For Fragmented Logs, do not search only the sandbox floors when the objective names the room overlooking them. The Conduit Backrooms hold another step and require a separate approach.
The Eastern Tunnel and its cargo-platform route lead into the southeastern vault neighborhood. The Seed Vault gate is a power problem, while the Archives Key door is a different facility-side storage-room destination.
Connecting Spaces and Cargo Containers
Metro Admin, the Atrium, and the Loading Bay are useful orientation and search areas. Staircases near the Atrium and between Cultural Archives and the Seed Vault should not be merged simply because two quests both mention stairs. Use the meeting mark, terminal, or destination named by your current objective.
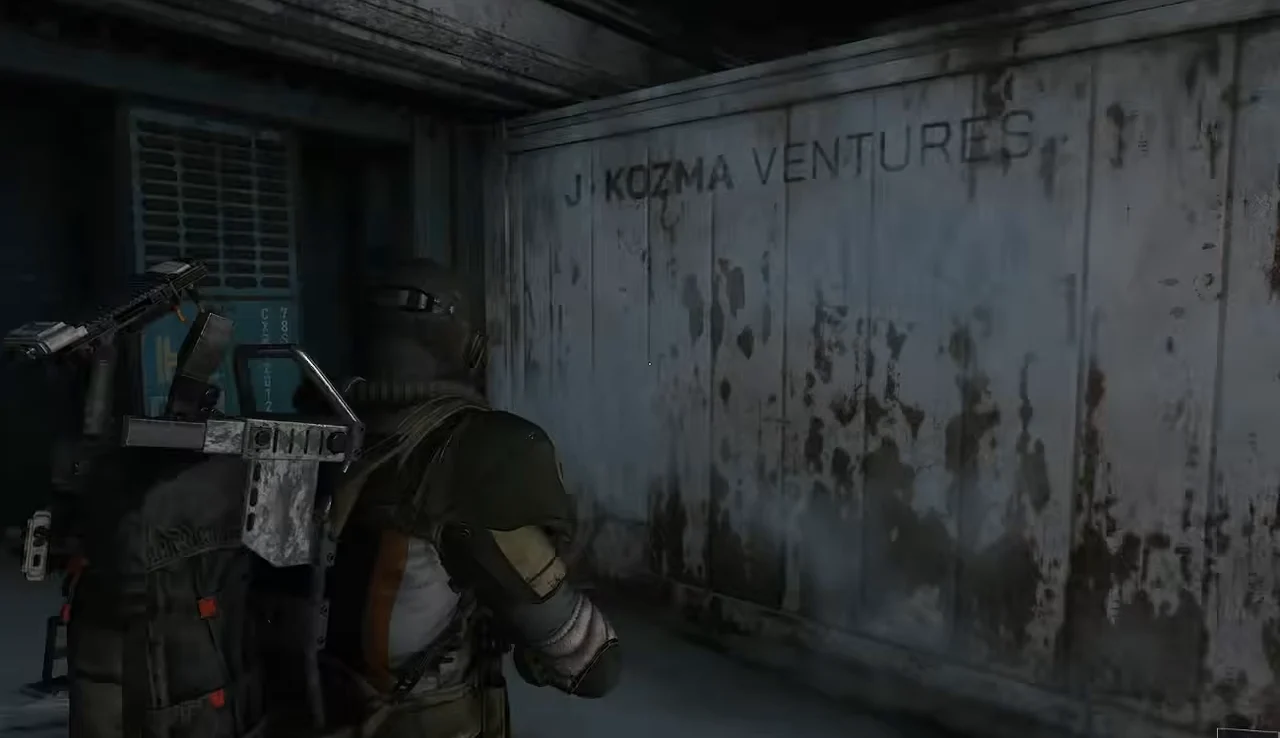
The J Kozma Ventures containers used by Cold Storage are a container type, not one room called Cold Storage. Search the branded cargo objects that offer the quest interaction, then check for the item that appears after searching.
The Project Heartwood blueprints in Stable Housing and the MANTIKOR shutdown documents in Last Entry belong to related investigations. Their story connection does not remove the separate Security Bridge and Seed Vault routes.
| POI | Area and layer | What it is | Quest walkthroughs |
|---|---|---|---|
| LobbyShow area on map | Lobby reception and the Security Bridge approachFacility view with stairs to other local levels | Use reception and security signs to orient toward Security Bridge above, distinguishing material searches from the business-area reception records. | Stable Housing On Deaf Ears With A View |
| Security BridgeShow area on map | Above the Lobby on the Upper map, north of the business area.Upper | Upper-level bridge above the Lobby. Use the Lobby as the nearby orientation landmark. | Snap and Salvage Stable Housing |
| Security CheckpointShow area on map | East side of the northern Lobby and Security Bridge area.Upper | From the northern Lobby's east security entrance, turn right beside the stairs and take the next doorway to check the inner Security Checkpoint Key prompt. | Snap and Salvage |
| Medical ResearchShow area on map | Southwestern research wing, including the North WingFacility view, multiple internal levels | Keep the North Wing key door, stair marking, computers and android searches separate, with With A View materials not guaranteed in drawers. | Furtive Meetings On Deaf Ears With A View In My Image |
| AssemblyShow area on map | Northwestern facility, beneath the Assembly WorkshopsFacility view, assembly work floor | Search conveyor-side tool carts for possible materials, with the Assembly Admin Key room below the workshop offices and the control-room objective above. | Snap and Salvage With A View |
| Assembly WorkshopsShow area on map | North of Assembly on the upper map layer.Upper | Upper-floor workshop area north of Assembly. | On Deaf Ears With A View |
| Business Center and Business LoungeBusiness Center (upper)Business Lounge (upper) | Business Center is east of the Lobby, with Business Lounge below it. Both are north of Cultural Archives.Upper | Business Center lies east of the Lobby, with Business Lounge below it. Both are north of Cultural Archives. | On Deaf Ears With A View In My Image |
| CafeteriaShow area on map | West of Atrium and south of Communications on the Upper map.Upper | Upper-level Cafeteria west of Atrium and south of Communications. | In My Image |
| Cultural ArchivesShow area on map | Eastern cultural wing, with the Archives Key Storage Room at its northeastern edgeFacility view, cultural rooms and adjacent storage | Keep the service terminal, tape and android searches separate from the adjacent Archives Key Storage Room, which is not a Seed Vault door. | Furtive Meetings Fragmented Logs In My Image Movie Night |
| Robotic Sandbox A and BNorthern Sandbox (lower)Robotic Sandbox B (lower) | Sandbox network, with the Control Room between A and BTransport and sandbox view, floor areas and raised control room | Keep the raised Control Room, lower Conduit Backrooms power stop and Sandbox B-to-Seed Vault ventilation connection separate from the sandbox floors. | Furtive Meetings Fragmented Logs |
| Seed VaultShow area on map | Southeastern vault neighborhood, beyond the Eastern Tunnel routeTransport and sandbox view, exterior rooms and gated interior | Use the workstation and hazmat-room Seed Vault Box Key outside, then the deposit box inside, checking the power prompt before using a Fuel Cell. | Furtive Meetings In My Image Last Entry |
| Eastern Tunnel and Cargo PlatformShow area on map | Southeastern transport route toward the Seed Vault neighborhoodTransport and sandbox view, tunnel and cargo platforms | Follow the tunnel toward Seed Vault, not the Archives Key door, which belongs to the Storage Room at the northeastern Cultural Archives edge. | In My Image |
| Metro AdminShow area on map | Office route beside Lobby Metro. The marker is the recorded lower-floor approach, not the exact office door.Lower | Follow the Metro Admin signs and staircase from the Lobby Metro approach. The office route is separate from the metro extraction controls. | In My Image |
| AtriumShow area on map | Atrium connection toward Cultural ArchivesConnecting stairs and local levels | Use the Atrium route toward Cultural Archives without assuming its stairs are the Cultural Archives-to-Seed Vault meeting staircase. | Fragmented Logs |
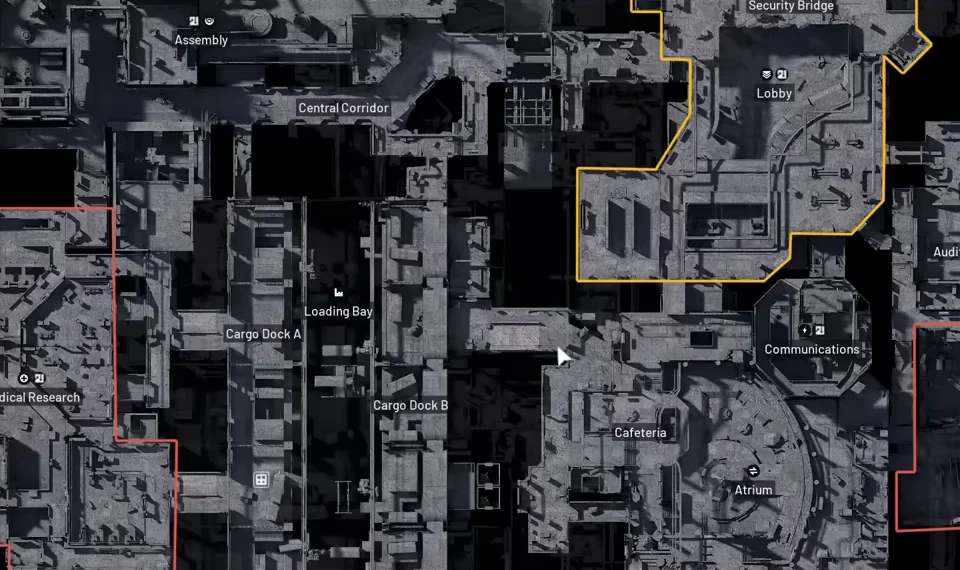
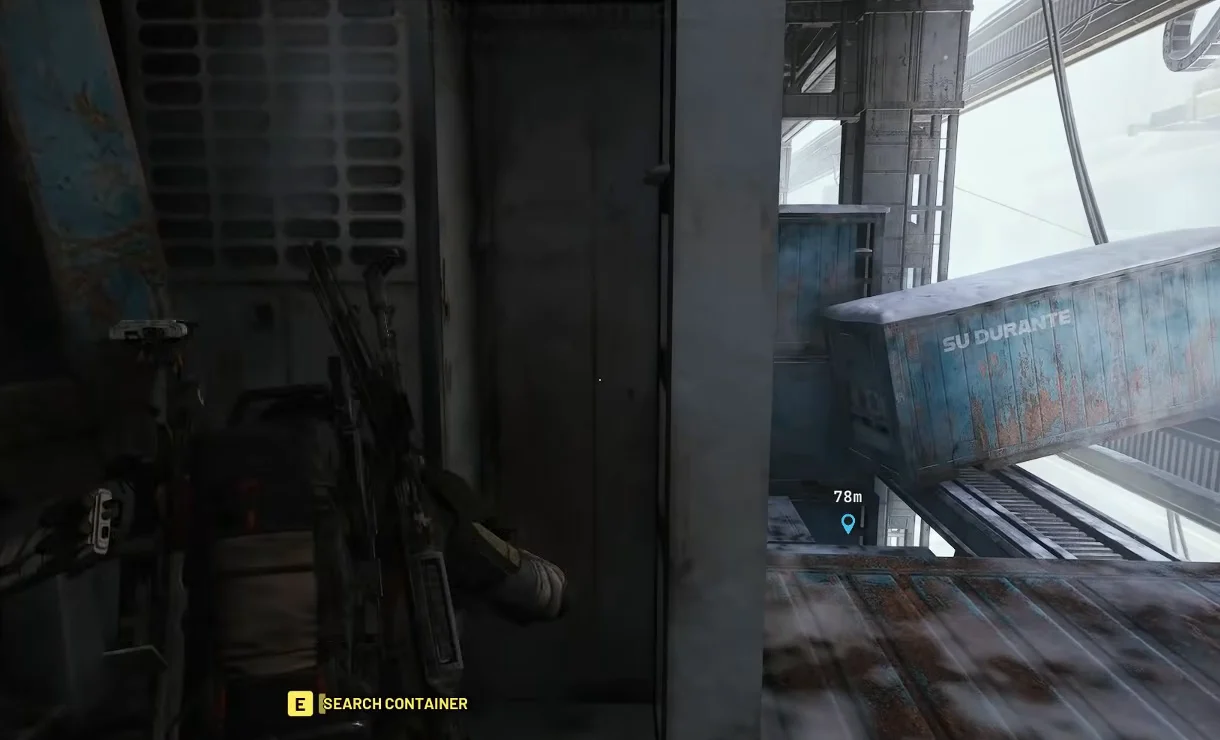
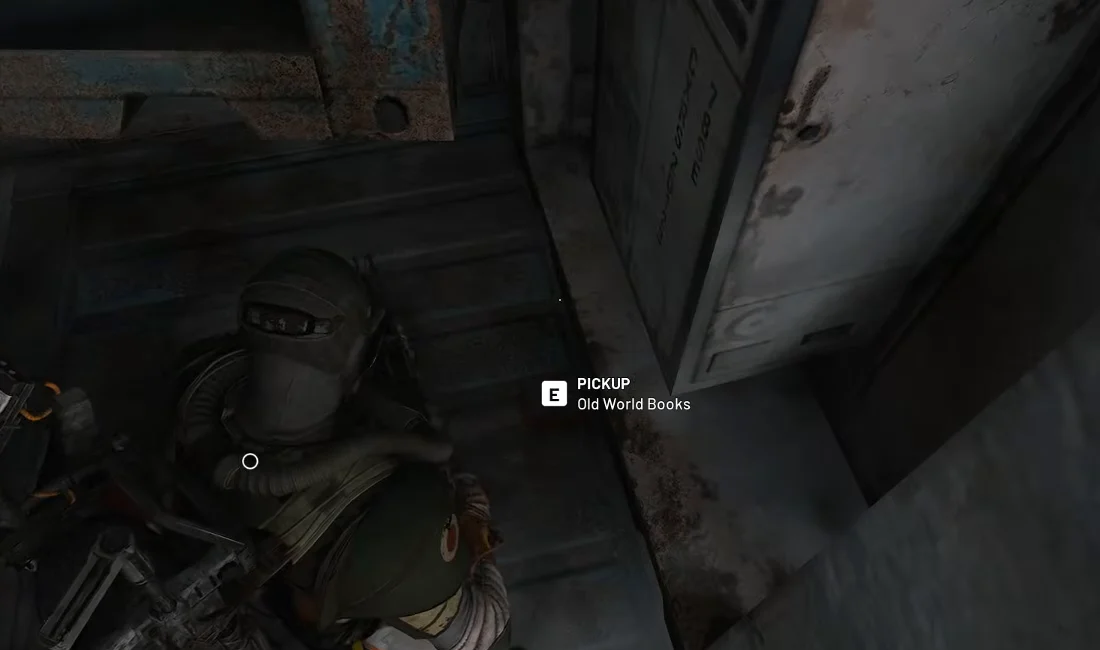
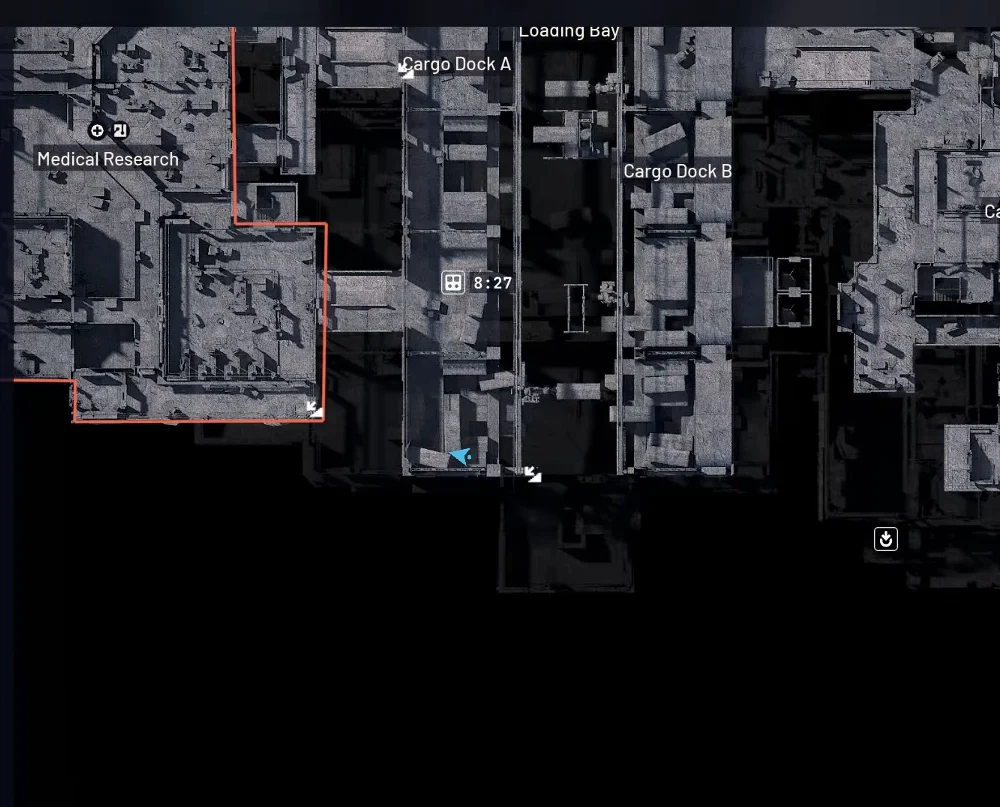
| J Kozma Ventures containersShow area on map | Southern Loading Bay cargo approach west of Cargo Dock B.Upper | Search a Loading Bay container with J KOZMA VENTURES branding, then use the separate PICKUP prompt for Old World Books. | Cold Storage |
| Sandbox B HatchShow area on map | Sandbox B-side hatch approachTransport and sandbox route | Check this optional exit's prompt and bring a Raider Hatch Key for the locked hatch, without assuming low traffic or few ARC. Follow the recorded lower-layer approach beside Sandbox B and check your current raid map and Raider Hatch Key prompt. | Furtive Meetings |
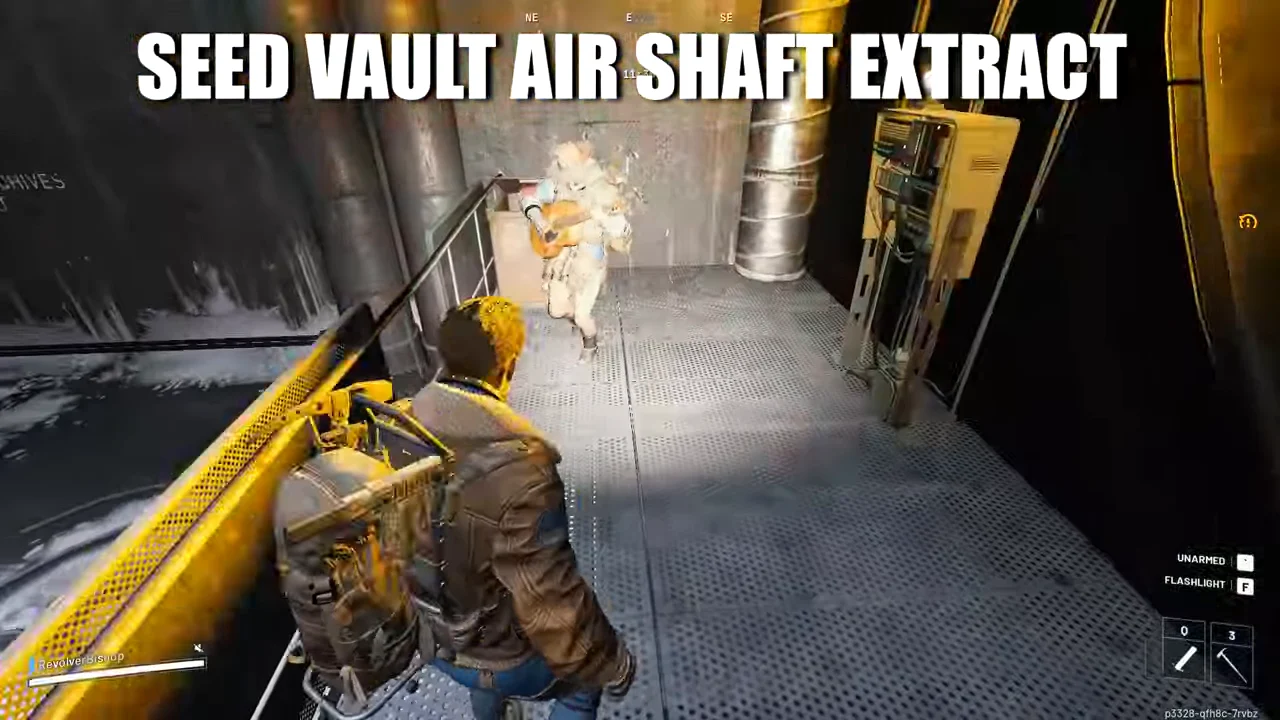
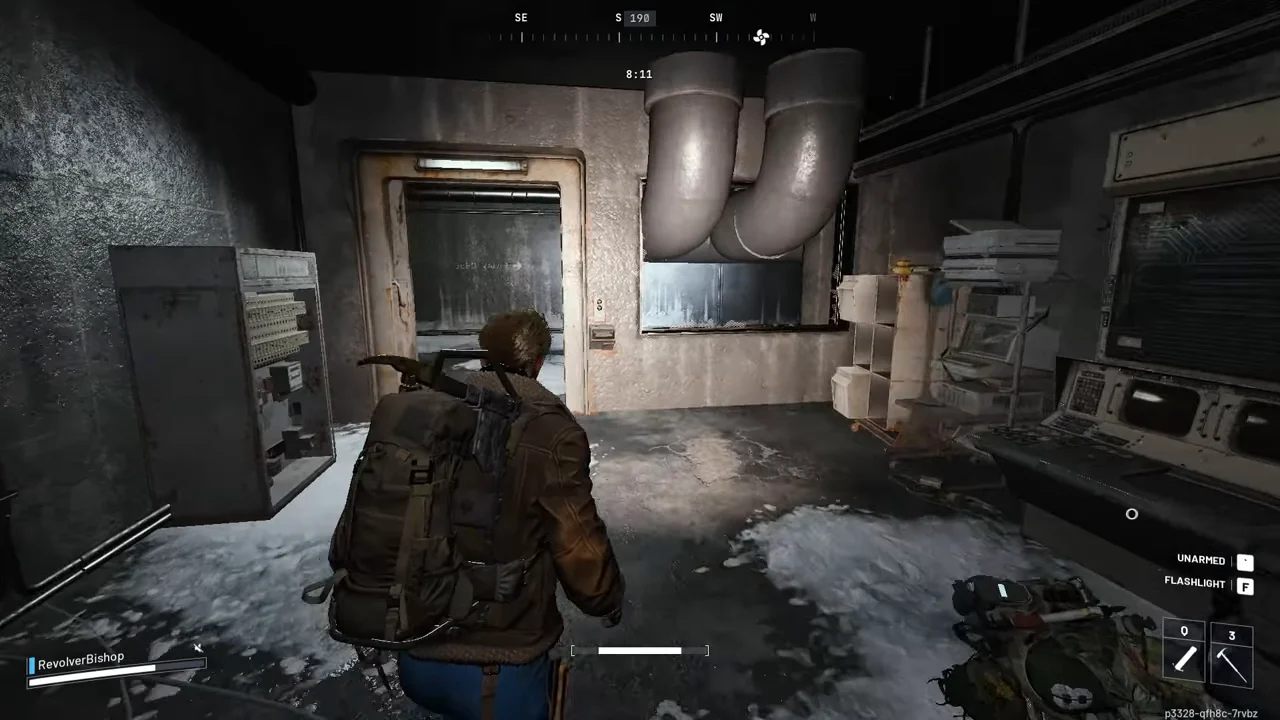
| Seed Vault AirshaftShow area on map | Southeastern route between the Seed Vault and Sandbox B neighborhoodTransport and sandbox route | Follow the corridor to the exit and check availability after Last Entry or Furtive Meetings, rather than trying to board from another floor. Use the recorded route between Seed Vault and Sandbox B toward the circular duct, then check the current raid state before relying on extraction. | Furtive Meetings Last Entry |
Plotted locations and overview areas
| Location | Layer | Precision | What it is |
|---|---|---|---|
| Loading Bay | upper | POI area | Use this upper-floor Loading Bay overview rather than the separate lower-floor view. |
| Business Lounge | upper | Recorded upper-floor business area | Business Center lies east of the Lobby, with Business Lounge below it. Both are north of Cultural Archives. |
| Stella Montis Archives Key · Cultural Archives | upper | Building access area, not exact door | Approach Cultural Archives and follow the Storage Room signs at its northeastern edge. Check the Archives Key prompt. |
| Stella Montis Security Checkpoint Key · Lobby | upper | Building access area, not exact door | Approach the Lobby and match the Stella Montis Security Checkpoint Key prompt, as the marker is not an exact door or loot guarantee. |
| Stella Montis Medical Storage Key · Medical Research | upper | Building access area, not exact door | Approach Medical Research and match the Stella Montis Medical Storage Key prompt, as the marker is not an exact door or loot guarantee. |
| With A View · Assembly | upper | Objective area, not exact interactable | Use the Assembly Workshops control-room switch and meet the Rotary Encoder and Ion Sputter requirements. |
| Furtive Meetings · Medical Research | upper | Objective area, not exact interactable | Visit the Medical Research stair marking, Sandbox B ventilation connection and Cultural Archives-side meeting staircase. |
| Fragmented Logs · Cultural Archives | upper | Objective area, not exact interactable | Use the raised Control Room between the sandboxes, lower Conduit Backrooms power stop and Cultural Archives service terminal. |
| On Deaf Ears · Assembly Workshops | upper | Objective area, not exact interactable | Follow business-area reception records and lecture notes, then Medical Research prototype information and Assembly Workshops shipping logs. |
| With A View · Assembly Workshops | upper | Objective area, not exact interactable | Use the Assembly Workshops control-room switch and meet the Rotary Encoder and Ion Sputter requirements. |
| Stable Housing · Security Bridge | upper | Objective area, not exact interactable | Follow Security Bridge's printer, notice-board and safe sequence for Project Heartwood Blueprints on local floors, not map layers. |
| In My Image · Cafeteria | upper | Objective area, not exact interactable | Search suitable androids at Medical Research, the business area, Cafeteria, Cultural Archives, Seed Vault or Metro Admin. |
| Cold Storage · J Kozma Ventures container approach | upper | Objective area, not exact interactable | Search a qualifying J Kozma Ventures container on the Loading Bay route, where upper and lower approaches may lead to the same container. |
| Western Tunnel | lower | POI area | Use the Western Tunnel label in the northern lower-floor recording as an area reference, not an exact door or extraction interaction. |
| Lobby Metro | lower | POI area | Use the recorded lower-floor Lobby Metro footprint for orientation, not its historical countdown as a live closure schedule. |
| Loading Bay | lower | POI area | Use this lower-floor Loading Bay overview rather than the separate upper-floor marker. |
| Control Room | lower | POI area | Use this lower-floor Control Room area as a reference, not an exact terminal or access point. |
| Robotic Sandbox B | lower | POI area | Keep the raised Control Room, lower Conduit Backrooms power stop and Sandbox B-to-Seed Vault ventilation connection separate from the sandbox floors. |
| Fragmented Logs · Control Room | lower | Objective area, not exact interactable | Use the raised Control Room between the sandboxes, lower Conduit Backrooms power stop and Cultural Archives service terminal. |
| Furtive Meetings · Robotic Sandbox B | lower | Objective area, not exact interactable | Visit the Medical Research stair marking, Sandbox B ventilation connection and Cultural Archives-side meeting staircase. |
| Last Entry · Seed Vault | lower | Objective area, not exact interactable | Use the outside Seed Vault workstation and hazmat-room key to retrieve Official Shutdown Documentation from the interior deposit box. |
| In My Image · Metro Admin approach | lower | Objective area, not exact interactable | Search suitable androids at Medical Research, the business area, Cafeteria, Cultural Archives, Seed Vault or Metro Admin. |
Resource Locations on Stella Montis
Exodus Materials
Search Assembly, Assembly Workshops, Business Center, and Medical Research for the Exodus materials needed by your current quest. Work carts, drawers, equipment areas, and the security-office route are useful places to inspect. A material category on the map is not a guarantee that one particular drawer contains the item.
| Material | Useful Search Route | Why to Keep It |
|---|---|---|
| Rotary Encoder | Medical Research drawers, business interiors, and security-office containers | With A View needs this item, so check your stash before starting another search. |
| Ion Sputter | Assembly machinery and work-area containers | Keep it for the With A View objective rather than spending it before the turn-in. |
| Flow Controller | Assembly and other Exodus-material container routes | Required by Snap and Salvage. |
| Magnetron | Assembly, business, and security-area searches | Required by Snap and Salvage. |
| Power Rod | Suitable Exodus-material containers along the same route | Useful for Tribute to Toledo when that delivery is active. |
Check your stash before planning a dedicated Snap and Salvage run. Its ordinary material delivery is different from a quest-specific world pickup such as the Cold Storage books. Do not discard a usable stored item because another quest required a fresh raid interaction.
Used by: Snap and Salvage, With A View, and Tribute to Toledo.
J Kozma Ventures Containers
Look for J Kozma Ventures branding on cargo containers for Cold Storage. The Loading Bay cargo route is a useful starting place, including approaches from an upper landing into the container area. An upper approach and a lower approach can lead toward the same search object, so do not count them as different containers merely because the routes use different layers.
Use a branded container with the quest search prompt, then collect the Old World Books it reveals. Searching is not the same as placing the books in your inventory. Protect the delivery item and follow the quest's one-round requirement.
J Kozma Ventures is also the company associated with Space Travel on Buried City. That connection is a name reference, not a reason to look for Cold Storage books in the Buried City key room.
Used by: Cold Storage.
Riven Tides Keycards in Blue Briefcases
Small blue briefcases on Stella Montis are worth checking for keycards, including reported hotel-card drops for Riven Tides. Their presence does not make every briefcase a guaranteed card source or reserve a particular room number for this map.
Keep the item name visible when sorting loot. A Riven Tides hotel card does not open a Stella Montis door, and an Archives Key does not replace a numbered hotel card.
Used by: matching locked rooms on Riven Tides, not a Stella Montis quest requirement.
Wires and Batteries
Check electrical containers and equipment areas along your existing route for Wires and Batteries. Separate ordinary inventory materials from world power objects carried to a socket. The Fuel Cell for the Seed Vault entrance is a different route problem from gathering a stack of Batteries.
For Fragmented Logs, prepare the required Electrical Components before deploying. Do not arrive at the Conduit Backrooms with only Wires and assume every electrical item is interchangeable.
Used by: Trash into Treasure, ordinary crafting, and the exact repair prompt shown by the mechanism you are using.
Call Stations and Field Depots
Do not plan a Stella Montis run around an assumed Call Station or Field Depot. The indoor facility's terminals, extraction consoles, and research computers serve different functions, and a familiar-looking screen is not proof of a supply-drop or depot interaction.
Use the Call Stations guide and Field Depots guide to choose a supported route for those objectives. If your active quest requires a depot rather than a research terminal, settle that destination before loading into this map.
Used by: A Better Use or Off The Radar on an appropriate supported route, not automatically by the indoor terminals here.
Extraction Points on Stella Montis
Choose an exit by its approach level, not only by how close its marker appears to your objective. A metro platform below you can require a longer route than an airshaft farther along your current corridor.
| Exit | Approach Context | Route Check |
|---|---|---|
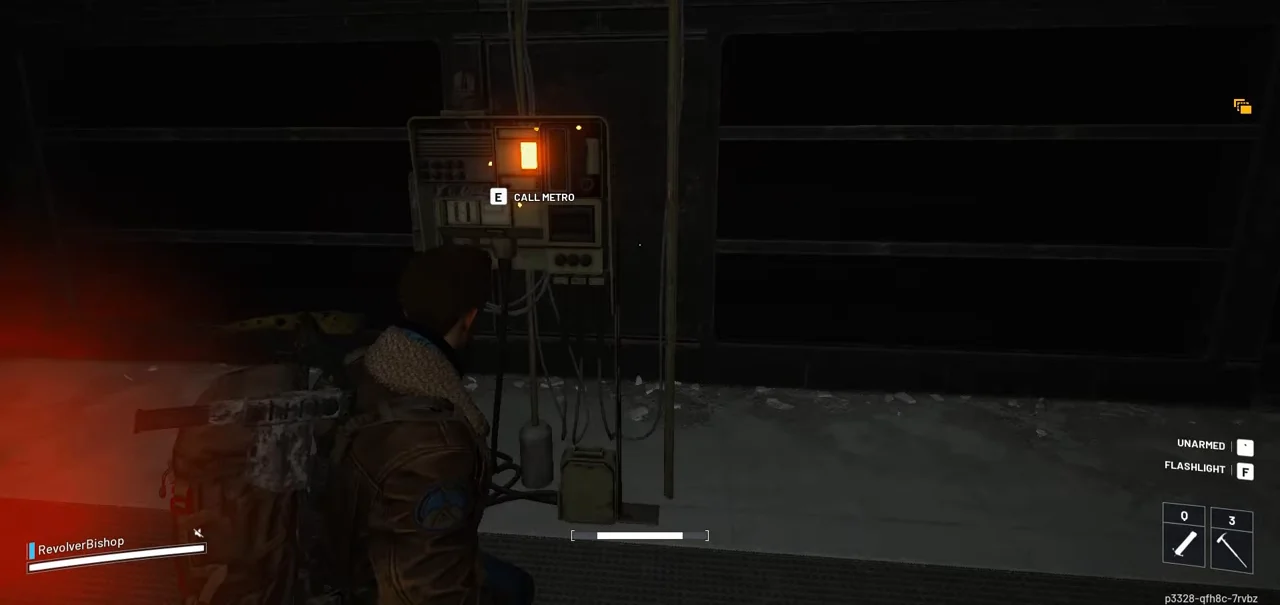
| Lobby Metro | Lower metro access beneath the Lobby-side route | Find the route down rather than waiting at the upper reception area. |
| Loading Bay Metro | Lower cargo and transport route | Trace the stairs or ramp from your current cargo level to the actual terminal. |
| Seed Vault Airshaft | Lower southeastern route between the vault and Sandbox B neighborhood | Check that the exit is still available before committing to the last corridor. |
| Sandbox B Hatch | Lower Sandbox B-side alternative | Bring a Raider Hatch Key for the locked hatch and identify the boarding interaction. |
These named exits are route options, not a promise that all are available in the same raid. Use the extraction symbols and timers in the raid you are playing. Do not read an upper-layer marker as permission to board from the floor above its terminal.
After a delivery pickup, stop adding optional rooms. Cold Storage and Last Entry require the item to leave with you, so confirm the books or documentation are in inventory before moving to extraction. Taking a photograph or searching a terminal does not prove a separate physical item was collected.
A hatch can be a useful alternative when you already have the correct key, but it should not become a last-second plan based on a missing item. Keep enough time for the actual route between floors.
Quests on Stella Montis
Use the quest table to choose the research, cargo, and material objectives that fit your current progression, including the Cultural Archives stop for Movie Night and the Security Bridge route for Stable Housing. The Flashpoint sequence runs through Fragmented Logs, Furtive Meetings, and Last Entry. Those are consecutive quests, not three objectives you can necessarily activate together.
Androids, Cargo, and Material Deliveries
In My Image, from Lance, asks you to search suitable androids. Check clusters around Medical Research, the business area, Cafeteria, Cultural Archives, Seed Vault, and Metro Admin. Not every android is searchable, and a remembered body is not a guaranteed interaction in another raid.
Cold Storage, from Shani, uses a J Kozma Ventures container and the Old World Books it reveals. Snap and Salvage, from Tian Wen, instead asks for Flow Controller and Magnetron materials. Check stored materials for the latter, but do not use that logic to skip Cold Storage's quest search.
Research and Security Bridge
On Deaf Ears follows reception records, lecture notes, Medical Research prototype information, and printed shipping logs in Assembly Workshops. Follow the journal's sequence. The later connection to Spaceport is not an instruction to perform this quest's research-computer steps in the Spaceport Arrival Building.
With A View combines a workshop control-room objective with Rotary Encoder and Ion Sputter requirements. Prepare the materials that your current objective requires and inspect the correct control-room switch.
Stable Housing uses Security Bridge's local floor 3 and floor 4. The floor 4 printer fails as part of the sequence. Return to the notice-board and safe route instead of treating the expected failure as proof you need an unrelated key.
The Flashpoint Investigation Chain
Fragmented Logs uses the Control Room between the sandboxes, a Conduit Backrooms power interaction, and the Cultural Archives terminal. Bring the required Electrical Components before starting the route.
Furtive Meetings uses meeting locations around the Medical Research staircase, the ventilation connection near Sandbox B, and the Cultural Archives-side staircase. After the last photograph, collect the nearby quest box rather than extracting as soon as the photo objective changes.
Last Entry begins outside the Seed Vault. Access the workstation, find the hidden key, power the entrance, and collect the Official Shutdown Documentation from the deposit box. The final item must be extracted in the same round before the handoff to Shani.
Movie Night
Movie Night is a real Apollo quest, not a map condition. It asks for a Portable TV and a Stack of Movie Tapes, with Cultural Archives relevant to the tape search. A generic item may be found elsewhere, so the quest's wider map classification does not remove the useful Stella Montis stop.
Do not assume the Archives Key is required simply because the tape objective names Cultural Archives. The general cultural wing and its locked Storage Room are different destinations.
| Quest | Trader | Objective location | Round and extraction | Route note |
|---|---|---|---|---|
| In My Image | Lance | Search suitable androids at Medical Research, the business area, Cafeteria, Cultural Archives, Seed Vault or Metro Admin.Show Cafeteria on mapShow Metro Admin approach on map | One round: Check quest journal Extraction: Not required | Check the search prompt, as not every android is searchable and remembered positions do not confirm usable objects this raid. |
| Cold Storage | Shani | Search a qualifying J Kozma Ventures container on the Loading Bay route, where upper and lower approaches may lead to the same container.Show J Kozma Ventures container approach on map | One round: Required Extraction: Required | Pick up the Old World Books after searching and extract for delivery. |
| Snap and Salvage | Tian Wen | Gather a Flow Controller and Magnetron from suitable Exodus searches or your stash for the material delivery.Related quest, not an objective on this map | One round: Check quest journal Extraction: Check quest journal | Check your stash before searching, as no fixed Assembly, Business Center or security-room interaction is required. |
| On Deaf Ears | Lance | Follow business-area reception records and lecture notes, then Medical Research prototype information and Assembly Workshops shipping logs.Show Assembly Workshops on map | One round: Not required Extraction: Check quest journal | Use the printed-log interaction on Stella Montis, not four computers in Spaceport's Arrival Building. |
| With A View | Shani | Use the Assembly Workshops control-room switch and meet the Rotary Encoder and Ion Sputter requirements.Show Assembly on mapShow Assembly Workshops on map | One round: Not required Extraction: Required | Assembly, Medical Research and business-area searches are material routes, not guaranteed drops or extra fixed objectives. |
| Stable Housing | Tian Wen | Follow Security Bridge's printer, notice-board and safe sequence for Project Heartwood Blueprints on local floors, not map layers.Show Security Bridge on map | One round: Required Extraction: Not required | The printer is meant to fail, so return to the notice-board clue and the safe opposite the stairwell. |
| Fragmented Logs | Shani | Use the raised Control Room between the sandboxes, lower Conduit Backrooms power stop and Cultural Archives service terminal.Show Cultural Archives on mapShow Control Room on map | One round: Check quest journal Extraction: Check quest journal | Bring the required Electrical Components before starting the route. |
| Furtive Meetings | Shani | Visit the Medical Research stair marking, Sandbox B ventilation connection and Cultural Archives-side meeting staircase.Show Medical Research on mapShow Robotic Sandbox B on map | One round: Required Extraction: Required | Collect the quest box after the final photo without assuming the meeting staircase is the Atrium connector. |
| Last Entry | Shani | Use the outside Seed Vault workstation and hazmat-room key to retrieve Official Shutdown Documentation from the interior deposit box.Show Seed Vault on map | One round: Required Extraction: Required | Collect the Seed Vault Box Key outside, use a Fuel Cell if prompted and extract the documentation in the same round. |
| Movie Night | Apollo | Find the Stack of Movie Tapes in Cultural Archives and obtain the requested Portable TV. | Follow your quest journal | Generic items can be sourced on other maps too. Do not spend an Archives Key unless the objective actually requires that room. |
| Tribute to Toledo | Celeste | Use suitable Exodus searches as an optional material route for the required Power Rod.Related quest, not an objective on this map | One round: Check quest journal Extraction: Check quest journal | This is not a fixed Stella Montis quest stop or a guaranteed container drop. |
| Trash into Treasure | Shani | Use electrical-container searches as a material route for the requested Wires and Battery.Related quest, not an objective on this map | One round: Not required Extraction: Required | No specific Stella Montis room is required, so gather these materials along your existing route. |
Stacking Quests on Stella Montis
Stack the currently active objectives in one wing, then choose a route that avoids climbing between the same floors twice. Quest chains often reuse a building after a previous turn-in, so a shared POI does not mean every named quest can be completed on the same visit.
Medical Research
In My Image, Furtive Meetings, With A View, and On Deaf Ears can all make Medical Research relevant at different points in your progression. Identify the searchable android, marked staircase, material containers, and research computer as separate stops. Add Medical Storage only when you have its key and enough room for optional loot.
Seed Vault and Sandbox B
In My Image can add an android search to a southeastern route. Furtive Meetings brings you through nearby shafts or stairs, while Last Entry uses the gated vault itself. Furtive Meetings must be completed before Last Entry becomes the next stage, so plan these as reusable routes rather than one simultaneous checklist.
Do not add the Archives Key door to this lower-layer loop simply because an older key guide placed it here. That storage door belongs to the Cultural Archives-side facility route.
Cultural Archives
Fragmented Logs, Furtive Meetings, and In My Image use different interactions in or near the cultural wing. Movie Night adds another reason to inspect the area when active. Work from the exact terminal, meeting mark, android, or tape objective rather than searching every room indiscriminately.
The locked Storage Room is optional. Check the corridor and inventory before spending the Archives Key, especially if you already carry a delivery item.
Assembly and the Workshops
Snap and Salvage, With A View, and On Deaf Ears can use the Assembly neighborhood. Search suitable material containers on the way to the control-room or shipping-log objective, then leave by the exit route that fits your current level.
Cold Storage and Snap and Salvage occur at different stages of progression, so collecting ordinary Exodus materials early can prepare a later handoff without making the later quest active during the cargo-container run.
Stella Montis Threats
Shredders and Narrow Passages
Shredders are a reason to inspect a corridor before sprinting through it, including the Cultural Archives Storage Room approach. Do not commit to a long unlock or inventory search while a machine controls your return path. Breaking sightlines and preserving a way back is more useful than treating every encounter as a mandatory fight.
Sound can travel through nearby rooms while stairs put the source above or below you. Check the level as well as the direction before chasing it.
Sentries and Smaller ARC
Watch for Sentry searchlights along interior approaches, including the Lobby-side route. A blue searchlight is a warning to inspect its source, not proof that the next doorway is safe once the beam passes.
Pops, Fireballs, and Ticks can threaten the Cultural Archives and adjoining passages. Look down at doorways and around low cover as well as ahead at larger machines. Do not assume an empty main room means its service backroom is clear.
Other Raiders and Key Doors
Medical Research, Assembly, security containers, and the Archives Storage Room all give other players reasons to use the same corridors. That is a route-planning concern, not a prediction about the number or behavior of raiders in your session.
Listen before crossing a landing, avoid sorting loot in an exposed doorway, and reconsider the next room once you have the quest item. A low-conflict earlier raid does not make this run safe, and an indoor map does not remove the need to check the extraction approach.
FAQ
How Many Map Layers Does Stella Montis Have?
There are two main navigation layers, but individual buildings also contain their own floors and raised rooms. Use the on-screen map-layer selector, then follow the physical stair, ramp, or shaft to your destination. Security Bridge floors 3 and 4 are local building levels, not additional map-layer names.
Where Does the Stella Montis Archives Key Work?
It opens the signed Storage Room at the eastern edge of Cultural Archives. Check the large shutter’s unlock panel for the Archives Key requirement. Do not confuse it with the Seed Vault entrance, which uses a power mechanism, or the Seed Vault Box Key used during Last Entry.
Which Stella Montis Key Room Should You Choose?
Choose the room that fits your active objective and return route. Security Checkpoint suits a security-container search, Medical Storage fits North Wing, and Assembly Admin fits the workshop area. No room guarantees a named blueprint or enough loot value to justify ignoring a closing extraction.
Why Is the Seed Vault Door Locked?
The entrance may require power from a nearby Fuel Cell and a door state that permits entry. Inspect the written console status, not just a blue or red light. Last Entry’s hidden Seed Vault Box Key opens the deposit-box interaction inside, not the main powered gate.
Where Do You Search Androids on Stella Montis?
Check android clusters around Medical Research, the business area, Cafeteria, Cultural Archives, Seed Vault, and Metro Admin. Only suitable androids offer the In My Image search interaction. Inspect the actual prompt in your raid rather than assuming every body, or the same body on another visit, can be searched.
Can Riven Tides Hotel Keycards Drop on Stella Montis?
Hotel-card finds have been reported from the small blue briefcases on Stella Montis. Treat those as containers worth checking on an existing route, not guaranteed drops. Read the card’s exact name and room number, since a Riven Tides card cannot replace a Stella Montis door key.
Plan Your Next Stella Montis Run
Choose the quest you want to finish, check its required items, and build the route around an available exit. For help with the objective, view the quest boost options.
Gameplay Image Credits
Gameplay images adapted from the following creators. Captures have been cropped or resized for this guide.
- Stella Montis upper: gameplay capture by Platinum Hunter. Cropped or resized for this guide.
- Stella Montis lower, Stella Montis location photos: gameplay capture by Nickko Kimiko. Cropped or resized for this guide.
- Stella Montis location photos: gameplay capture by RageGamingVideos. Cropped or resized for this guide.
- Stella Montis location photos: gameplay capture by GosuNoob. Cropped or resized for this guide.
- Stella Montis location photos: gameplay capture by TooFumed. Cropped or resized for this guide.
- Stella Montis location photos: gameplay capture by the Full Measure. Cropped or resized for this guide.
- Stella Montis location photos: gameplay capture by Arekkz Gaming. Cropped or resized for this guide.