

Quick Answer
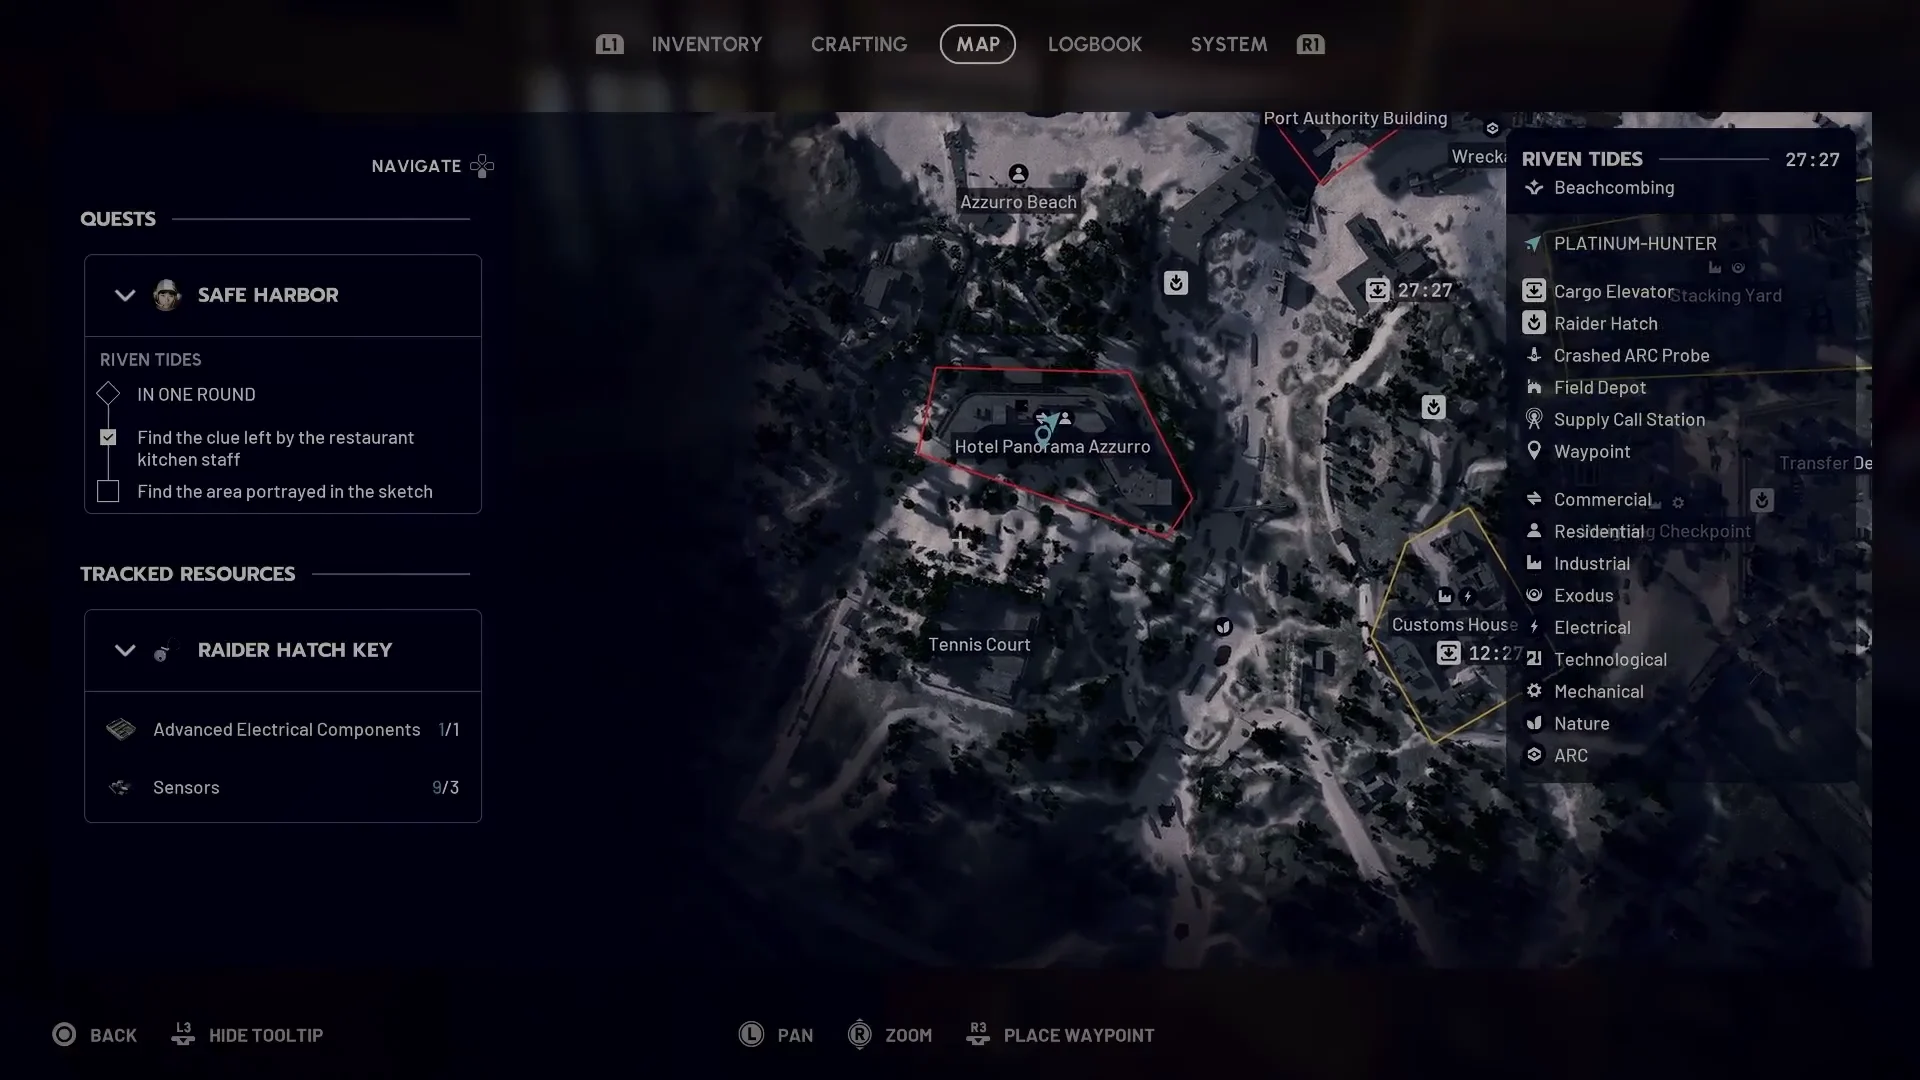
- Enter Riven Tides with a safe-pocket augment and reach Hotel Panorama Azzurro from the south.
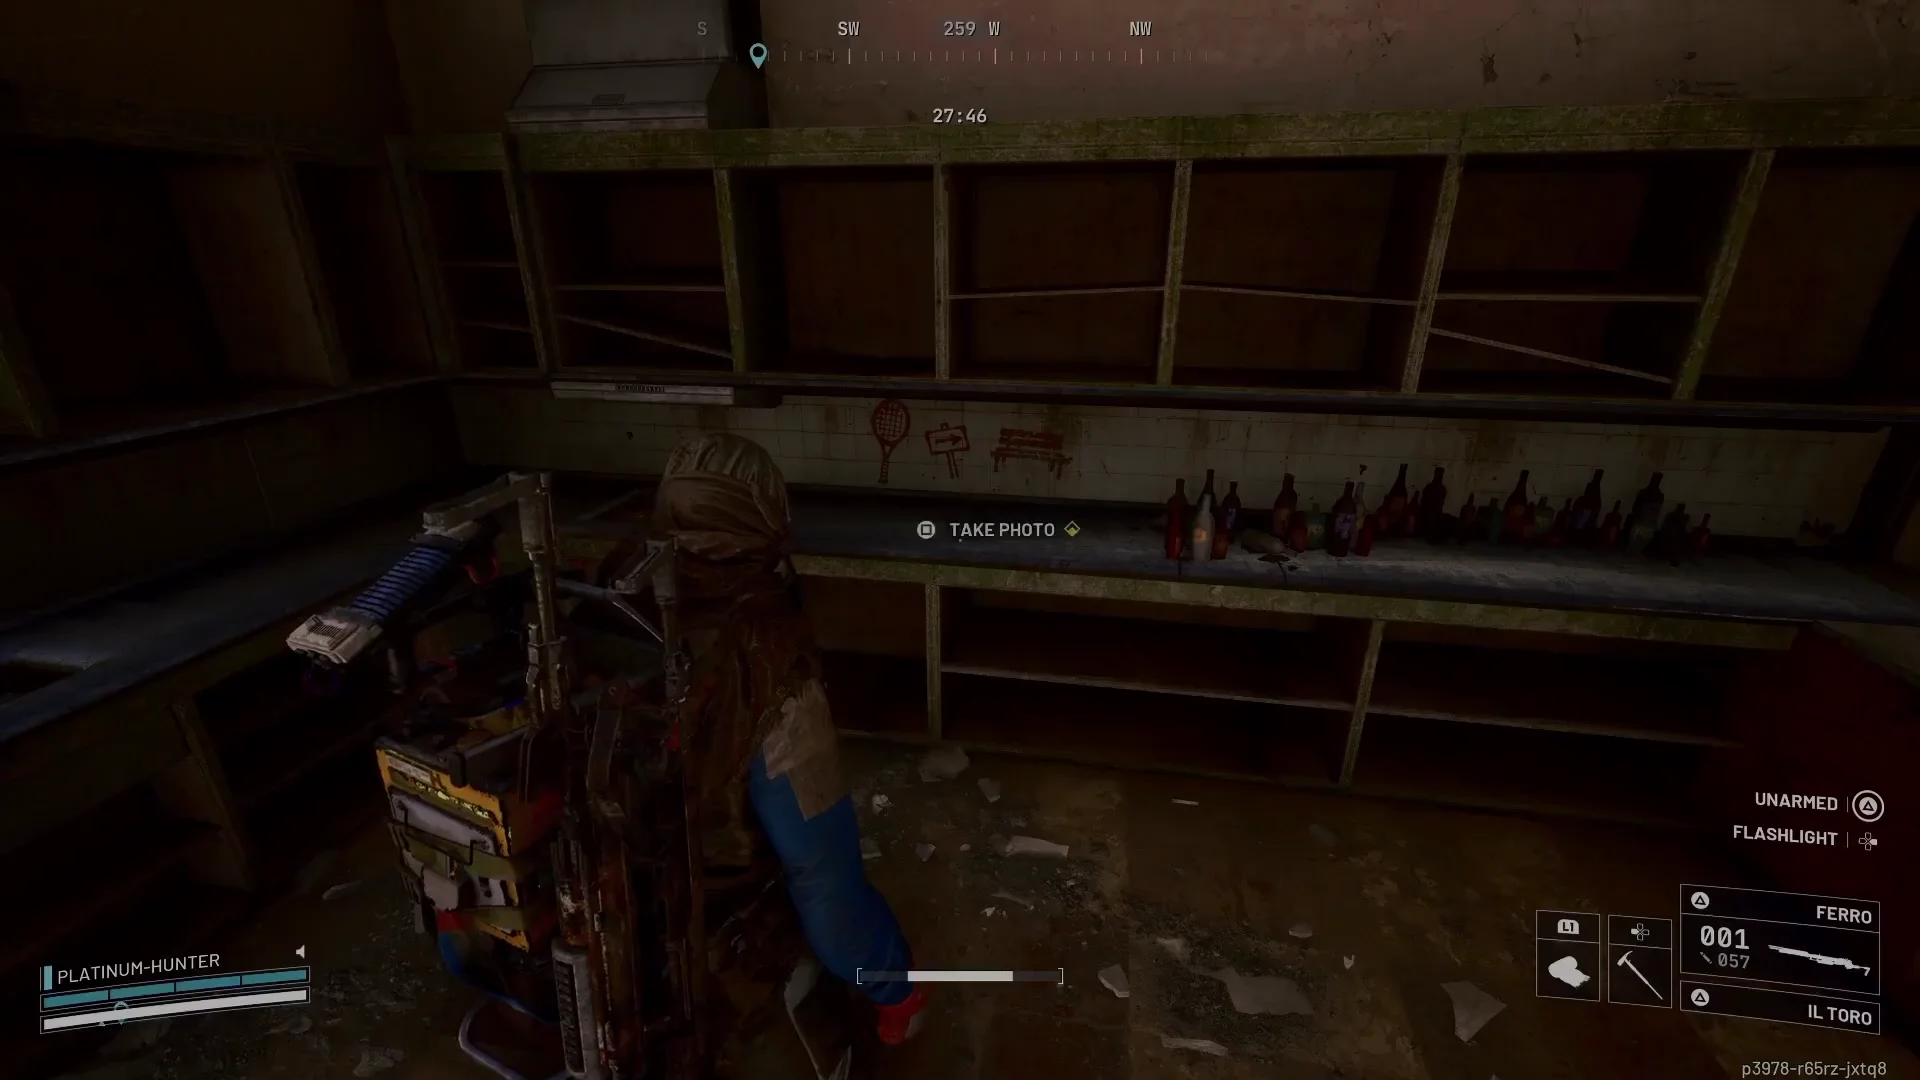
- Find the kitchen counter and photograph the sketch.
- Follow the tennis-racket clue to the Tennis Court.
- Dig at the quest-marked spot, place the Precision Gimbal in your safe pocket, and extract through Customs or Seaside.
Complete the full sequence in one deployment. Losing the Gimbal or dying before extraction means repeating the route.
Safe Harbor Requirements
Have Safe Harbor active from Tian Wen and access to Riven Tides. Equip an augment with a safe pocket before you enter: you must carry the Precision Gimbal to extraction, and losing it restarts the objective sequence. There is no checkpoint between the hotel clue and the exit.
Mark the hotel, Tennis Court, and a likely extraction on the map before moving. Expect threats around the hotel and avoid lingering after you have the Gimbal.
How to Get to the Hotel Kitchen
Hotel Panorama Azzurro is on the western side of Riven Tides. Approach from the south, enter the hotel, and work toward the kitchen counter rather than searching guest rooms for the clue.
- Reach the hotel from the south and check your route for nearby ARC.
- Move through the accessible interior toward the restaurant and kitchen area.
- Find the sketch on the kitchen counter and use the photograph interaction before leaving.
The same hotel appears in Battening Down, although that quest has a separate objective.
The Sketch Shows a Tennis Racket
The sketch is the clue to the next location, not a reward item. It is painted on the wall above the hotel kitchen counter. Photograph the drawing with the TAKE PHOTO prompt: its tennis racket points to the Tennis Court POI south of the hotel.
Wait until the photo objective registers, then leave the hotel for the court. Understanding that clue avoids searching the hotel for a second interactable that is not there.
Where to Dig at the Tennis Court
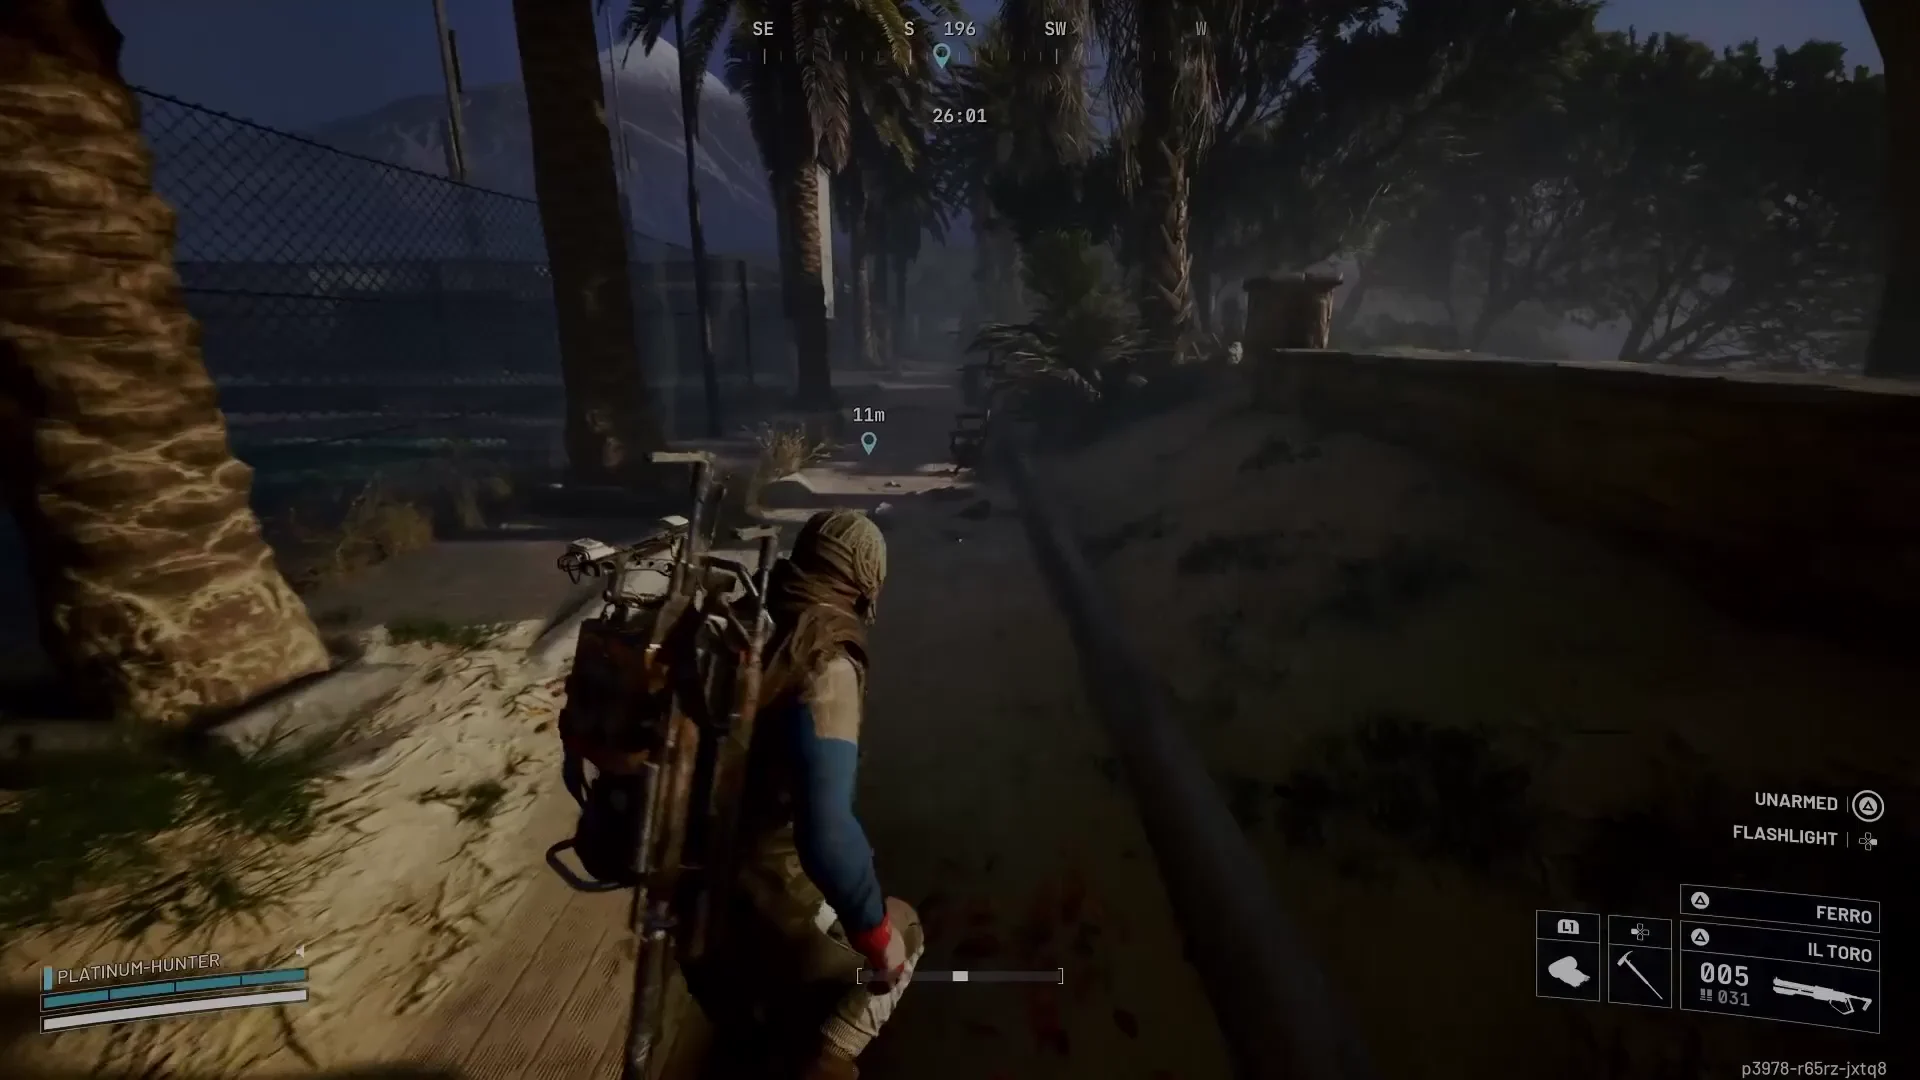
The dig objective is at the Tennis Court on Riven Tides. Head there after photographing the kitchen sketch and watch for the active quest indicator at the court's edge.
- Travel from Hotel Panorama Azzurro to the Tennis Court while keeping an extraction route in mind.
- Enter the quest-marked area and let the location objective register.
- Locate the dig interaction among the court-side ground markers and collect the Precision Gimbal.
- Put the Gimbal in your safe pocket immediately before moving to the exit.
How to Extract with the Precision Gimbal
Once the Precision Gimbal is secured, leave by the safer available Customs or Seaside elevator. Choose the exit based on your current position and raid conditions rather than crossing the map for unrelated loot.
Keep the Gimbal in your safe pocket and avoid avoidable fights. Safe Harbor requires the item at extraction in the same round as the hotel and dig objectives.
Safe Harbor Rewards
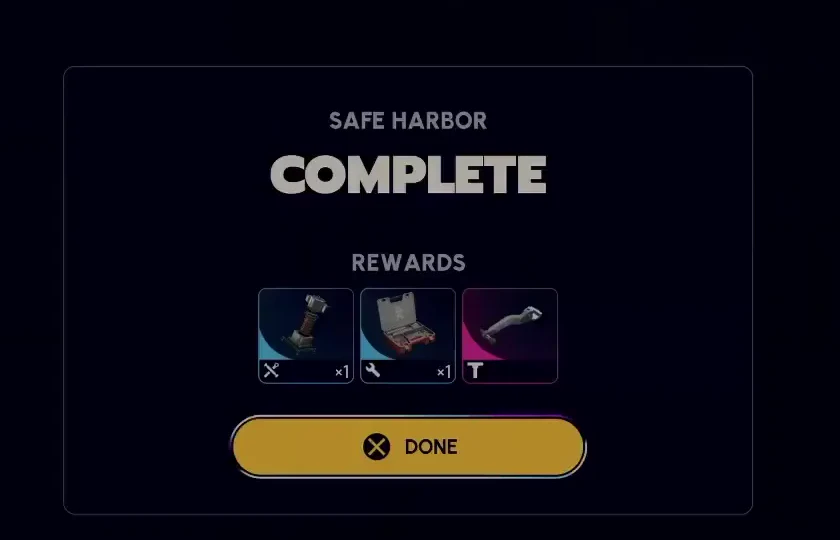
Extract with the Precision Gimbal to finish Safe Harbor, then claim 1 Surge Coil, 1 Heavy Gun Parts, and 1 Horizontal Grip from Tian Wen. The Gimbal is the objective item you carry out; it is not a substitute for completing the extraction step.
What Comes After Safe Harbor
Safe Harbor sits in Tian Wen's Riven Tides questline. Continue from the next quest shown in her trader menu after the Gimbal handoff. A Wrench in the Works belongs to Celeste and takes place on Spaceport, while Battening Down is an Apollo objective at the same Riven Tides hotel.
The Stella Montis Connection
The Gimbal errand continues the thread of research equipment and data moving from Stella Montis to Riven Tides. For related story stops, see Stable Housing, A Rising Tide, and A Dead End. The immediate Safe Harbor task remains the single-round hotel-to-court extraction.
Frequently Asked Questions
Where is the kitchen clue in Safe Harbor?
The sketch is on the wall above the kitchen counter inside Hotel Panorama Azzurro on Riven Tides. Photograph it before leaving for the Tennis Court.
What does the sketch show?
It shows a tennis racket, pointing you toward the Tennis Court where the Precision Gimbal is buried.
Where do you dig for the Precision Gimbal?
Go to the Tennis Court after the sketch objective registers and look for the quest-marked dig interaction around the court-side ground markers.
Can you do Safe Harbor across multiple raids?
No. Plan to photograph the sketch, dig up the Gimbal, and extract with it in one deployment.
What happens if you die carrying the Gimbal?
You must repeat the quest's one-round route. Put the Gimbal in a safe pocket as soon as you collect it and head for extraction.
Get Safe Harbor Completed
Skip the route and let our in-house team complete it on your account.
Buy quest boost→Credits: Gameplay images: ARC RAIDERS SAFE HARBOR Quest Guide by Platinum Hunter, CC BY 3.0; reward frame cropped for clarity; objective and map frames unchanged. Walkthrough reference: TroubleChute Basics.