

The Blue Gate
surface · 50 overview areasShow on map
Choose a surface approach and a tunnel return route before following a key-room marker. Underground rooms, road tunnels, and surface airshaft entrances can overlap on the map without sharing the same entrance.
Blue Gate Key Rooms
Bring the key for the room you intend to visit and keep it protected when your augment has a safe pocket. A key is consumed on use. Residential containers in places such as the Abandoned Housing Project are worth checking along your route, but they are not guaranteed key spawns.
Check the condition banner before choosing a Night Raid. Darkness can change your approach, but it does not turn a locked room into guaranteed profit or establish a higher drop rate for every container. The cross-map keys guide separates door access from loot expectations.
Confiscation Room
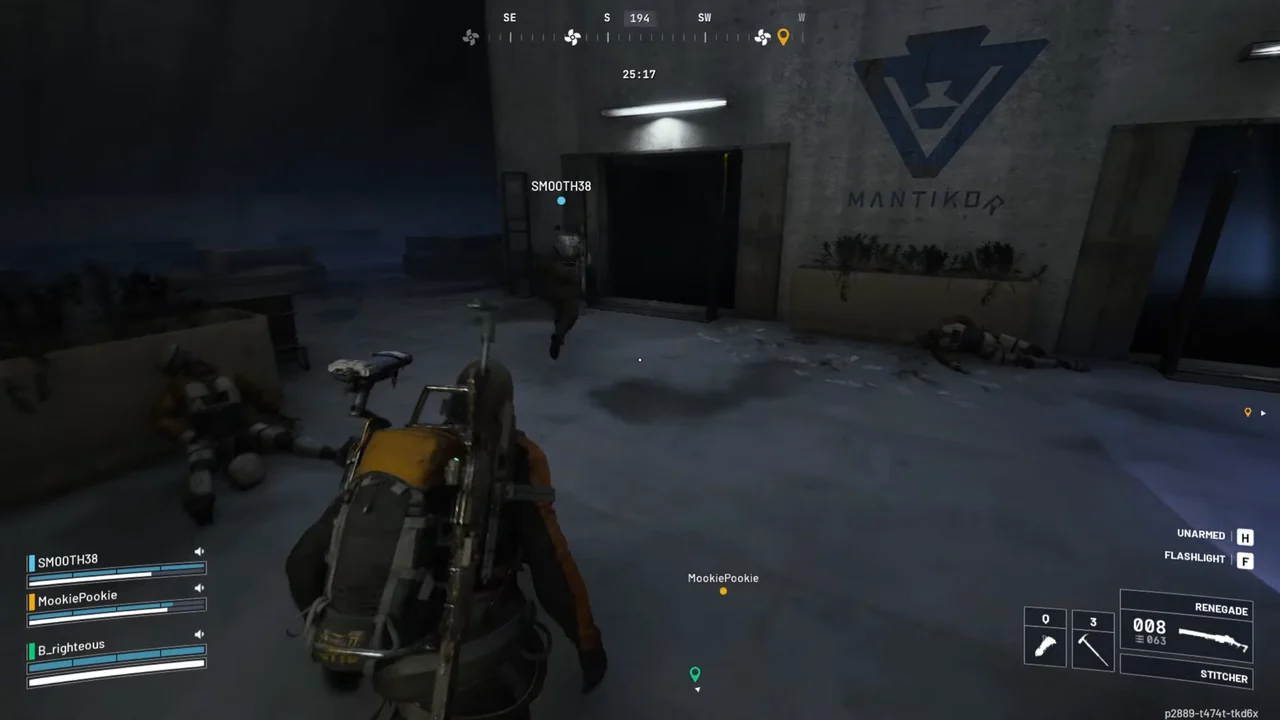
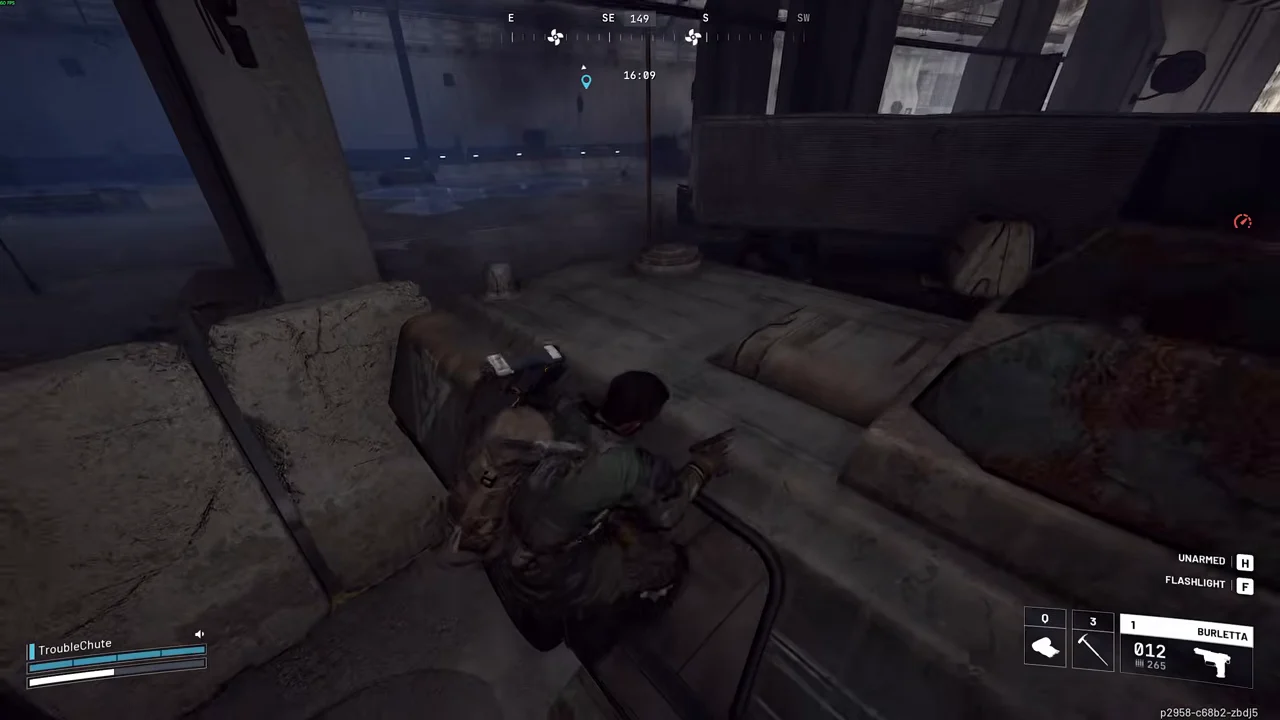
The Confiscation Room is underground in the Security Wing, beside the Traffic Tunnels beneath the Headhouse area. Look for the confiscated-goods door and MANTIKOR signage, not a locked office on the surface. This is where you use the Blue Gate Confiscation Room Key.
The interior zipline at Reinforced Reception is an approach into the lower complex. Once down, identify the Security Wing and the signed door rather than following an uninterrupted sequence of left turns from an unspecified entrance. A turn-by-turn route only works when you start from the same side.
Before unlocking, check the corridor behind you and decide how you will leave. The card buys access to a room, not control of the tunnel. The MANTIKOR puzzle area used by A Dead End is a separate interaction, so solving that puzzle does not replace this key.
Cellar Key
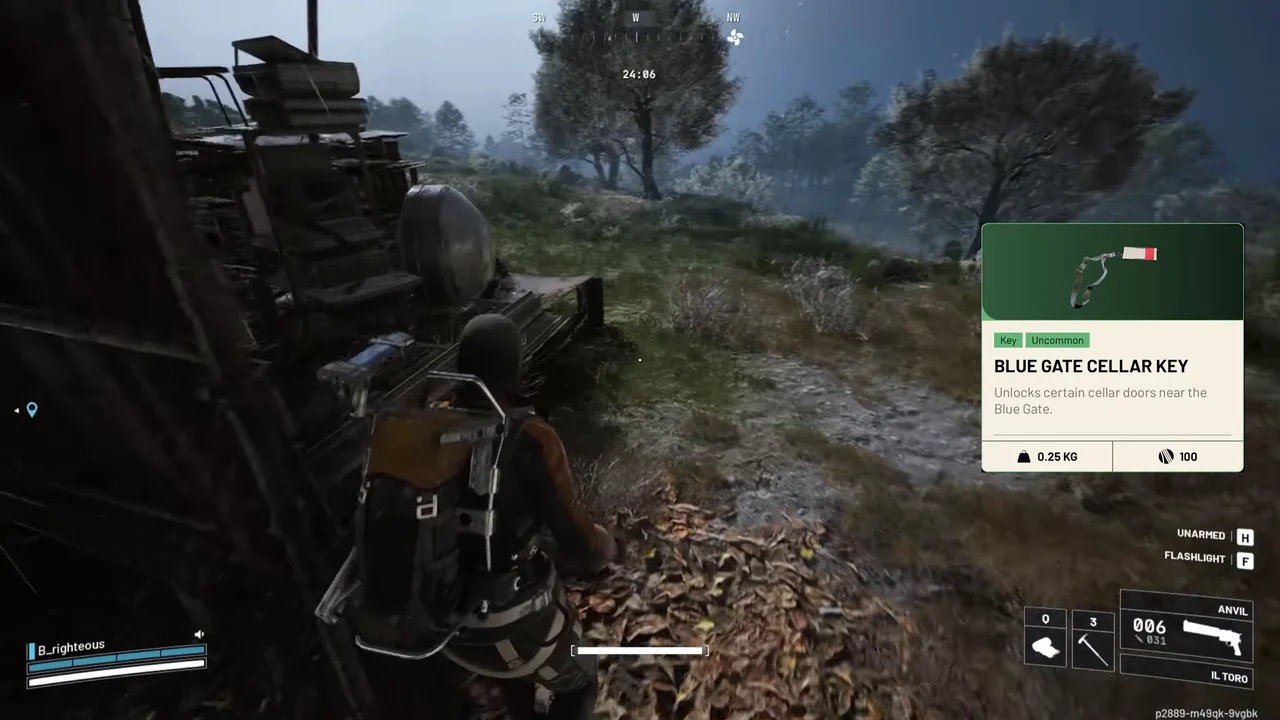
The Blue Gate Cellar Key opens compatible cellar doors at more than one location. Like the Buried City Residential Master Key, it is a multi-door key type rather than a reusable key that opens an entire district in one raid.
For the orchard route, search the stone-walled hillside around the southern side of Olive Grove, toward Ruined Homestead. The hatch blends into the wall near rocks and fruit trees. Check the key prompt before using it, since an ordinary shelter or puzzle entrance is not necessarily one of its doors.
A second reported cellar approach is around Trapper's Glade. Treat it as an alternative to inspect on a nearby route, not a reason to assume every cellar in the area accepts the key. The Raider's Refuge switch puzzle is a different access mechanic.
The orchard door can fit a visit for Bees!. Keep the yellow-tarp beehive shed and the stone-wall cellar hatch as separate stops.
Village Key
The Blue Gate Village Key belongs to the large double-door building in The Village, near the broken-greenhouse landmark. The Village is a surface district on the western side of the wider map. A description of the eastern side of that district is not necessarily a claim that the entire Village is east of the gate.
Find the greenhouse and the substantial double doors, then read the key prompt. Do not choose a random house because its compass bearing matches a guide. The door's general shape resembles the Town Hall entrance on Buried City, but the keys are not interchangeable.
The Village also serves Clamoring for Attention. Its boom box is a separate outdoor interaction, while loose residential items may be useful for The League. A key-room search does not automatically satisfy either task.
Communication Tower Key
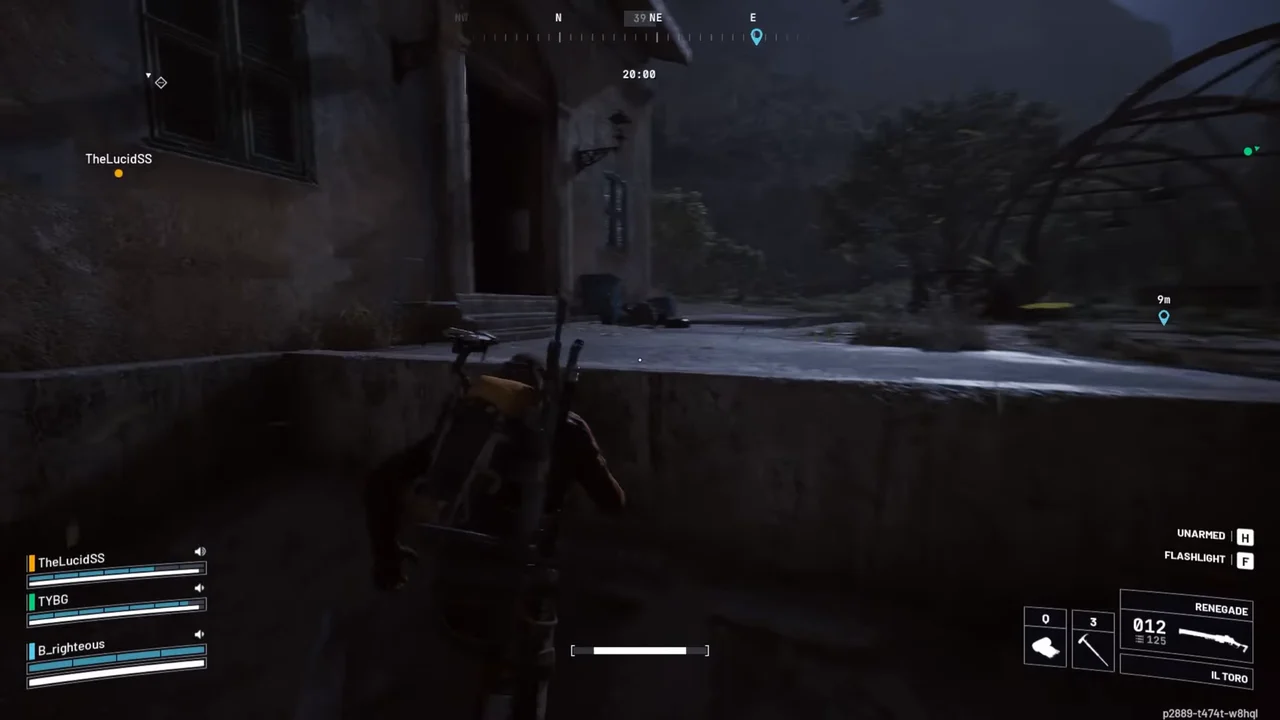
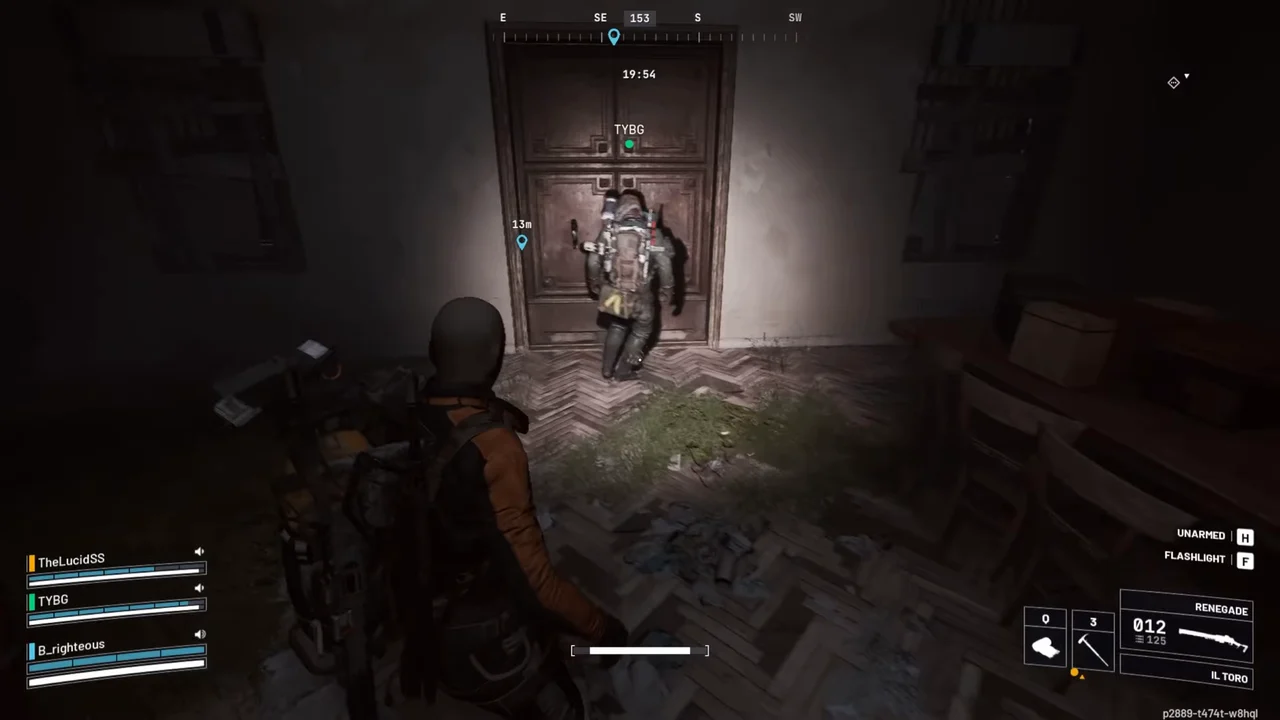
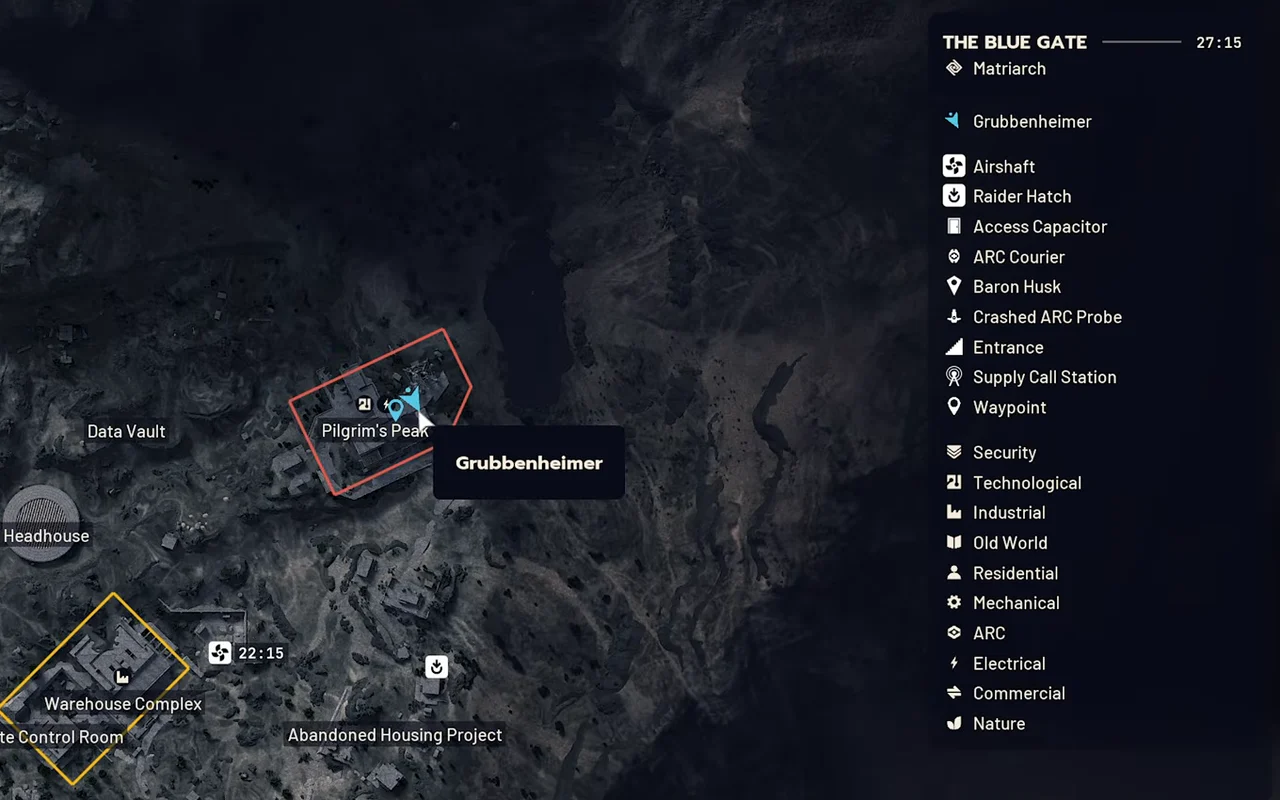
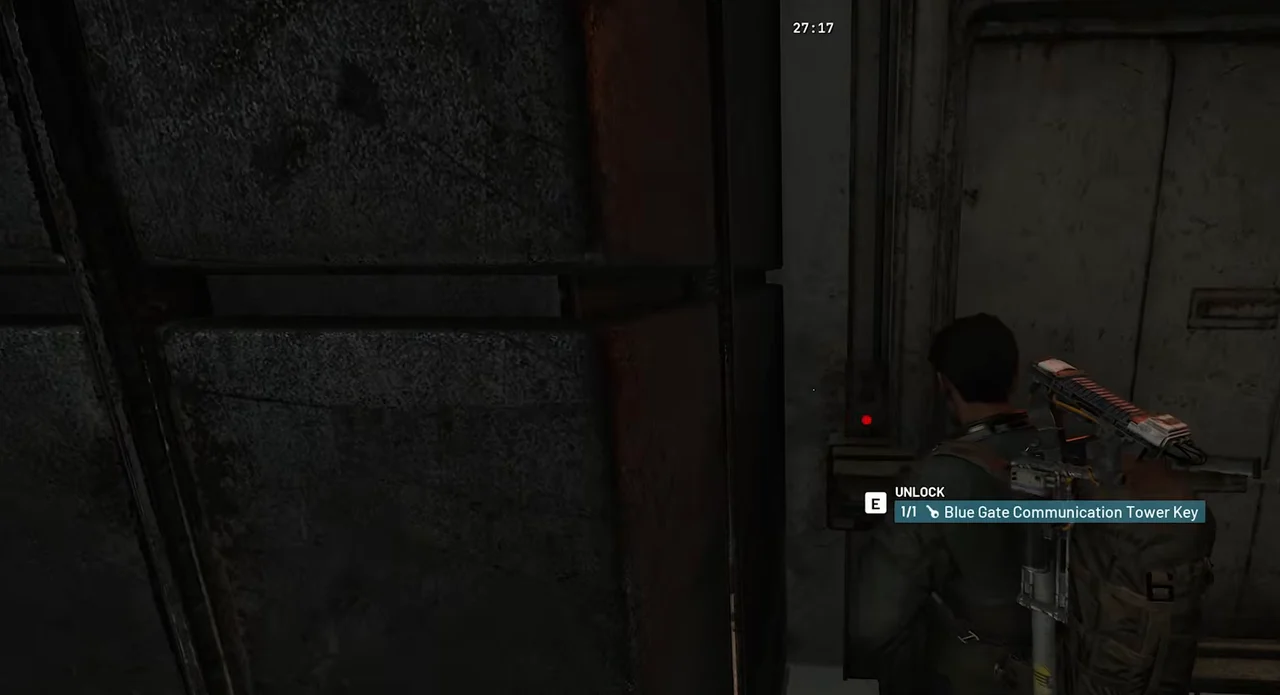
The Blue Gate Communication Tower Key opens a basement room at Pilgrim's Peak, by the Communication Tower. It is not a pass that opens every tunnel on the map. The tower-side descent and the larger building's stairs both require you to identify the correct basement and door.
At Pilgrim's Peak, enter the stairwell beside the Communication Tower, go down to the basement corridor, and check the native Blue Gate Communication Tower Key prompt on the metal door. The roof antenna, the whiteboard objective, and this basement key door are separate stops in the same tower area.
Outstanding Balance and Groundbreaking use Pilgrim's Peak, while its electrical containers can help supply Clamoring for Attention. This is the Blue Gate Communication Tower, not the similarly named Communications Tower on Spaceport.
Patrol Car Key
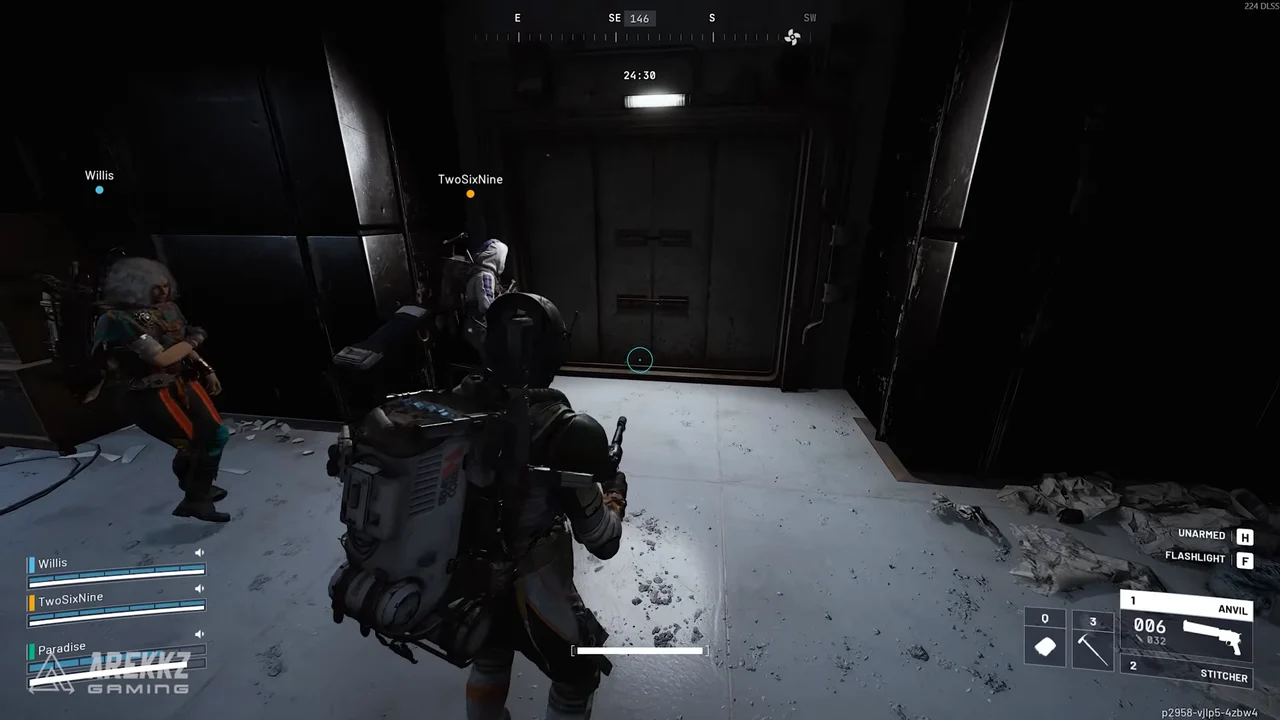
The Patrol Car Key is a separate item from the Armored Patrol Key Card used during Armored Transports. The ordinary key is associated with locked patrol-car loot and is a reward listed for A Prime Specimen. A car near Headhouse is a possible route stop, not a reason to replace the quest's named card with any car key you own.
Armored Transports directs you through the guard huts and into the Traffic Tunnel near the Checkpoint. If its card is missing, check the spare-card route described in the threat section before assuming the quest is permanently blocked.
Planning a Two-Key Tunnel Run
Carrying the Communication Tower Key and Confiscation Room Key lets you plan two locked-room stops, but it also means risking two access items. Start with the room nearest your entry, identify a return shaft, and keep the second room optional once your inventory is full.
Do not assume the tower basement provides an uninterrupted shortcut into every branch of the main network. For access help, the ARC Raiders keys service is the relevant product. Choose the route before choosing how many keys to carry.
The Blue Gate Tunnels
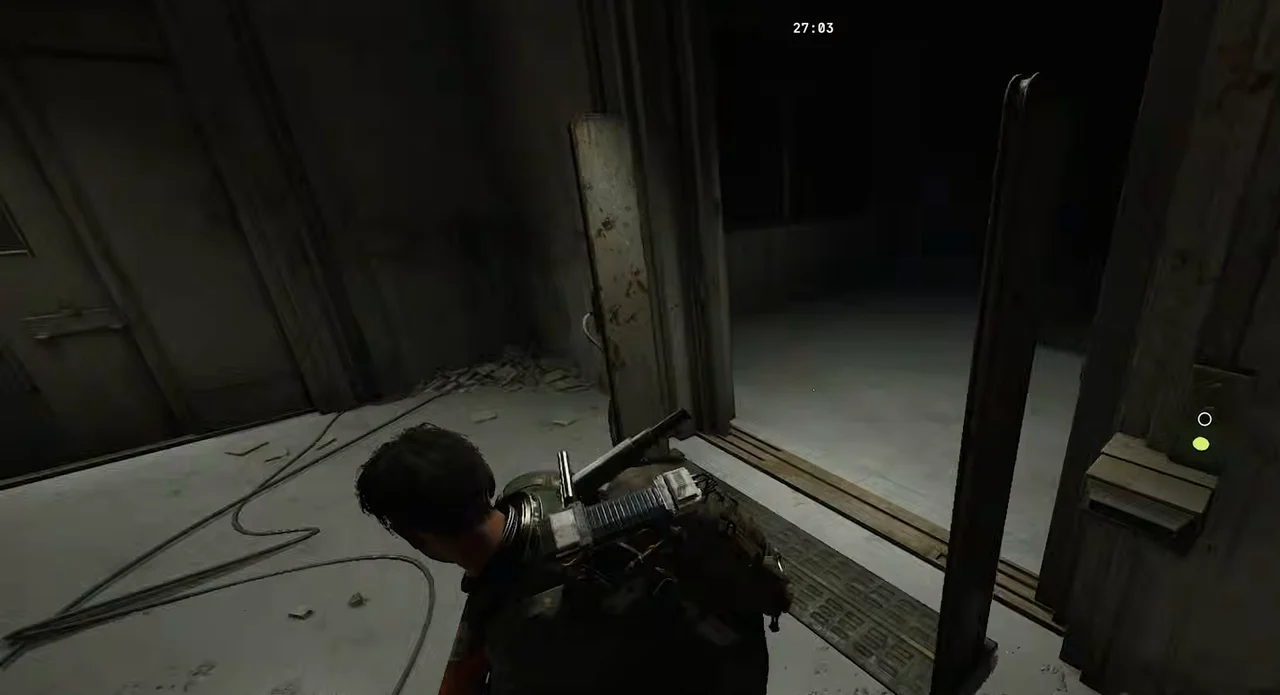
Enter the lower network through surface shafts or the Reinforced Reception descent, then select Underground in this interactive map. Traffic Tunnel, Security Wing, and Maintenance Wing are distinct named areas. Check physical stairs, shafts, and room signs rather than assuming every adjoining passage connects.
| Tunnel Section | Access | How to Use It |
|---|---|---|
| Main or standard passages | Unkeyed approaches into the network | Identify an entry and return route before moving deeper. |
| Traffic Tunnels | Road-tunnel entrances near the Checkpoint | Follow Armored Transports to the vehicle pileup without confusing its cars with surface loot stops. |
| Security Wing | Interior route beside the road tunnels | Separate the Confiscation Room door from the MANTIKOR puzzle objectives. |
| Communication Tower basement | Tower-side or building descent | The locked room needs its own key, not the Confiscation Room Key. |
| Vertical shafts | Connections between surface and lower routes | Use them to change level, not as automatic extraction points. |
| Confiscation Room | Its named key at the signed door | Check your return corridor before spending the key. |
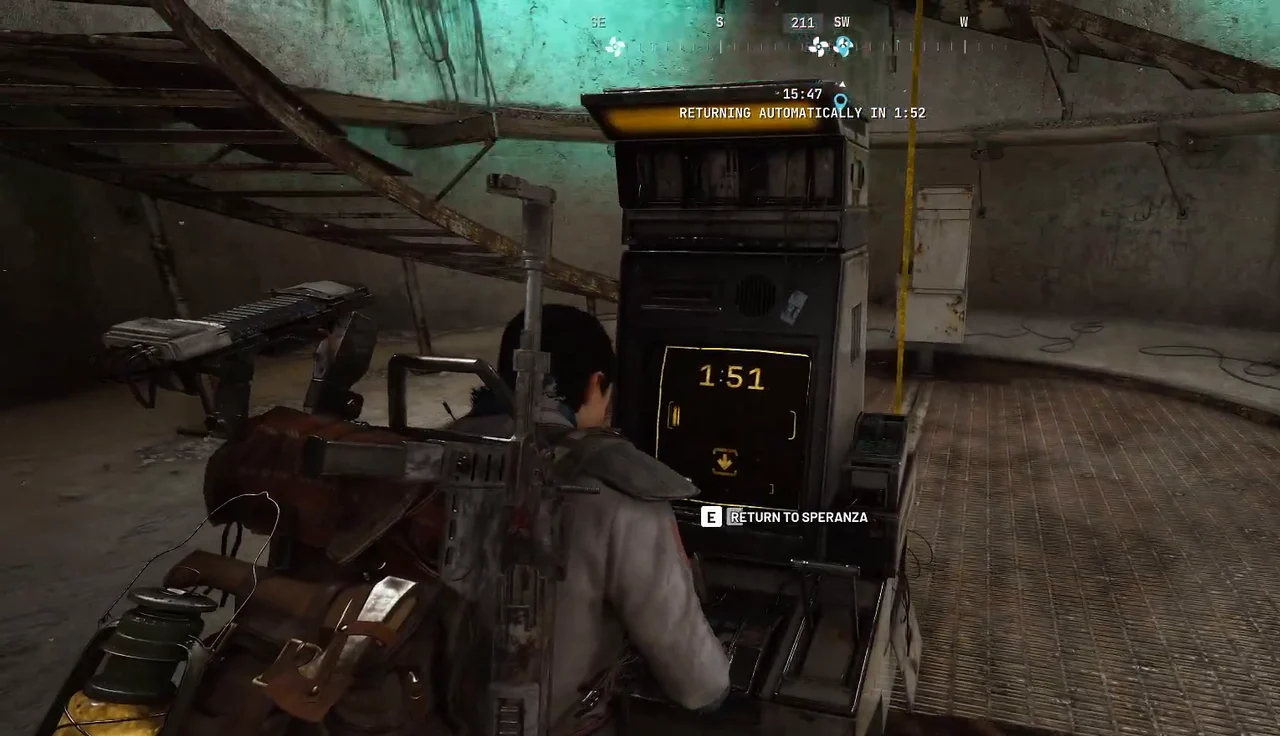
A tunnel opening and an extraction airshaft are different things. Climbing a shaft to the surface does not send you to Speranza unless it is an actual extraction with the correct terminal and boarding interaction.
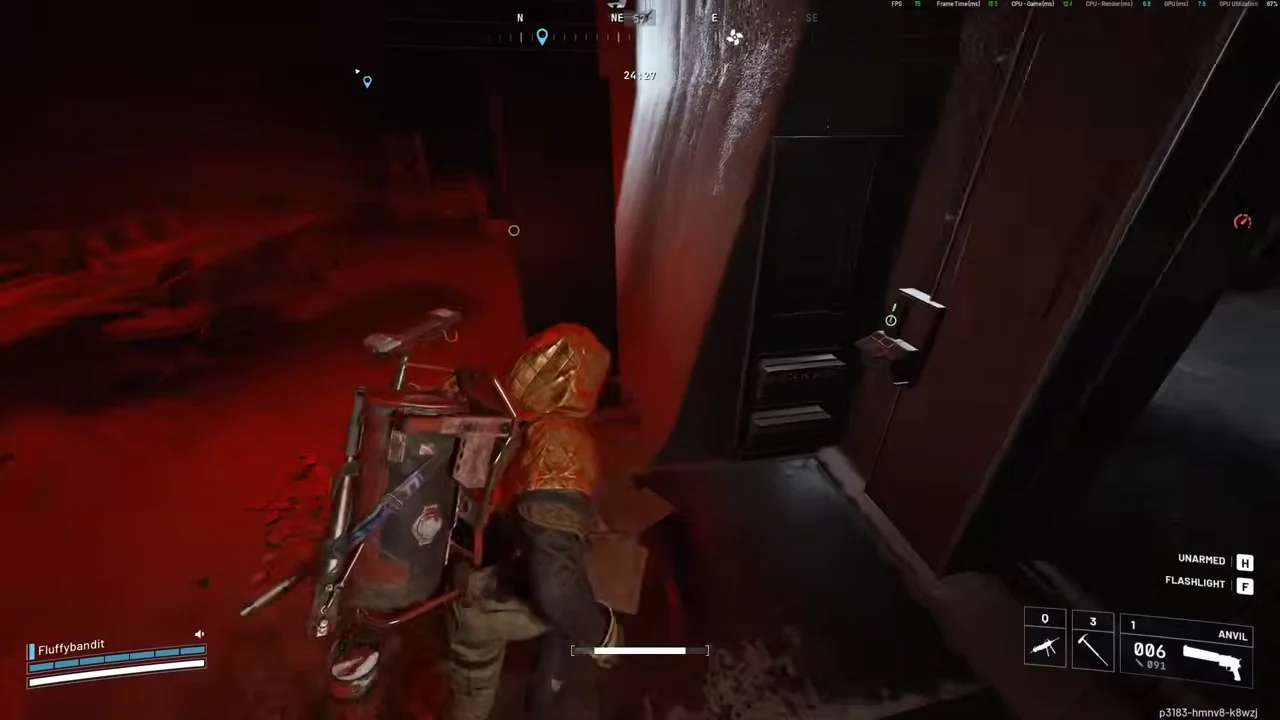
A Dead End uses a MANTIKOR power puzzle and the Red Room route. Work through the puzzle's prompts instead of spending a Confiscation Room Key on the assumption that every MANTIKOR door shares an unlock.
For Clamoring for Attention, use the road bus outside The Checkpoint that offers the horn interaction. The buses inside the Traffic Tunnels are not substitutes for that surface objective.
The MANTIKOR investigation continues toward the shutdown-documentation story in Last Entry on Stella Montis. Those related investigations do not make the Blue Gate Data Vault and Stella Montis Seed Vault the same location.
Every POI on the Blue Gate
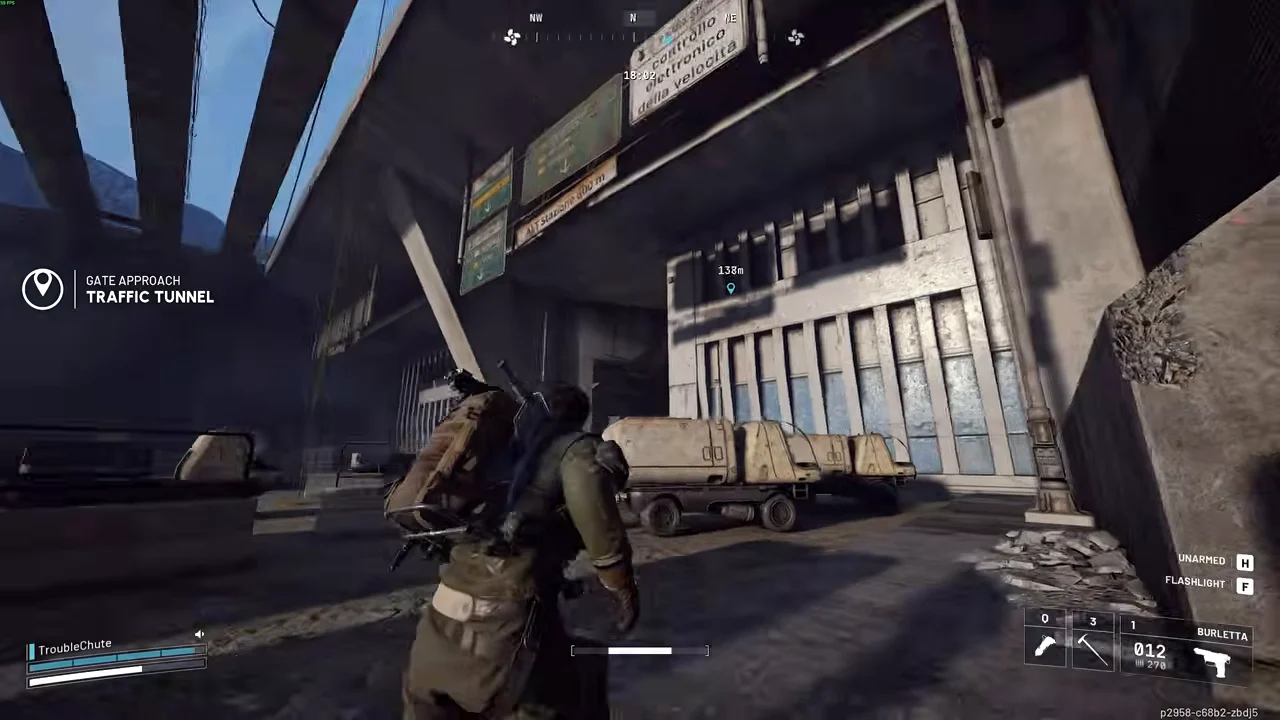
Choose a landmark cluster first, then check the layer and access route for the individual room. The Checkpoint, a guard hut, Reinforced Reception, and the Security Wing can all appear in a gate-area route without being alternate names for one room.
The Gate and Industrial Buildings
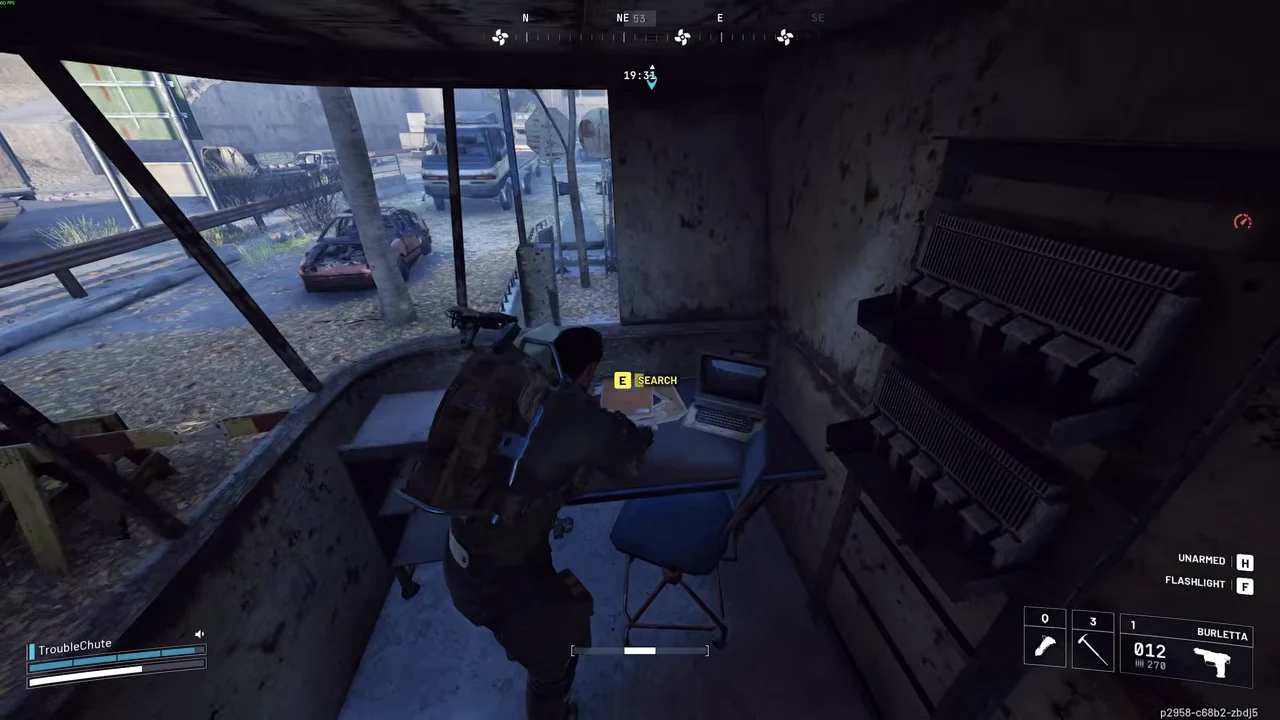
The Checkpoint is the surface gate complex. Its Security Checkpoint guard-hut stop belongs to the Armored Transports card search, while Reinforced Reception supplies a descent into the lower complex. Keep those markers separate until the particular entrance is in view.
The Warehouse Complex sits by the Gate Control Room, with Headhouse and the Data Vault farther along the industrial cluster. For Clamoring for Attention, the siren interaction is at the antenna's base, not a reward for climbing to its top. The nearby car pileup belongs to the road-tunnel route for Armored Transports.
The Data Vault is a Blue Gate landmark. It is neither Stella Montis's Seed Vault nor the seed-vault room in Buried City's Research Building.
Village, Orchard, and Southern Wreckage
The Village and Abandoned Housing Project are residential stops. Olive Grove adds fruit trees, the communication terminal, the yellow-tarp beehive shed, and a nearby cellar route. Ruined Homestead is a separate landmark, not another name for the orchard.
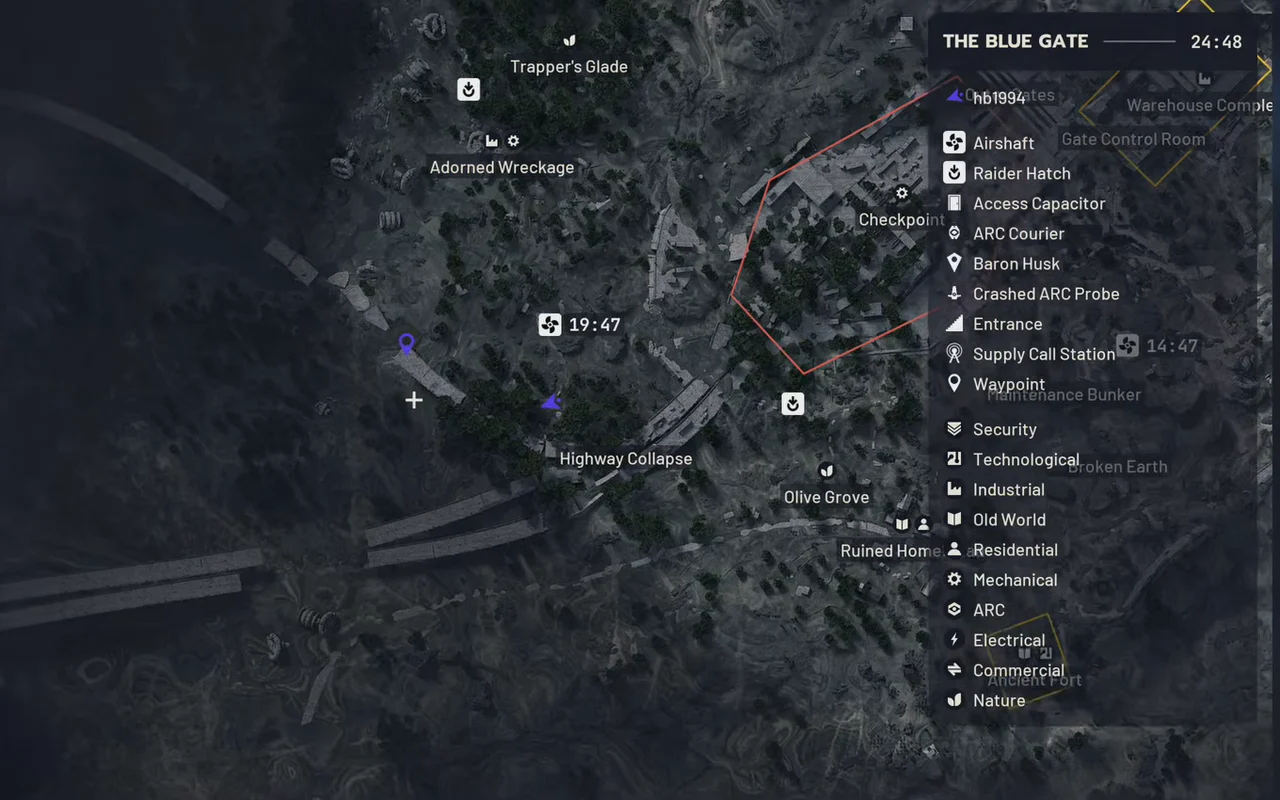
Highway Collapse and Adorned Wreckage belong to the southern investigation routes. For Keeping an Eye Out, search for the shelter under the collapsed highway rather than treating the wreckage name alone as the destination. With a Trace also uses Barren Clearing and Adorned Wreckage, with a communications-device inspection after the initial investigation.
Summit, Woodland, and Name Collisions
Pilgrim's Peak is the summit complex with the antenna, whiteboard building, and Communication Tower basement. Trapper's Glade is a woodland stop, useful to inspect for plants and the reported cellar entrance.
A Baron Husk is an investigation or loot target for Dormant Barons, not a live Deforester. Use the actual husk marker and interaction rather than assuming any large wreck qualifies.
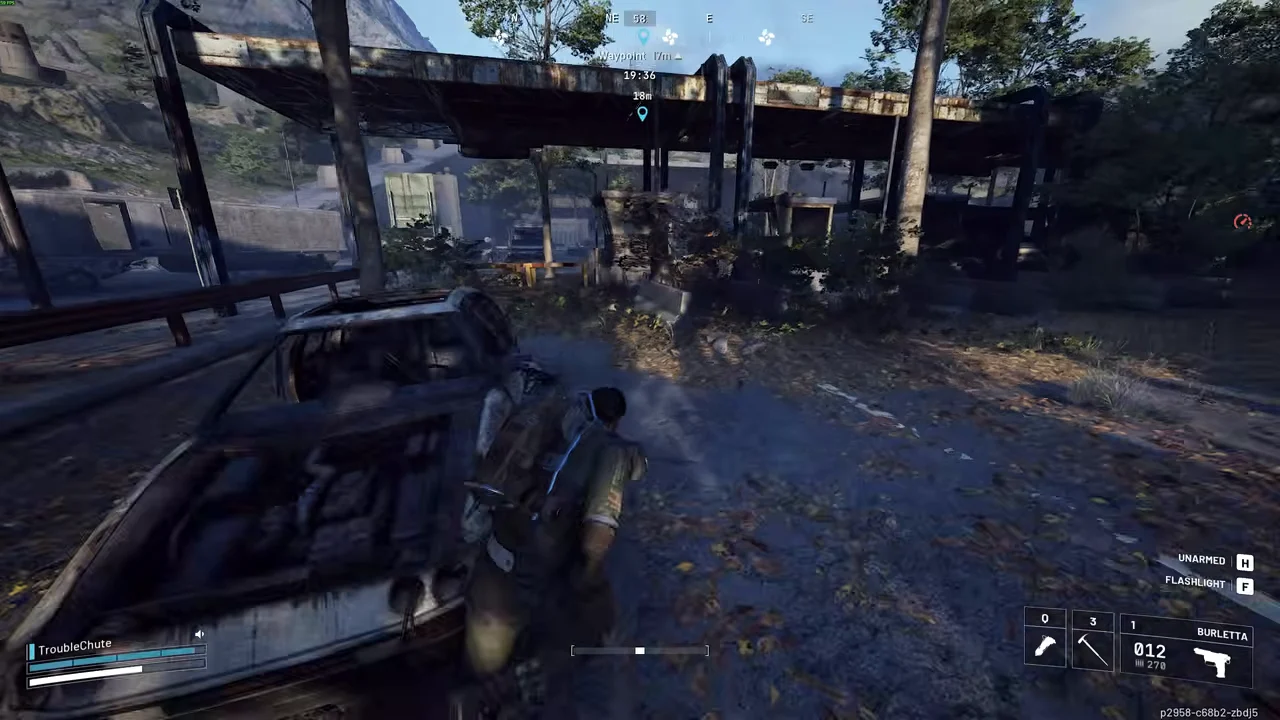
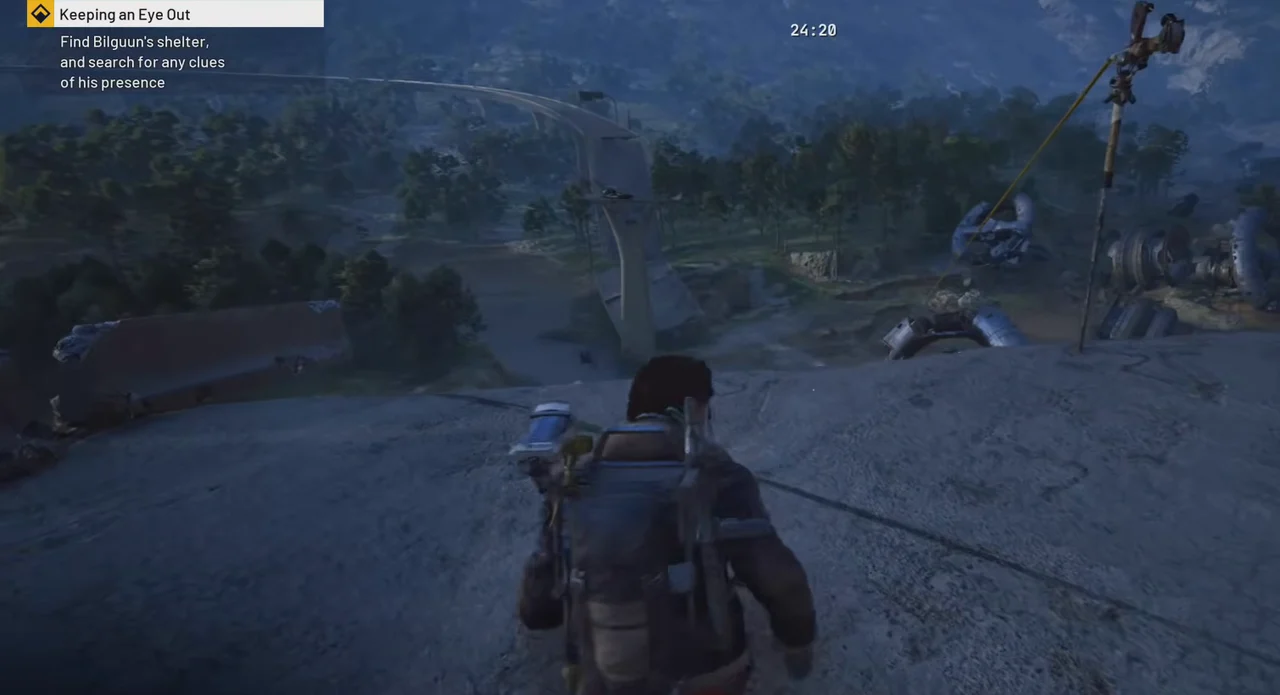
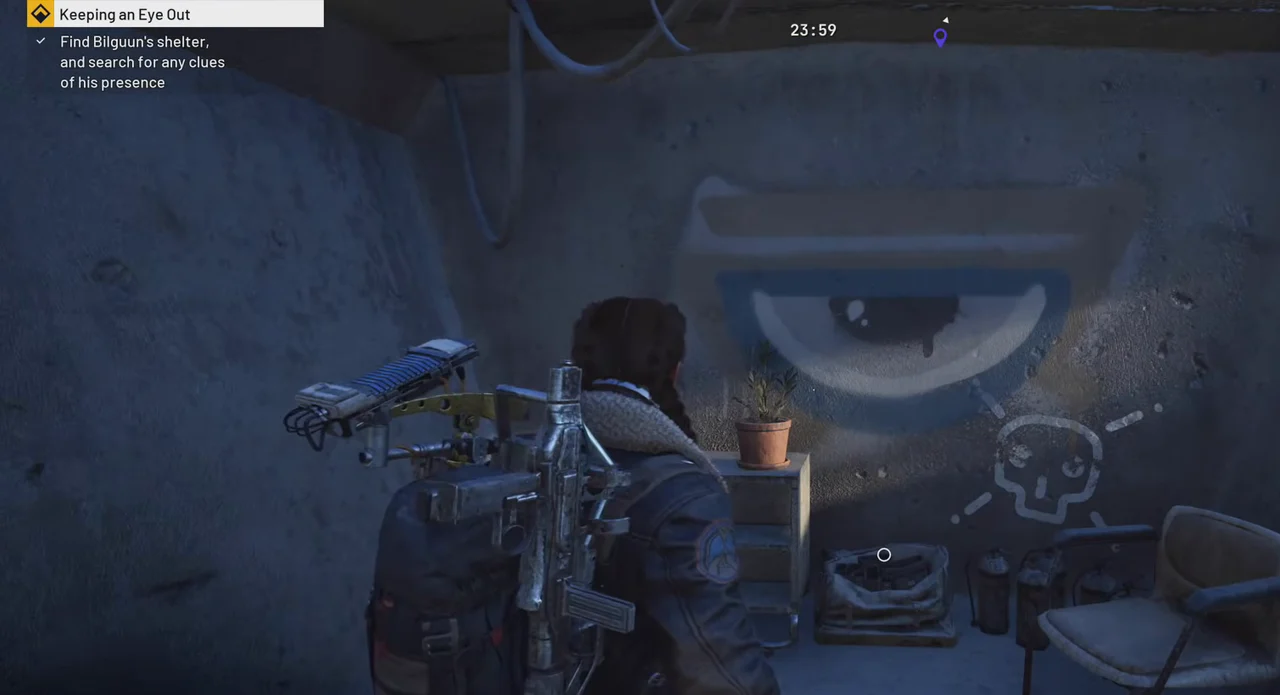
Follow the road at Highway Collapse on the southern edge of Barren Clearing to its broken end. The map waypoint marks this road approach, not the shelter interior. Drop from the road edge and jump into the hollow concrete bridge support beneath it to reach Bilguun's Shelter. In the shelter with the large eye/skull graffiti, inspect the clue for Keeping an Eye Out. This Blue Gate shelter is not Bilguun's Hideout on Spaceport, which belongs to What We Left Behind.
Forest Airshaft and Overlook Airshaft are extraction names to compare with your current raid map. They are not interchangeable with every vertical shaft leading out of the tunnels.
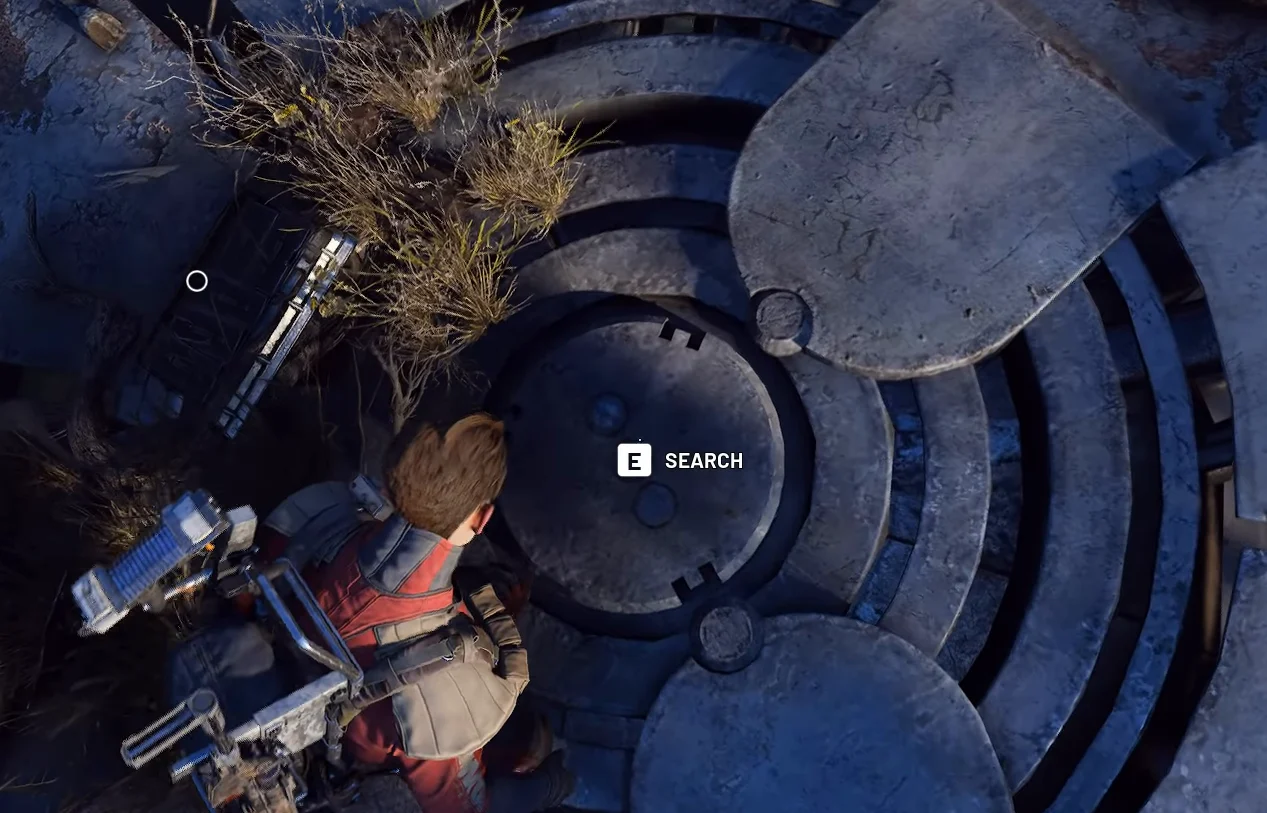
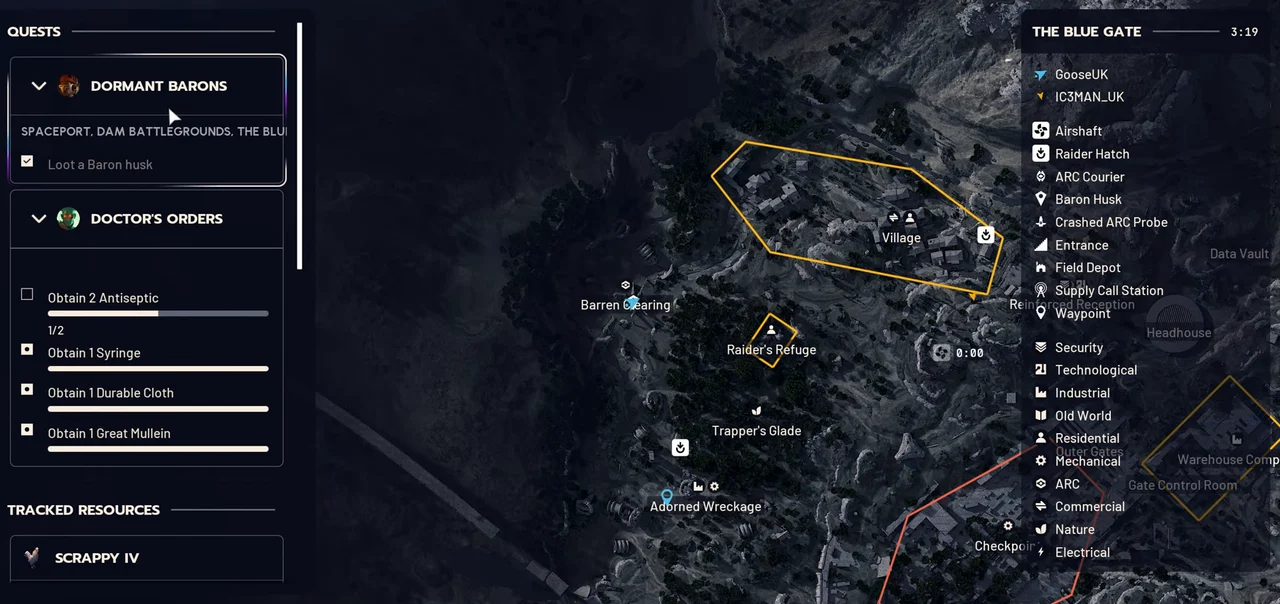
| POI | Area and layer | What it is | Quest walkthroughs |
|---|---|---|---|
| The CheckpointShow area on map | Central gate complex, with road buses outside the Traffic TunnelsSurface | Use an outside bus horn for Clamoring for Attention, with Bees! south at Olive Grove and A Better Use dependent on a usable Call Station prompt. | Clamoring for Attention A Better Use Bees! |
| Security CheckpointShow area on map | Beside the road within the surface Checkpoint footprint.Surface | Roadside guard-hut area at the Checkpoint, separate from Reinforced Reception. | Armored Transports |
| Reinforced ReceptionShow area on map | Gate-area descent toward the underground Security WingSurface entrance into underground routes | Follow the interior zipline toward the separately keyed Confiscation Room in the Security Wing, not the guard-hut card search. | |
| Car pileup by the gateShow area on map | Traffic Tunnel underground road, at the armored patrol-vehicle approach.Underground | Underground patrol-vehicle approach in the Traffic Tunnel area. Match the quest card prompt at the vehicle. | Armored Transports |
| The VillageShow area on map | Western Village settlement, with a broken greenhouse as the key-door landmarkSurface and house interiors | Find the boom-box prompt and the Village Key double doors near the greenhouse, treating The League only as a material search here. | Clamoring for Attention The League |
| Olive GroveShow area on map | South of the Checkpoint, beside the Ruined Homestead routeSurface orchard and nearby cellar descent | Keep the yellow-tarp beehive shed, communications terminal and Cellar Key hatch separate, with fruit dependent on what is present. | A First Foothold Bees! |
| Ruined HomesteadShow area on map | Southern homestead area, southeast of Olive GroveSurface | Use the homestead as an orchard and cellar landmark, not the Bees! shed or a promised Leaper encounter for material gathering. | Into the Fray Bees! |
| Highway CollapseShow area on map | Southern collapsed-highway areaSurface wreckage and shelter beneath the highway | Investigate the Deforester for Reduced to Rubble and the separate shelter beneath the highway for Keeping an Eye Out. | Keeping an Eye Out Reduced to Rubble |
| Adorned WreckageShow area on map | Southern investigation route near Highway CollapseSurface wreckage | Follow With a Trace from Barren Clearing to the communications device, but continue beneath Highway Collapse for Keeping an Eye Out's shelter. | Keeping an Eye Out With a Trace |
| Trapper's GladeShow area on map | Woodland clearing, follow the cellar entrance directionsSurface woodland with a reported cellar approach | Search for Great Mullein and confirm the reported cellar's key prompt, keeping that entrance separate from the Raider Refuge switch puzzle. | Doctor's Orders |
| Pilgrim's PeakShow area on map | Northern summit and Communication Tower complexSurface buildings with basement access | Use the antenna for Outstanding Balance and whiteboard for Groundbreaking, with Clamoring for Attention only an optional material search here. | Clamoring for Attention Outstanding Balance Groundbreaking |
| Communication TowerShow area on map | At Pilgrim's Peak inside the tower stairwell, down to the basement corridor.Surface approach to basement | Basement corridor approach under the Communication Tower at Pilgrim's Peak. Check the metal door prompt before spending the key. | |
| Warehouse ComplexShow area on map | Beside the Gate Control Room, south of Headhouse and the Data VaultSurface industrial buildings and tower approaches | Use the siren at the antenna base for Clamoring for Attention, not the top or Back On Top's separate lookout south of the warehouses. | Clamoring for Attention Back On Top |
| Gate Control RoomShow area on map | Central industrial cluster, beside the Warehouse ComplexSurface building | Use this building as a warehouse-route landmark, with no direct quest interaction established here. | |
| HeadhouseShow area on map | Industrial cluster north of the Warehouse ComplexSurface building, with tunnel routes beneath the area | Use Headhouse for patrol-car and lower Security Wing orientation, without substituting a Patrol Car Key for the Armored Patrol Key Card. | |
| Data VaultShow area on map | Industrial cluster north of the Warehouse ComplexSurface building | Keep this Blue Gate landmark separate from Stella Montis's Seed Vault and Buried City's seed-vault room without inferring a shared key or quest. | |
| MANTIKOR complexShow area on map | Inside the underground Security Wing, on the approach to the red-lit room.Underground | Security Wing interior approach to the MANTIKOR red-lit room. The recorded player position is not an exact door pin. | A Dead End |
| Traffic TunnelsShow area on map | Underground road through the Gate Approach, beside Security and Maintenance Wings.Underground | Main underground road-tunnel area, distinct from the adjoining Security and Maintenance Wings. | Armored Transports |
| Abandoned Housing ProjectShow area on map | Abandoned residential housing areaSurface and residential interiors | Search residential drawers and cabinets for possible keys without treating the area as a guaranteed drop or measured high-yield farm. | |
| Bilguun's ShelterShow area on map | Inside the hollow concrete bridge support below the broken road at Highway Collapse, on the southern edge of Barren Clearing.Surface approach to shelter beneath road | Road approach at Highway Collapse, southern Barren Clearing. Bilguun's Shelter and its clue are in a hollow concrete support beneath the broken road. | Keeping an Eye Out |
| Forest AirshaftShow area on map | West of Checkpoint. The mapped guide name is matched to the recorded native Airshaft symbol.Surface approach | Airshaft west of Checkpoint. Match the Forest Airshaft terminal and check its availability in your raid before descending. | Bees! |
| Overlook AirshaftShow area on map | Above Maintenance Bunker, southeast of Checkpoint. Also labelled Outlook Airshaft by a mapped guide.Surface approach | Airshaft above Maintenance Bunker, southeast of Checkpoint. Check the named terminal and raid availability before committing. | Bees! |
| Baron HuskShow area on map | Barren Clearing west of the Village. The pin marks the recorded search area, not an exact object coordinate.Surface | Recorded Baron Husk search area at Barren Clearing west of the Village. The footage shows Search and a completed Dormant Barons loot check. | Dormant Barons |
Plotted locations and overview areas
| Location | Layer | Precision | What it is |
|---|---|---|---|
| The Forest | surface | POI area | Use this western forest district as an overview, with Village objects requiring their own detailed markers. |
| The Mountains | surface | POI area | Use this northern mountain district as an overview, not an exact Pilgrim's Peak or Data Vault marker. |
| Gate Approach | surface | POI area | Use this district overview while keeping the road Traffic Tunnels separate from the underground facility. |
| Farmlands | surface | POI area | Use this southern Farmlands overview, not as a precise Adorned Wreckage or surveyor-hatch location. |
| Fragrant Hatch | surface | Native map symbol or approach with guide-matched name | Raider Hatch south of Checkpoint. Bring a Raider Hatch Key and confirm the Fragrant Hatch prompt in your raid. |
| Raider's Refuge | surface | Recorded building area | This recorded footprint identifies the building area, not an exact door or guaranteed interaction. |
| Cliffside Airshaft | surface | Native map symbol or approach with guide-matched name | Airshaft east of Raider's Refuge. Check the Cliffside terminal and current exit status, not the historical map countdown. |
| Lucky Hatch | surface | Native map symbol or approach with guide-matched name | Raider Hatch southeast of the Village. Bring a Raider Hatch Key and match the Lucky Hatch prompt before using it. |
| Outer Gates | surface | Recorded building area | This recorded footprint identifies the building area, not an exact door or guaranteed interaction. |
| Ridgeline | surface | Recorded building area | This recorded footprint identifies the building area, not an exact door or guaranteed interaction. |
| Broken Earth | surface | Recorded building area | This recorded footprint identifies the building area, not an exact door or guaranteed interaction. |
| Blue Gate Village Key · The Village | surface | Building access area, not exact door | Approach the Village and match the Blue Gate Village Key prompt, as the marker is not an exact door or loot guarantee. |
| Blue Gate Communication Tower Key · Pilgrim's Peak | surface | Building access area, not exact door | Approach Pilgrim's Peak and match the Blue Gate Communication Tower Key prompt, as the marker is not an exact door or loot guarantee. |
| A First Foothold · Olive Grove | surface | Objective area, not exact interactable | Complete the foothold route, including the Olive Grove communications terminal. |
| Bees! · Olive Grove | surface | Objective area, not exact interactable | Search the beehive in Olive Grove's yellow-tarp shed, not the nearby Cellar Key hatch. |
| Reduced to Rubble · Highway Collapse | surface | Objective area, not exact interactable | Investigate the Deforester at Highway Collapse. |
| Clamoring for Attention · The Village | surface | Objective area, not exact interactable | Activate the Warehouse Complex siren at its base, the Village boom box and the outside Checkpoint bus horn. |
| With a Trace · Adorned Wreckage | surface | Objective area, not exact interactable | Investigate Barren Clearing, Adorned Wreckage and the communications device. |
| Clamoring for Attention · The Checkpoint | surface | Objective area, not exact interactable | Activate the Warehouse Complex siren at its base, the Village boom box and the outside Checkpoint bus horn. |
| A Better Use · The Checkpoint | surface | Objective area, not exact interactable | Use a qualifying Call Station, with Checkpoint as a reported route option. |
| Outstanding Balance · Pilgrim's Peak | surface | Objective area, not exact interactable | Follow the antenna route at Pilgrim's Peak and search the quest container. |
| Groundbreaking · Pilgrim's Peak | surface | Objective area, not exact interactable | Find the whiteboard objective in the Pilgrim's Peak complex. |
| Clamoring for Attention · Warehouse Complex | surface | Objective area, not exact interactable | Activate the Warehouse Complex siren at its base, the Village boom box and the outside Checkpoint bus horn. |
| Back On Top · Warehouse Complex | surface | Objective area, not exact interactable | Reach the lookout south of the Warehouse Complex for the Blue Gate objective. |
| Armored Transports · Checkpoint guard-hut area | surface | Objective area, not exact interactable | Search Checkpoint guard huts for the Armored Patrol Key Card, not a Patrol Car Key, then reach the Traffic Tunnel vehicle. |
| Keeping an Eye Out · Bilguun shelter road approach | surface | Objective area, not exact interactable | Find the shelter beneath Highway Collapse. |
| Dormant Barons · Baron Husk at Barren Clearing | surface | Objective area, not exact interactable | Use a qualifying Baron Husk interaction on Blue Gate. |
| Prefab Hatch | surface | Native map symbol or approach with guide-matched name | Raider Hatch at the Abandoned Housing Project approach. Bring a Raider Hatch Key and check the terminal name and raid state. |
| Reinforced Hatch | surface | Native map symbol or approach with guide-matched name | Raider Hatch west of Trapper's Glade. Bring a Raider Hatch Key and confirm the Reinforced Hatch interaction before using it. |
| Warehouse Airshaft | surface | Native map symbol or approach with guide-matched name | Airshaft at Warehouse Complex. Check the named exit and its current status before relying on this industrial-area route. |
| Security Wing | underground | Recorded underground wing area | Use the underground view to distinguish Security Wing from the Traffic Tunnel and Maintenance Wing. |
| Maintenance Wing | underground | Recorded underground wing area | The maintenance-side rooms in the underground network. Do not confuse them with Security Wing. |
| Armored Transports · Traffic Tunnel | underground | Objective area, not exact interactable | Search Checkpoint guard huts for the Armored Patrol Key Card, not a Patrol Car Key, then reach the Traffic Tunnel vehicle. |
| Armored Transports · Armored Transports vehicle approach | underground | Objective area, not exact interactable | Search Checkpoint guard huts for the Armored Patrol Key Card, not a Patrol Car Key, then reach the Traffic Tunnel vehicle. |
Resource Locations on the Blue Gate
Wires and Batteries
Search the electrical and server-room interiors at Pilgrim's Peak for Wires and Batteries. Bring the materials for an active repair instead of relying on a particular cabinet still being available when you arrive.
Clamoring for Attention needs 3 Wires and a Battery for its repair interactions. Keep that stack reserved while looting. Spending it on an optional mechanism can leave the quest unfinished even though you reached all the right landmarks.
Used by: Clamoring for Attention and Trash into Treasure.
Great Mullein
Inspect vegetation around Trapper's Glade, Highway Collapse, Ruined Homestead, the Checkpoint approaches, and Forest Airshaft for Great Mullein. These are search areas rather than a promise that each location has a plant in every raid.
Look at the ground and plant beds instead of searching only containers. Harvest what is present along the route you already need, then leave the open patch before sorting inventory.
Used by: Doctor's Orders.
Mushrooms
Look for Mushrooms in shaded woodland and around the bases of trees, with the Trapper's Glade route a useful place to inspect. They are loose natural resources, not a guaranteed reward from a cellar or industrial room.
A fruit or plant run should stay flexible. When a patch is empty, continue toward your next objective instead of waiting for a resource to appear or forcing a long detour for a fixed yield that is not assured.
Used by: optional natural-resource gathering rather than a dedicated Blue Gate quest objective.
Scrappy Fruit at Olive Grove
Olive Grove is the natural stop for Olives, Lemons, and Apricots along an orchard route. Check the trees and ground for the fruit that is actually present. Check Pears separately if your upgrade asks for them rather than assuming every required fruit comes from the same grove.
Confirm the requested fruit before loading in. The nearby beehive shed, terminal, and cellar are useful reasons to visit, but none of them guarantees a complete upgrade's worth of fruit.
Used by: Scrappy upgrades that ask for the fruit you collect.
Call Stations and Field Depots
Check the Call Station layer near the Checkpoint when planning A Better Use. Verify the interaction at the station before making it the focus of the raid. An existing marker does not establish that a supply call is currently available.
For Off The Radar, use the actual Field Depot terminal required by the quest, not a Call Station, guard desk, or extraction console. The Call Stations guide and Field Depots guide explain the different interactions. Do not carry a crate toward an assumed depot without checking its destination.
Used by: A Better Use and Off The Radar when their required interaction is available.
Extraction Points on the Blue Gate
Check Forest Airshaft and Overlook Airshaft against the names and status on your raid map before choosing an exit. A recorded Forest Airshaft shutdown warning gives 90 seconds, not a universal closing rule. Use your own raid's warning and timer rather than treating that notice as a fixed schedule.
The extraction footage descends through a circular surface opening with metal grating and yellow lights into a round interior. The console reads RETURN TO SPERANZA. The earlier Forest warning does not prove that this physical shaft is Forest Airshaft, so match the terminal name in your raid. A traversal shaft is not an extraction without a functioning return terminal.
| Exit | Recorded Area | Before You Commit |
|---|---|---|
| Forest Airshaft | West of Checkpoint | Match the named terminal and check the exit timer. |
| Overlook Airshaft | Above Maintenance Bunker, southeast of Checkpoint | Also labelled Outlook in a mapped guide. Check the terminal name in your raid. |
| Cliffside Airshaft | East of Raider's Refuge | Check the surface approach and remaining availability. |
| Warehouse Airshaft | Warehouse Complex | Check the industrial approach and the active exit timer. |
| Fragrant Hatch | South of Checkpoint | Bring a Raider Hatch Key and check the prompt. |
| Lucky Hatch | Southeast of the Village | Bring a Raider Hatch Key and check the prompt. |
| Prefab Hatch | Abandoned Housing Project approach | Bring a Raider Hatch Key and check the prompt. |
| Reinforced Hatch | West of Trapper's Glade | Bring a Raider Hatch Key and check the prompt. |
Treat this as route planning, not a fixed list of exits guaranteed to be open together. Check the timer on the selected exit. A key-room detour is a poor trade when it leaves you needing a long surface crossing after your preferred exit closes.
Before boarding, check what the journal asks you to carry. A completed interaction, an item secured in inventory, and a successful extraction are different states. Do not deliberately abandon a Bees! or investigation run based on somebody else's account of whether rewards persist after death.
For an underground run, identify the return shaft before opening your first room. Once you have the material or quest item you came for, the second key room is optional.
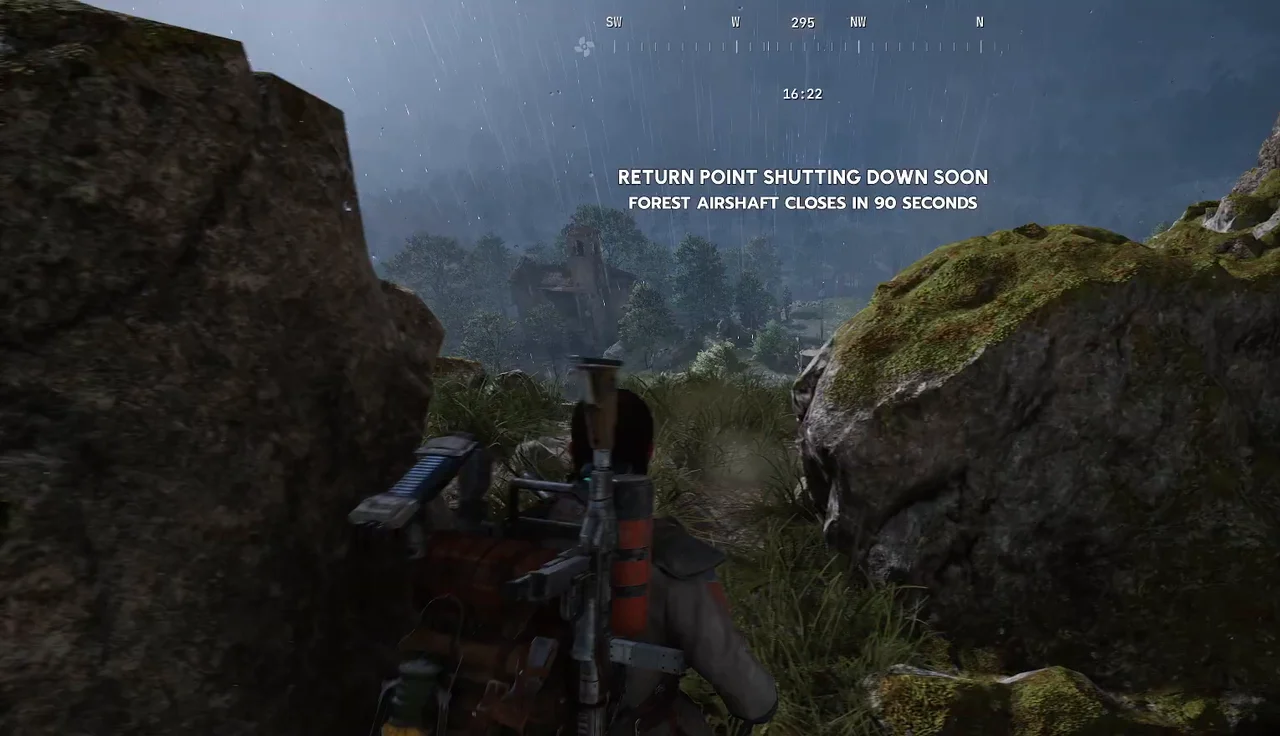
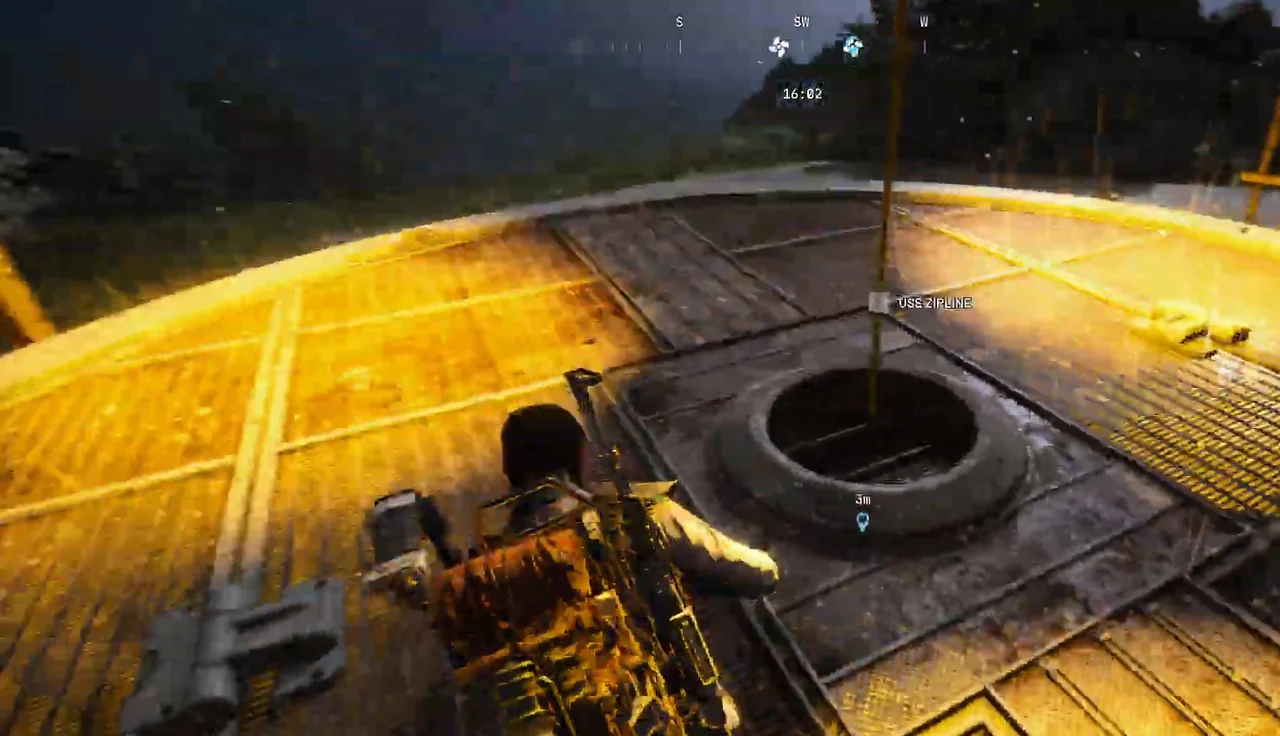
Quests on the Blue Gate
Blue Gate combines dedicated investigations with cross-map material and utility objectives. Use the table to choose the active quests that fit your entry point, then check the item or interaction required at each stop. Pilgrim's Peak is especially useful for combining a summit objective with an electrical search or a basement key stop.
Pilgrim's Peak and the Orchard
Outstanding Balance is Tian Wen's antenna investigation at Pilgrim's Peak. Check for the note after interacting with its container instead of leaving as soon as the first prompt finishes. Groundbreaking, from Apollo, uses the whiteboard route in the same summit complex.
A First Foothold includes the Olive Grove communications terminal as part of a wider set of locations. Bees!, from Celeste, uses the yellow-tarp shed and beehive. Check the journal after each interaction rather than assuming that visiting the grove completes both quests.
Wreckage and Investigation Routes
Reduced to Rubble uses the Deforester investigation at Highway Collapse. With a Trace continues an investigation through Barren Clearing and Adorned Wreckage. The latter includes a communications device, not just a proximity visit to a large wreck.
A Prime Specimen requires the Deforester that offers the quest interaction in that raid. Bring the required ARC Powercells and inspect the machine before committing them. An inactive wreck that looks similar is not a substitute.
Keeping an Eye Out uses the shelter beneath the collapsed highway. A Dead End instead sends you into the MANTIKOR complex and its power puzzle. Use each quest's landmark and current step rather than turning all southern clues into one destination.
Gate, Village, and Utility Work
Armored Transports starts with the guard-hut card search and continues to a locked armored patrol car in the Traffic Tunnel. Use the Armored Patrol Key Card named by that objective, not the generic Patrol Car Key.
Clamoring for Attention, from Shani, combines the Warehouse Complex siren, Village boom box, and road bus at the Checkpoint. Bring 3 Wires and a Battery, activate the siren at its base, and use the surface bus with the horn prompt. Tunnel buses do not replace it.
The Clean Dream has work on both Blue Gate and Spaceport. Filtration and purification are separate objectives, so completing one mechanism is not proof that you have finished the other map's stage.
Cross-Map Opportunities
Dormant Barons can use a qualifying Baron Husk. Off The Radar and A Better Use depend on their respective depot or station interactions. Mixed Signals and Into the Fray require the relevant ARC target or material, so add them only when the actual opportunity fits your run.
Back On Top has a Blue Gate lookout objective near the industrial route. Paving the Way also includes Blue Gate in its wider map coverage, but an arbitrary industrial door is not an ENELICA objective. Doctor's Orders and The League can benefit from suitable resource finds without making every plant or Village container a dedicated quest marker.
| Quest | Trader | Objective location | Round and extraction | Route note |
|---|---|---|---|---|
| Outstanding Balance | Tian Wen | Follow the antenna route at Pilgrim's Peak and search the quest container.Show Pilgrim's Peak on map | One round: Required Extraction: Required | Pick up the revealed note after searching, as the first interaction does not confirm collection. |
| A First Foothold | Apollo | Complete the foothold route, including the Olive Grove communications terminal.Show Olive Grove on map | One round: Not required Extraction: Not required | The Olive Grove terminal is only one stop, so check every journal objective. |
| Reduced to Rubble | Shani | Investigate the Deforester at Highway Collapse.Show Highway Collapse on map | One round: Not required Extraction: Required | A registered interaction does not establish that any extraction or turn-in requirements are met. |
| With a Trace | Shani | Investigate Barren Clearing, Adorned Wreckage and the communications device.Show Adorned Wreckage on map | One round: Check quest journal Extraction: Not required | Reaching the wreck does not replace inspecting its communications device. |
| Groundbreaking | Apollo | Find the whiteboard objective in the Pilgrim's Peak complex.Show Pilgrim's Peak on map | One round: Check quest journal Extraction: Check quest journal | The whiteboard is separate from the antenna objective and Communication Tower basement key room. |
| A Prime Specimen | Shani | Find a Deforester offering the quest interaction in your current raid. | One round: Check quest journal Extraction: Check quest journal | Bring 2 ARC Powercells and check the prompt, as not every wreck works and no fixed active target count is established. |
| Keeping an Eye Out | Celeste | Find the shelter beneath Highway Collapse.Show Bilguun shelter road approach on map | One round: Not required Extraction: Check quest journal | Adorned Wreckage is not the final shelter destination. |
| A Dead End | Shani | Follow the MANTIKOR power puzzle to the Red Room and collect the Dusty Film Reel. | One round: Required Extraction: Required | The Red Room investigation is not the Confiscation Room stop. |
| Bees! | Celeste | Search the beehive in Olive Grove's yellow-tarp shed, not the nearby Cellar Key hatch.Show Olive Grove on map | One round: Check quest journal Extraction: Not required | Check pickup and turn-in progress rather than assuming the quest is complete and abandoning the raid. |
| Armored Transports | Tian Wen | Search Checkpoint guard huts for the Armored Patrol Key Card, not a Patrol Car Key, then reach the Traffic Tunnel vehicle.Show Checkpoint guard-hut area on mapShow Traffic Tunnel on mapShow Armored Transports vehicle approach on map | One round: Check quest journal Extraction: Not required | With the quest active and card missing, check the right-entrance guard shack's rations container, but spare recovery is not assured. |
| Clamoring for Attention | Shani | Activate the Warehouse Complex siren at its base, the Village boom box and the outside Checkpoint bus horn.Show The Village on mapShow The Checkpoint on mapShow Warehouse Complex on map | One round: Not required Extraction: Not required | Bring 3 Wires and a Battery, and use an outside bus because tunnel buses do not count. |
| The Clean Dream | Apollo | Follow the Blue Gate stage of the filtration and purification quest shared with Spaceport. | One round: Not required Extraction: Not required | Follow the Blue Gate journal prompt, and keep filtration and purification objectives separate. |
| Dormant Barons | Shani | Use a qualifying Baron Husk interaction on Blue Gate.Show Baron Husk at Barren Clearing on map | One round: Check quest journal Extraction: Check quest journal | A Deforester is not a Baron Husk, and the Village label does not guarantee a usable encounter. |
| Off The Radar | Shani | Use a Field Depot with the required quest prompt. | One round: Required Extraction: Check quest journal | No exact Blue Gate depot is established here, so check that the interaction is usable in your raid. |
| A Better Use | Tian Wen | Use a qualifying Call Station, with Checkpoint as a reported route option.Show The Checkpoint on map | One round: Check quest journal Extraction: Not required | Check the station's prompt rather than assuming it is active in every raid. |
| Mixed Signals | Shani | Use a suitable encounter as a material opportunity for the required Surveyor Vault.Related quest, not an objective on this map | One round: Check quest journal Extraction: Check quest journal | No fixed Blue Gate objective is established here, so follow the journal's target and handoff requirements. |
| Into the Fray | Shani | Use a suitable encounter as a gathering option for the required Leaper Pulse Unit.Related quest, not an objective on this map | One round: Check quest journal Extraction: Check quest journal | Ruined Homestead is only a route reference, not a guaranteed Leaper spawn or fixed Blue Gate target. |
| Back On Top | Tian Wen | Reach the lookout south of the Warehouse Complex for the Blue Gate objective.Show Warehouse Complex on map | One round: Not required Extraction: Check quest journal | The siren interaction at the antenna base is not the lookout objective. |
| Paving the Way | Apollo | Use a qualifying ENELICA building for the active Blue Gate objective. | One round: Not required Extraction: Check quest journal | Follow the journal to the matching door or panel. Not every industrial mechanism is a quest objective. |
| Doctor's Orders | Lance | Use Trapper's Glade and suitable plant patches as optional Great Mullein gathering routes.Related quest, not an objective on this map | One round: Check quest journal Extraction: Check quest journal | This any-map delivery has no fixed Blue Gate objective, and the other requested supplies must be gathered separately. |
| The League | Apollo | Use Village containers as an optional source of delivery items.Related quest, not an objective on this map | One round: Not required Extraction: Required | No Blue Gate kiosk-photo objective is established here, so do not confuse gathering with the magazine photograph. |
| Trash into Treasure | Shani | Use electrical areas such as Pilgrim's Peak as optional gathering routes for Wires and a Battery.Related quest, not an objective on this map | One round: Not required Extraction: Required | These searches have no dedicated quest interaction or guaranteed container contents. |
| What We Left Behind | Tian Wen | This related row points to Bilguun's Hideout on Spaceport, not a Blue Gate objective.Related quest, not an objective on this map | One round: Not required Extraction: Not required | Do not substitute Blue Gate's Bilguun's Shelter for the Spaceport stop or the Buried City camp beneath the Parking Garage. |
Stacking Quests on the Blue Gate
Pilgrim's Peak
Outstanding Balance and Groundbreaking share the summit complex. Add the Communication Tower basement only when you have its key and a viable return route. Searching electrical containers can supply Clamoring for Attention, but it is a resource stop for that quest, not a third summit objective.
Bring required repair materials from your stash where possible. Reaching the antenna with an empty material stack does not make a distant repair objective easier.
Olive Grove
Bees! and A First Foothold have separate interactions in the grove. Identify the yellow-tarp shed and the communications terminal before looking for fruit or the Cellar Key hatch. Optional loot should not displace the item needed for the active quest.
The Checkpoint and Traffic Tunnel
Clamoring for Attention can use the surface road bus before Armored Transports takes you into the nearby tunnel. The shared approach is useful, but the bus and armored-car interactions are not on the same vehicle.
After collecting the quest card, protect it when your loadout allows that item in a safe pocket. Find the target car before adding the Confiscation Room, since a second underground objective means another chance to lose your return route.
Highway Collapse
Reduced to Rubble and Keeping an Eye Out share the collapsed-highway area. Inspect the machine for one quest and find the shelter below the structure for the other. With a Trace can bring you back to neighboring wreckage later in the chain, so do not assume every investigation quest is available simultaneously.
Read the journal before treating a chain as a single-raid checklist. Nearby locations save travel only when their quests are active and their completion rules are compatible.
Blue Gate Threats
Surface Machines and Deforesters
A Leaper can make the Ruined Homestead approach difficult. Check the actual patrol and keep solid cover between you and its attack before stopping at a cellar hatch or shed. Flying ARC can also expose a route that looked quiet from the ridge.
For A Prime Specimen, a Deforester is a raid-dependent interaction target. Do not infer an active target from a static wreck marker or spend your supplies on the assumption that every machine of the same shape works.
Underground Angles
Tunnel corners, stairs, and zipline landings limit your view. Pause before committing to the next room, especially when the sound of another raider or machine is coming from the same direction as your exit.
A room door is not permanent protection. A Door Blocker can help control an approach, but it does not make the room secure against every threat or remove the need to leave it.
Losing the Armored Transports Card
Do not assume a lost Armored Patrol Key Card permanently ends the quest. A spare-card route is documented at the guard shack just inside the right Traffic Tunnel entrance, in a rations container on the floor, when the quest is active and the card is absent from your inventory.
Check that quest state and container before falling back to random loot searches. This is a recovery route to inspect, not a promise that every inventory or quest bug is fixed. Keep the card distinct from the generic Patrol Car Key throughout the attempt.
Other Raiders
An informal truce is not an extraction guarantee. Keep enough distance to react, avoid blocking your own exit while looting with strangers, and do not treat a solo queue or a quiet earlier raid as proof that the next encounter will be friendly.
FAQ
Where Is the Blue Gate Confiscation Room?
It is in the underground Security Wing beside the Traffic Tunnels beneath the Headhouse area. The Reinforced Reception descent is one approach into the lower complex. Follow the confiscated-goods door and MANTIKOR signage, then confirm that the prompt asks for the Confiscation Room Key.
What Does the Blue Gate Cellar Key Open?
It opens compatible cellar doors at multiple locations, but each use consumes a key. The orchard-side stone-wall hatch is a useful starting route, with another cellar approach reported around Trapper’s Glade. Check the prompt instead of assuming every shelter or switch-puzzle cellar uses this item.
Where Do You Use the Blue Gate Village Key?
Use it at the large double-door building near the broken greenhouse in the Village. Identify the building and key prompt before relying on a compass direction. The Village’s position on the wider map and the door’s position within the Village describe different scales of location.
How Do You Get Into the Blue Gate Tunnels?
Use a named surface shaft, the Reinforced Reception descent, or a road-tunnel entrance for the appropriate branch. Check the underground view and physical connections as you move. A vertical shaft is usually a way between levels, not automatically a terminal that extracts you to Speranza.
Can You Recover a Lost Armored Transports Key Card?
Check the spare-card container in the guard shack just inside the right Traffic Tunnel entrance while the quest is active and the card is missing. It is a rations container on the floor. Do not confuse this quest card with the separate Patrol Car Key.
Is the Blue Gate Communication Tower the Spaceport One?
No. Blue Gate’s Communication Tower is at Pilgrim’s Peak and has its own basement key room. The Communications Tower used by the Spaceport route is on a different map. Match the map name and the required key or quest interaction before planning the climb.
Plan Your Next Blue Gate Run
Choose the quest you want to finish, check its required items, and build the route around an available exit. For help with the objective, view the quest boost options.
Gameplay Image Credits
Gameplay images adapted from the following creators. Captures have been cropped or resized for this guide.
- The Blue Gate surface, The Blue Gate surface: gameplay capture by Platinum Hunter. Cropped or resized for this guide.
- The Blue Gate underground, The Blue Gate location photos: gameplay capture by TroubleChute Basics. Cropped or resized for this guide.
- The Blue Gate location photos: gameplay capture by iDentity. Cropped or resized for this guide.
- The Blue Gate location photos: gameplay capture by Arekkz Gaming. Cropped or resized for this guide.
- The Blue Gate location photos: gameplay capture by FluffyBanditGaming. Cropped or resized for this guide.
- The Blue Gate location photos: gameplay capture by PazarGamingGuides. Cropped or resized for this guide.
- The Blue Gate location photos: gameplay capture by TroubleChute Basics. Cropped or resized for this guide.
- The Blue Gate location photos: gameplay capture by HarryNinetyFour. Cropped or resized for this guide.
- The Blue Gate location photos: gameplay capture by Goose UK. Cropped or resized for this guide.