

Buried City
surface · 66 overview areasShow on map
Use the key-room and pharmacy markers to choose a district, then read the building route before moving. A roof objective and a ground-floor room can occupy the same place on the map without sharing an entrance.
Buried City Key Rooms
Keep the key for the door you actually plan to open. Keys are single-use access items, not permanent unlocks, and an unprotected key can be lost with your loadout. Put it in a safe pocket when your augment allows it. Residential drawers, desks, cabinets, and luggage are places to search for keys, but no apartment guarantees a drop.
Grandioso Apartments offers residential containers alongside several quest routes. Search what is on your path rather than crossing the city solely to roll another drawer. A Night Raid changes the run you are entering, not the need to identify the correct door or protect the key.
Residential Master Key
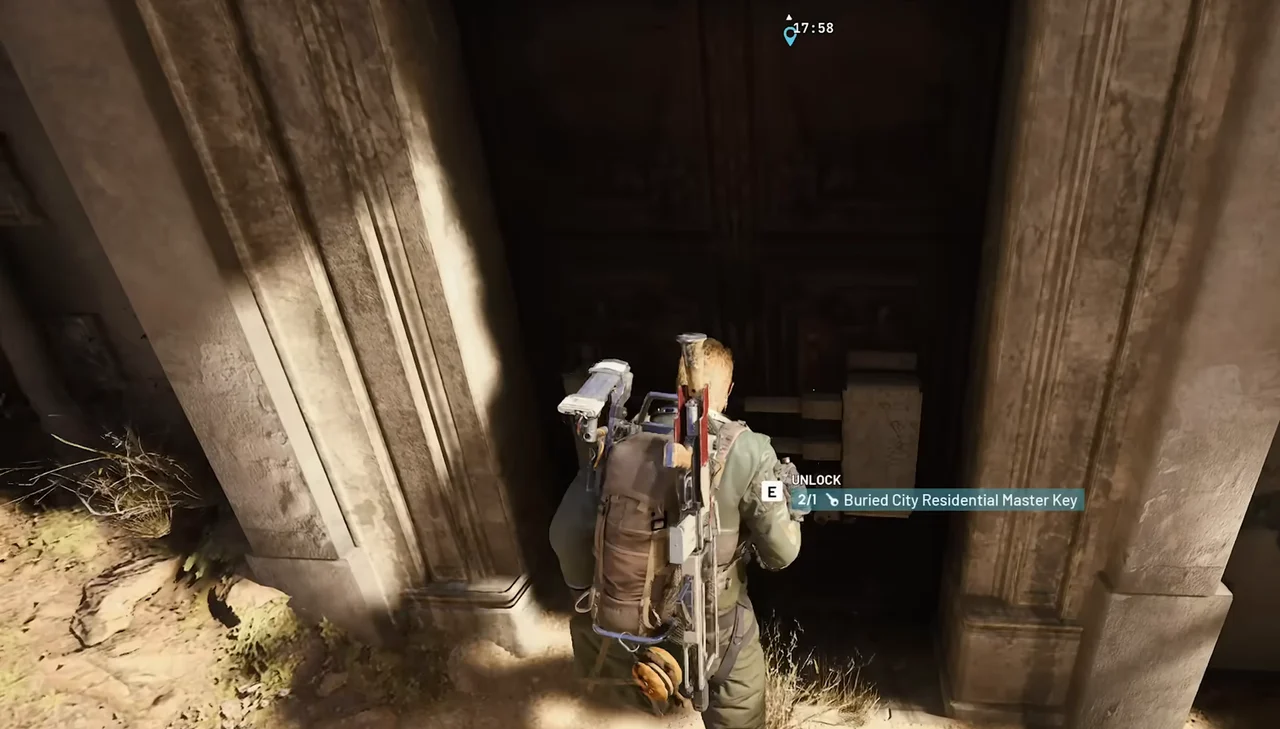
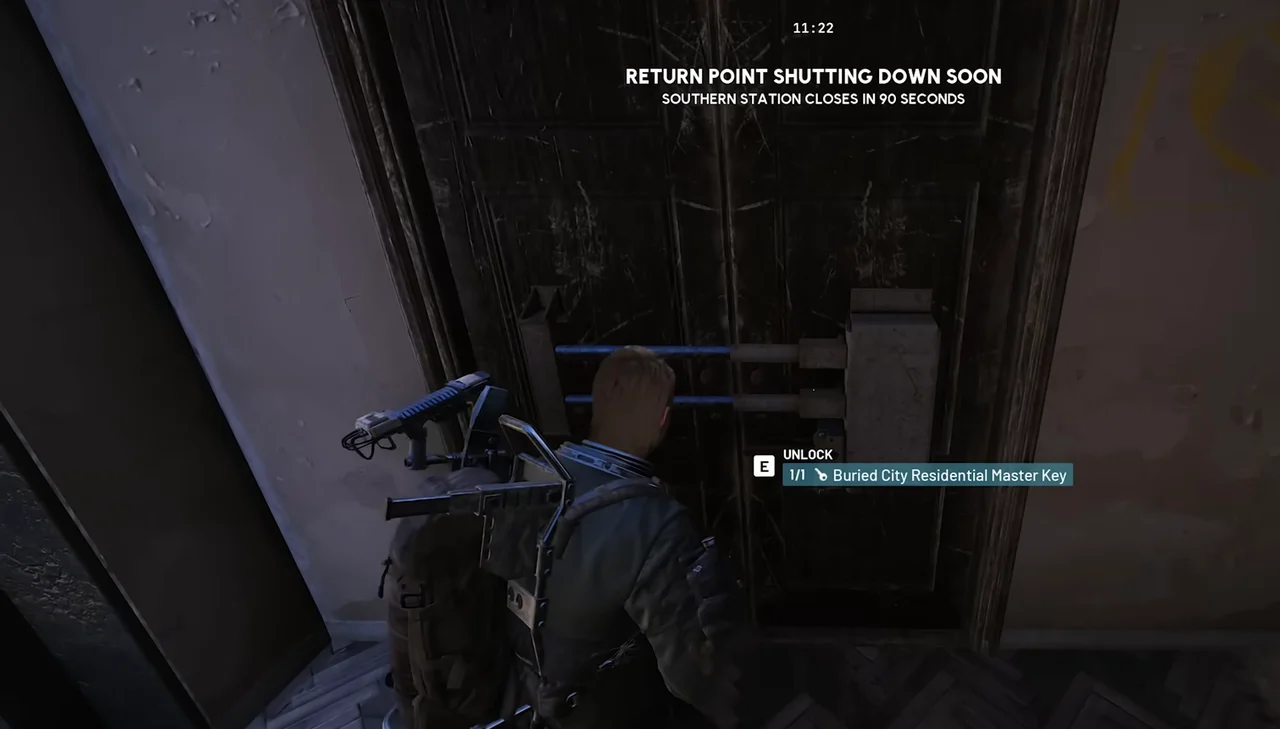
The Buried City Residential Master Key works on multiple compatible apartment doors, rather than one uniquely named room. That does not mean one copy opens every apartment. Using the key consumes it, so choose a door before spending it.
At the north side of Grandioso Apartments, approach the ground-level arched entrance and check the door for the Buried City Residential Master Key unlock prompt.
A second door is in a separate apartment building west of Plaza Rosa and north of Main Street. Reach the second floor, identified by the 02 floor sign, and check for the same key prompt. Do not assume other apartment doors accept this key or contain a specific item.
A master-key route is easiest to justify when you already have a roof or residential objective nearby. Keep enough room for the quest item before filling your inventory with optional loot.
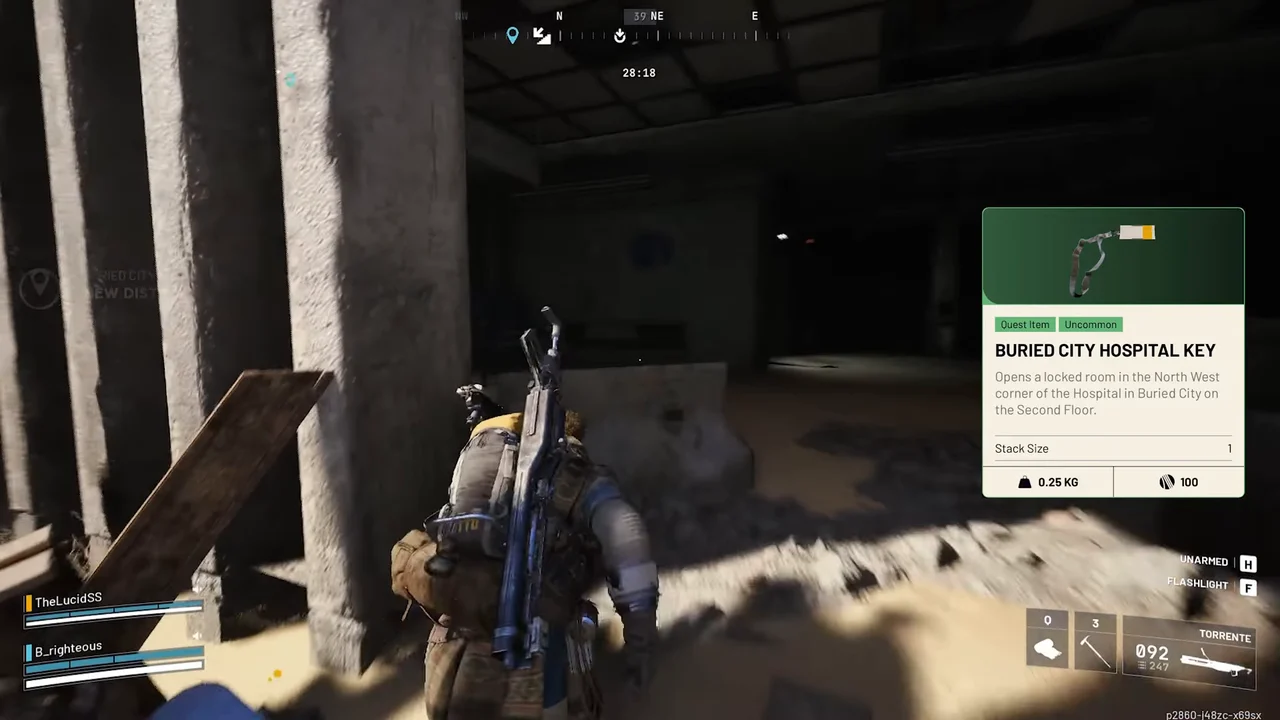
Hospital Key
The Buried City Hospital Key opens an interior room on the upper levels of the Hospital, beside the Parking Garage. Reaching the Hospital and reaching its locked room are separate steps. The exterior scaffolding gives you an alternative to searching for a street-level entrance.
Use the scaffolding or the building's vertical access to reach the upper interior, then match the door prompt to the Hospital Key. Keep the staircase landing clear before unlocking. Medical containers elsewhere in the building can still matter for Medical Merchandise, so you do not need to spend a key simply to begin that Hospital objective.
Town Hall Key
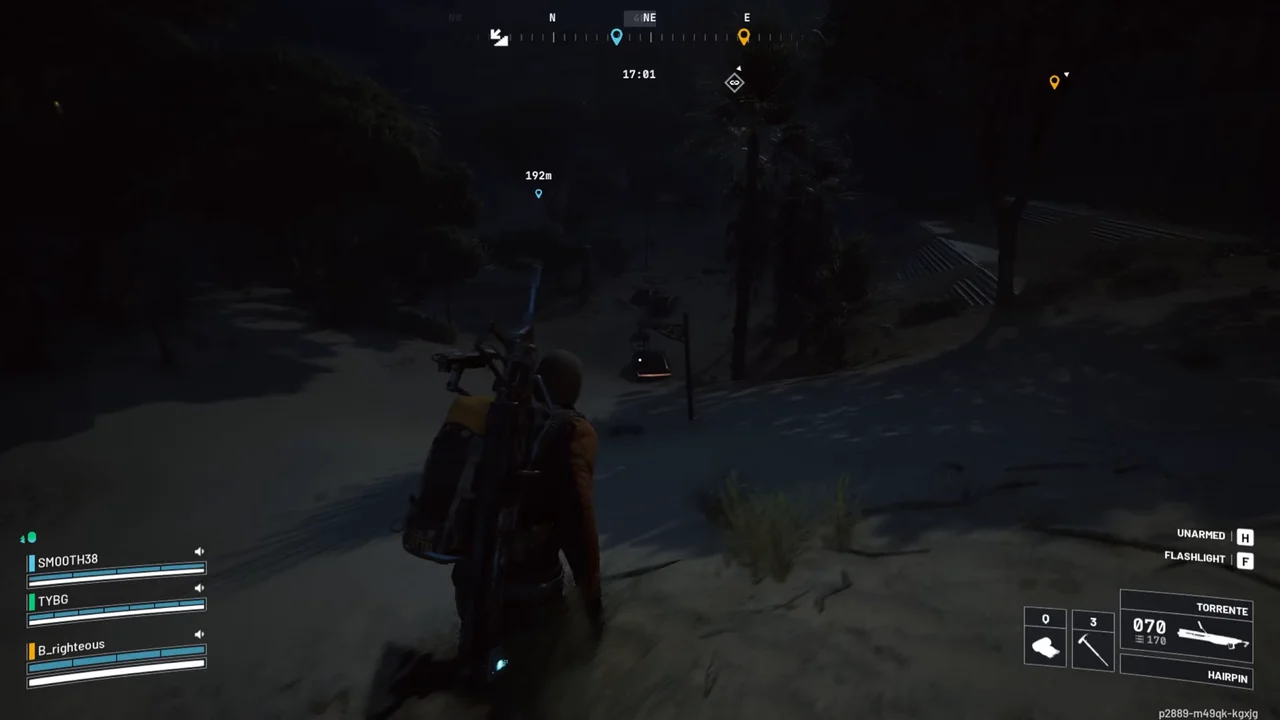
The Buried City Town Hall Key is used at the northern ground-level entrance of Town Hall. Start outside the building and identify that entrance instead of searching upper offices for another locked room.
Our Presence Up There awards this key, making that quest a useful preparation step for a later Buried City raid. Check your stash before hunting a replacement. Once inside, search the room's containers on their own merits rather than budgeting the raid around a fixed number of safes, a named gun, or a guaranteed profit.
JKV Employee Access Card
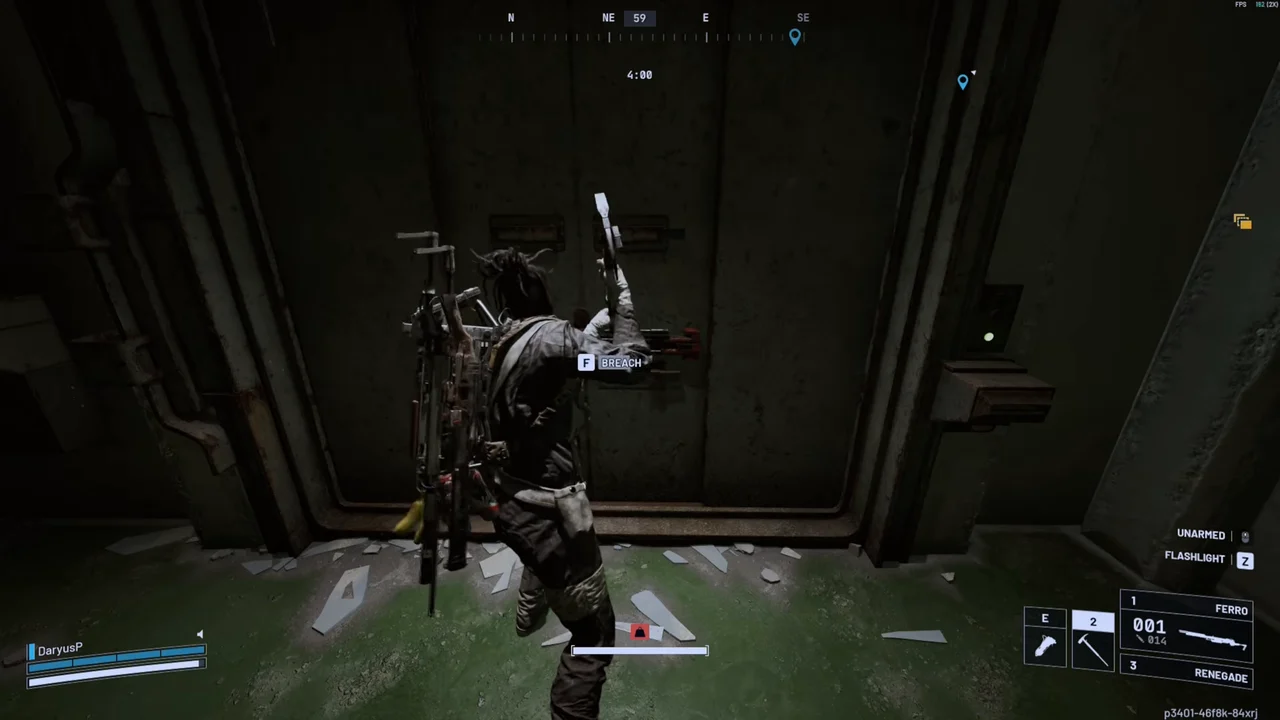
The Buried City JKV Employee Access Card opens the security door on the floor marked 4 in Space Travel. Look for the red light above the door and check the stairwell number. The floor label is a better confirmation than counting landings from whichever entrance you used.
You can approach Space Travel from its northeast entrance or reach its roof from the Galleria roof zipline and work downward. Stop at floor 4 for the card room. The floor 6 Locked Room used by Greasing Her Palms is a different destination, so reaching one does not prove you have completed the other.
Space Travel belongs to J Kozma Ventures, the name also found on the containers used for Cold Storage on Stella Montis. Pair the rooftop approach with Eyes in the Sky only after checking both quests' actual objectives and access requirements.
For another map's doors, use the ARC Raiders keys guide. The ARC Raiders keys service is the relevant option when access, rather than the route itself, is your blocker.
Pharmacies and Medical POIs in Buried City
Find Buried City pharmacies by the Farmacia lettering and green cross on the building facade, not by expecting a dedicated pharmacy label on the in-game map. A medical-loot symbol and a pharmacy storefront are not the same thing. The pharmacy stops to distinguish are Arbusto Farmacia at Piazza Arbusto and the separate shop at Plaza Rosa.
Piazza Arbusto and the Apartment Above
Arbusto Farmacia is the pharmacy near Piazza Arbusto, east of Town Hall. Its storefront sits beneath residential rooms, with the Eastern Station approach nearby. Identify the sign first, then decide whether your objective is in the shop or upstairs.
A Reveal in Ruins uses the pharmacy search for the ESR Analyzer. Search the quest container and collect the item it reveals before leaving. An ordinary analyzer from another container is not a reliable substitute for triggering the pharmacy objective.
Life of a Pharmacist sends you to the apartment above the shop. Check its four clues rather than treating a search downstairs as completion. These are two useful visits to one building, but they are not one shared interaction, and a later quest in your trader progression may not yet be available.
Plaza Rosa Pharmacy
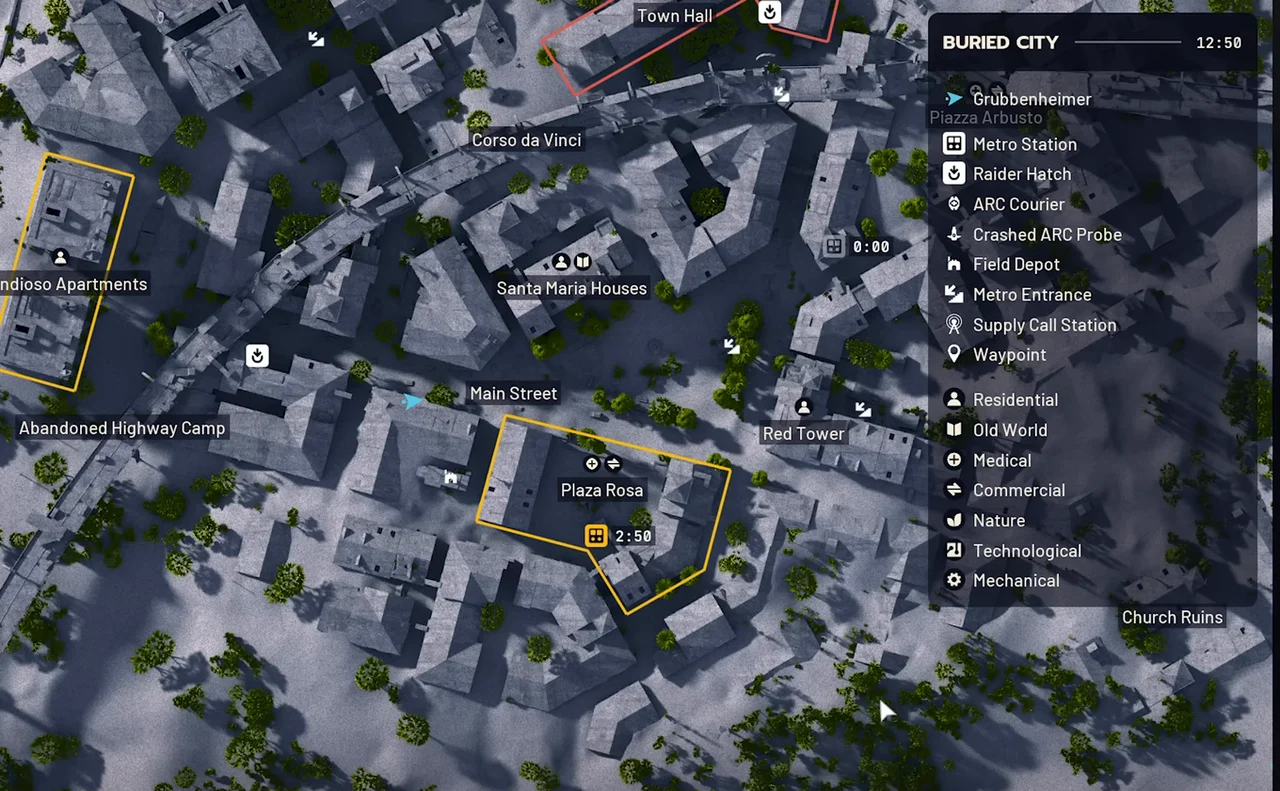
The other pharmacy is at Plaza Rosa, south of the Town Hall district. The shop faces a street junction near the Red Tower. Its green cross belongs on the facade, which helps distinguish it from an unrelated medical container deeper in the city.
Use this pharmacy when it fits your approach or when the other shop has already been searched. Do not cross the map merely because somebody calls one shop safer. Choose the route with an available exit and manageable sightlines in your raid.
Hospital and Galleria Medical Stops
The Hospital is the container-search stop for Medical Merchandise. The Galleria adds a different kind of medical resource: Great Mullein in planter beds on the first-floor shopping level. For Doctor's Orders, look for the plant itself rather than expecting it to appear in a medical drawer.
Check which objective you are satisfying before entering. A pharmacy quest object, a Hospital container search, and a harvested plant can all support medical quests without being interchangeable.
Plaza Rosa Is Not Piazza Roma
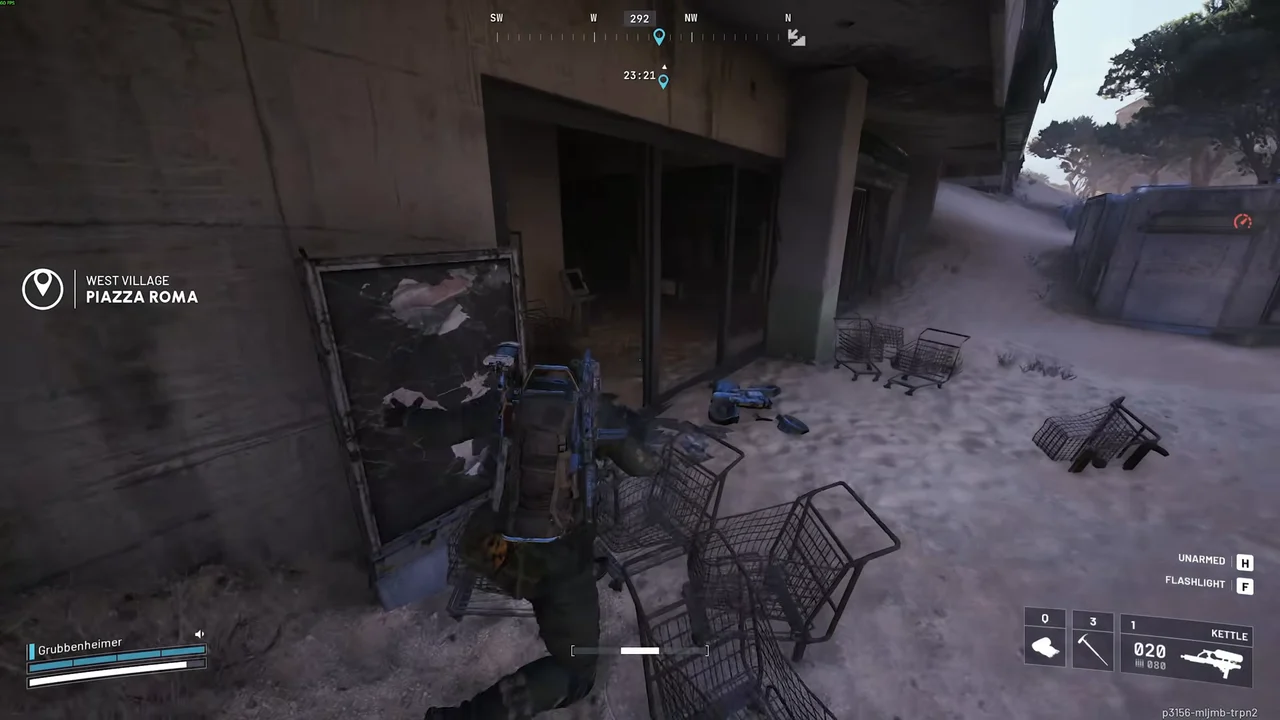
Plaza Rosa is the pharmacy district near the Red Tower. Piazza Roma is a different place associated with ENELICA and the quest routes for Paving the Way and Unexpected Initiative. Similar names are not alternate spellings.
For the pharmacy, follow the Farmacia storefront and Plaza Rosa marker. For the ENELICA objective or Unexpected Initiative pickup, follow the Piazza Roma route. The foreman's apartment for A Rising Tide is another separate stop south of Piazza Roma, not the apartment above Arbusto Farmacia.
A useful final check is the interaction you expect to see. Pharmacy search, ENELICA interaction, and apartment investigation are different tasks. When the prompt does not match, check the district name before changing floors or spending a key.
Every POI in Buried City
Read the POI table as a set of building approaches, not a flat collection of loot dots. Buried City's street plan hides roof entrances, interior landings, and metro stairs beneath nearby labels. The route between two objectives can matter more than the distance between their markers.
Northern Warehouses and the Hospital District
Su Durante Warehouses and the Gas Station make a northern pair in The Outskirts. The warehouse cache belongs to Marked for Death, while Industrial Espionage uses a different cache by the Gas Station's damaged transport and blue sofa landmark. Zoom into this district when a small location label is absent from the wider view.
The Hospital, Parking Garage, and Galleria are a second cluster. Garage stairs can break a sightline, but the Hospital's height means you should also check above street level. The Galleria roof and its lower planter beds serve different objectives.
Park, Research Building, and Civic Buildings
Marano Park is an open central landmark with buses and a fountain. The Research Building sits between the park and Space Travel. For The Root of the Matter, identify the park-facing room on the level where the building's zipline routes meet instead of relying on contradictory ground-floor and third-floor directions.
That seed-vault room is not the Seed Vault POI on Stella Montis. Town Hall and the Library form another nearby pair. The Library's damaged ceiling is part of your exposure, not dependable overhead cover.
Marano Station is also distinct from Marano Park. Use the station's cache or kiosk route when the quest names those objects, rather than assuming the park's metro approach contains them.
Residential Roofs and Southern Landmarks
Santa Maria Houses is the residential cluster southwest of the Town Hall area. The dead-drop objective is reached from above, so repeatedly circling ground-level doors will not solve that route. Grandioso Apartments and the Abandoned Highway Camp belong to a different residential and highway loop.
For Eyes On the Prize, the missing anchor is the terrace with blue tarps southwest of Southern Station. For A Rising Tide, use the foreman's apartment south of Piazza Roma and approach its obstructed interior from above. Neither location should be merged with the pharmacist's apartment.
The Red Tower is the antenna landmark for Communication Hideout. Security Breach is a skill associated with security lockers, not an extra Red Tower quest to add to your journal.
| POI | Area and layer | What it is | Quest walkthroughs |
|---|---|---|---|
| Grandioso ApartmentsShow area on map | Southwestern residential district, near the Abandoned Highway Camp routeStreet level, apartments and roof | Use the roof for Unexpected Initiative and flooded ground for After Rain Comes, checking separate key-door, interior and rooftop Call Station prompts. | Unexpected Initiative A Warm Place to Rest After Rain Comes A Better Use Espresso |
| Su Durante WarehousesShow area on map | Northern outskirts, west of the Gas StationSurface and warehouse interiors | Search the cache, follow footprints through the broken fence and inspect the clue, with no item to carry, keeping the Gas Station cache separate. | Industrial Espionage Marked for Death |
| Gas StationShow area on map | Northern outskirts, north of the HospitalSurface | Find the Industrial Espionage cache by the damaged transport and blue sofa, not Su Durante's cache, and check Hospital sightlines before stopping. | Industrial Espionage |
| HospitalShow area on map | Hospital district, beside the Parking GarageMedical interiors and upper rooms | Use exterior scaffolding for an upper approach, keeping the Hospital Key door separate from medical searches that do not all require it. | Medical Merchandise |
| Parking GarageShow area on map | Beside the HospitalGarage decks, stairs and the camp beneath | Use stairs as possible cover, not fixed targets, and search the raider camp beneath the garage for What We Left Behind rather than an upper deck. | What We Left Behind Combat Recon |
| Space TravelShow area on map | Central district, near the Parking Garage and GalleriaSeparate upper interior rooms and roof access | Use stairwell signs and door prompts to distinguish the red-lit JKV Employee Access Card door from Greasing Her Palms' separate Locked Room. | Greasing Her Palms |
| GalleriaShow area on map | Between the Hospital and Space TravelInterior planter level and roof | Use the rooftop for Eyes in the Sky and the Space Travel zipline, with Great Mullein a planter search below rather than a guaranteed plant drop. | Eyes in the Sky Doctor's Orders |
| Research BuildingShow area on map | Between Marano Park and Space TravelPark-facing room at the zipline-alignment level | Find the seed-sample room by its Marano Park view and aligning ziplines, not a numeric floor or Stella Montis's separate Seed Vault. | The Root of the Matter |
| Marano ParkShow area on map | Central park, beside the Research Building routeSurface with metro access below | Use the fountain and buses for orientation and possible cover, but find a qualifying kiosk photo prompt for The League rather than just visiting the park. | The Root of the Matter Building a Library Combat Recon The League |
| Marano StationShow area on map | Northwestern station areaStation approaches and kiosk interiors | Keep Market Correction's red-ribbon cache separate from The League's northern-kiosk magazine photograph, which is not a pickup. Keep the Raider Hatch beside Marano Station separate from the similarly named Marano Park metro. | Market Correction The League |
| Town HallShow area on map | Central civic district, across from the LibrarySurface entrance and interior | Use the northern entrance for the Town Hall Key, but continue to the separate Library for books without assuming fixed container contents. | Building a Library |
| LibraryShow area on map | City Center, across from Town Hall, between Marano Station and the HospitalLibrary interior | Follow the yellow-shelf quest prompts inside, remembering that the damaged ceiling leaves openings for attacks from outside. | Building a Library |
| Santa Maria HousesShow area on map | Southwest of the Town Hall area, northwest of Plaza RosaResidential interiors and upper dead-drop approach | Approach the dead drop from above without assuming all ground entrances are unusable, with electrical searches offering no guaranteed Wires. | Trash into Treasure Digging Up Dirt |
| Piazza ArbustoShow area on map | East of Town Hall, near the Eastern Station approachStreet-level pharmacy and apartment above | Use Arbusto Farmacia's lettering and green cross for the downstairs pharmacy and upstairs clues, not the foreman's apartment south of Piazza Roma. | Life of a Pharmacist A Reveal in Ruins |
| Plaza RosaShow area on map | South of Town Hall and southeast of Santa Maria Houses, at the Red Tower-side junctionStreet-level pharmacy and nearby station approach | Use this pharmacy as an A Reveal in Ruins option, not Piazza Roma or Arbusto, and check the junction and stairs without assuming safety or campers. | A Reveal in Ruins |
| Piazza RomaShow area on map | Piazza Roma square and its ENELICA buildingSurface and quest-building approaches | Keep the ENELICA objective and quest pickup separate, with the foreman's apartment south of this square rather than at Plaza Rosa. | Unexpected Initiative Paving the Way A Rising Tide |
| Red TowerShow area on map | Antenna landmark on the Plaza Rosa-side routeTower and antenna-terminal approach | Install the battery, then enable power for Communication Hideout, noting that Security Breach is a skill rather than another tower quest. | Communication Hideout |
| Abandoned Highway CampShow area on map | Under the highway, north of the Grandioso Apartments areaSurface camp beneath the highway | Follow the camp investigation to the grave for A Warm Place to Rest without skipping journal steps or searching the apartment roof. | A Warm Place to Rest |
| West VillageShow area on map | Western residential districtSurface and residential interiors | Use Residential Master Key approaches south of the area and add a Call Station stop only when its required interaction is available. | A Better Use |
| The OutskirtsShow area on map | Northern Gas Station and cache districtSurface region | Treat this as a region, not a cache, keeping Industrial Espionage's Gas Station stop separate from Market Correction's Marano Station cache. | Industrial Espionage Market Correction |
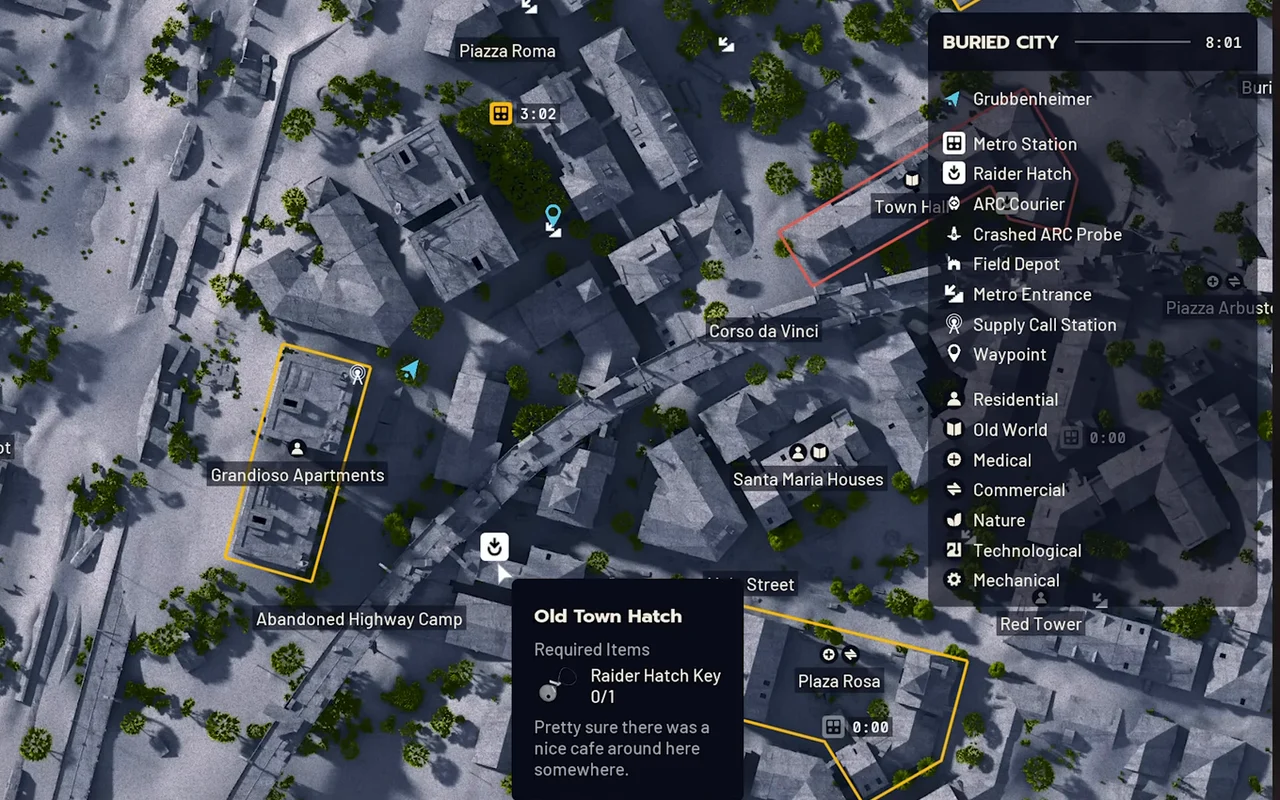
| Old Town HatchShow area on map | At the named hatch symbol west of Old Town and south of West Village, not an exact entrance.Surface | West of Old Town and south of West Village. The tooltip requires one Raider Hatch Key. Check your raid map and the hatch interaction before committing. | The Root of the Matter |
| Eastern StationShow area on map | Station symbol south of Piazza Arbusto and east of Santa Maria Houses.Surface | Head south of Piazza Arbusto, east of Santa Maria Houses, to the station-symbol area. Check the exit status on your raid map. | Life of a Pharmacist A Reveal in Ruins |
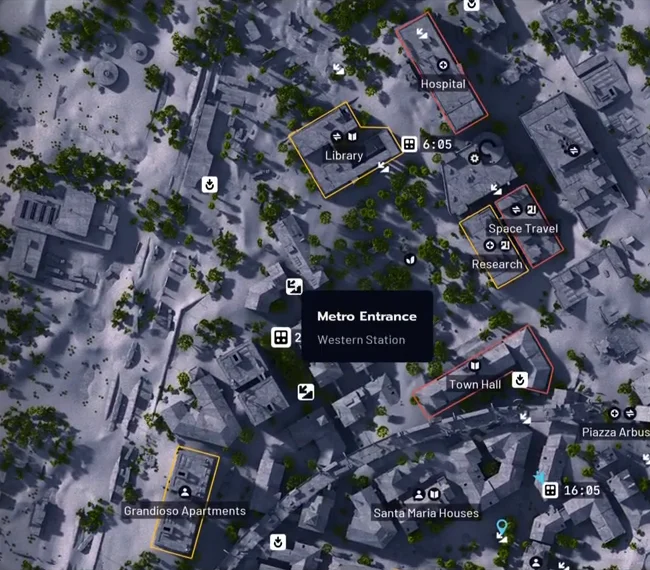
| Northern StationShow area on map | Station symbol on the northeast side of the Library.Surface | Use the station-symbol area on the northeast side of the Library. Check the exit status on your raid map before descending. | Building a Library |
| Marano Park metroShow area on map | Metro entrance southwest of the Marano Park buses. An approach to Western Station, not another station.Surface entrance to the metro | Metro entrance southwest of the Marano Park buses. This is an approach to Western Station, not a fifth station or an exact terminal. | The Root of the Matter Building a Library |
| Plaza Rosa extractionShow area on map | Inside Plaza Rosa, at the Metro Station symbol rather than an exact terminal.Surface | Metro symbol inside Plaza Rosa, with its station name unconfirmed. Check the named exit and availability on your raid map. |
Plotted locations and overview areas
| Location | Layer | Precision | What it is |
|---|---|---|---|
| New District | surface | POI area | Use the New District overview as an area reference, not an exact Research Building room marker. |
| Old Town | surface | POI area | Use this Old Town overview while keeping Plaza Rosa and Piazza Roma as distinct locations. |
| Western Station | surface | Recorded native station symbol, not exact underground terminal | Head southwest of the Library, west of Town Hall, to the station-symbol area. Check the exit status on your raid map. |
| Gas Station roof Call Station area | surface | Recorded rooftop approach, not exact pole coordinate | Use the corrugated roof north of Hospital as an approximate recorded approach, not an exact pole position, and check the station prompt. |
| Library roof Call Station area | surface | Recorded rooftop approach, not exact pole coordinate | Climb the Library's interior stairs and exterior yellow ladder, using this as an approximate recorded roof approach rather than an exact pole. |
| Parking Garage roof Call Station area | surface | Recorded rooftop approach, not exact pole coordinate | Follow the spiral ramp and yellow zipline to the upper circular roof, using this as an approximate recorded approach rather than an exact pole. |
| Piazza Roma roof Call Station area | surface | Recorded rooftop approach, not exact pole coordinate | Use the courtyard-side exterior zipline at Piazza Roma, not Plaza Rosa, and treat this as an approximate recorded roof approach, not an exact pole. |
| Research roof Call Station area | surface | Recorded rooftop approach, not exact pole coordinate | Use the raised roof beside Space Travel as an approximate recorded station approach, not an exact pole position, and check the station prompt. |
| Grandioso Apartments roof Call Station area | surface | Recorded rooftop approach, not exact pole coordinate | Use Grandioso Apartments' interior ascent and upper stairs as an approximate recorded roof approach, not an exact pole position. |
| Corso da Vinci roof Call Station area | surface | Recorded rooftop approach, not exact pole coordinate | Use the Corso da Vinci roof beside the elevated road as an approximate recorded station approach, not an exact pole position. |
| Piazza Arbusto roof Call Station area | surface | Recorded Supply Call Station icon | Check the station prompt on the Piazza Arbusto roof by the elevated road and church tower, as the recorded native icon does not prove current activation. |
| Plaza Rosa roof Call Station area | surface | Recorded Supply Call Station icon | Check the station prompt at Plaza Rosa's northeast roof edge, not Piazza Roma, as the recorded native icon does not prove current activation. |
| Raider Hatch near Market Ruins | surface | Recorded Raider Hatch icon | The recorded hatch northeast of Hospital has no exact official exit name or current availability established here. |
| Buried City Residential Master Key · Grandioso Apartments | surface | Building access area, not exact door | Approach Grandioso Apartments and match the Buried City Residential Master Key prompt, as the marker is not an exact door or loot guarantee. |
| Buried City Town Hall Key · Town Hall | surface | Building access area, not exact door | Approach Town Hall and match the Buried City Town Hall Key prompt, as the marker is not an exact door or loot guarantee. |
| Buried City JKV Employee Access Card · Space Travel | surface | Building access area, not exact door | Approach Space Travel and match the Buried City JKV Employee Access Card prompt, as the marker is not an exact door or loot guarantee. |
| Buried City Hospital Key · Hospital | surface | Building access area, not exact door | Approach Hospital and match the Buried City Hospital Key prompt, as the marker is not an exact door or loot guarantee. |
| Medical Merchandise · Hospital | surface | Objective area, not exact interactable | Search the required medical containers inside the Hospital. |
| What We Left Behind · Parking Garage | surface | Objective area, not exact interactable | Search the quest containers in the raider camp beneath the Parking Garage. |
| Combat Recon · Parking Garage | surface | Objective area, not exact interactable | Follow the active reconnaissance and target requirements around Marano Park and the Parking Garage. |
| Greasing Her Palms · Space Travel | surface | Objective area, not exact interactable | Reach the quest Locked Room in Space Travel. |
| The Root of the Matter · Research Building | surface | Objective area, not exact interactable | Collect the Experimental Seed Sample in the Research Building room facing Marano Park. |
| The Root of the Matter · Marano Park | surface | Objective area, not exact interactable | Collect the Experimental Seed Sample in the Research Building room facing Marano Park. |
| Combat Recon · Marano Park | surface | Objective area, not exact interactable | Follow the active reconnaissance and target requirements around Marano Park and the Parking Garage. |
| Eyes in the Sky · Galleria | surface | Objective area, not exact interactable | Reach the Galleria rooftop installation for the Buried City stage. |
| Unexpected Initiative · Piazza Roma | surface | Objective area, not exact interactable | Collect the quest pickups on Grandioso's roof and at Piazza Roma. |
| Paving the Way · Piazza Roma | surface | Objective area, not exact interactable | Use the qualifying ENELICA building interaction at Piazza Roma. |
| A Rising Tide · Piazza Roma | surface | Objective area, not exact interactable | Enter the foreman's apartment south of Piazza Roma from above for the Buried City stage. |
| Communication Hideout · Red Tower | surface | Objective area, not exact interactable | Install the battery and enable power at the Red Tower. |
| A Warm Place to Rest · Abandoned Highway Camp | surface | Objective area, not exact interactable | Investigate the Abandoned Highway Camp north of Grandioso Apartments and follow the quest to the grave. |
| After Rain Comes · Grandioso Apartments | surface | Objective area, not exact interactable | Repair the flooded ground-level solar panels beside Grandioso Apartments. |
| Espresso · Grandioso Apartments | surface | Objective area, not exact interactable | Search a qualifying espresso machine, such as an interior option around Grandioso Apartments. |
| Digging Up Dirt · Santa Maria Houses | surface | Objective area, not exact interactable | Use the roof-side approach to the upper dead drop at Santa Maria Houses. |
| Life of a Pharmacist · Piazza Arbusto | surface | Objective area, not exact interactable | Investigate the apartment clues above Arbusto Farmacia at Piazza Arbusto. |
| A Reveal in Ruins · Piazza Arbusto | surface | Objective area, not exact interactable | Search the Piazza Arbusto or Plaza Rosa pharmacy for the quest ESR Analyzer. |
| A Reveal in Ruins · Plaza Rosa | surface | Objective area, not exact interactable | Search the Piazza Arbusto or Plaza Rosa pharmacy for the quest ESR Analyzer. |
| Building a Library · Library | surface | Objective area, not exact interactable | Search the Library's yellow shelves and collect the requested books. |
| Market Correction · Marano Station | surface | Objective area, not exact interactable | Investigate, then sabotage the red-ribbon cache at Marano Station. |
| The League · Marano Station | surface | Objective area, not exact interactable | Photograph football magazines at a qualifying kiosk, such as the one north of Marano Station. |
| Marked for Death · Su Durante Warehouses | surface | Objective area, not exact interactable | Search the Su Durante Warehouses cache, follow footprints through the broken fence and interact with the clue. |
| Industrial Espionage · Gas Station | surface | Objective area, not exact interactable | Use the Gas Station cache by the damaged transport and blue sofa for the Burletta handoff. |
Resource Locations in Buried City
Great Mullein
Search the Galleria's first-floor planter beds for Great Mullein. Stay on the shopping level for the plant search, not the rooftop route used for the LiDAR objective. Harvest the plant when present and check the item name before leaving the planter.
Used by: Doctor's Orders.
Apricots
Check the trees and fallen fruit around Marano Park for Apricots. Treat the park as a search area, not a promise that every tree will have harvestable fruit. Keep the bus cover between you and a threat before stopping to inspect the ground.
Used by: Scrappy progression when the upgrade screen asks for Apricots.
Prickly Pear
Look for Prickly Pear on fruit-bearing cactus rather than inside city containers. Inspect cactus patches along the sandy edges of the urban route you already need to travel. A bare cactus is not a missed container, and another raid may offer a different harvest.
Do not abandon an extracted quest item for an unconfirmed fruit circuit. Check the required fruit and quantity in the upgrade screen before deploying.
Used by: Scrappy progression when Prickly Pear is requested.
Wires and Batteries
Search electrical containers and residential interiors around Santa Maria Houses and Space Travel for Wires and Batteries. Bring required repair materials from your stash when possible instead of making a quest depend on finding them during the raid.
After Rain Comes is the important ground-level distinction: its solar panels sit in water beside Grandioso Apartments, not on the roof. Prepare 5 Wires and 2 Batteries for that repair route. Eyes On the Prize needs 3 Wires, so do not spend the same reserved stack elsewhere first.
Used by: Trash into Treasure, After Rain Comes, and Eyes On the Prize.
Call Stations and Field Depots
A Call Station and a Field Depot are different stops. The former calls a supply drop, while depot objectives require the relevant terminal or delivery interaction. Do not use a station marker as a substitute for a depot upload.
The recorded Library and Grandioso Apartments roof approaches are options to check for A Better Use. Both map markers use approximate rooftop player positions rather than exact pole coordinates. Confirm the station prompt in your own raid before adding either stop.
Use the Call Stations guide for the supply-drop interaction and the Field Depots guide for depot work. Raider Caches are another separate container type, not either kind of station.
Used by: A Better Use and Off The Radar, according to the objective you have active.
Extraction Points in Buried City
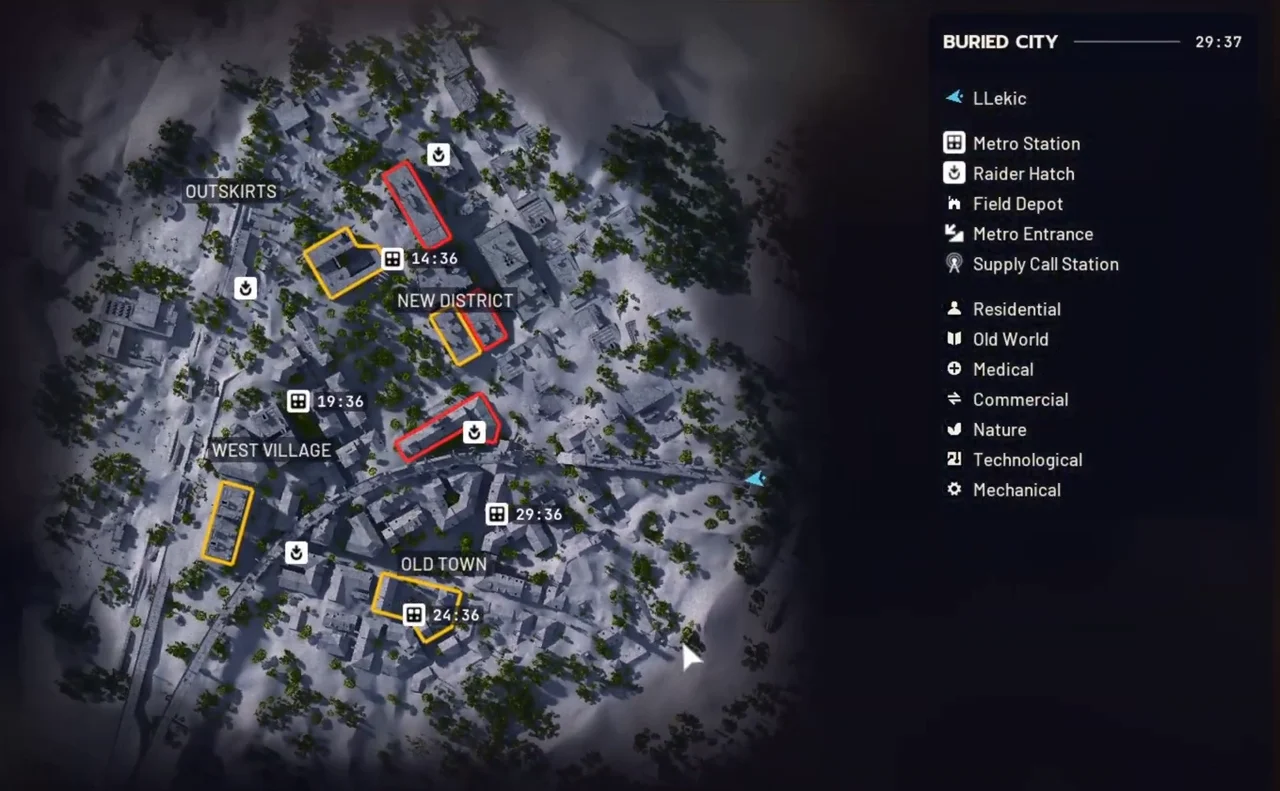
Calling an extraction makes noise, so check the approach before starting it. At Plaza Rosa, clear the street junction, nearby doorways, and the stair approach instead of walking straight down while watching only the terminal. That is a sightline precaution, not a claim that campers are present in every raid.
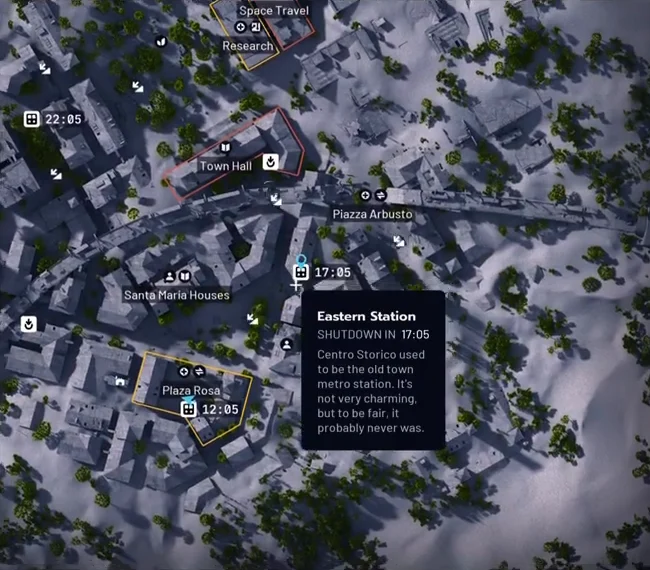
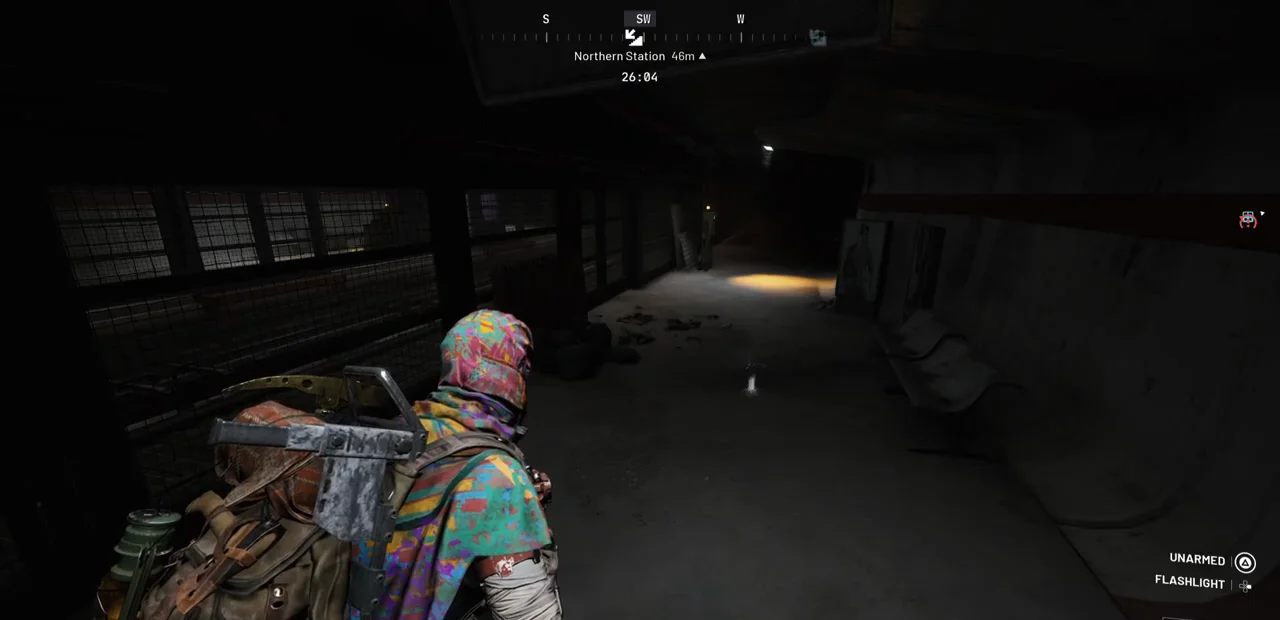
Eastern Station is south of Piazza Arbusto and east of Santa Maria Houses. Northern Station is northeast of the Library, while Western Station is southwest of it and west of Town Hall. The Marano Park metro approach marker identifies the entrance southwest of the park buses, not a fifth station or the exact underground terminal. Check the station name and exit status before descending.
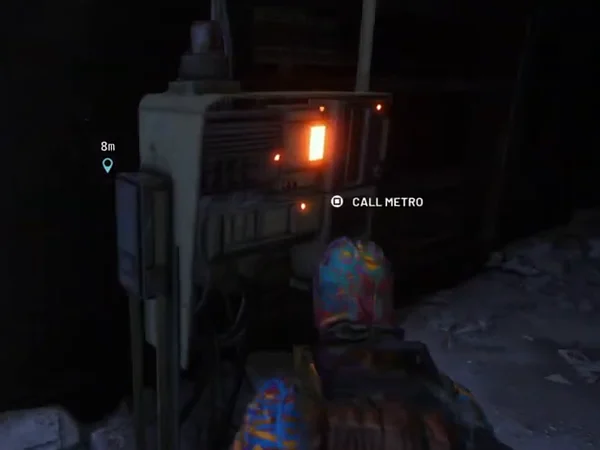
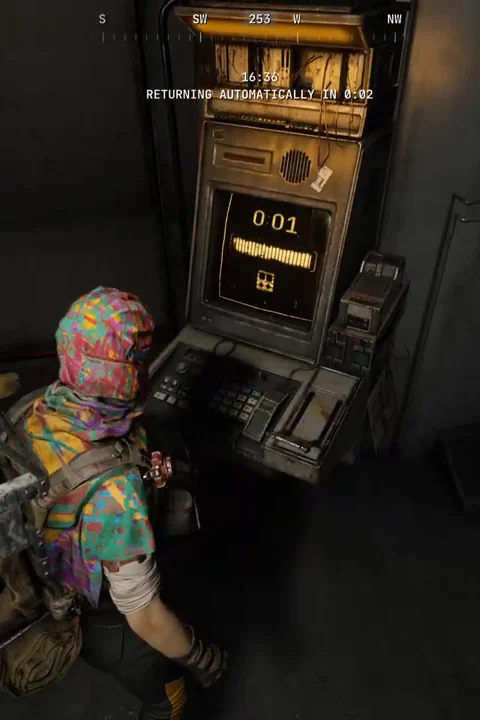
Check the exit name, status and timer on your raid map before descending the entrance stairs to a metro console. Use CALL METRO, board the transport and remain inside through the displayed return countdown. Follow your raid's timer rather than treating a recorded countdown as a general closing schedule.
| Exit or Approach Area | When It Fits Your Route | What to Check |
|---|---|---|
| Eastern Station | Piazza Arbusto pharmacy or upstairs apartment | Confirm the metro entry and its remaining availability before looting another floor. |
| Northern Station | Library and northern civic-building routes | Check the stairs for ARC before committing to the platform. |
| Southern Station | Eyes On the Prize terrace and southern residential movement | Do not confuse the nearby terrace with the station entrance itself. |
| Marano Park metro approach | Research Building and park-side routes | Cross the open park only after checking the exit marker and cover. |
| Plaza Rosa extraction approach | The southern pharmacy district | Inspect junction sightlines and confirm which station the current marker names. |
| Old Town Hatch | The native tooltip names this hatch west of Old Town and south of West Village. | The tooltip requires one Raider Hatch Key. Check the hatch interaction and availability in your current raid before relying on it. |
A nearby marker is not enough when an item must leave with you. Check that the item is actually in your inventory, protect it when possible, and make the available exit your next objective. Do not substitute a memorized closing time for the timer shown in the raid.
Safe pockets protect eligible carried items, but they do not override a quest's one-round or extraction requirements. For The Root of the Matter, plan the departure before collecting the delivery item. Marked for Death completes at the clue interaction after the cache search and footprint trail. It has no carried quest item, delivery, or extraction requirement.
Quests in Buried City
The quest table covers the city routes below, including cross-map quests and resource objectives that a map-only filter can miss. Use the current journal to decide which are available together. Tian Wen, Apollo, Shani, Lance, and Celeste can send you to the same district for different interactions.
Caches, Machines, and Separate Pickups
Marked for Death requires searching the Su Durante Warehouses cache and following the footprints through the broken fence to the clue. Interacting with that clue completes it, with no quest item to carry or deliver and no extraction required. Industrial Espionage uses the Gas Station cache instead. Prepare the Burletta you intend to surrender and remove valuable attachments from that copy before deploying.
Market Correction uses the cache marked by a red ribbon at Marano Station. Investigating and sabotaging are separate actions. For Espresso, searching an espresso machine is also not the final step: collect the Espresso Machine Parts left on the counter.
Roofs, Apartments, and Repairs
Unexpected Initiative takes you to Grandioso's roof and Piazza Roma for quest-specific pickups. Existing stash items are not a substitute for triggering those searches. Communication Hideout uses the Red Tower and requires the battery installation followed by the separate power action.
Digging Up Dirt takes you above ground level at Santa Maria Houses. Eyes On the Prize needs the blue-tarp terrace southwest of Southern Station and the Wires you brought. A Rising Tide uses the foreman's apartment south of Piazza Roma, with other steps on Dam Battlegrounds.
After Rain Comes belongs at the flooded ground-level solar panels by Grandioso. A Warm Place to Rest uses the Abandoned Highway Camp and its grave, not the apartment roof. Follow the journal's current step before skipping any part of the investigation.
Medical and Research Objectives
Life of a Pharmacist uses the apartment over Arbusto Farmacia, while A Reveal in Ruins uses a pharmacy search downstairs or at Plaza Rosa. Medical Merchandise requires Hospital container searches. Doctor's Orders can add the Galleria's Great Mullein to that medical route.
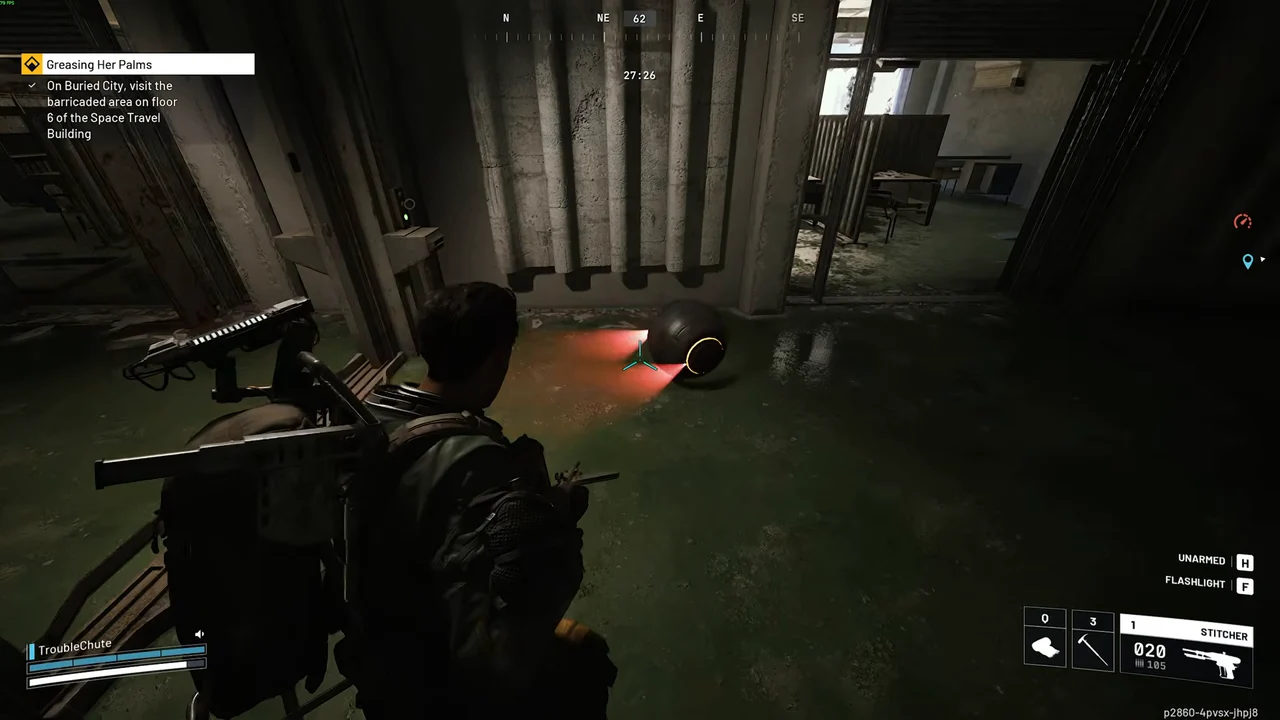
The Root of the Matter uses the park-facing Research Building room and the Experimental Seed Sample. Treat the item pickup and its extraction as separate requirements. Greasing Her Palms uses the floor 6 Locked Room in Space Travel, not the floor 4 JKV card door.
Civic Buildings, Rooftops, and Photographs
Building a Library sends you to the Library's yellow shelves. The League asks for a photograph of football magazines in a kiosk, rather than a magazine item to extract. The kiosk north of Marano Station is a usable route, and the objective's wording allows a qualifying kiosk rather than only one exclusive building.
Eyes in the Sky uses the Galleria rooftop installation. Paving the Way uses the ENELICA objective around Piazza Roma. Combat Recon involves the park and garage route, but confirm that the quest and its required target are in your current journal before building a raid around it.
Other Relevant City Stops
A Better Use can fit a usable Call Station along your route. Back On Top has a Buried City objective, and What We Left Behind includes the raider-camp container search beneath the Parking Garage. Trash into Treasure can use electrical finds gathered while moving between those stops.
Line in the Sand is another Buried City quest to check in your journal before adding a new stop to the route. Security Breach does not belong in the quest table. A skill-enabled locker is not another quest objective.
| Quest | Trader | Objective location | Round and extraction | Route note |
|---|---|---|---|---|
| Marked for Death | Tian Wen | Search the Su Durante Warehouses cache, follow footprints through the broken fence and interact with the clue.Show Su Durante Warehouses on map | One round: Check quest journal Extraction: Not required | Interacting with the clue completes the quest without a carried item or extraction. |
| A Warm Place to Rest | Apollo | Investigate the Abandoned Highway Camp north of Grandioso Apartments and follow the quest to the grave.Show Abandoned Highway Camp on map | One round: Check quest journal Extraction: Not required | Follow the current journal step rather than skipping part of the trail. |
| Unexpected Initiative | Tian Wen | Collect the quest pickups on Grandioso's roof and at Piazza Roma.Show Piazza Roma on map | One round: Required Extraction: Check quest journal | Stash items do not replace the designated searches and pickups. |
| Communication Hideout | Shani | Install the battery and enable power at the Red Tower.Show Red Tower on map | One round: Required Extraction: Not required | Installing the battery does not trigger the separate power action. |
| Life of a Pharmacist | Lance | Investigate the apartment clues above Arbusto Farmacia at Piazza Arbusto.Show Piazza Arbusto on map | One round: Required Extraction: Not required | The downstairs pharmacy search is for A Reveal in Ruins, not this upstairs investigation. |
| Digging Up Dirt | Celeste | Use the roof-side approach to the upper dead drop at Santa Maria Houses.Show Santa Maria Houses on map | One round: Check quest journal Extraction: Not required | Circling street-level doors will not lead you to the upper objective. |
| Eyes On the Prize | Tian Wen | Complete the interaction on the blue-tarp terrace southwest of Southern Station. | One round: Check quest journal Extraction: Check quest journal | Bring 3 Wires for the terrace interaction. |
| Combat Recon | Shani | Follow the active reconnaissance and target requirements around Marano Park and the Parking Garage.Show Parking Garage on mapShow Marano Park on map | One round: Not required Extraction: Required | Confirm the active quest and Spotter Relay requirement without assuming fixed targets by the buses or stairs. |
| Market Correction | Tian Wen | Investigate, then sabotage the red-ribbon cache at Marano Station.Show Marano Station on map | One round: Check quest journal Extraction: Not required | The investigation prompt does not complete the separate sabotage action. |
| Espresso | Apollo | Search a qualifying espresso machine, such as an interior option around Grandioso Apartments.Show Grandioso Apartments on map | One round: Check quest journal Extraction: Required | Pick up the Espresso Machine Parts left on the counter after the search. |
| A Rising Tide | Celeste | Enter the foreman's apartment south of Piazza Roma from above for the Buried City stage.Show Piazza Roma on map | One round: Not required Extraction: Check quest journal | The apartment above Arbusto Farmacia is not the foreman's apartment. |
| Industrial Espionage | Tian Wen | Use the Gas Station cache by the damaged transport and blue sofa for the Burletta handoff.Show Gas Station on map | One round: Check quest journal Extraction: Not required | Remove valuable attachments from the Burletta you surrender, as unequipping it alone does not protect it. |
| Eyes in the Sky | Shani | Reach the Galleria rooftop installation for the Buried City stage.Show Galleria on map | One round: Not required Extraction: Not required | Plan the climb and zipline approach to the roof, not the interior planters. |
| A Reveal in Ruins | Lance | Search the Piazza Arbusto or Plaza Rosa pharmacy for the quest ESR Analyzer.Show Piazza Arbusto on mapShow Plaza Rosa on map | One round: Required Extraction: Required | Check the pharmacy pickup in your journal rather than assuming an unrelated looted Analyzer counts. |
| The Root of the Matter | Celeste | Collect the Experimental Seed Sample in the Research Building room facing Marano Park.Show Research Building on mapShow Marano Park on map | One round: Required Extraction: Required | Use the park view and zipline alignment to find the correct level. Collect the sample before extracting. |
| Building a Library | Apollo | Search the Library's yellow shelves and collect the requested books.Show Library on map | One round: Required Extraction: Required | Town Hall is a nearby landmark, not the building containing the book searches. |
| The League | Apollo | Photograph football magazines at a qualifying kiosk, such as the one north of Marano Station.Show Marano Station on map | One round: Not required Extraction: Required | Use the photograph prompt, not a magazine pickup. |
| Medical Merchandise | Lance | Search the required medical containers inside the Hospital.Show Hospital on map | One round: Not required Extraction: Not required | Check container-search progress rather than assuming any medical loot counts. |
| After Rain Comes | Celeste | Repair the flooded ground-level solar panels beside Grandioso Apartments.Show Grandioso Apartments on map | One round: Check quest journal Extraction: Not required | Bring 5 Wires and 2 Batteries for the repair. |
| Paving the Way | Apollo | Use the qualifying ENELICA building interaction at Piazza Roma.Show Piazza Roma on map | One round: Not required Extraction: Check quest journal | Use the ENELICA quest prompt at Piazza Roma, not a generic panel or a stop at Plaza Rosa. |
| Doctor's Orders | Lance | Use Galleria planters for Great Mullein and medical areas for other supplies as optional gathering routes.Related quest, not an objective on this map | One round: Check quest journal Extraction: Check quest journal | This is an any-map delivery, and neither plants nor container contents are guaranteed. |
| Greasing Her Palms | Celeste | Reach the quest Locked Room in Space Travel.Show Space Travel on map | One round: Not required Extraction: Check quest journal | Follow the quest room's prompt. The red-lit JKV Employee Access Card door is a different destination. |
| A Better Use | Tian Wen | Use a Call Station offering the quest prompt on the Grandioso or West Village route. | One round: Check quest journal Extraction: Not required | A reported station position does not guarantee a usable prompt in your raid. |
| Back On Top | Tian Wen | Follow the multi-map quest journal for the Buried City stage. | One round: Not required Extraction: Check quest journal | Follow the journal's location hint on this map rather than substituting another map's stage. |
| What We Left Behind | Tian Wen | Search the quest containers in the raider camp beneath the Parking Garage.Show Parking Garage on map | One round: Not required Extraction: Not required | Search below the garage, not on an upper deck or at Spaceport's separate Bilguun's Hideout stage. |
| Trash into Treasure | Shani | Use residential and electrical containers as a material route for the requested Wires and Battery.Related quest, not an objective on this map | One round: Not required Extraction: Required | Santa Maria Houses and Space Travel are optional search areas, not required stops or guaranteed drops. |
| Off The Radar | Shani | Use a Field Depot offering the required quest interaction. | One round: Required Extraction: Check quest journal | No exact depot is established here, and a remembered location does not guarantee a usable prompt. |
| Line in the Sand | Celeste | Follow the Buried City objective in the current quest journal. | Follow your quest journal | Follow the location hint in your quest journal. |
Stacking Quests in Buried City
Stack objectives that are active together and share an approach, not merely names that appear near one another on the map. Collect required repair materials before the run, then set a stop point after the most valuable delivery item is secured.
Grandioso Apartments and the Highway Camp
Grandioso can support Unexpected Initiative on the roof, After Rain Comes beside the building, and the nearby route to A Warm Place to Rest. Add Espresso only when you find a usable machine, and A Better Use only when the roof Call Station interaction is available.
That makes several reasons to visit the area, not several guaranteed objectives in the same apartment. Do the ground repair before an unnecessary roof climb when your approach allows it. Once a carried quest item is secured, reconsider the optional key door.
Piazza Arbusto Pharmacy Pair
A Reveal in Ruins and Life of a Pharmacist use the same building at different heights. Search the pharmacy for the analyzer objective, then use the apartment route for the clues when that quest is active. If one quest unlocks later in your progression, reuse the route on the later visit rather than trying to trigger an unavailable objective.
Galleria and Space Travel
The Galleria can combine Great Mullein with the Eyes in the Sky rooftop objective. From there, the Space Travel approach can support a separate key-room stop or Greasing Her Palms. Mark floor 4 and floor 6 as different stops before descending from the roof.
Marano Park and the Civic Buildings
The Root of the Matter, Building a Library, The League, and Combat Recon can all influence a central-city route. The research room, library shelves, station kiosk, and combat targets are not one shared interaction. Use the park as an orientation landmark, then follow the named building or target for each quest.
Gas Station and Su Durante Warehouses
Industrial Espionage and Marked for Death are the compact northern pairing. Keep the Burletta handoff separate from the Su Durante Warehouses cache search and footprint trail through the broken fence. Interacting with the clue completes Marked for Death, with no quest item to carry or deliver and no extraction required.
Buried City Threats
Town Hall, Library, and Marano Park
A Bombardier and its Spotters are hazards to watch for around the Town Hall and Library approaches. Check for the actual patrol before moving into the courtyard. The Library's broken ceiling means a roof outline does not guarantee protection from an outside attack.
Bastions and Leapers can also make the park route expensive. Use buses and building corners to interrupt a line of fire, and leave yourself another way out. A machine marked as a possible encounter is not a promise that it occupies that point in every raid.
Hospital, Galleria, and Space Travel
Check the Hospital windows and Galleria roof before crossing open ground. Someone above you can watch a planter search, scaffolding climb, or key-door approach without being visible from the street.
Inside Space Travel, listen and look for Turrets before riding a zipline or stepping into a landing. A narrow doorway can protect you from one angle while exposing you to another. Do not spend a key while an unresolved threat controls the only return route.
Metro Stairs and Extraction Calls
ARC Pods and Fireballs are possible hazards around station approaches. Clear the path you will actually use to board, not just the terminal. If an extraction call brings another raider into view, keep the exit and your cover in sight rather than chasing them back into the street.
No district is reliably friendly because an earlier raid was quiet. Let current sound, sightlines, remaining healing, and the item in your inventory decide whether to continue.
FAQ
What Does the Buried City Residential Master Key Open?
It opens compatible apartment doors at multiple locations, not every locked residential door. A key is consumed when used, so choose the door that fits your route and check its prompt. Do not treat a multi-door key type as unlimited access or a guarantee of a particular weapon.
Where Are the Pharmacies in Buried City?
The pharmacy stops are Arbusto Farmacia at Piazza Arbusto and the separate shop at Plaza Rosa. Look for Farmacia lettering and a green cross on the facade. Life of a Pharmacist uses the apartment above Arbusto, while A Reveal in Ruins uses a pharmacy search.
Is Plaza Rosa the Same as Piazza Roma?
No. Plaza Rosa is the pharmacy district near the Red Tower, while Piazza Roma is associated with ENELICA and separate quest pickups. Check the full place name before following a marker. The foreman’s apartment south of Piazza Roma is also not the pharmacist’s apartment.
Where Is the Buried City Hospital Key Room?
It is inside the upper Hospital levels beside the Parking Garage. Use the exterior scaffolding or the building’s vertical access, then confirm the locked door’s key prompt. Ordinary Hospital container searches for Medical Merchandise are separate from opening the key room.
Where Do You Use the JKV Employee Access Card?
Use it at the red-lit security door on the Space Travel floor marked 4. Read the stairwell number instead of counting from your entrance. The floor 6 Locked Room used by Greasing Her Palms is a separate stop and should not be confused with this card door.
Should You Avoid the Plaza Rosa Extraction?
Not automatically. Check the current exit marker, junction sightlines, doorways, and stairs before calling it. There is no reliable promise that another exit will be quieter. Choose an available route you can reach with cover rather than treating a location’s camping reputation as live raid information.
Plan Your Next Buried City Run
Choose the quest you want to finish, check its required items, and build the route around an available exit. For help with the objective, view the quest boost options.
Gameplay Image Credits
Gameplay images adapted from the following creators. Captures have been cropped or resized for this guide.
- Buried City surface: gameplay capture by Mortal TV. Cropped or resized for this guide.
- Buried City location photos: gameplay capture by DaryusP. Cropped or resized for this guide.
- Buried City location photos: gameplay capture by TroubleChute Basics. Cropped or resized for this guide.
- Buried City location photos: gameplay capture by TroubleChute Basics. Cropped or resized for this guide.
- Buried City location photos: gameplay capture by iDentity. Cropped or resized for this guide.
- Buried City location photos: gameplay capture by TheNoGearGuy. Cropped or resized for this guide.
- Buried City location photos: gameplay capture by Lex. Cropped or resized for this guide.
- Buried City location photos: gameplay capture by TroubleChute Basics. Cropped or resized for this guide.