

Riven Tides
surface · 23 overview areasShow on map
Use the hotel room numbers and industrial keycard markers to choose your destination. Keep the Stacking Yard button puzzle separate from the Crane House keycard room, and confirm an available exit before committing to either route.
Riven Tides Keycards
Match each card to its named door or painted hotel room number. A keycard is consumed when used, so opening a room is a decision to spend access, not a permanent unlock. Protect cards in a safe pocket when your augment allows it and keep room for the item you came to collect.
Riven Tides cards can be found away from this map, including reported hotel-card finds in small blue briefcases on Stella Montis. Search suitable containers along your existing route, but do not build a raid around a guaranteed card drop or a particular suite's loot value.
Riven Tides arrived with the official Patch 1.26.0. Use the cards in your inventory and the current door prompts to plan access, rather than treating launch-era loot reports as fixed room contents. For other maps, use the ARC Raiders keys guide.
Secure Storage Keycard
The Riven Tides Secure Storage Keycard opens an inner locked room reached through Classified Records in the Port Authority Building. Plan for nested access: the outer Classified Records door and the inner Secure Storage door are separate locks.
Reach the upper Port Authority offices and identify Classified Records first. If its outer door is still locked, you need the Riven Tides Classified Records Keycard as well as the Secure Storage card. Do not arrive with only the inner-room card and assume it opens the first locked door you encounter.
Once through Classified Records, locate the Secure Storage door and confirm its prompt. Check the route back before opening it. A second lock adds another access requirement, not a guarantee that the rooms remain untouched or contain a specific weapon.
The search phrase Secure Storage Key refers to this keycard route. It is not a reason to invent another item with a separate door. Treat reported rare weapons and valuable containers as possible loot, not a minimum haul.
Crane House Keycard
The Riven Tides Crane House Keycard opens the Crane House room in the Stacking Yard. Use the ladder and crane-control-building approach to reach the keyed door. The described entrances lead into the same room, rather than two independent rooms requiring two different cards.
Check the door prompt before spending the card. A platform or cabin that looks like another crane control room is not enough to identify the correct lock. The Crane House Key search phrasing belongs to this same keycard route.
A Powered Descender blueprint has been reported among the room's possible finds. That is not a guaranteed drop or proof that every run will repay the access item. The Stacking Yard button puzzle is a different access route and does not require you to spend this card merely to start pressing buttons.
Classified Records Keycard
The Riven Tides Classified Records Keycard opens the upper Port Authority records area. It is useful both as its own room access and as the outer step toward Secure Storage when that route is closed.
Identify the records-area door from the upper offices, then keep track of the corridor you used to enter. Multiple doors into one area do not mean multiple separate caches. If you also carry the Secure Storage card, check the inner door after entering rather than searching the rest of the building for an unrelated room.
The Hotel Keycards and the 107 to 208 Chain
Battening Down rewards the Riven Tides Hotel Keycard No. 107. That makes Room 107 a useful first planned card stop at Hotel Panorama Azzurro, on the western side of the map.
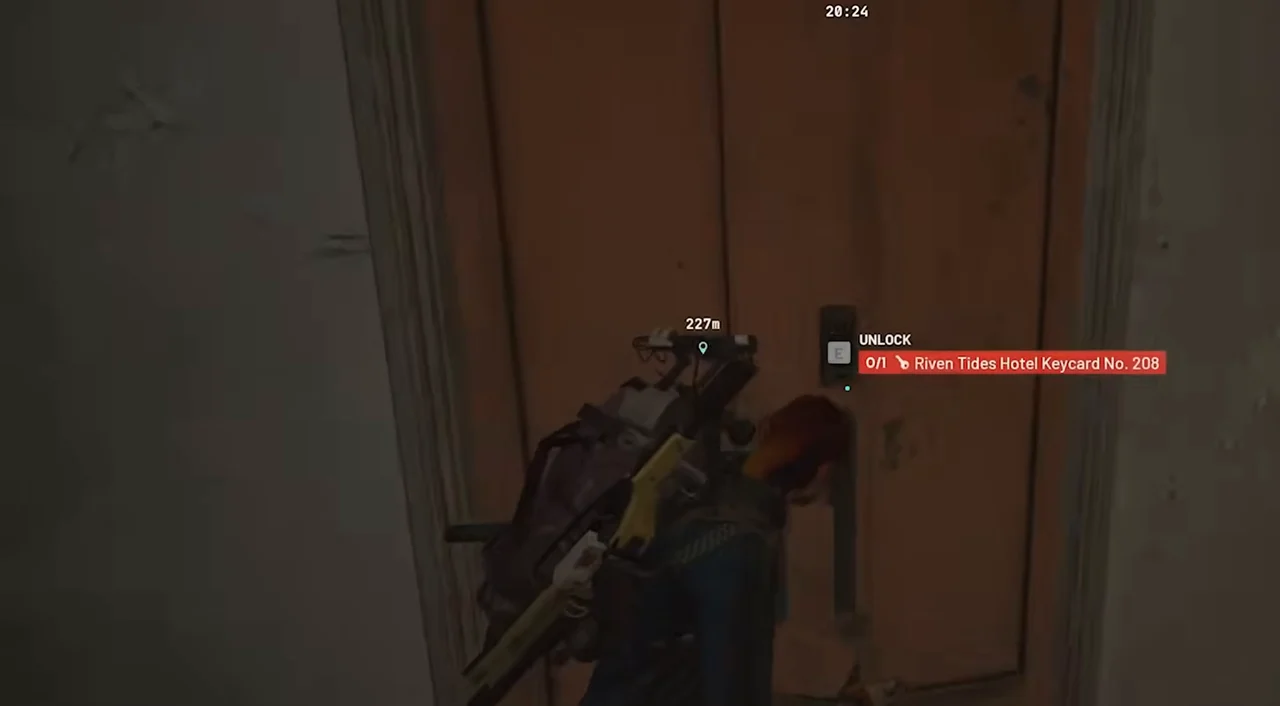
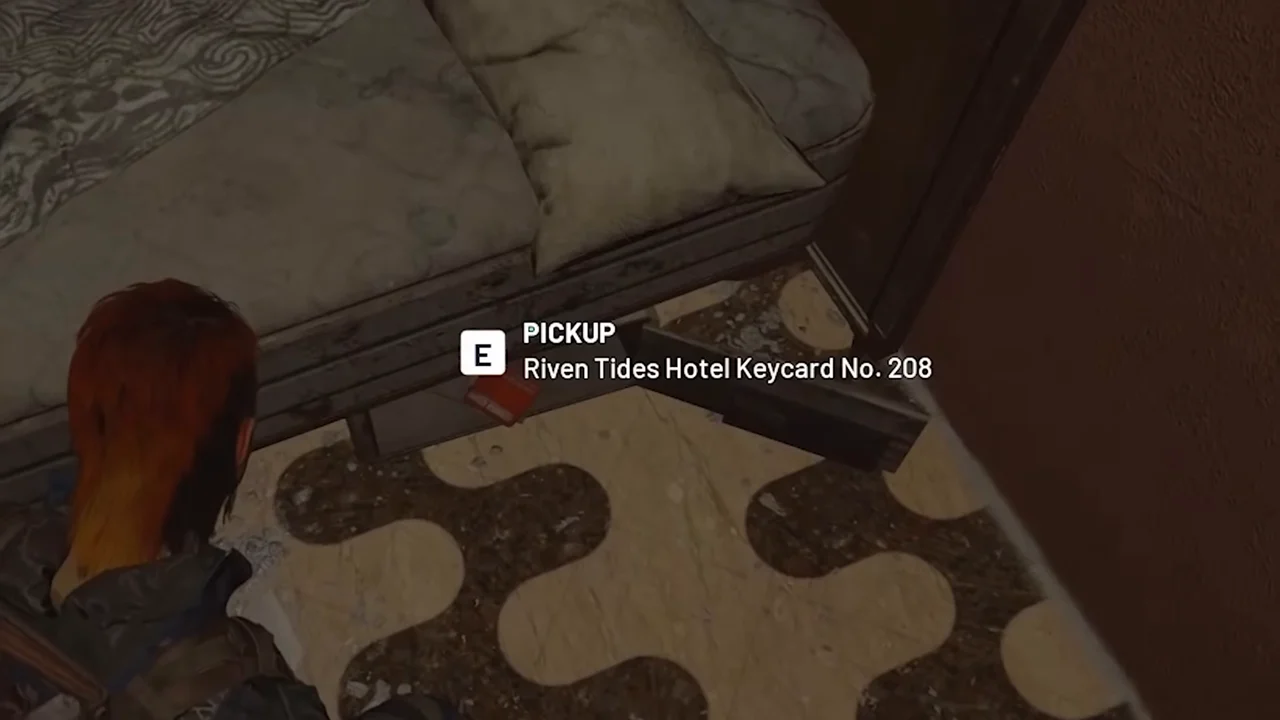
A Room 208 keycard has been reported in the safe beneath Room 107's bed. Check that safe after opening 107, but make the upstairs visit conditional on actually finding the card. There is no verified first-visit guarantee here, and a looted safe or a different result should change your route rather than make you assume the run is broken.
- Claim the Room 107 card from Battening Down and bring it protected where possible.
- Match the painted 107 number before using the card.
- Search the under-bed safe and inspect what it actually contains.
- Continue to Room 208 only when you have its matching card and a viable exit afterward.
Use the red room numbers above doorframes to settle the floor question. The 1xx, 2xx, 3xx, and 4xx room levels are more useful than counting stairs from an outside entrance at a different height.
| Hotel Card | Room Level and Approach | Important Distinction |
|---|---|---|
| Riven Tides Hotel Keycard No. 102 | 1xx level, western hallway | Match 102 rather than assuming the next numbered room uses the same card. |
| Riven Tides Hotel Keycard No. 107 | 1xx level, central suite route | Battening Down reward, with the under-bed safe worth checking for a 208 card. |
| Riven Tides Hotel Keycard No. 113 | 1xx level, eastern hallway | Use the number above the door, not a direction counted from another entrance. |
| Riven Tides Hotel Keycard No. 205 | 2xx level, near the central vertical-access area | Inspect the interior approach before opening and entering. |
| Riven Tides Hotel Keycard No. 208 | 2xx level, central-to-eastern suite | Separate card required, even when you reached it through the 107 route. |
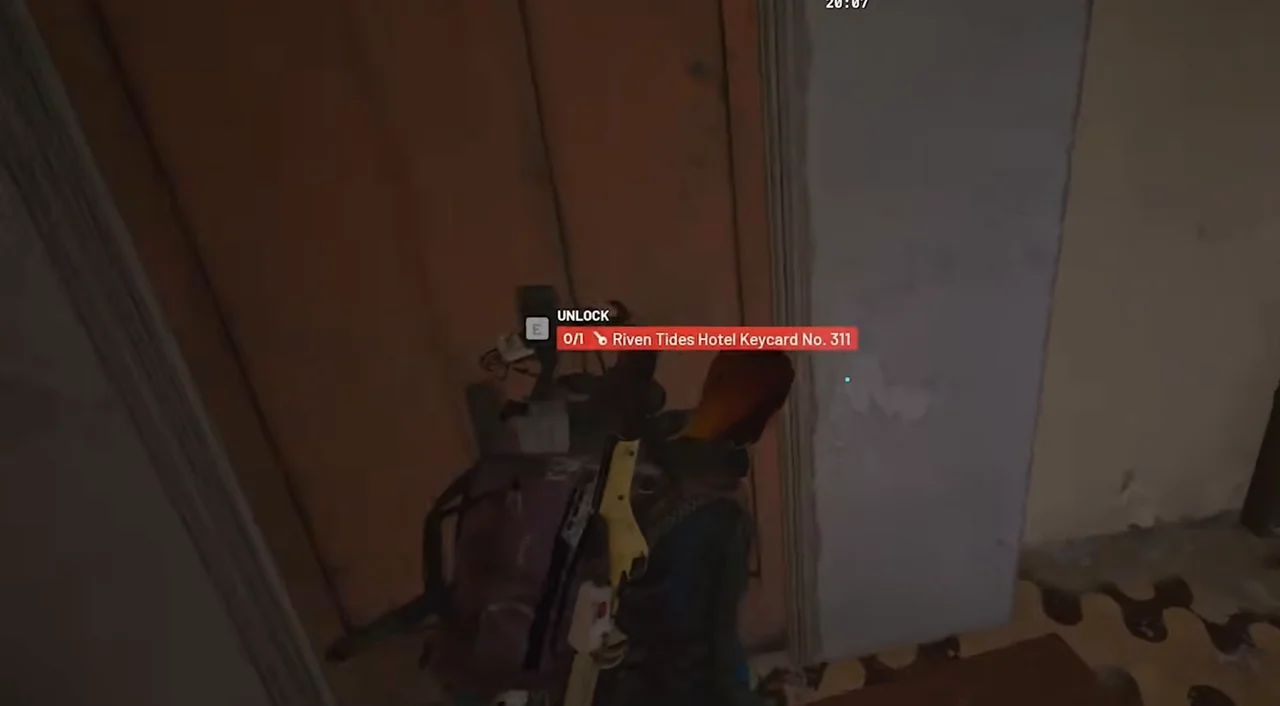
| Riven Tides Hotel Keycard No. 311 | 3xx level, eastern exterior approach | Do not assume the main entrance zipline provides a direct hallway route. |
| Riven Tides Hotel Keycard No. 404 | 4xx level | Use the stairs or roof-side vertical route and confirm the 404 door number. |
Room 106 is the window-repair stop for Shoring Up Defenses, not Room 107's keycard suite. Room 103 is not listed as an additional keycard destination, so do not buy or search for an extra card merely to make a room-number sequence look complete.
The ARC Raiders keys service is the relevant access option. Choose the room and check every outer lock before deciding which cards you need.
The Stacking Yard Secret Room Puzzle
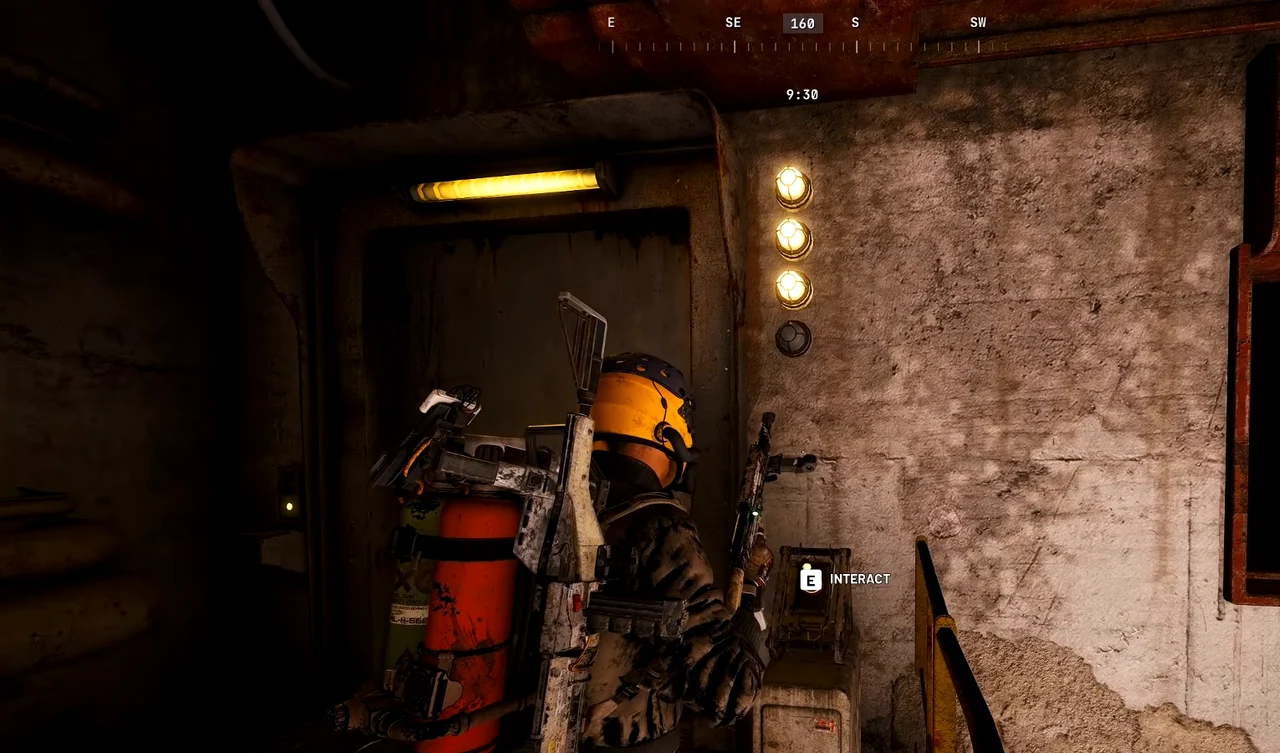
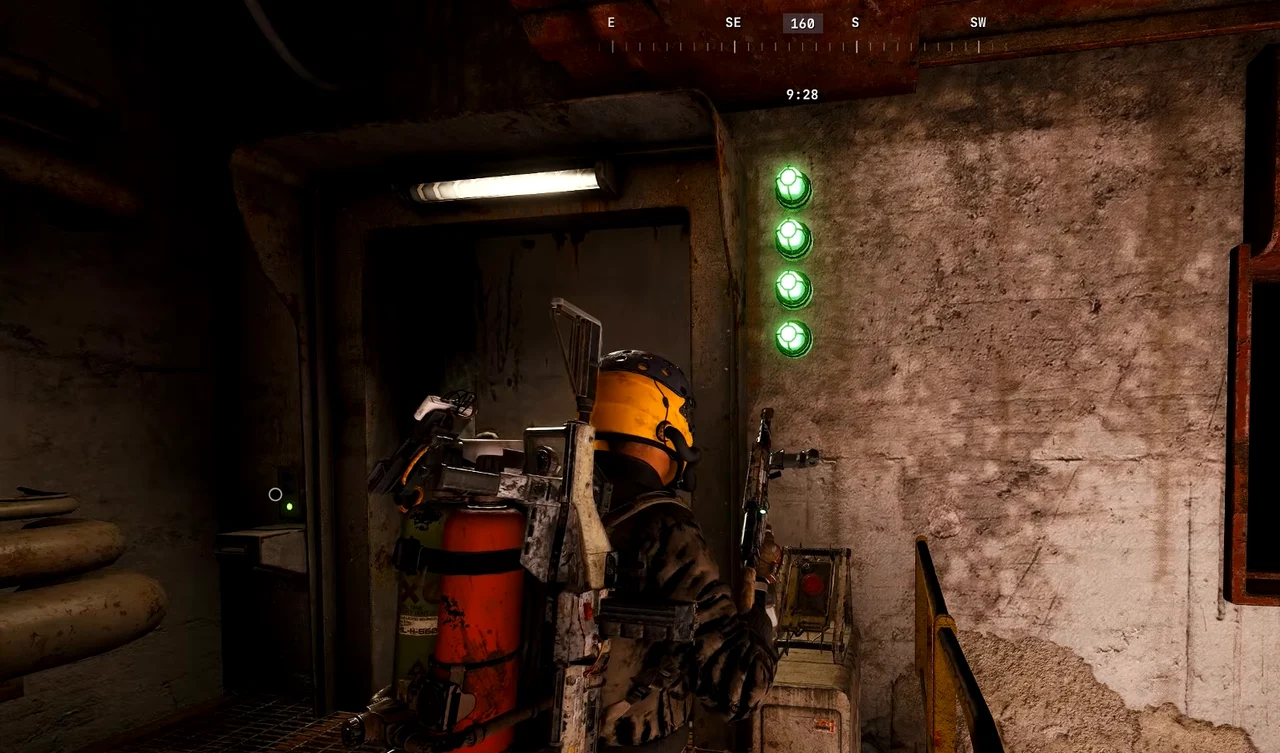
Press the four active Stacking Yard buttons to open the first puzzle room, then treat the lift and carried Fuel Cell stage as a separate step. The active buttons are selected from candidate positions, so a list of four permanent coordinates would send you to the wrong objects in another raid.
Finding the Active Buttons
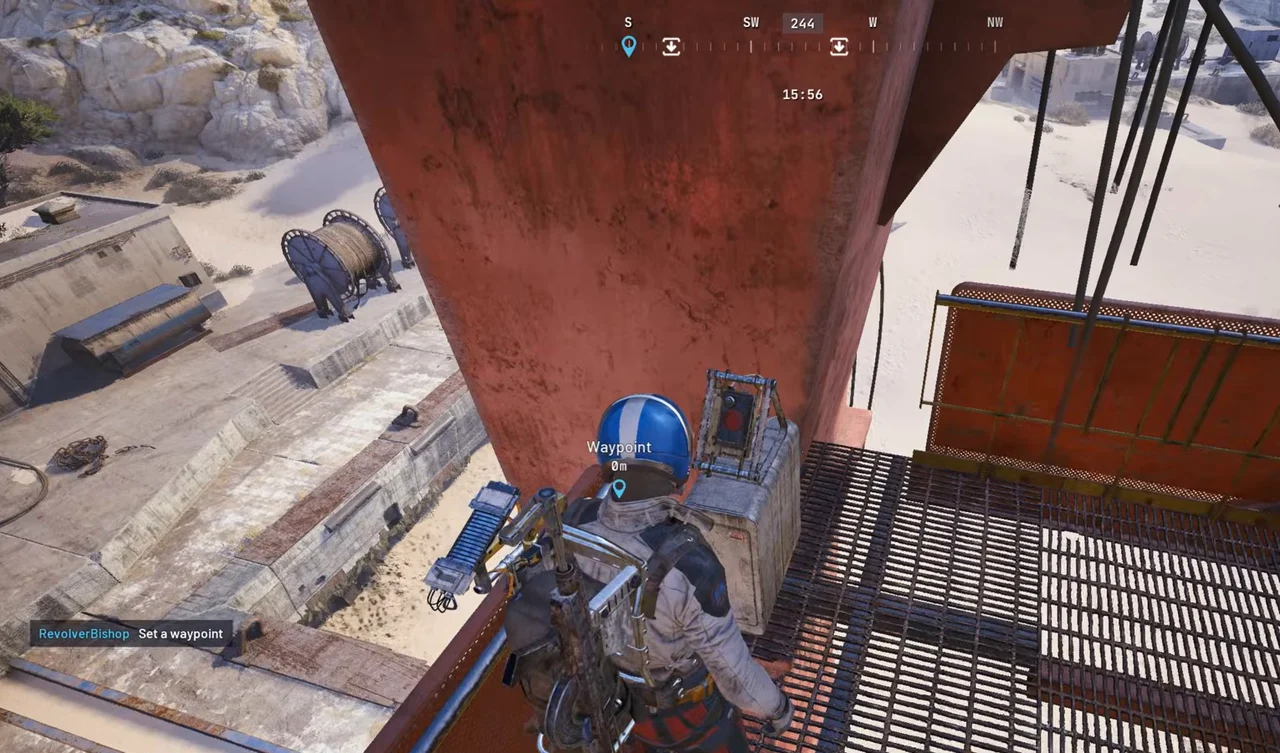
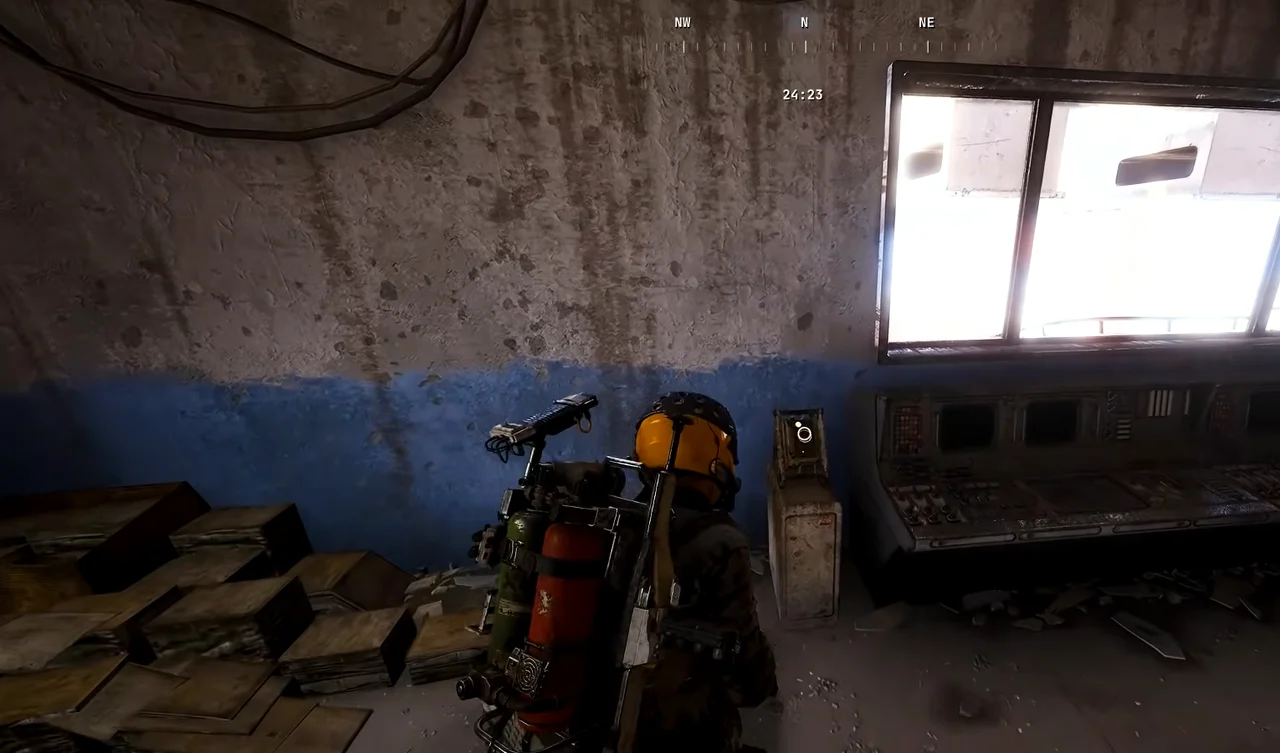
For the first button room, sweep buildings 03, 02, then 01, checking ground level, interiors and the upper cranes linked by ziplines. Finish at the room in building 01. The button stage can be completed solo.
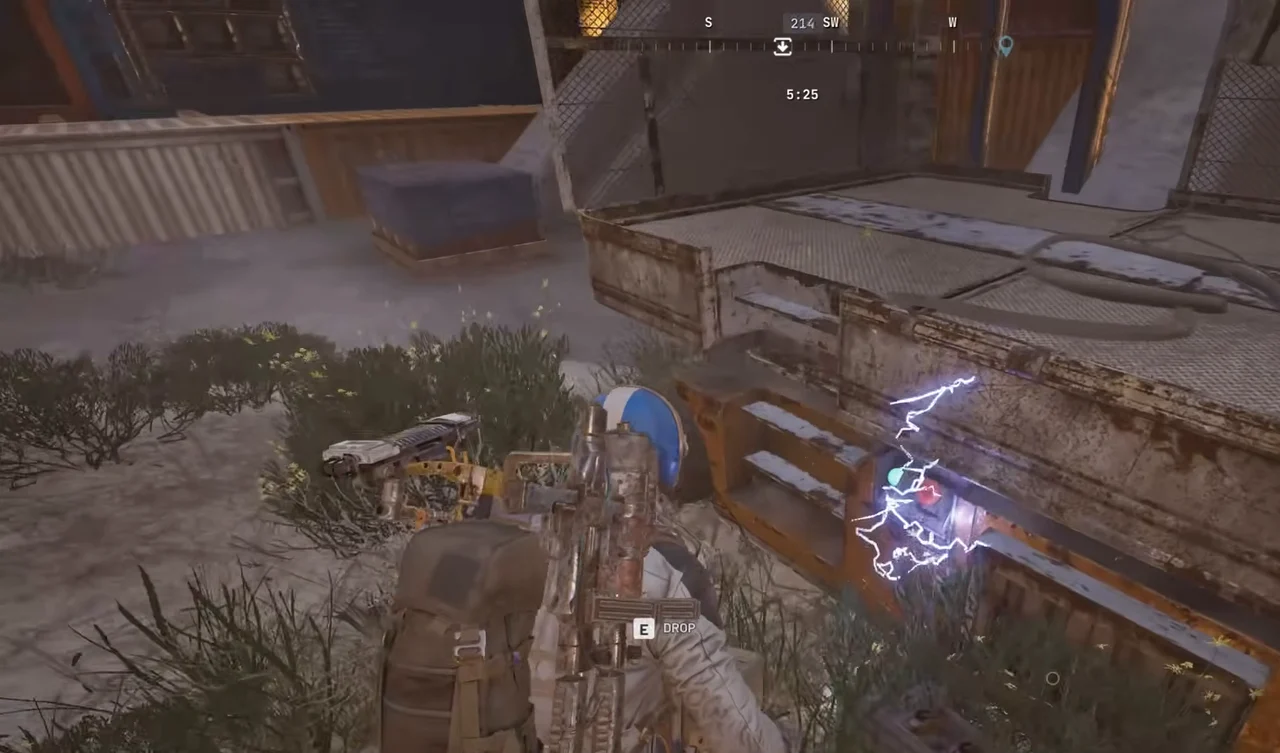
Illustrated candidate positions include vegetation beside a concrete foot at building 01, a red beam beside the crane 1 grated stair landing, an upper interior window console and the room-door catwalk. These are possible button positions, not a fixed four-button layout. Check the native interaction prompt at each button, then confirm four green indicators and the first room door opening.
| Search Zone | Places to Inspect | What to Avoid |
|---|---|---|
| Tower base and nearby containers | Ground-level corners, vegetation, and container-side recesses | Assuming every button is above eye level. |
| Exterior stairs and ladders | Landings, railings, stair supports, and the path into the crane structure | Repeating a full climb without checking the landing edges. |
| Crane platforms and beams | Platform corners, red structural beams, and adjoining walkways | Treating one photographed candidate position as permanently active. |
| Cabin and roof-edge areas | Room interiors, exterior corners, and accessible roof edges | Following a guessed marker when no usable button is present. |
These are search zones, not four guaranteed button positions. Recheck the first room after the active buttons have been used. A searched or already opened puzzle can have a different visible state from a fresh one.
The Lift and Fuel Cell Stage
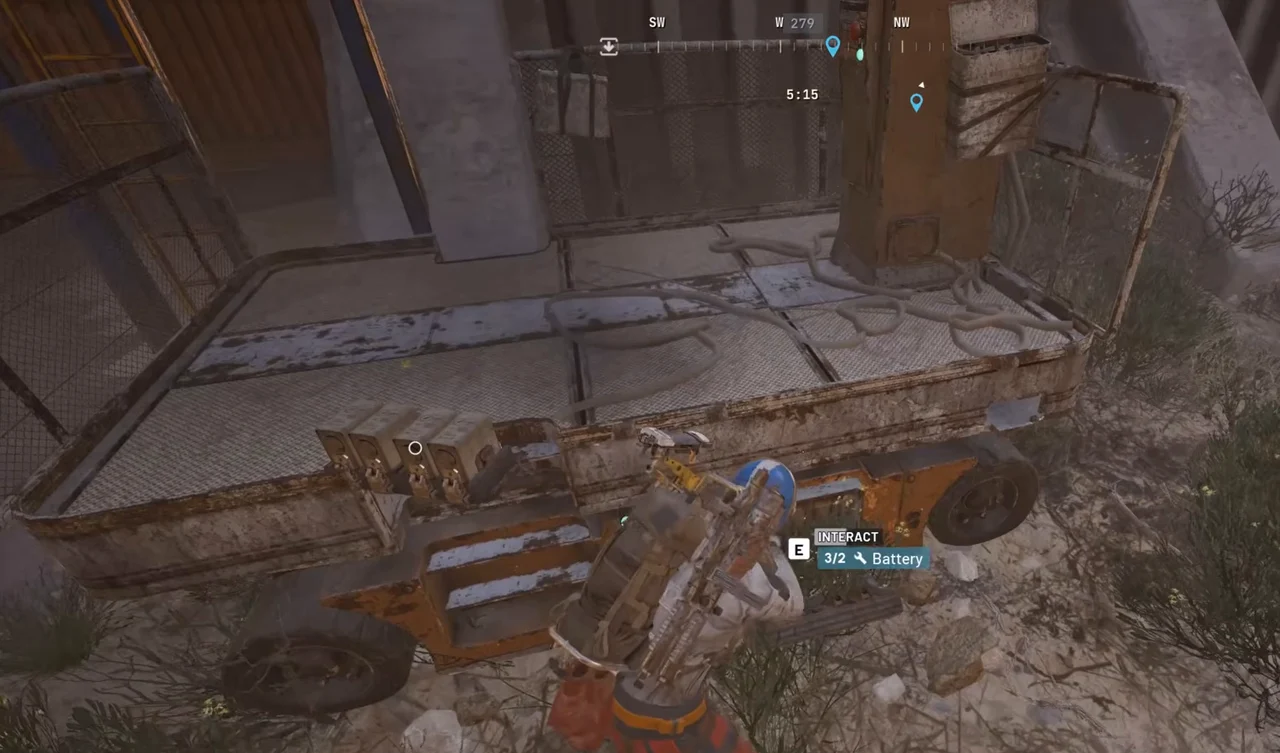
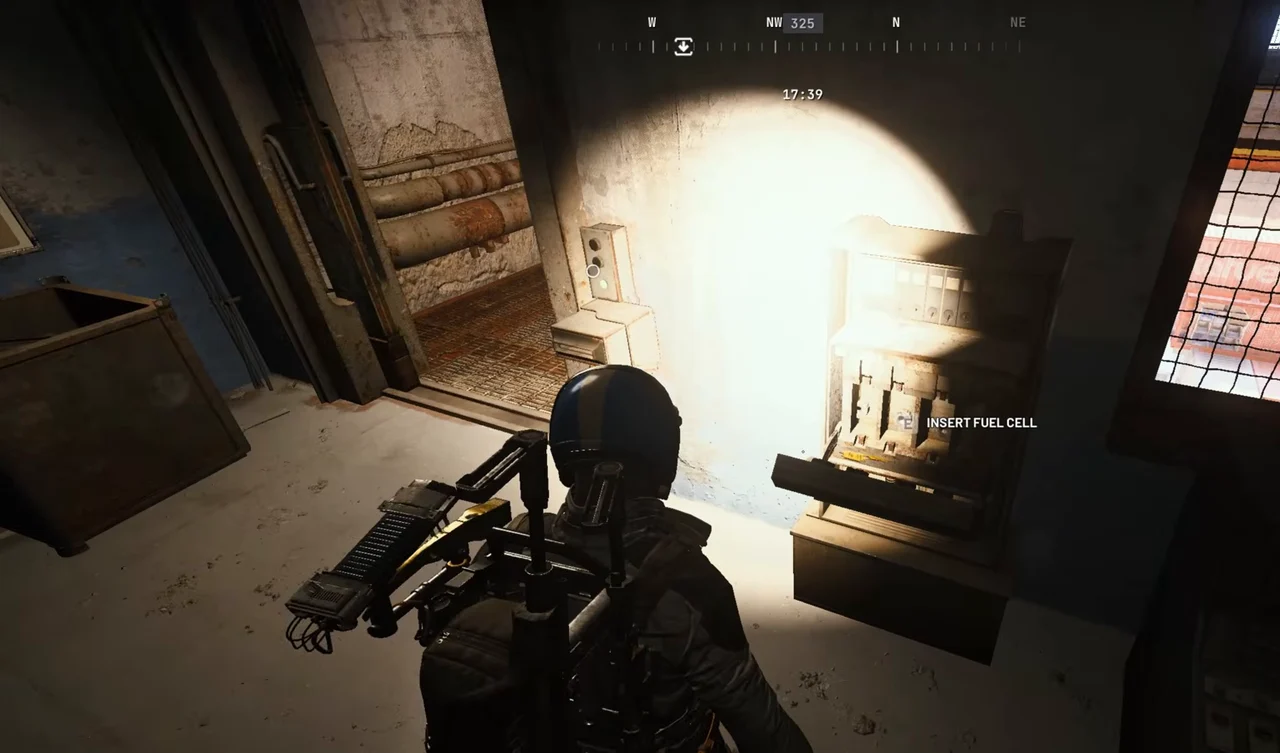
Read the lift repair prompt for the required inventory material and quantity. The pictured Battery prompt shows 3/2 and requires two inventory batteries for that repair. Check your own prompt rather than assuming a universal recipe. Carry the separate world Fuel Cell to the INSERT FUEL CELL socket inside the first room, rather than confusing it with the inventory repair material.
For the coordinated lift method, have one raider hold the ground lift control while the other carries the Fuel Cell on the platform to the upper first room and its socket. This is a two-person method for the lift stage, not a partner requirement for the first button room.
The first button stage and the later lift stage should not be described as one blanket two-player requirement. A solo player can work on the button search, but should not count on completing the coordinated transfer alone. Do not commit a solo delivery run to that second stage without an available method shown by the current mechanism.
Puzzle Room or Crane House Room?
The button puzzle and Crane House keycard room are separate access problems. A card prompt requires the named card, while the puzzle requires its active interactions and power sequence. Spending the Crane House card does not press the buttons, and finding the buttons is not proof that the keyed room is open.
Keep the puzzle optional when you already carry a quest item. Its climbs and repair stops can take you away from the exit route that made your original raid manageable.
Every POI on Riven Tides
The map combines a western hotel district with an industrial port and exposed shoreline. Plan around the named building and approach, then use room numbers or mechanism prompts to settle the final destination. A map marker alone cannot tell you which floor of the hotel or Port Authority you need.
Hotel Panorama Azzurro and the Tennis Court
Hotel Panorama Azzurro is on the west side. Its main entrance gives access to the vertical circulation route, with a zipline and flanking stairs inside. Room numbers remain the final confirmation when you enter from a roof, balcony, or side approach instead.
Safe Harbor uses the hotel kitchen sketch before sending you toward the Tennis Court south of the hotel. Shoring Up Defenses uses Room 106's shuttered windows. The 107 suite, kitchen, and 106 repair room are separate destinations in one building.
For Room 311, approach the hotel from outside on the eastern side and work toward the 3xx-level access. Do not keep taking the entrance zipline on the assumption that every upper suite is connected by the same hallway.
Stacking Yard and Port Authority
Stacking Yard is the crane-and-container portion of the port, east of the hotel district. For Shoring Up Defenses, reach a qualifying raider shelter on a crane and use its reinforcement prompt. That structure is not the Crane House keycard door or one of the secret-room buttons.
Port Authority holds Classified Records and the nested Secure Storage route. Work upward into the office area, then distinguish the two locks. Customs House is another building with its own interior height changes and extraction approach. An underground passage inside a building does not by itself prove that the map needs another global layer.
Beaches, Seawall, and Pipelines
Azzurro Beach lies north of the hotel district and supports the seaweed stage of Battening Down. The nearby Seabed description is a shoreline landmark, not a numbered hotel-room objective.
The Wavebreaker seawall and northeastern pipelines form another part of the coastal investigation. Use the damaged seawall for the photograph and the rainbow oil sheen to identify the pipe area. Do not rely on whether a screenshot shows wet or dry sand to replace the actual collection prompt.
Exit Labels and Optional Secrets
Use the actual Customs Elevator and Seaside Elevator markers when planning a departure. A hilltop hatch description needs to match a real hatch marker and prompt before it becomes an exit plan. The name Xfell Monument is not a reliable substitute for a confirmed extraction symbol.
The hotel's disco-ball secret is optional exploration, not one of the numbered keycard rooms or the Stacking Yard button sequence. Keep those discoveries out of a timed delivery route unless the extra detour still leaves a clear way out.
| POI | Area and layer | What it is | Quest walkthroughs |
|---|---|---|---|
| Hotel Panorama AzzurroShow area on map | Western hotel districtHotel interiors, room corridors and exterior upper approaches | Use the kitchen for Safe Harbor and painted numbers for Room 106 repairs, keeping Room 107's reward suite and Room 311's exterior east approach separate. | Shoring Up Defenses Battening Down Safe Harbor |
| Stacking YardShow area on map | Port crane-and-container district east of the hotelYard ground, crane platforms and raised rooms | Keep crane repair, the Crane House keycard room, button room and later powered lift separate, with button locations raid-dependent rather than fixed. | Shoring Up Defenses |
| Port Authority BuildingShow area on map | Port Authority office building in the industrial portMultiple internal levels, upper office route | Secure Storage sits behind Classified Records, requiring the Classified Records Keycard and separate Secure Storage Keycard when both doors are shut. | |
| Customs HouseShow area on map | Customs House and its named elevator approachBuilding interiors with local stairs and tunnel routes | Check the Customs elevator for an optional Safe Harbor exit, not a quest pickup, without assuming interior tunnels form a separate global layer. | Safe Harbor |
| Wave Breaker / Wavebreaker seawallShow area on map | Northeastern coastal seawallSurface shoreline and seawall | Photograph the damaged seawall for Battening Down, keeping the northeastern oil-pipe inspection as a separate coastal stop. | Battening Down |
| Azzurro BeachShow area on map | North of Hotel Panorama Azzurro, on the northwestern shoreSurface beach | Use the seaweed-sample prompt, not wet or dry sand as proof, with Beachcombing separate and dependent on its condition and detector. | Battening Down |
| Tennis CourtShow area on map | Outside and south of Hotel Panorama AzzurroSurface court and nearby dig area | Follow the kitchen sketch's tennis-racket clue to the dig prompt and collect the Precision Gimbal, not treating any shovel or rocks as proof. | Safe Harbor |
| SeabedShow area on map | Shoreline area near Azzurro Beach, exact boundary unconfirmedSurface shoreline | Use this coastal landmark for orientation, then follow the seaweed or pipe quest prompt to the collection point. | Battening Down |
| Northeast pipelinesShow area on map | Far northeastern shoreline, where pipelines emerge from the seaSurface shoreline | Follow the rainbow oil sheen to the Battening Down pipe area and check the inspection prompt rather than assuming every pipeline counts. | Battening Down |
| Hilltop HatchShow area on map | Beside Mulatierra Hill, not the far northern shore. The name is matched to a recorded native hatch symbol.Surface | Raider Hatch beside Mulatierra Hill, not the far northern shore. Match the Hilltop Hatch prompt and carry a Raider Hatch Key. | |
| Xfell MonumentNot a separate map location | Use the five named exits in this guide rather than treating this label as another extraction.Not a separate location | Unsupported extraction label from the brief. Use Customs, Seaside, Hilltop, Saltswept or Weighbridge instead of treating it as another exit. | |
| Seaside elevatorShow area on map | Seaside extraction approach shown on the raid mapApproach to the elevator terminal | Check the terminal name, approach and availability for this optional Safe Harbor departure after collecting the item, not another pickup objective. Cargo Elevator south of Port Authority. Check the active terminal and your raid map before choosing this harbor extraction. | Safe Harbor |
| Customs elevatorShow area on map | At Customs HouseLocal interior route to the elevator terminal | Follow the stairs or passage to this optional Safe Harbor exit and check availability rather than assuming access from every level. Cargo Elevator at Customs House. Use the countdown and terminal state in your current raid, not the recording's historical timer. | Safe Harbor |
| Hidden hatchesSaltswept Hatch (surface)Hilltop Hatch (surface)Weighbridge Hatch (surface) | Saltswept north of the hotel, Hilltop beside Mulatierra Hill and Weighbridge east of Transfer Depot.Surface | Three separate native Raider Hatch areas with guide-matched names. Carry a Raider Hatch Key and confirm the named prompt in your raid. Raider Hatch north of Hotel Panorama Azzurro. Carry a Raider Hatch Key and check the Saltswept Hatch prompt in your raid. |
Plotted locations and overview areas
| Location | Layer | Precision | What it is |
|---|---|---|---|
| Beach Bar | surface | POI area | Use the Beach Bar north of the hotel as a landmark. Check the event selector before planning a Beachcombing run. |
| Poolside | surface | POI area | Poolside is beside the western side of the hotel. |
| Dried Riverbed | surface | POI area | Use the Dried Riverbed east of the hotel as a local navigation reference. |
| Transfer Depot | surface | Recorded building area | This recorded footprint identifies the building area, not an exact door or guaranteed interaction. |
| Weighing Checkpoint | surface | Recorded building area | This recorded footprint identifies the building area, not an exact door or guaranteed interaction. |
| Weighbridge Hatch | surface | Native map symbol or approach with guide-matched name | Raider Hatch east of Transfer Depot, near Weighing Checkpoint. Bring a Raider Hatch Key and check the terminal before using it. |
| Safe Harbor · Tennis Court | surface | Objective area, not exact interactable | Read the hotel kitchen sketch, follow its tennis-racket clue to the Tennis Court dig prompt and retrieve the Precision Gimbal. |
| Shoring Up Defenses · Stacking Yard | surface | Objective area, not exact interactable | Use ARC Alloy for a qualifying Stacking Yard crane shelter, reinforce Room 106's shuttered windows and complete Wasp and Firefly tasks. |
| Battening Down · Azzurro Beach | surface | Objective area, not exact interactable | Photograph the damaged Wavebreaker seawall, sample Azzurro Beach seaweed and inspect the northeastern oil pipe by the rainbow sheen. |
| Battening Down · Wavebreaker seawall | surface | Objective area, not exact interactable | Photograph the damaged Wavebreaker seawall, sample Azzurro Beach seaweed and inspect the northeastern oil pipe by the rainbow sheen. |
Beachcombing on Riven Tides
Use the Dockmaster's Detector on the beach during Beachcombing to locate buried finds. The beeps become more frequent as you close in, and the dig interaction is the confirmation that you have reached a usable spot. Do not keep digging a remembered patch solely because it produced loot in another raid.
The detector is granted through Shoring Up Defenses, separately from the quest's completion rewards. Check your inventory and the current map conditions before building a raid around beachcombing.
- Equip the detector on a beach with the condition available.
- Adjust your direction as the beeps become more frequent.
- Use the dig prompt when it appears.
- Check the find and nearby ground before stepping forward to collect it.
Buried finds can include hazards such as mines or Ticks, not only treasure. Keep room to move away from the dig spot and avoid sorting loot while standing over a newly exposed object.
Avian Alarm is a player project introduced with the update, not another name for the Beachcombing map condition. Its presence in a progression menu does not establish that beachcombing is active in your next raid.
Resource Locations on Riven Tides
Wires, Batteries, and Crane Repairs
Search suitable electrical and industrial containers along the port route for Wires and Batteries. For the Stacking Yard lift, read the current repair prompt before spending materials. A carried Fuel Cell belongs to the later power step, not the same inventory-material stack.
Shoring Up Defenses uses ARC Alloy for the crane-shelter reinforcement. Reserve the item requested by that quest instead of assuming Wires repair every structure.
Used by: the Stacking Yard mechanism and Shoring Up Defenses, according to their separate prompts.
Great Mullein and Natural Resources
Do not make a Riven Tides Great Mullein run depend on an unconfirmed beach spawn. For a specific Doctor's Orders plant search, the Galleria route on Buried City or the vegetation routes on Blue Gate provide a clearer starting plan.
The seaweed interaction for Battening Down is a quest sample, not a substitute for Great Mullein or an ordinary fruit harvest.
Used by: the named quest objective, not every natural-resource turn-in.
Call Stations and Field Depots
A port console, crane switch, and Customs extraction terminal are not automatically Call Stations or Field Depots. Choose a marker with the correct interaction before carrying supplies toward it.
Consult the Call Stations guide and Field Depots guide for their supported routes. Keep a depot-dependent objective off your Riven Tides plan when you cannot identify a usable depot in that raid.
Used by: A Better Use or Off The Radar only where the required station or depot interaction is actually supported.
Extraction Points on Riven Tides
Plan around a named, available extraction rather than assuming the nearest tower or tunnel is a way home. Customs Elevator and Seaside Elevator are the main named approaches used by the Safe Harbor route, but their availability must be checked in the current raid.
| Exit | Recorded Area | Before You Commit |
|---|---|---|
| Customs Elevator | Customs House side of the port | Reach the terminal and check the active exit timer. |
| Seaside Elevator | South of Port Authority | Check the terminal and the exposed coastal approach. |
| Hilltop Hatch | Mulatierra Hill | Bring a Raider Hatch Key and match the prompt. |
| Saltswept Hatch | North of Hotel Panorama Azzurro | Bring a Raider Hatch Key and match the prompt. |
| Weighbridge Hatch | East of Transfer Depot, near Weighing Checkpoint | Bring a Raider Hatch Key and match the prompt. |
The recorded map has two elevator areas and three hatch symbols. The hatch names above are matched to mapped guide labels, so confirm them at the terminal in your raid. Xfell Monument is not one of the named exits above. Inspect available exits before collecting a delivery item.
For Safe Harbor, the hotel kitchen and Tennis Court belong to one delivery route. After collecting the Precision Gimbal, prioritize extraction over the Stacking Yard puzzle or an extra hotel suite. The quest's same-round requirement does not disappear because the item is in a safe pocket.
Leave enough time for stairs, ladders, and interior detours. An exit that looks close from a hotel balcony may still require a long descent and an exposed ground-level crossing.
Quests on Riven Tides
The map's core quest routes are Battening Down, Shoring Up Defenses, and Safe Harbor. They share buildings and shoreline approaches without using the same interactions. Treat the kitchen sketch, shuttered windows, seaweed sample, and oil-pipe inspection as separate journal steps.
Battening Down
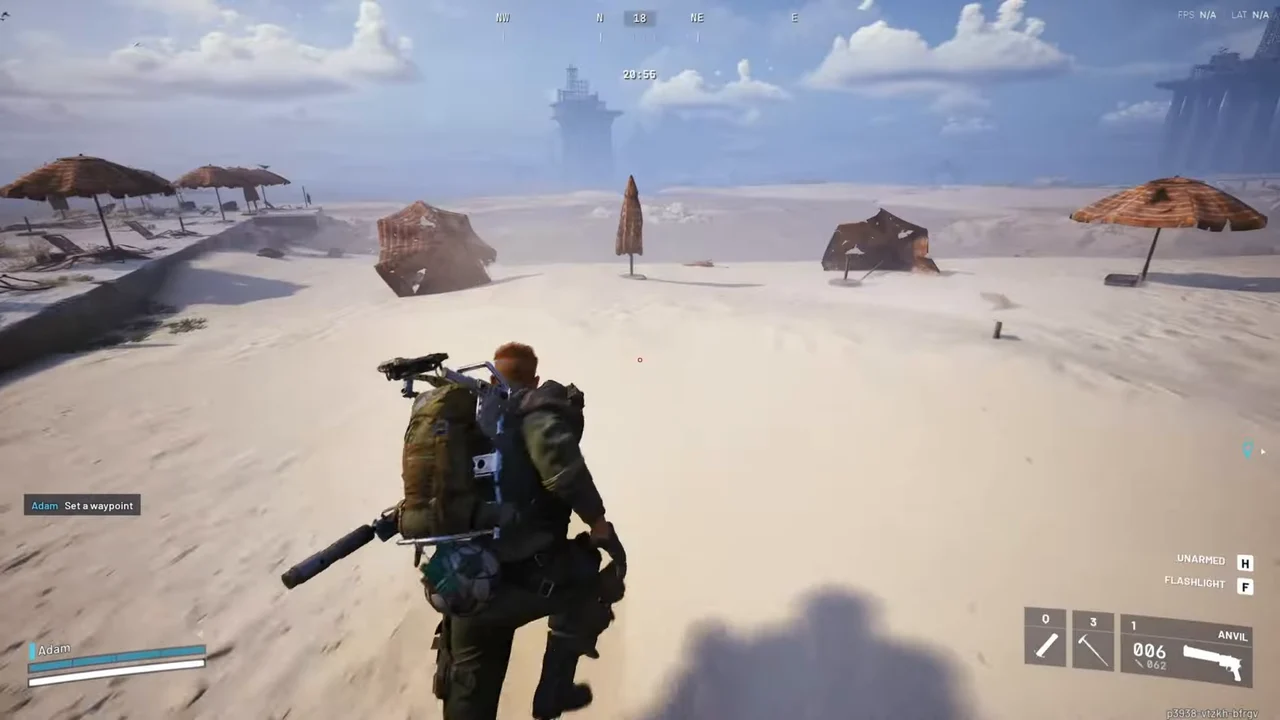
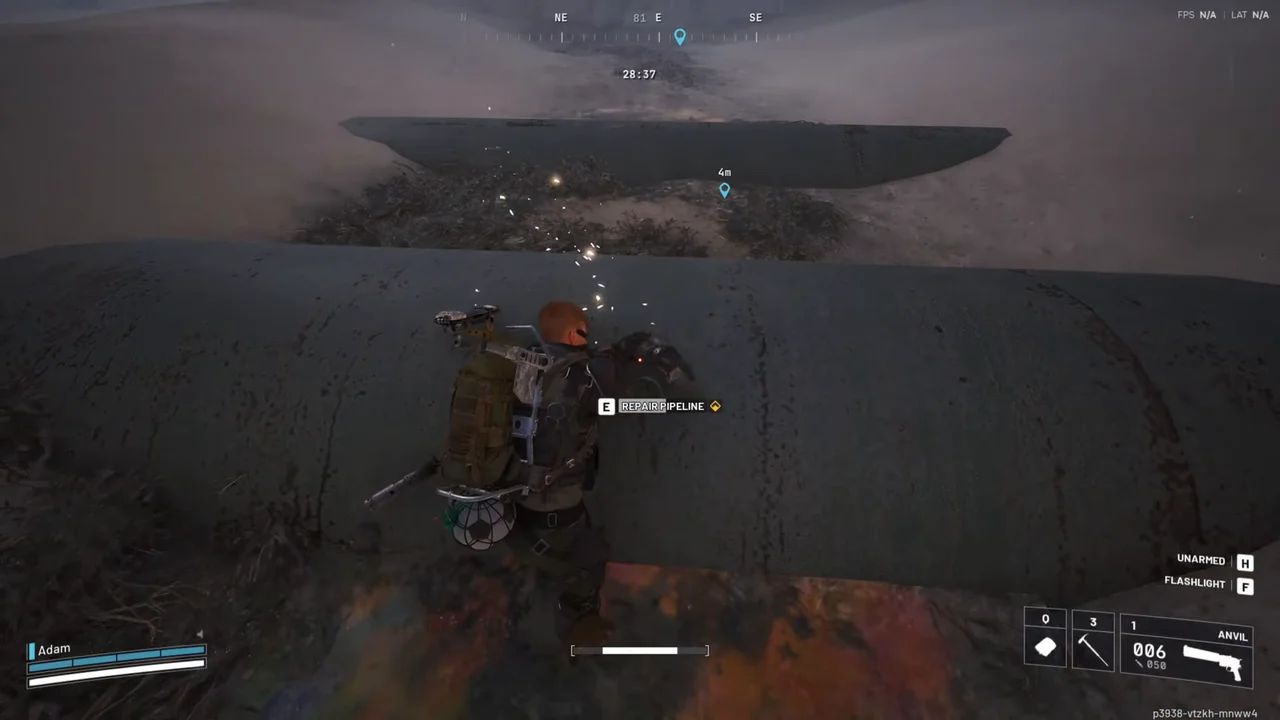
Battening Down, from Apollo, uses the damaged Wavebreaker seawall, seaweed around Azzurro Beach, and the northeastern oil-pipe area. The rainbow sheen helps identify the pipe location. Check the quest prompt rather than treating any pipe entering the sea as the objective.
These investigation stops can be approached as your journal permits rather than forcing a full coastline circuit in one attempt. Its Room 107 keycard reward is the connection to the hotel-card route. Claim that reward before planning to open 107.
Shoring Up Defenses
Shoring Up Defenses, also from Apollo, combines qualifying Wasp and Firefly kills with a crane-shelter reinforcement and the hotel's shuttered windows. The kill objectives can progress away from the hotel route when the correct targets count for the active quest.
Bring the ARC Alloy required for the crane structure. At the hotel, identify Room 106 and the red, already-shuttered windows rather than opening Room 107 with a card and looking for a repair prompt there. The Dockmaster's Detector is a granted tool, not proof you have finished the building repairs.
Safe Harbor
Safe Harbor, from Tian Wen, begins with the hotel kitchen sketch and continues to the Tennis Court dig site. Use the tennis-racket clue to identify the intended route, then inspect the actual dig prompt rather than treating any shovel or rock cluster as the objective.
Collect the Precision Gimbal and extract in the same round. A visit to the kitchen, a completed dig, and an item delivered to the trader are different stages. Make the exit your next stop once the Gimbal is secured.
Stacking the Hotel and Shoreline Routes
When the quests are active together, the hotel can combine Safe Harbor's kitchen with Shoring Up Defenses' Room 106 windows. Room 107 is an optional keycard detour, not another repair objective. Continue toward the Tennis Court only after confirming the kitchen step and your available extraction.
Azzurro Beach can combine a Battening Down sample search with Beachcombing when the condition and detector are available. The beach sample and detector dig are separate interactions. Add the seawall or cranes only if the remaining route still fits your exit plan.
A Wrench in the Works arrived with the Riven Tides update but takes place on Spaceport. Do not add its Water Towers or Western Gate objectives to this map merely because the update names match.
| Quest | Trader | Objective location | Round and extraction | Route note |
|---|---|---|---|---|
| Battening Down | Apollo | Photograph the damaged Wavebreaker seawall, sample Azzurro Beach seaweed and inspect the northeastern oil pipe by the rainbow sheen.Show Azzurro Beach on mapShow Wavebreaker seawall on map | One round: Not required Extraction: Not required | The Room 107 keycard is a reward, not a hotel objective or a guarantee of a Room 208 card. |
| Shoring Up Defenses | Apollo | Use ARC Alloy for a qualifying Stacking Yard crane shelter, reinforce Room 106's shuttered windows and complete Wasp and Firefly tasks.Show Stacking Yard on map | One round: Not required Extraction: Check quest journal | Reinforce Room 106's already shuttered windows, not the Room 107 suite. |
| Safe Harbor | Tian Wen | Read the hotel kitchen sketch, follow its tennis-racket clue to the Tennis Court dig prompt and retrieve the Precision Gimbal.Show Tennis Court on map | One round: Required Extraction: Required | Collect the Gimbal and extract in the same round rather than stopping after the dig interaction. |
| A Wrench in the Works | Unconfirmed | This related quest uses the Water Towers and Western Gate on Spaceport, not Riven Tides.Related quest, not an objective on this map | One round: Not required Extraction: Not required | Do not use the update name as the objective map, and note that the trader is unconfirmed in these records. |
Riven Tides Threats
The Turbine
The ARC Turbine is the large airborne ARC introduced with Riven Tides. Its missile attack can produce lightning strikes, so a projectile passing your first position does not mean the attack is over. Keep moving away from the impact area and avoid choosing an exposed beach as your only retreat route.
Do not stop moving just because the first projectile has passed. The practical danger is the missile-and-lightning sequence, including the area where the attack lands. Watch the ground for deployed mines when the machine descends, and do not assume it becomes harmless while landed.
Its armor changes when it lands, exposing machinery that is otherwise protected. A quest-carrying run does not need to become a Turbine hunt. Break contact and preserve your exit route when the fight is unrelated to your objective.
Shredders in the Hotel
Shredders can obstruct hotel corridors and the routes between room levels. Check the next landing before committing to a zipline or a long unlock. Do not assume every floor is occupied, but do not treat one clear hallway as proof that the adjoining suite or staircase is clear.
The eastern approach to Room 311 deserves its own exit check. Reaching a balcony is not useful when it leaves you without a controlled route back down.
Port Authority Doorways
Classified Records and Secure Storage give other raiders reasons to use the same upper offices. Nested locks can leave you moving back through the same narrow corridor with a fuller inventory.
Before opening the inner door, check the outer approach and keep your return route in mind. A previously opened outer room may save a card, but it can also mean another raider has already passed through. It is not evidence that the building is empty.
Beaches, Seawall, and Crane Platforms
The shoreline and seawall expose you while photographing, collecting, or digging. Use the available solid cover and finish one interaction before sorting inventory. A moving ARC patrol can change a crossing that was clear when you first arrived.
Crane platforms add fall risk and narrow approaches to the same problem. Complete the required reinforcement or puzzle interaction, then reassess the route rather than treating height as automatic safety from raiders below.
FAQ
How Many Keycards Are Covered on Riven Tides?
This page covers ten named map-specific cards: three industrial cards and seven hotel cards. Do not count Room 103 as an additional keycard destination. The generic Patrol Car Key is a separate item and should not be used to inflate the count of Riven Tides hotel or industrial keycards.
Where Do You Use the Secure Storage Keycard?
Use it for the inner Secure Storage room reached through Classified Records in the upper Port Authority Building. Bring the Classified Records card too when the outer door is locked. One card does not open both locks, and an open outer room does not guarantee untouched loot inside.
Is Room 107 the Best Hotel Keycard Stop?
It is a useful planned stop because Battening Down awards its card and a Room 208 card has been reported in the under-bed safe. Check the actual contents before planning the upstairs continuation. There is no verified first-visit guarantee, fixed weapon set, or minimum loot value.
Where Are the Stacking Yard Buttons?
The four active buttons are selected from candidate positions around the puzzle tower and its structures. Check ground-level corners, stairs, platform edges, beams, and cabin areas for the usable prompts. Four permanent map pins are not a reliable substitute for searching the active positions in your raid.
How Do You Reach Hotel Room 311?
Approach from outside the hotel on its eastern side and work toward the 3xx-level access, then confirm the 311 number. Do not assume the main entrance zipline leads directly to the correct hallway. Check the return route before spending the card at an exposed approach.
What Is the Turbine on Riven Tides?
The ARC Turbine is a large flying machine with heavy armor and electrified attacks. Its missiles can trigger lightning at the impact area, and it can deploy mines while descending. Landing exposes parts of its machinery but does not make it defenseless, so a quest run need not become a fight.
Plan Your Next Riven Tides Run
Keep the hotel, crane puzzle, and shoreline objectives as separate decisions. Choose the quest you want to finish first, then prepare its required items before adding optional keycard stops.
Gameplay Image Credits
Gameplay images adapted from the following creators. Captures have been cropped or resized for this guide.
- Riven Tides surface: gameplay capture by Platinum Hunter. Cropped or resized for this guide.
- Riven Tides surface, Riven Tides location photos: gameplay capture by Adam Survives. Cropped or resized for this guide.
- Riven Tides surface: gameplay capture by TroubleChute Basics. Cropped or resized for this guide.
- Riven Tides location photos: gameplay capture by Huuge. Cropped or resized for this guide.
- Riven Tides location photos: gameplay capture by Nickko Kimiko. Cropped or resized for this guide.
- Riven Tides location photos: gameplay capture by GosuNoob. Cropped or resized for this guide.