

Pendola Pass
surface · 45 mapped locationsShow on map
How to Get Inside the Fallen Emperor
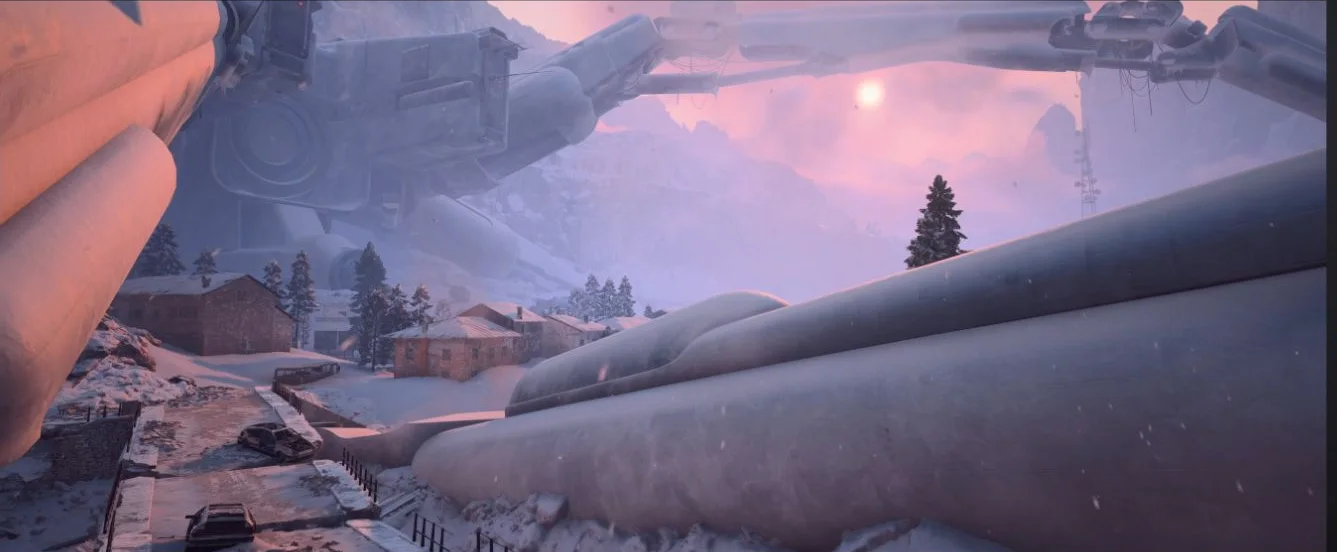
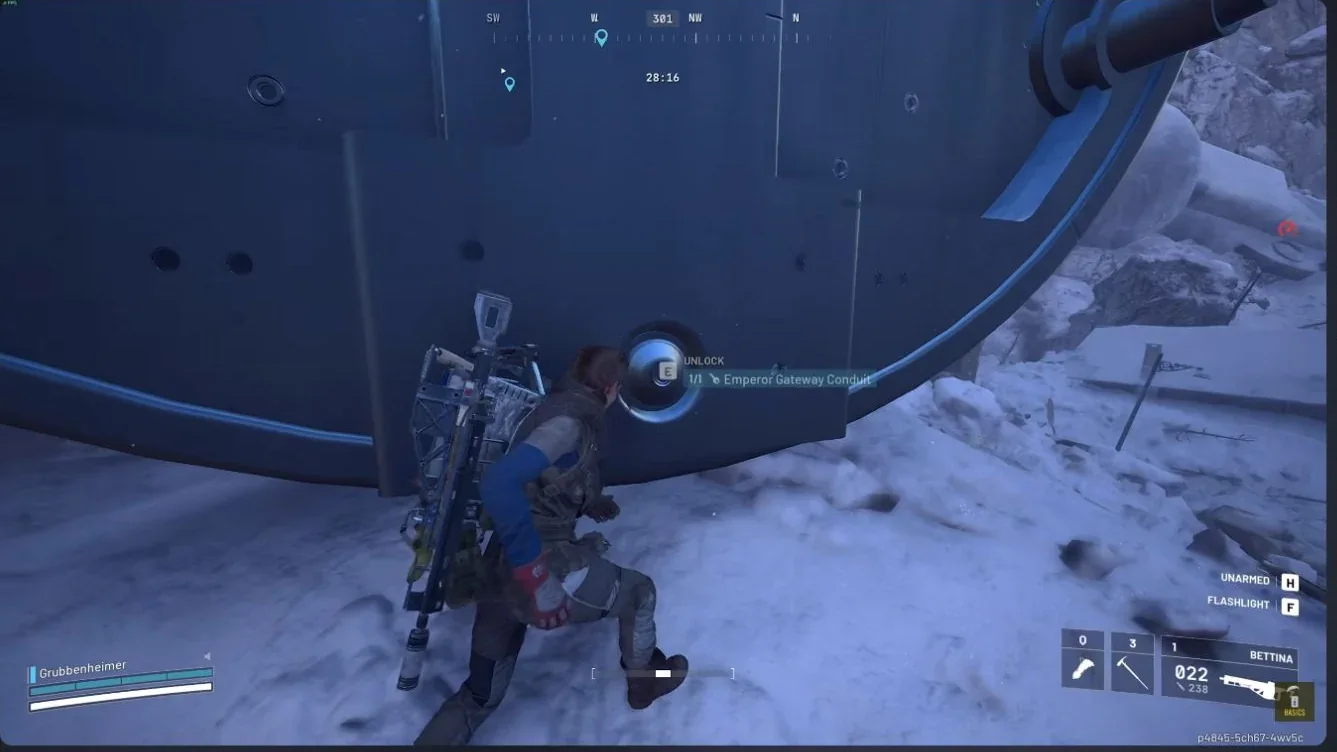
Use an Emperor Gateway Conduit at the socket on the fallen Emperor's lower hull to open its round entrance hatch. The machine lies against the mountainside, with its enormous legs extending across the surrounding landscape. Follow the hull down to its base rather than climbing a leg and expecting to find the interior entrance at the top.
Prepare the Conduit and Your Climbing Gear
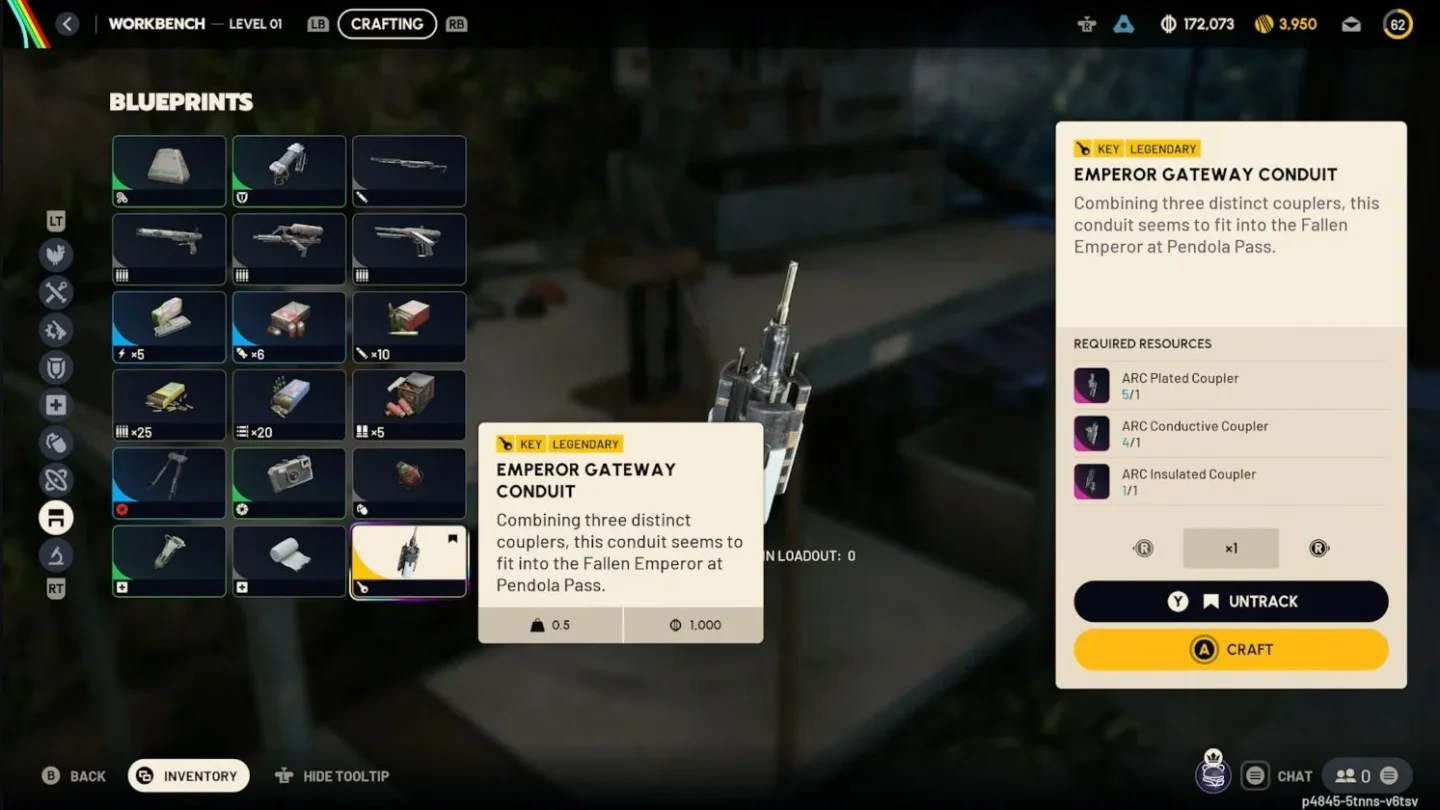
Learn the Conduit blueprint and craft the item at Workbench I before deploying. The recipe uses one ARC Insulated Coupler, one ARC Conductive Coupler and one ARC Plated Coupler. Bring the finished Conduit for a closed hatch, plus a Grappling Hook, ammunition and healing for the climb inside.
The Reward Pass supplies a finished Emperor Gateway Conduit at tier 60 as an alternative to crafting. This reward is the legendary key itself, not its crafting blueprint.
Accept Belly of the Beast before an interior quest run. It supplies a Grappling Hook and sends you through the Emperor's power, payload-processing and storage areas. The Emperor Modulator is something you obtain inside, not an item you need to bring to open the door.
Collect the Couplers Through Redirection
- Find an active Damaged Emperor Relay. During Redirection, use the relay's map countdown and red beam to judge when to approach. A relay marker is not a promise that it is ready to search immediately.
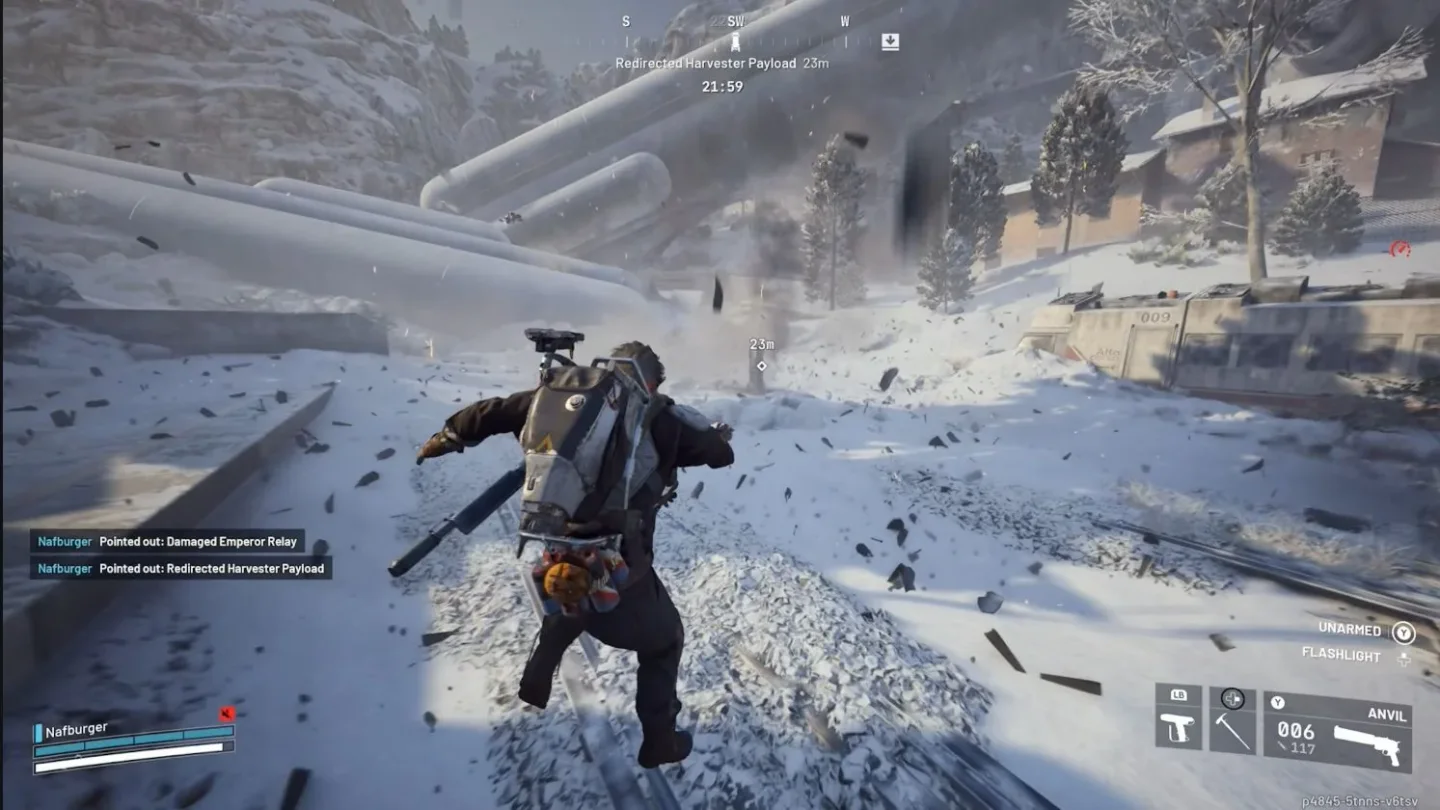
- Search the relay for an Emperor Beacon. Deploy the beacon in an open area, then move clear of the incoming debris. Watch both the sky and the approaches other Raiders can use.
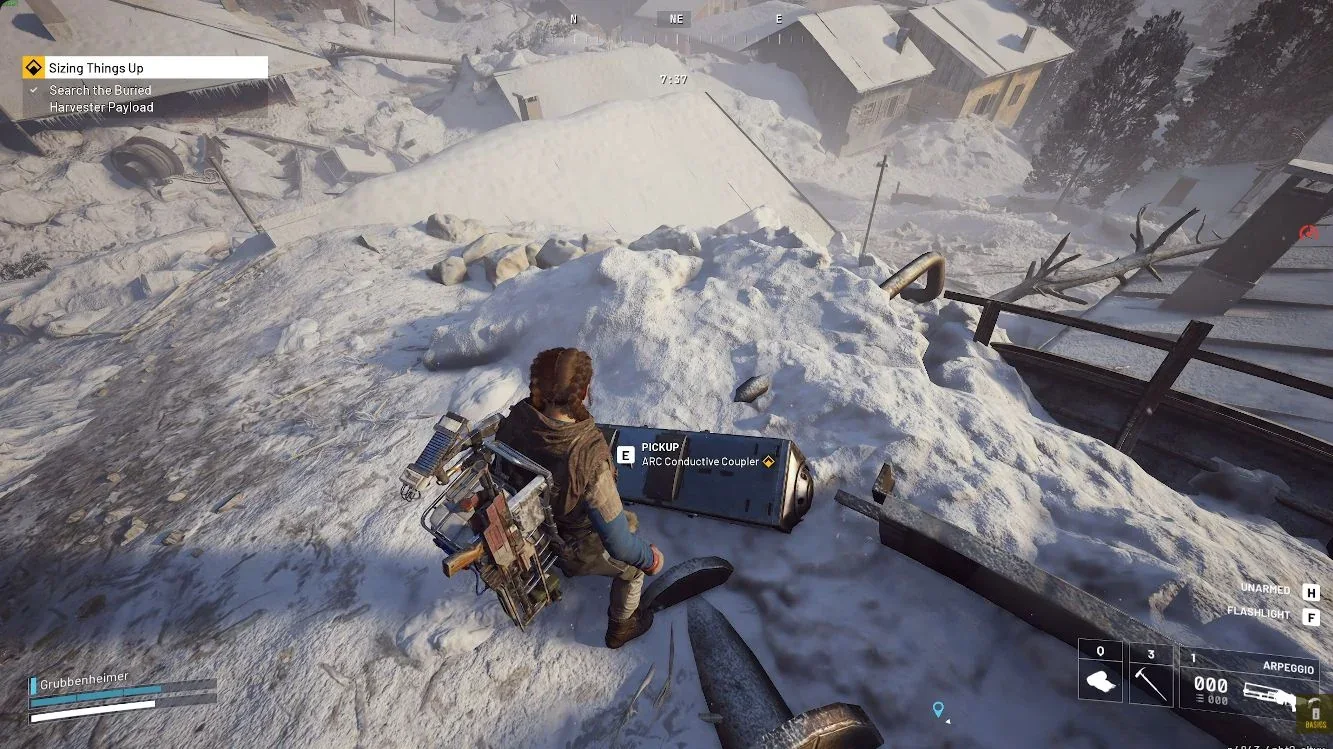
- Breach the large upright Harvester Payload. Search it for the Couplers and Conduit blueprint. Check the item names rather than treating every piece of ARC salvage as a recipe component.
- Extract with the materials and craft the key. Build the Conduit at Workbench I once you have the blueprint and one of each required Coupler. Do not plan around getting the whole recipe from a single payload.
Redirection provides this materials route. At the Emperor itself, the closed entrance uses the Conduit socket. An already-open hatch also lets other Raiders physically enter, so agree who will open it before spending time on separate approaches. Entering through another Raider's open hatch is not the same task as acquiring a Conduit yourself.
Open the Hatch and Follow the Interior
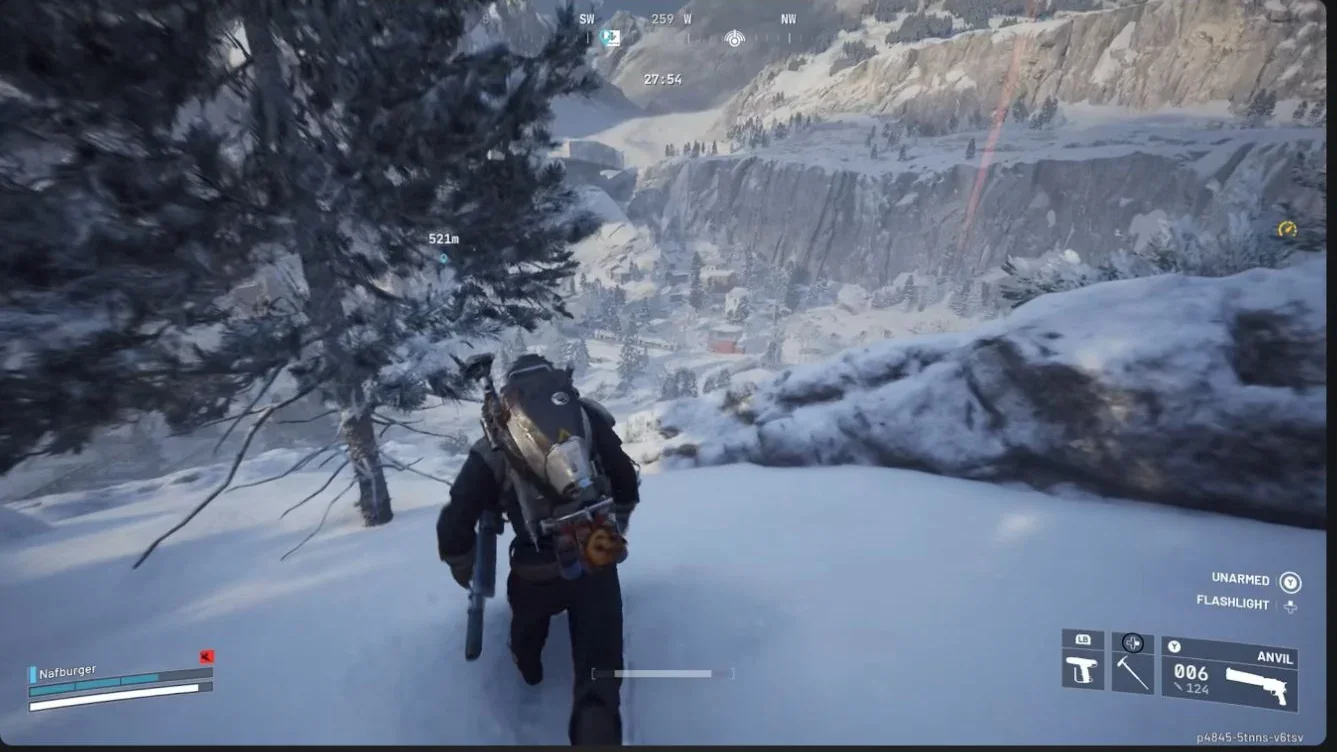
Interact with the socket at the base, unlock it with one Conduit and go through the round hatch beside it. Use the first-room elevator route to begin climbing. Follow the white lights at onward passages, and check each room's platforms, ladders and machinery before moving on. Navigate by those features rather than memorizing a compass turn for every trial room.
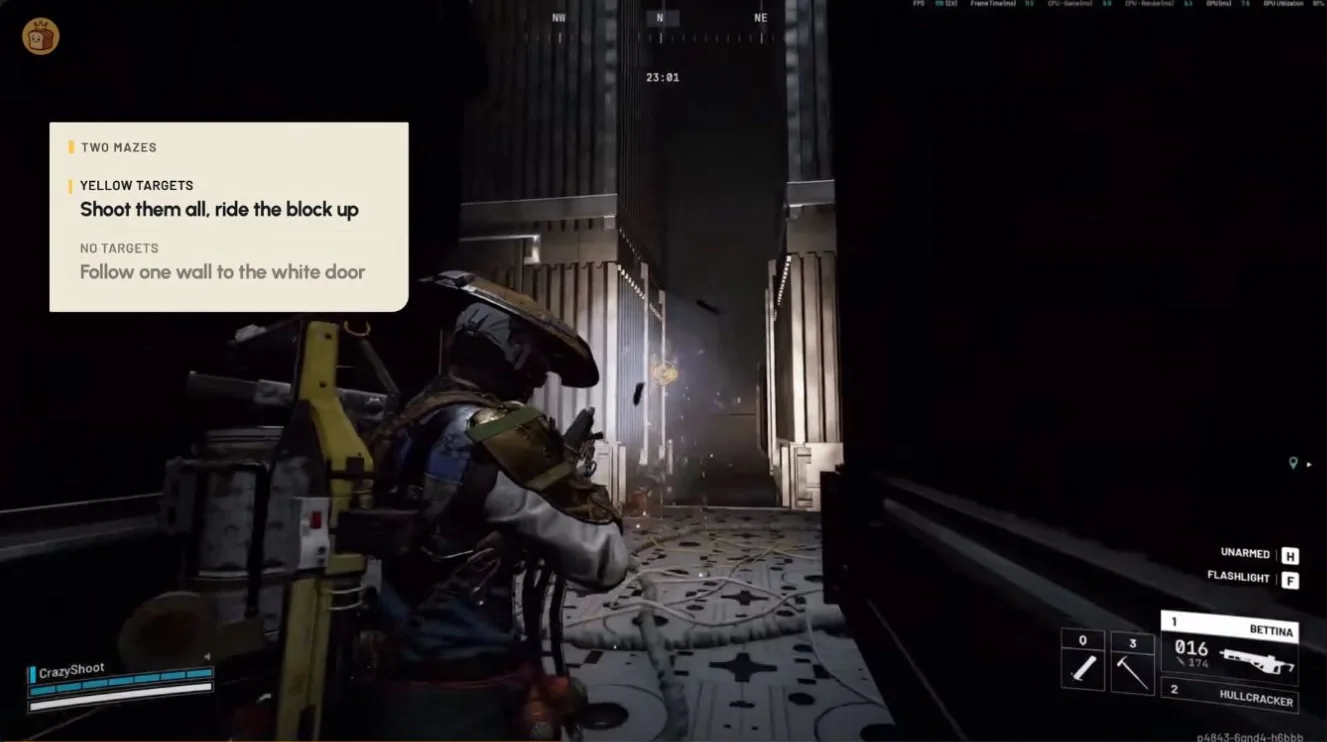
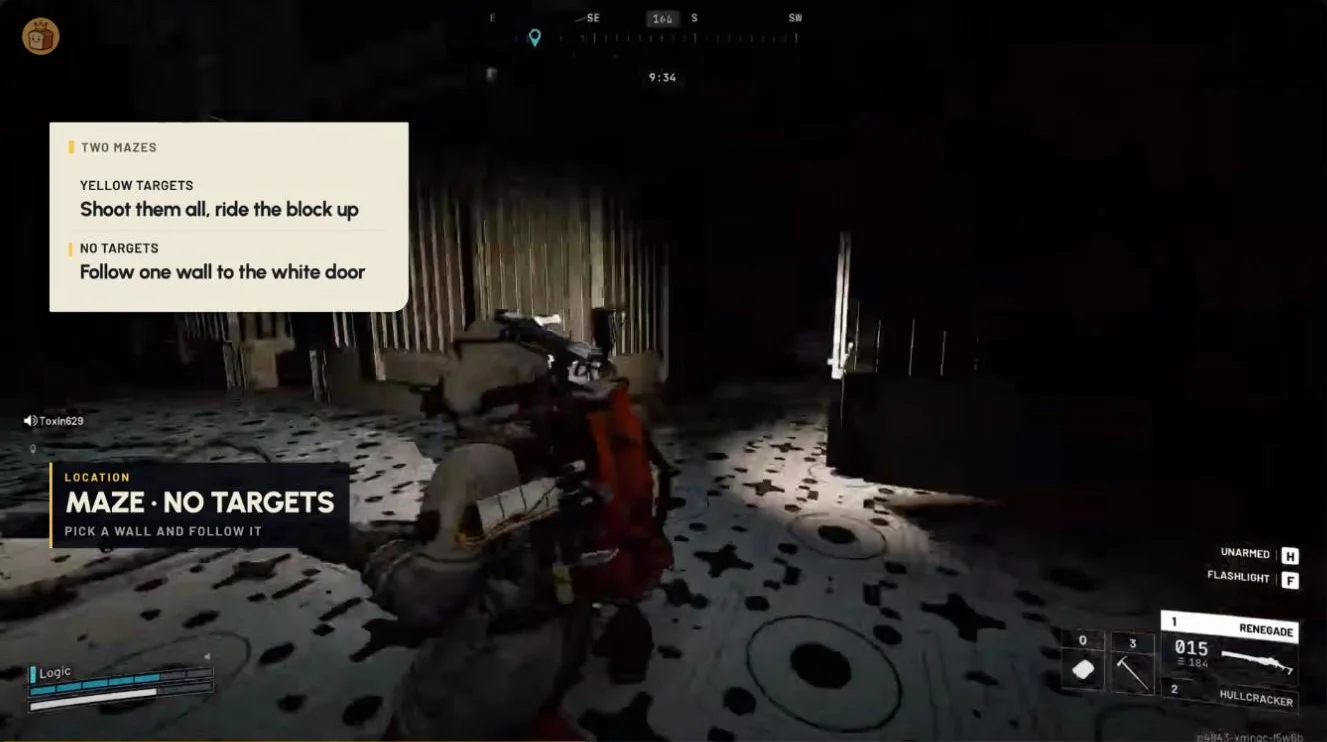
The middle trials can change order, and familiar rooms can have different puzzles. In the maze with yellow targets, shoot them to set a block moving, then ride it up through the ceiling opening. In the no-target maze variant, work through the corridors toward the white-lit onward door rather than looking for the same upward route.
For Belly of the Beast, climb the ladder above the compactor to reach the upper platform for the payload-processing objective. Search containers as you progress through the interior. The five-container task does not require saving all five searches for the final room. The doorway overlooking the final loot hangar is the important landmark for the storage objective.
Searching an orange canister starts an explosive timer. Move away before it detonates, and sort your inventory somewhere else. Blue canisters are loot containers, not a reason to linger beside a triggered orange one.
Take the Modulator and Return to the Surface
Look for the Emperor Modulator among the interior loot and keep it for the quest. Do not confuse it with Amplification Modules Mk I to V. The Modulator and those weapon-progression items serve different purposes.
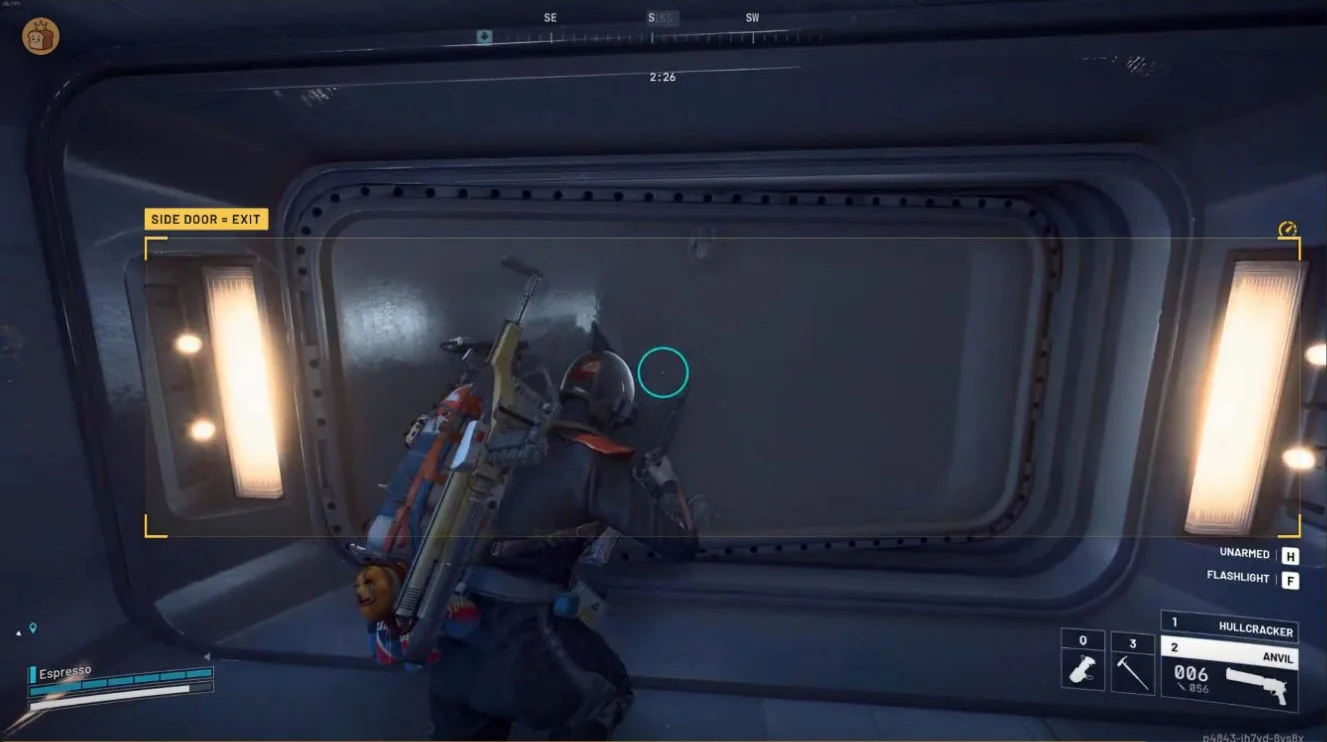
After working through the final hangar mechanisms, use the yellow-lit side exit to reach the snowy surface. Getting out of the Emperor is not extraction. Leave enough time for the surface journey, the Gondola call and boarding, rather than spending the last part of the raid sorting loot inside the hull.
Pendola Pass Extraction Points
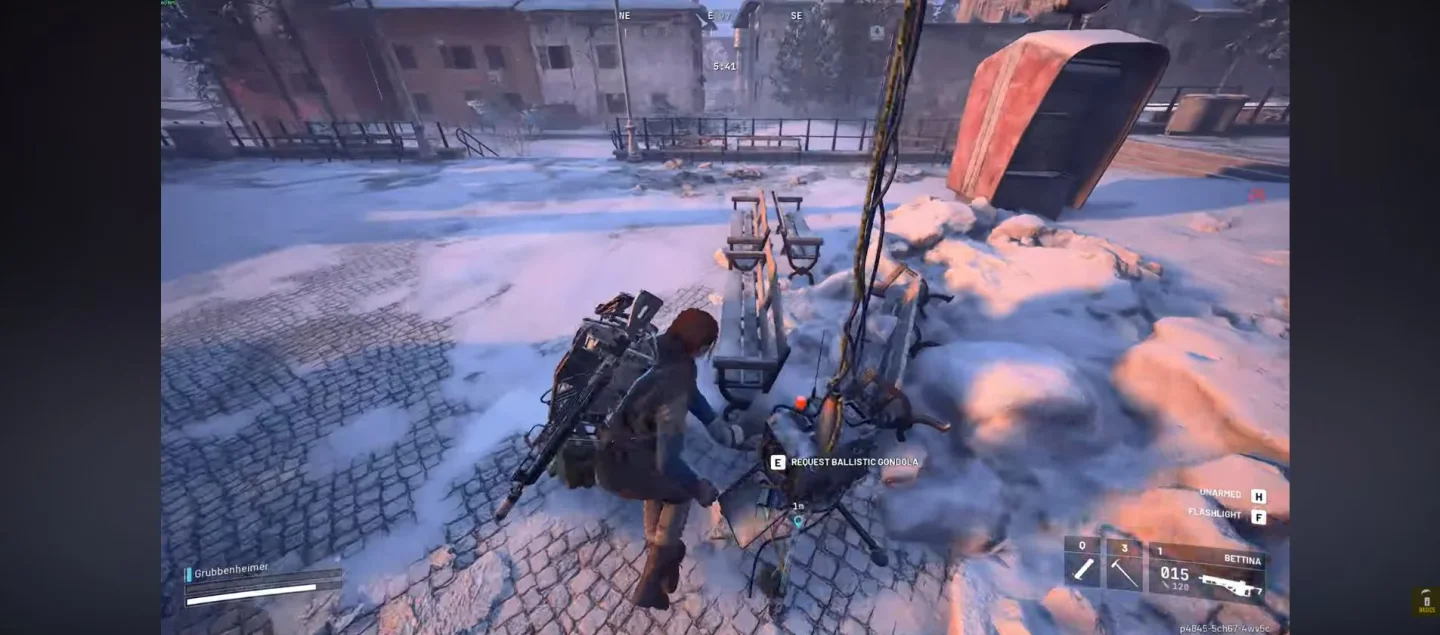
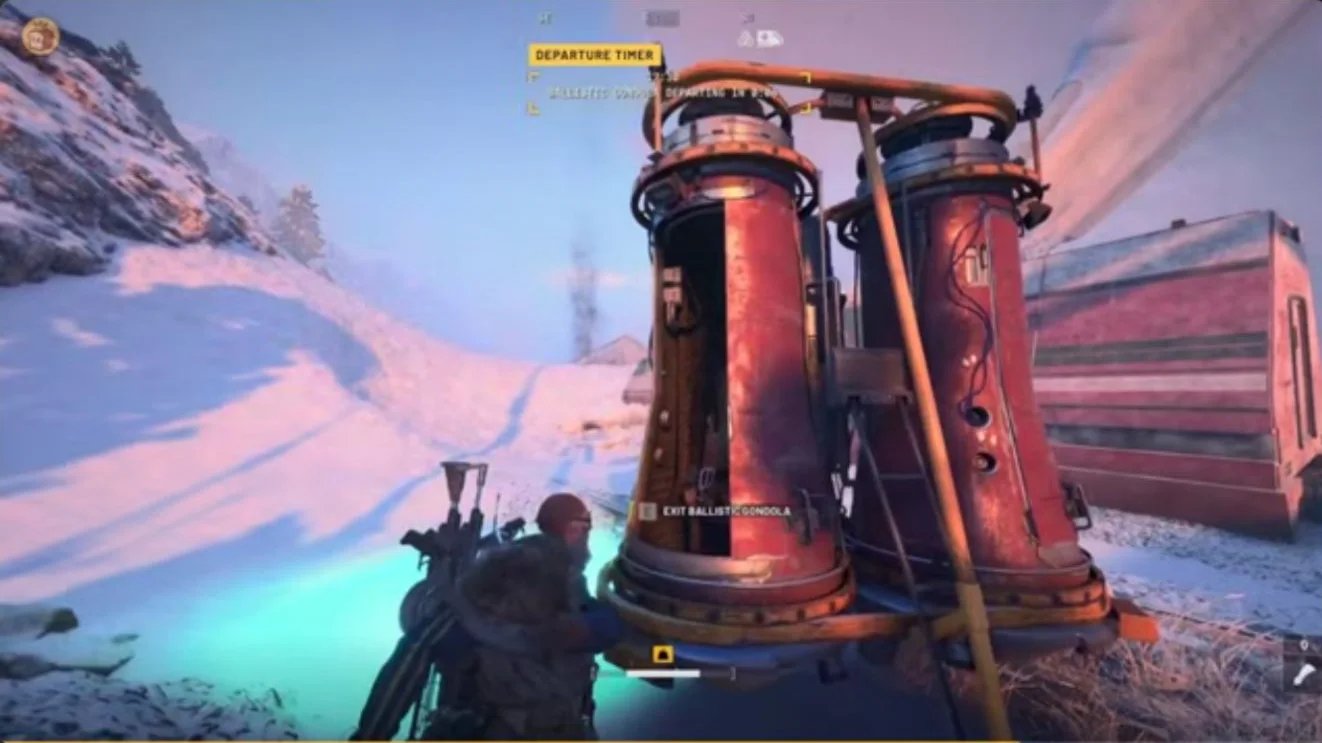
Call a Ballistic Gondola from a Gondola Transceiver, reach its boarding point and get into an available seat. The vehicle carries up to three seated Raiders. Plan this exit before entering the Emperor, taking a key-room detour or starting a long fight.
Gondola Transceivers do not expire as the raid progresses, so late calls remain possible. The departure countdown belongs to the called vehicle, not the terminal. Still leave enough raid time to reach the boarding point and depart.
Gondola Transceiver Locations
| Transceiver | Where to Look |
|---|---|
| Northern Transceiver | In the northern map region. |
| Supermarket Transceiver | By Commissary Supermarket. |
| Reckless Transceiver | In the fallen Emperor's shadow. |
| Glacial Transceiver | On Frozen River below Railyard. |
Call, Move and Board
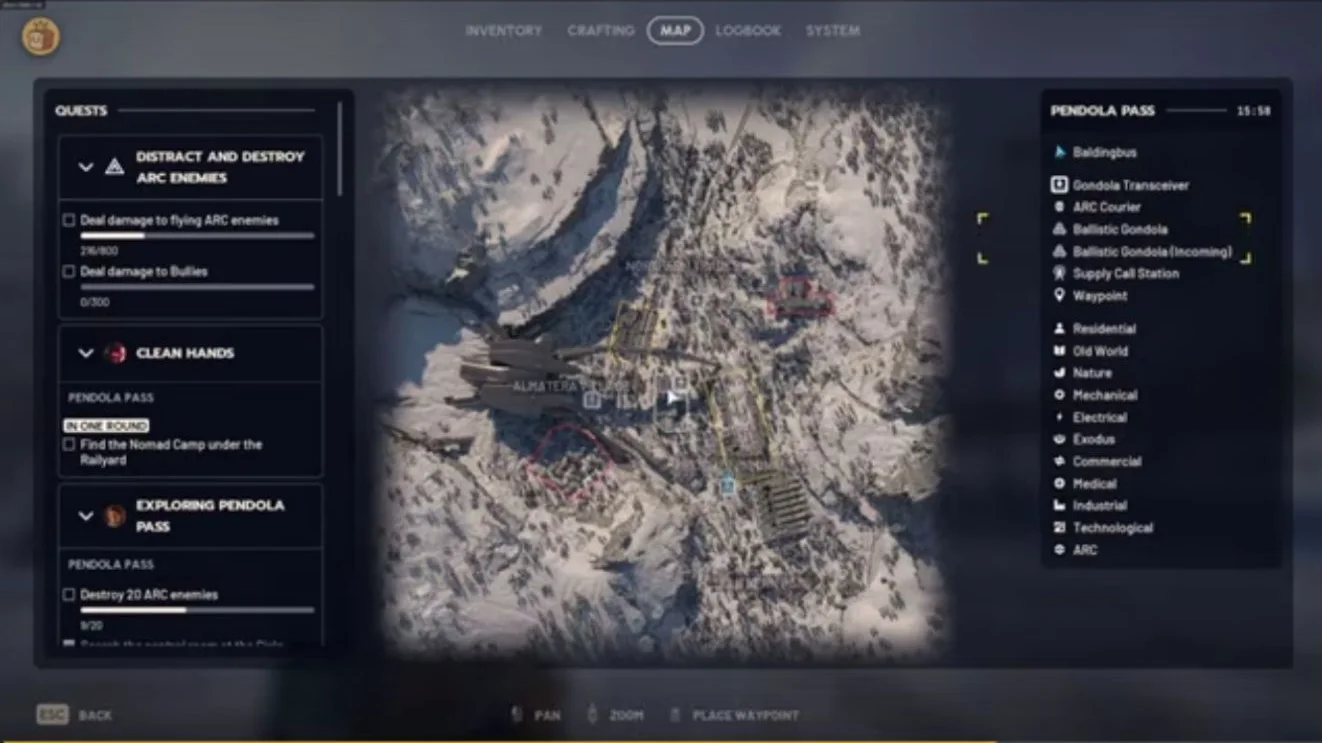
- Choose a transceiver. Use the Gondola Transceiver symbols on your map and compare the approach with your current position, nearby shelter and remaining raid time.
- Make the call. Interact with the transceiver, then follow the incoming Gondola indicator to the boarding point. Do not assume waiting beside the call terminal puts you at a seat.
- Watch the approach. Keep listening and checking nearby cover while the Gondola arrives. Its arrival makes the boarding area a poor place to stop managing your inventory.
- Board before departure. Get into a free seat and follow the vehicle's prompts. Read the departure countdown in your own raid and leave a margin for the journey there.
The Ballistic Gondola (Incoming) marker is separate from the transceiver's map symbol. Follow it to the vehicle's boarding point, then read the departure countdown in your current raid.
The four transceiver markers give you options around the map, but distance alone should not decide your exit. A longer approach through buildings can be preferable to crossing open ground during a Flash Freeze. Check the map again after a detour and keep the raid timer separate from the Gondola's departure countdown.
For a seated departure together, arrange no more than three Raiders per Gondola. A Grappling Hook is useful climbing equipment for the Emperor, but your planned exit should still include a reachable boarding point and an available seat.
If the Seats Are Full
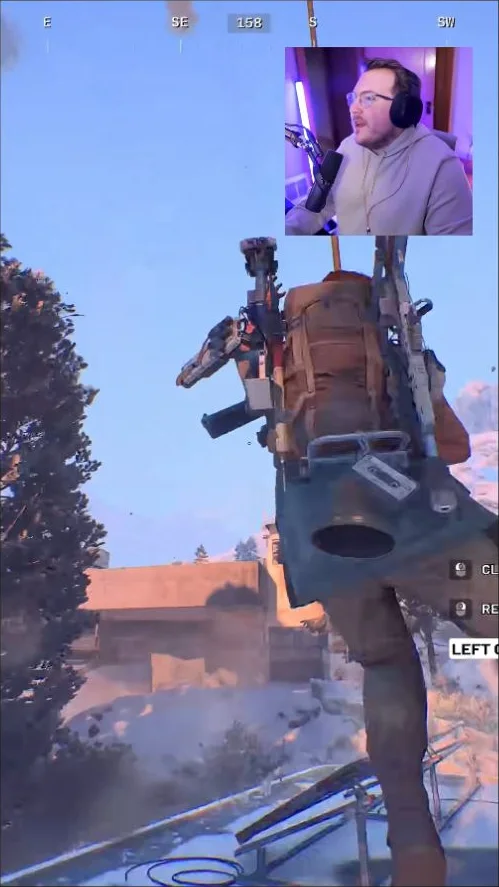
If all three seats are occupied, call another Gondola and look for an available seat. To ride outside instead, attach the Grappling Hook toward the red tank before departure. You remain exposed and can slip off, so a normal free seat remains the preferred planned departure.
Flash Freezes and Shelters
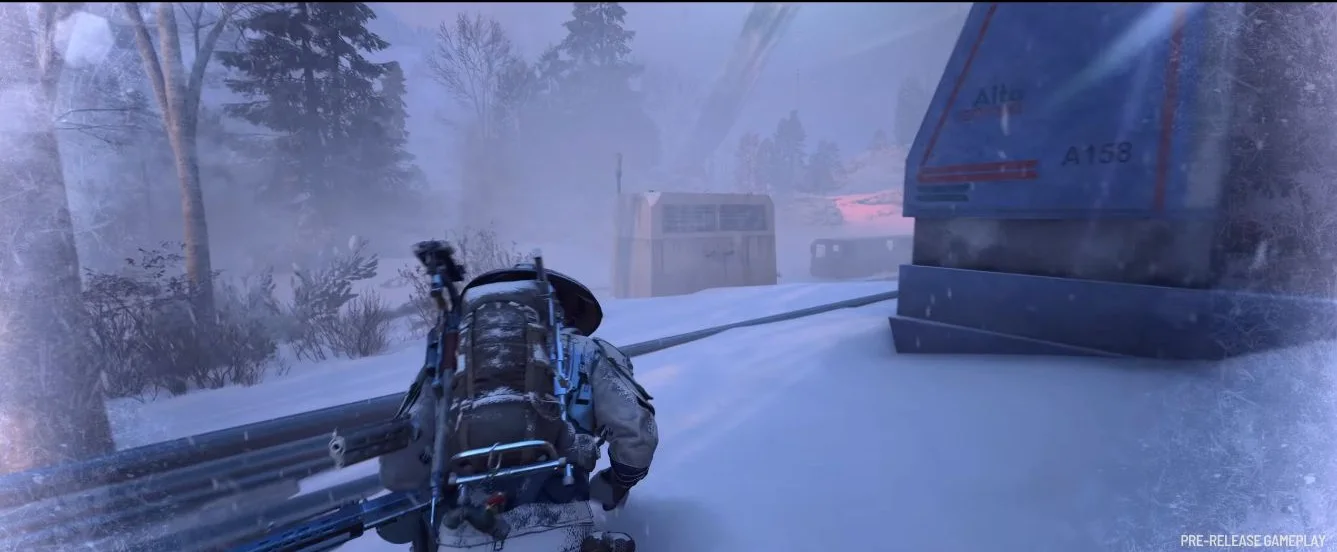
Flash Freeze is a local cold hazard built into Pendola Pass, not a separate rotating map condition. Exposure outdoors damages you, so move indoors when the weather warning arrives instead of trying to finish one more exposed loot stop.
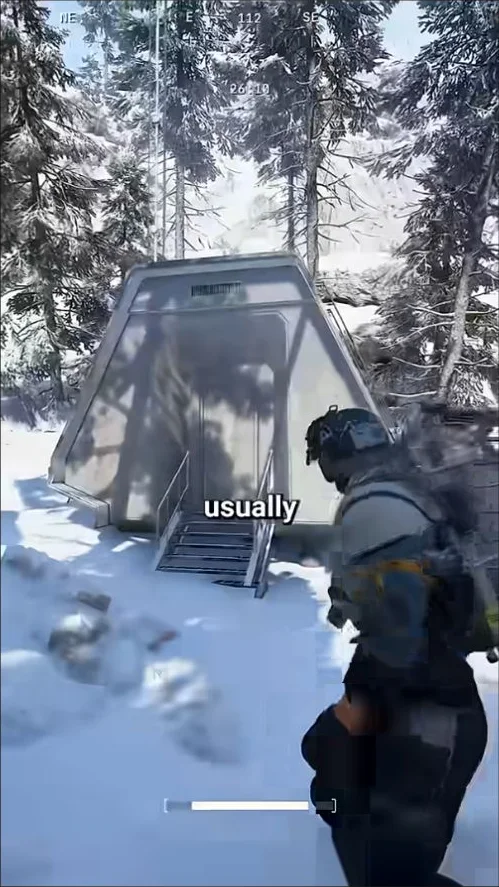
Look for the native Storm Hut shelter symbol. One useful shelter landmark is west of Commissary Supermarket. Storm Huts provide refuge and containers to search when accessible during the freeze, but an ordinary nearby building is a better immediate choice than a long sprint toward a distant hut.
Storm Hut marker visibility can depend on your proximity and the local weather. Act on weather warnings and use accessible enclosed shelter even if no hut marker is visible. Budget roughly three minutes indoors as a flexible planning allowance, not a fixed storm duration, and let the weather determine when you leave.
Enter and Leave a Storm Hut
- Watch for the local storm. The warning siren and red lights accompany the freeze. Check the nearby hut's state in your current raid rather than assuming all huts are open at once.
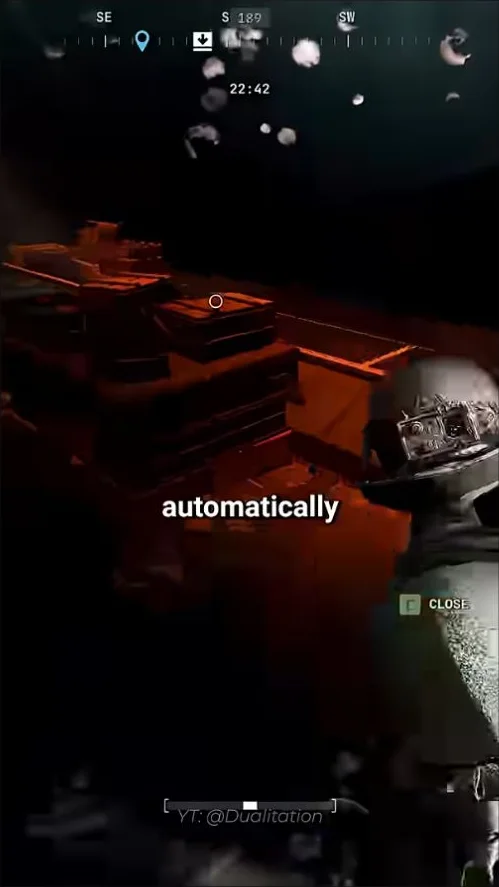
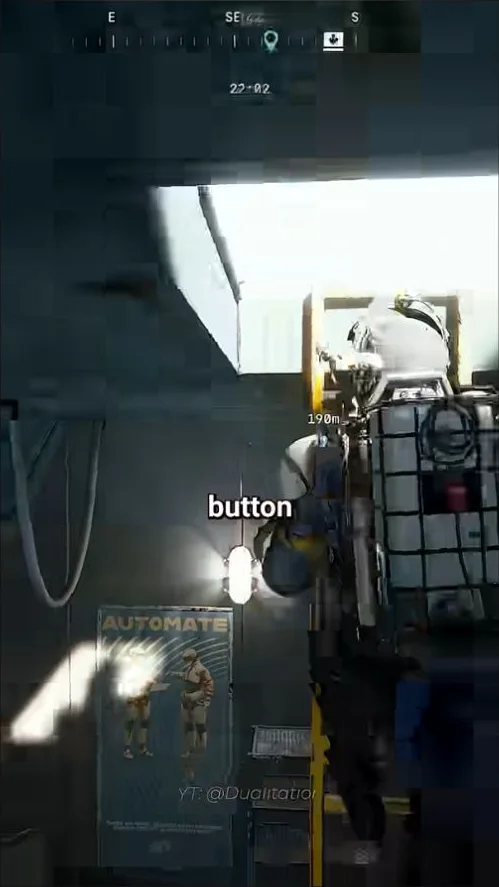
- Enter through the main door. It opens automatically during the local storm and closes afterwards. Do not wait outside a closed hut when an accessible enclosed building is within reach.
- Use the roof hatch to get out. Press the manual button inside to open the roof hatch, then climb the yellow ladder to exit.
Pick your next indoor stop before crossing open ground. Once under cover, recover, check the weather and decide whether continuing toward your objective leaves enough time to extract. Loot in a hut is a reason to use shelter well, not a reason to promise yourself a particular weapon, blueprint or container count.
If a frozen door blocks your intended refuge, use another accessible entrance or nearby building rather than spending your remaining health experimenting at the door. Do not use a remembered storm duration as a substitute for the conditions around you.
Clear a Frozen Door With a Blaze Grenade
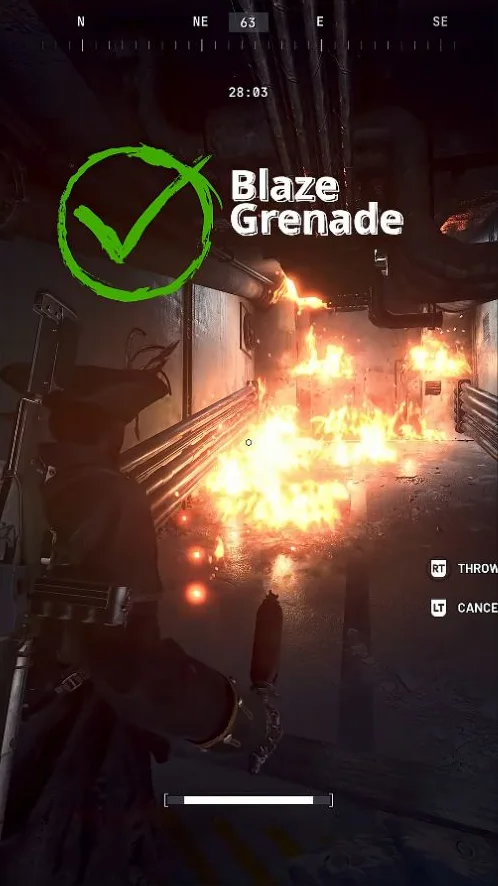
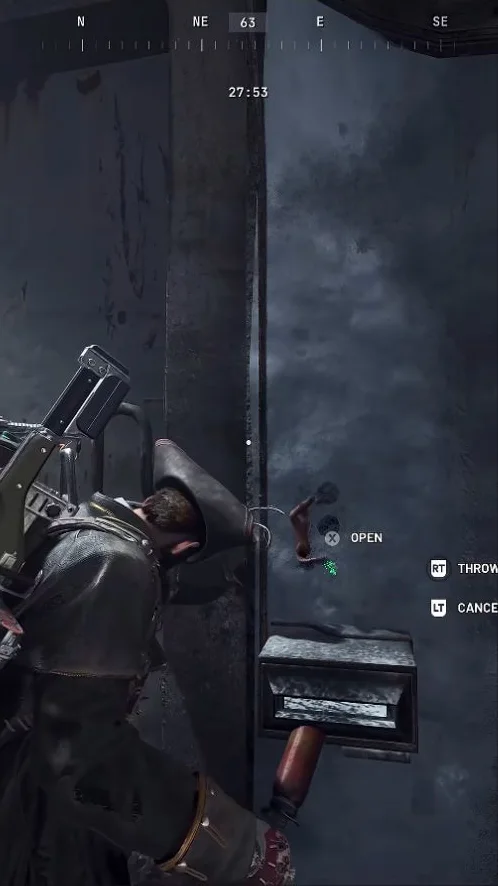
A Blaze Grenade can clear ice blocking a frozen door. Throw it at the ice and stay back while the doorway burns. Once the ice is gone and the flames have died down, approach and use OPEN to open the door. Clearing the doorway does not stop the outdoor cold hazard.
Dynamic Loot Zones: Why There Are No Fixed Loot Spots
There are no fixed best-loot spots on Pendola Pass because Dynamic Loot Zones change an area's loot value between raids. They do not change its underlying loot type. A Residential area remains Residential even when its value differs from your previous visit.
Use the map at the start of each raid to inspect the areas along your route. Match the loot type to the materials you need, then weigh the displayed value against travel, weather, enemies and the return to extraction. For example, Old Town has Residential and Old World loot types, but its value is not permanently tied to one rating.
A productive route is a sequence of useful stops, not a promise that one building always wins. Choose your quest or crafting target first, inspect the nearby loot zones, and make room for a shelter and an exit. Reuse the landmarks you learn, but reassess the loot-value decision every raid.
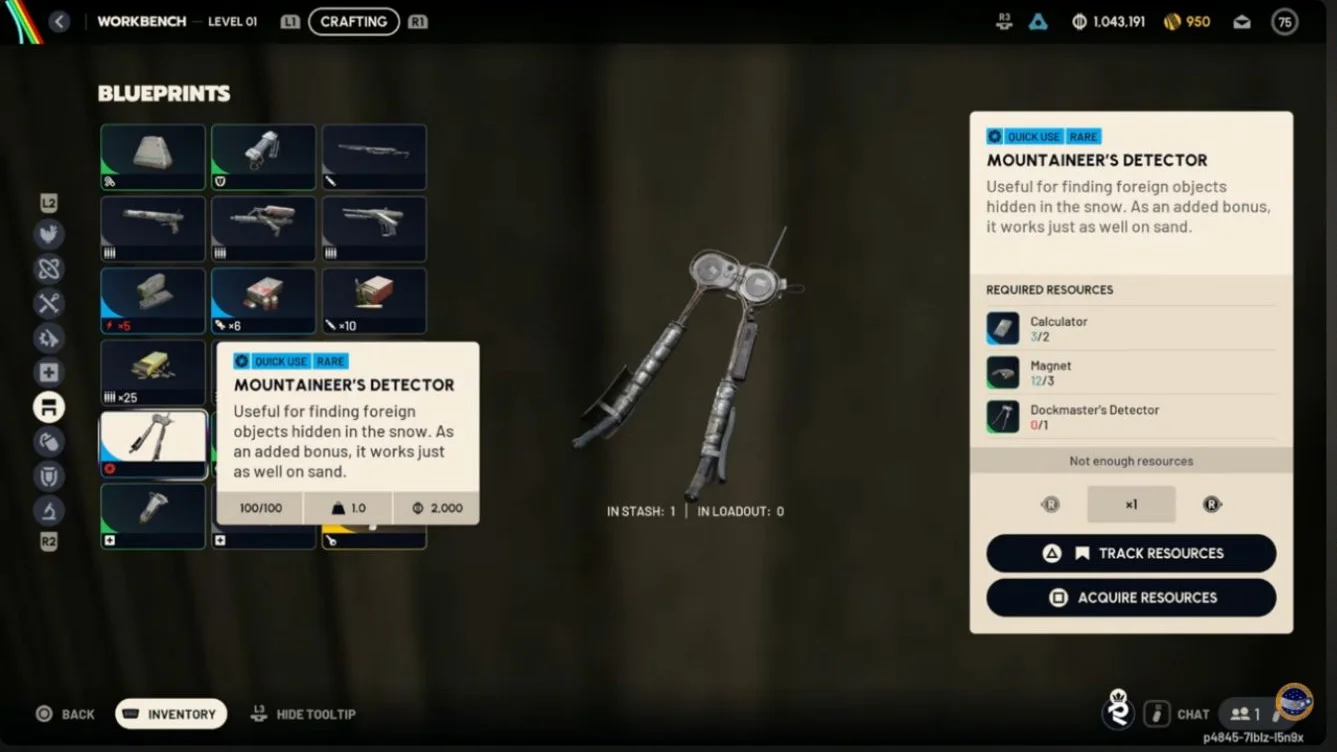
Mountaineer's Detector
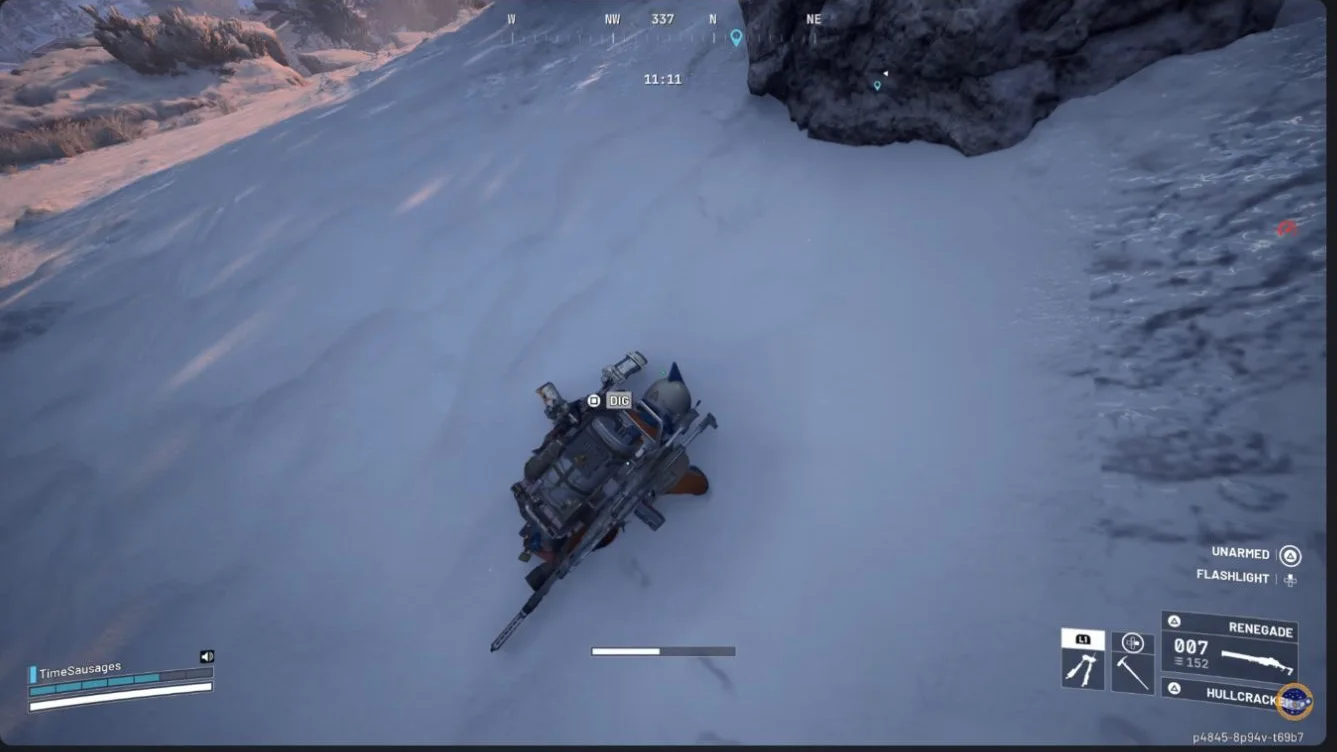
The Mountaineer's Detector finds foreign objects hidden in snow and also works in sand. Its Workbench I recipe lists 2 Calculators, 3 Magnets and 1 Dockmaster's Detector. Check that the recipe is available in your crafting menu before gathering materials. On Pendola Pass, follow the detector through the snow until the DIG prompt appears. Dig, then breach and search the uncovered container. Use the detector rather than fixed treasure pins, and do not count on particular contents.
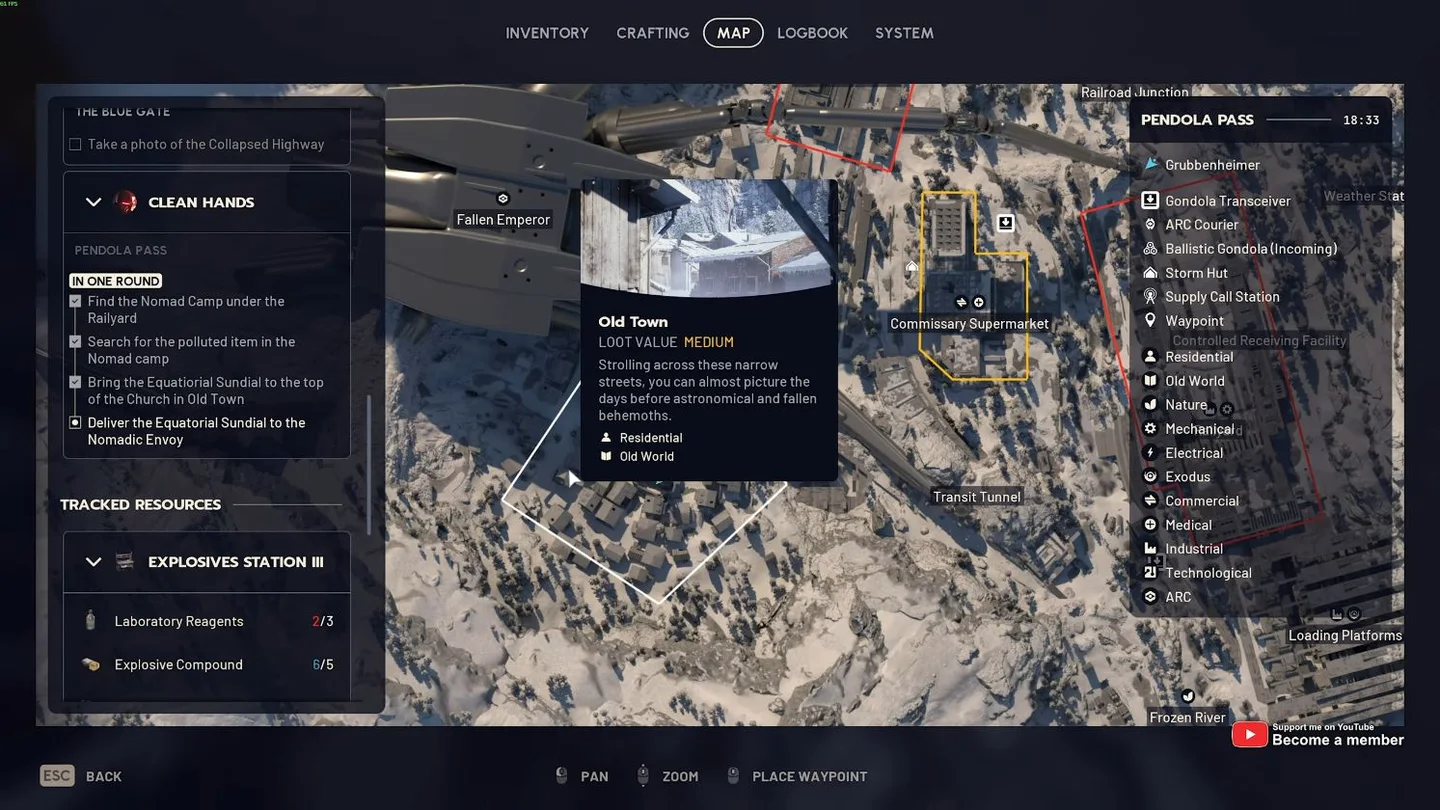
Pendola Pass Keys and Locked Rooms
Match your key to the exact door name before taking a locked-room detour. The four conventional keys below open rooms around Pendola Pass, while the Emperor Gateway Conduit opens the Emperor's entrance. Use the ARC Raiders key guide when planning access items across maps.
If your loadout has an available Safe Pocket that accepts the key, store it there to keep it after defeat. Keys left in your backpack are lost on defeat. Unlocking can still consume a protected key.
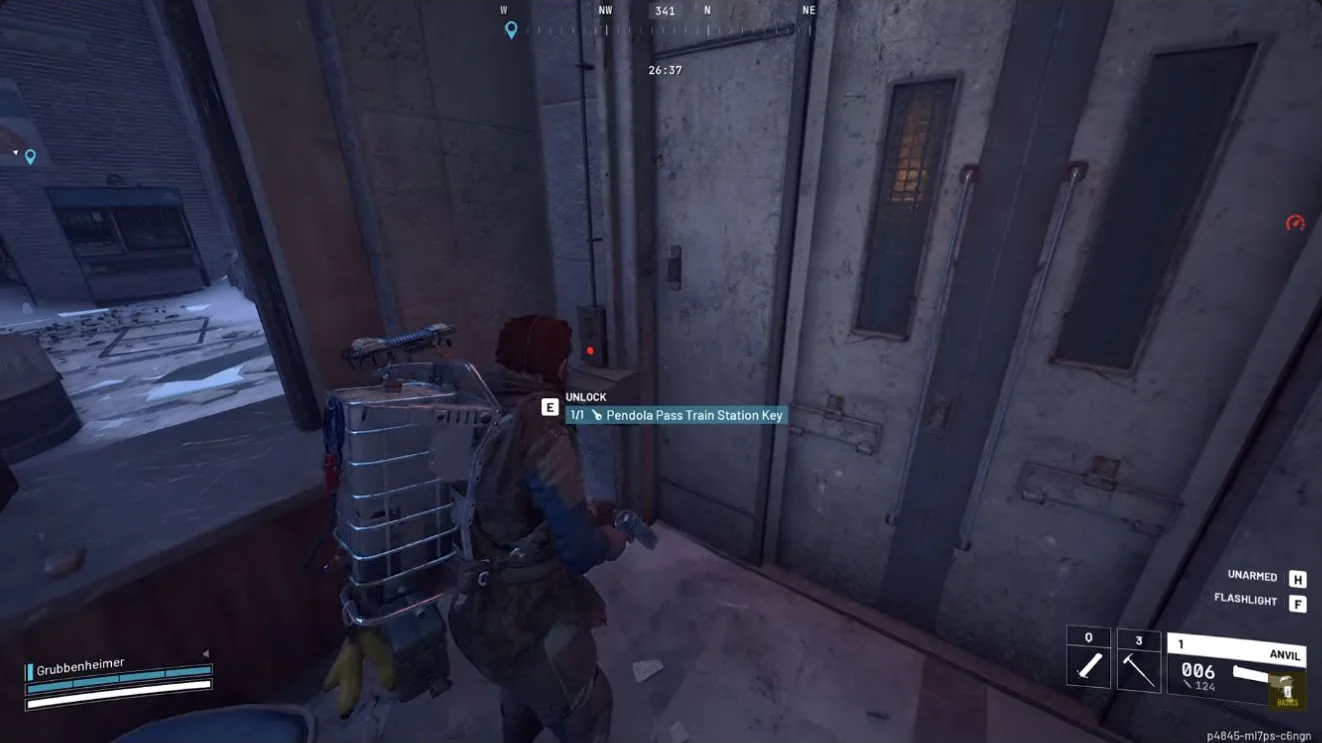
Pendola Pass Train Station Key
The Pendola Pass Train Station Key opens the locked room at Almatera Station. Approach the middle of the station from the west and enter the reception area. The locked door is on your left. There is a camera behind the approach, so check your surroundings before stopping at the lock.
The Pendola Pass Train Station Key is consumed when you unlock the room. Bring another copy for a later visit if you need to unlock the door again.
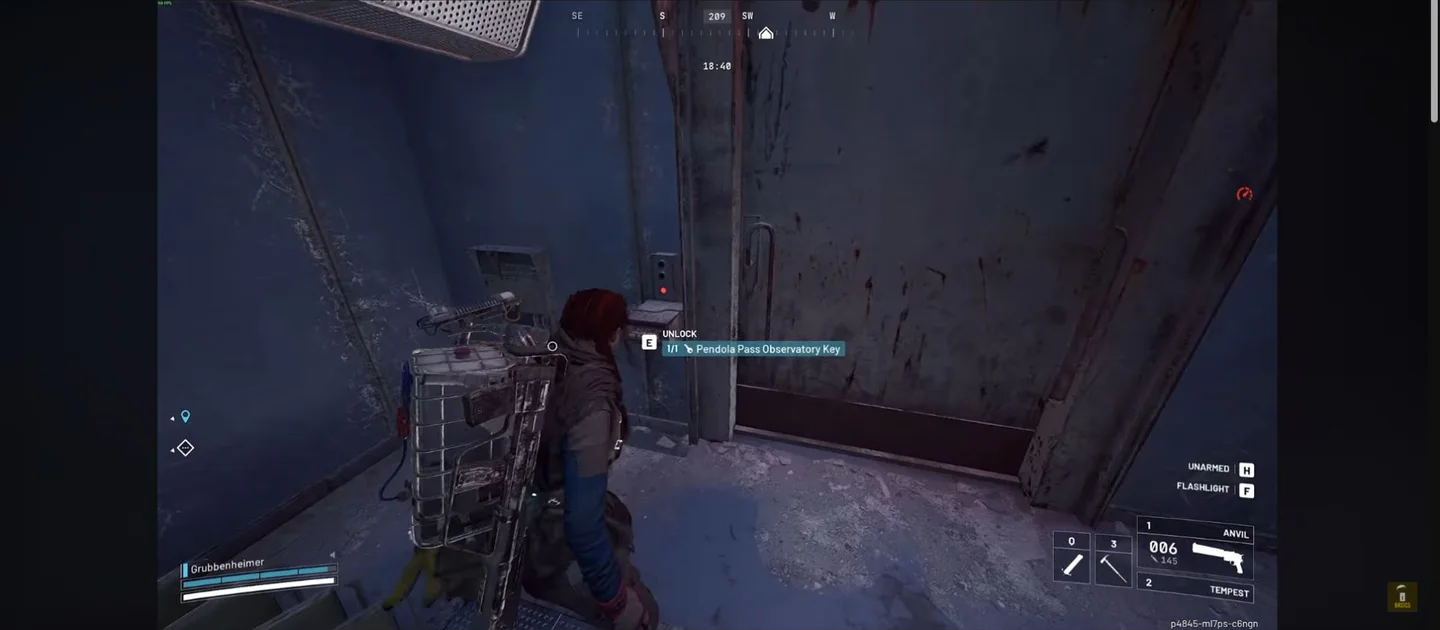
Pendola Pass Observatory Key
The Pendola Pass Observatory Key opens a small room inside Cielo Sereno Observatory, north of Railyard. Take the western exterior stairs to the lower platform and enter through the central doorway toward the north. Take the right-hand door, turn immediately left, then follow the passage on the right beyond the control-room section. The locked room is at the far end.
The Pendola Pass Observatory Key is consumed when you unlock the door. Bring another copy to unlock it again in a later raid.
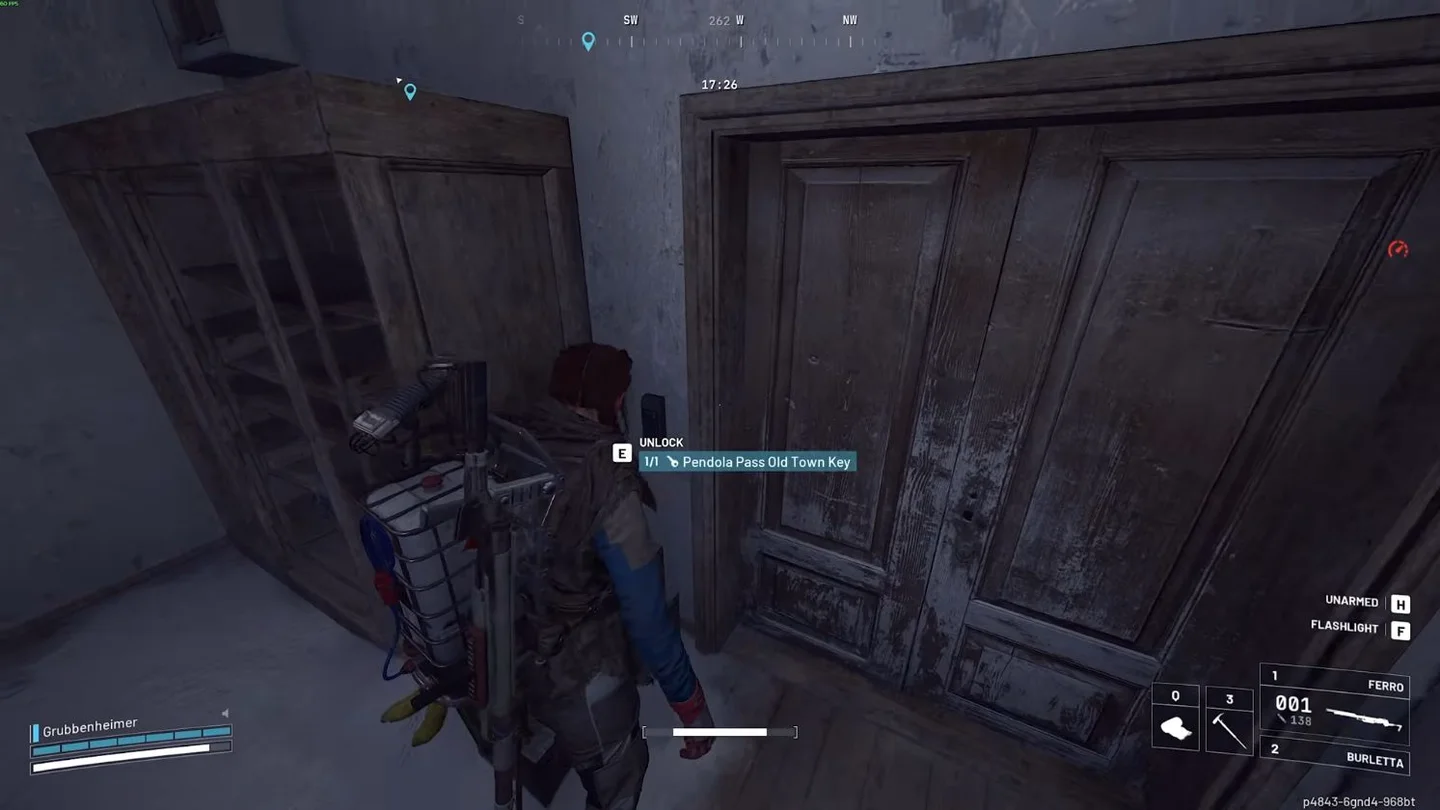
Pendola Pass Old Town Key
The Pendola Pass Old Town Key opens a basement route among the western houses in the southwest part of Old Town. Find the southern white house and use the narrow entrance between the buildings. Turn left inside to the locked doorway, then descend into the basement.
Old Town is west of Railyard. Do not head to Old Hamlet, which is a different settlement south of Loading Platforms.
The Pendola Pass Old Town Key is consumed when you unlock the door. Bring another copy to unlock it again in a later raid.
Pendola Pass Railyard Key
The Pendola Pass Railyard Key is used at Controlled Receiving Facility. Find the SC/Super Costa building, climb its exterior stairs and follow the upper hallway. Pass the stairwell on your right. The locked door is immediately beyond it.
The Pendola Pass Railyard Key is consumed when you unlock the door. Bring another copy to unlock it again in a later raid.
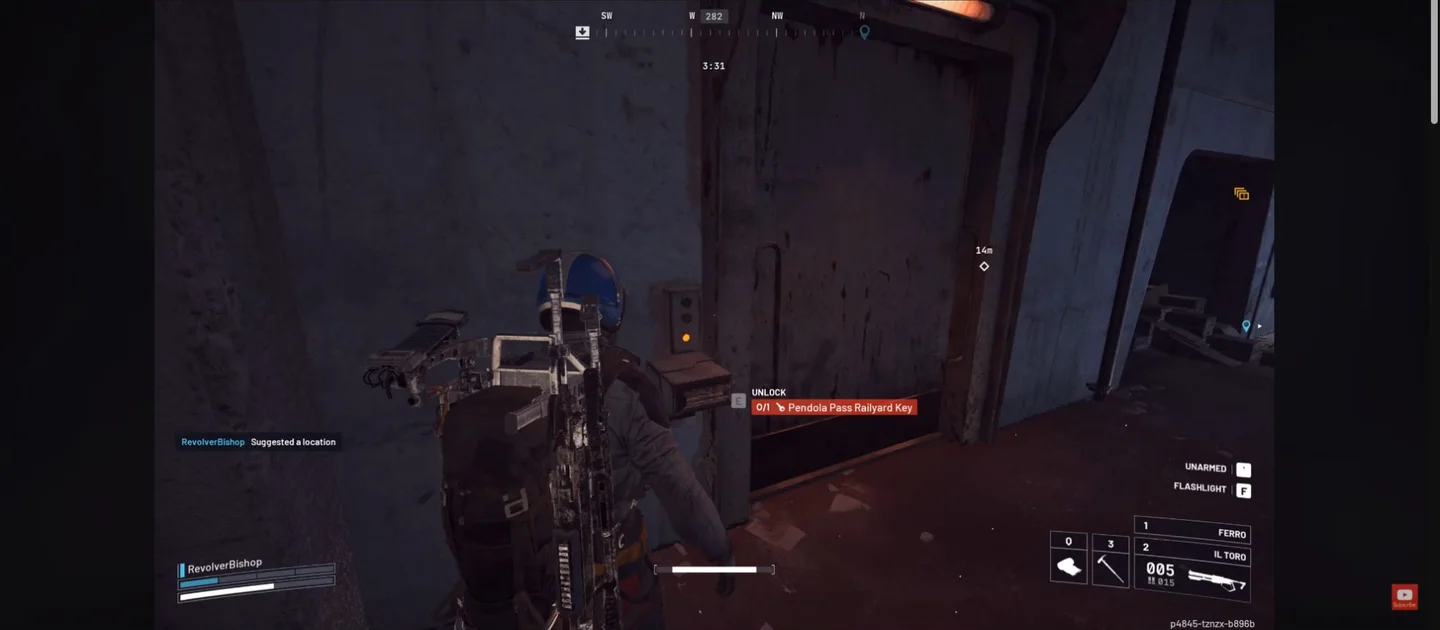
Emperor Gateway Conduit
The Conduit fits the socket on the Emperor's lower hull, beside the round entrance hatch. Craft it at Workbench I with its blueprint and one of each required Coupler. Treat this as an interior expedition with climbing gear and an extraction plan, not a quick room beside an ordinary loot stop. The Reward Pass also supplies the finished Conduit key at tier 60 as an alternative to crafting.
The Frigate and Redirection
Frigate and Redirection create different objectives. Frigate is the airborne boarding and sabotage operation. Redirection lets you call down Harvester Payloads on Pendola Pass. Check the selected raid's condition panel and the map conditions guide before building your loadout.
The Frigate: Boarding Is Only the Start
You board the Frigate, work through its machinery and take its cargo. You do not destroy the whole vessel with weapons. Other squads can enter too, so cooperation at a control panel does not remove the risk of a fight in the next passage. The operation is not exclusive to Pendola Pass.
A full cargo run has several separate cooperation requirements. The central Move Up controls need three Raiders operating together. Matching domed red cargo panels need two simultaneous operators. For the later cargo release, interact with the four floor posts until all retract before cargo descent. Reaching the ship or collecting accessible hull loot does not replace that release sequence.
- Climb through the machinery. Shoot yellow targets to extend platforms. Keep the lift button held until the rider locks the next level, then destroy the orange-ring engine core beneath the roof.
- Clear both fire-room cores. Shoot the yellow door targets until their indicators turn green. Cross between fire cycles, use the dark space at the far end for shelter and breach or shoot the core in the far corner of each room.
- Return from the lower core. Continue through the red-lit door and descending shafts, then through the green-lit door to the small lower core. Destroy it and grapple back up. The opening beneath the ship is not the route back to the cargo puzzle.
- Open all four cargo panels. Operate the first matching pair together and destroy the cores behind them, then open the upper pair. Prepare for Rocketeers after the fourth panel opens.
- Release and loot the cargo. Interact with the four floor posts until all retract before cargo descent. Descend with the cargo, staying in the central area and away from the outer sides. After it lands, search the round wall containers and use a normal active extraction.
For a return before the cargo descent, head toward the lower wing and rear dock, board a returning Reclaimer and ride it down without using DISRUPT. You are exposed on this descent, without a protective shield. Getting back to the ground still leaves the extraction journey. Do not replace a planned return route with an uncontrolled jump from the ship.
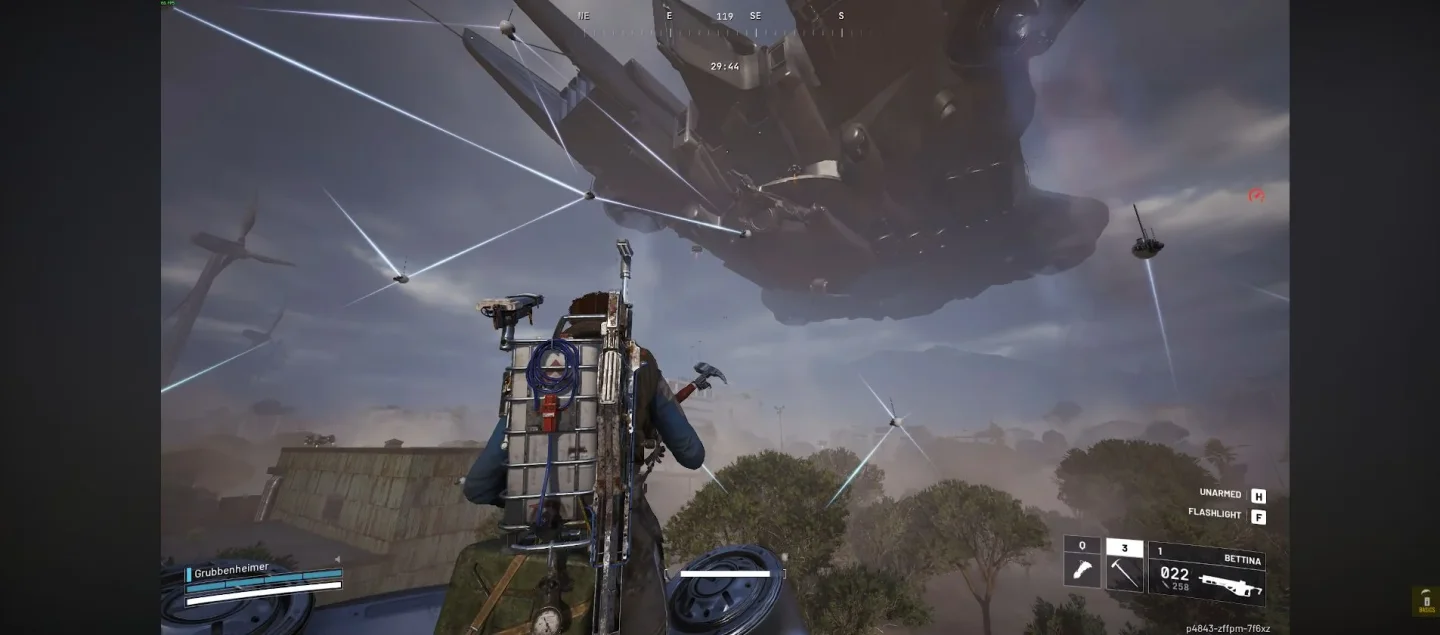
Redirection: Follow the Relay to the Payload
Redirection is the Pendola Pass condition for the relay-and-beacon materials route. Find a Damaged Emperor Relay, wait for its active state, search it for an Emperor Beacon and deploy the beacon in the open. Move clear of the falling debris, defend your opportunity to loot and breach the large upright Harvester Payload.
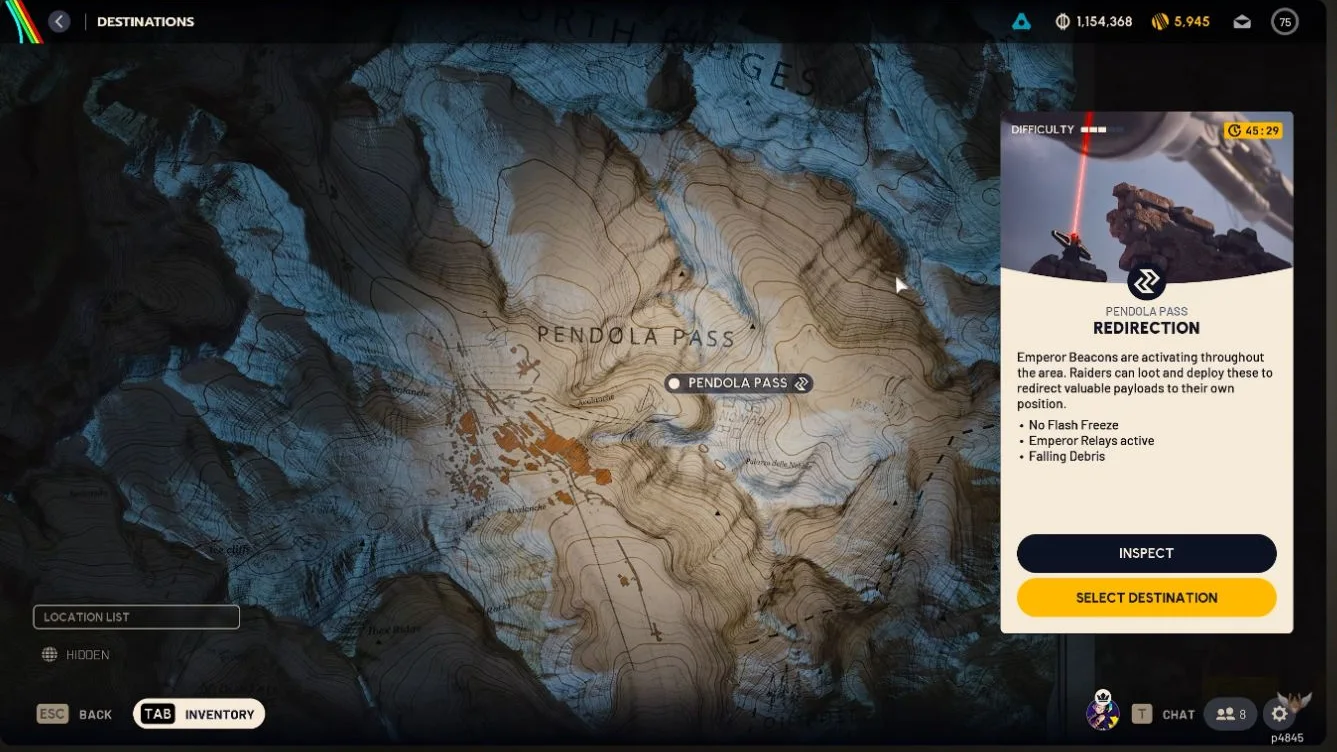
The Redirection destination panel lists No Flash Freeze for that raid, alongside Emperor Relays active and Falling Debris. Keep clear of falling debris even without the freeze.
The relay countdown belongs to that raid. Use it to decide whether the detour still leaves time for a payload search and extraction. Keep the Conduit recipe in mind while looting, and do not confuse the map's intrinsic Flash Freeze hazard with a separate condition you must select for this route.
Pendola Pass Map Locations and Landmarks
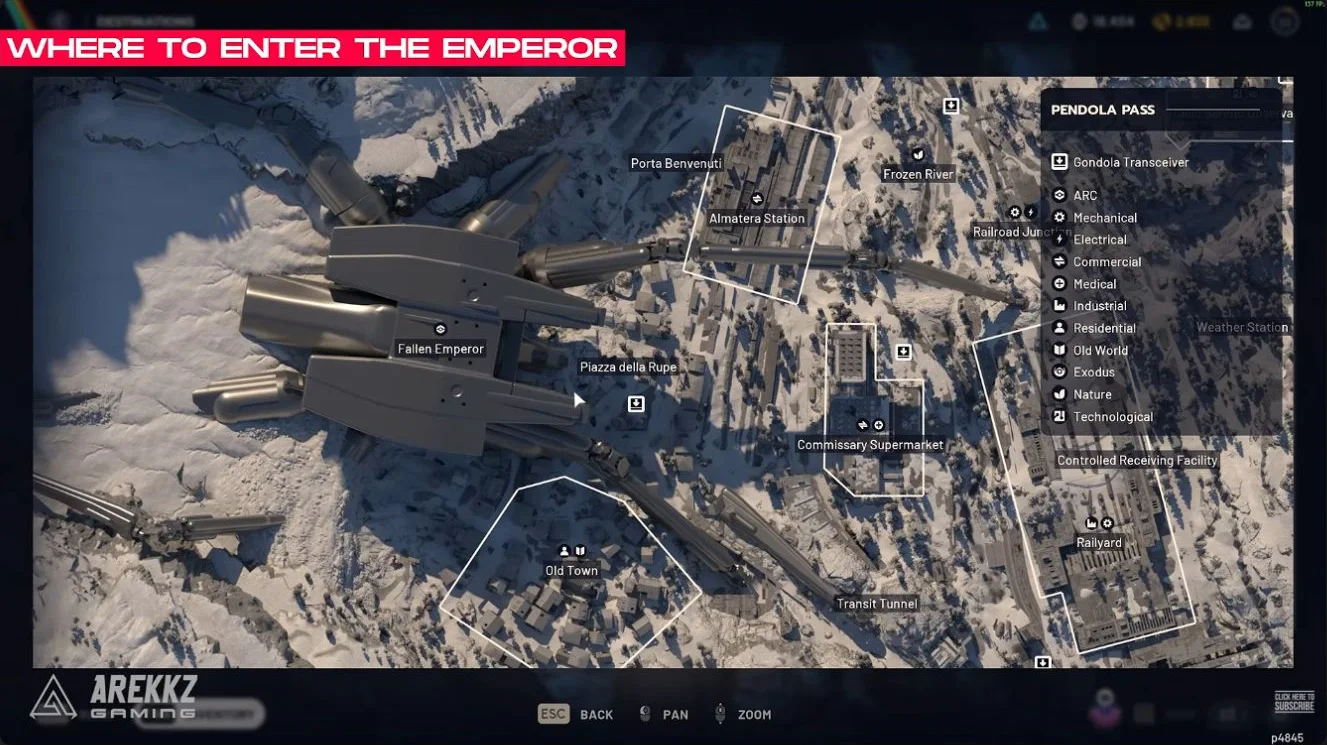
Use the Emperor's legs, Railyard and Commissary Supermarket to orient yourself before following smaller landmarks. The same area can serve as a quest stop, a key-room approach and a changing loot zone, so combine nearby tasks without assuming their entrances are the same.
Observatory, Railyard and Supermarket
Cielo Sereno Observatory is north of Railyard, with Deep-Space Telescope as another named landmark in the observatory area. For the Observatory key room, use the western exterior stairs and the passage beyond the control-room section. At Railyard, distinguish the tallest antenna tower from the separate key-door approach at Controlled Receiving Facility.
Commissary Supermarket is a central landmark. For Exploring Pendola Pass, go inside and search three ordinary containers. Do not spend that objective searching ARC wrecks or containers outside the supermarket.
Northern Tracks and Almatera Station
Use Northern Tracks, Frozen River, Railroad Junction and Almatera Station as your northern navigation references. An Emperor leg at Railroad Junction is an investigation landmark for Sizing Things Up. At Almatera Station, the western reception approach leads to the Train Station key door.
Old Town, Old Hamlet and Nomad Camp
Old Town lies west of Railyard. Its church is the Clean Hands landmark, and the bridge outside the town is associated with the Emperor-leg photo objective in Sizing Things Up. Old Hamlet is the separate settlement south of Loading Platforms. Do not substitute it for Old Town when following either quest.
Nomad Camp is beneath Railyard. Reach its western pipe entrance between Railyard and Transit Tunnel. Look for the pipe between those two landmarks rather than searching the buildings above the camp.
For another destination or a wider route comparison, use the ARC Raiders maps hub.
| Location | Type | Position |
|---|---|---|
| Deep-Space TelescopeThe telescope above Cielo Sereno Observatory, at the northeastern end of the map. | Points of interest | Named area |
| Cielo Sereno ObservatoryThe observatory above the Railyard. The main building contains its control room and an Observatory Key room. | Points of interest | Named area |
| Almatera StationThe station north of Commissary Supermarket. Enter its middle section from the west to reach the reception area and Train Station Key room. | Points of interest | Named area |
| Railroad JunctionThe rail junction between Almatera Station and the observatory. A fallen Emperor leg crosses the area. | Points of interest | Named area |
| Fallen EmperorThe fallen machine beside Old Town and Almatera Station. The hull entrance uses an Emperor Gateway Conduit. | Points of interest | Named area |
| Commissary SupermarketThe central supermarket between Old Town and the Railyard. | Points of interest | Named area |
| Old TownThe village west of the Railyard and south of the Fallen Emperor. Old Hamlet is a separate location farther south. | Points of interest | Named area |
| RailyardThe long rail facility east of Old Town. Controlled Receiving Facility occupies its northern section, with Loading Platforms to the south. | Points of interest | Named area |
| Loading PlatformsThe platforms immediately south of the Railyard and north of Old Hamlet. | Points of interest | Named area |
| Weather StationThe station on the hillside east of Controlled Receiving Facility. | Points of interest | Named area |
| Controlled Receiving FacilityThe northern building in the Railyard. Its eastern exterior stairs lead to the Railyard Key room route. | Points of interest | Named area |
| Frozen River: northern reachThe northern reach of Frozen River near Railroad Junction and Almatera Station. | Points of interest | Named area |
| Transit TunnelThe tunnel area west of the Railyard, beside the western approach to the Nomad Camp. | Points of interest | Named area |
| Old HamletThe southern settlement beyond the Loading Platforms. This is not Old Town, where the church objective takes place. | Points of interest | Named area |
| Frozen River: southern reachThe southern reach of Frozen River, west of Loading Platforms. | Points of interest | Named area |
| Northern TracksThe northern rail region around Almatera Station, Railroad Junction and Frozen River. | Points of interest | Named area |
| Almatera VillageThe western village region around the Fallen Emperor and Old Town. This broad region is not the separate Almatera Station building. | Points of interest | Named area |
| Freight TerminalThe eastern freight region covering the Railyard and its loading facilities. Use the individual building markers for a precise route. | Points of interest | Named area |
| Southern PassThe southern pass below the Freight Terminal region. This is a regional navigation label, not a separate extraction or quest interaction. | Points of interest | Named area |
| Northern Gondola TransceiverUse this transceiver to call the Ballistic Gondola, then follow its arrival and departure signals. | Gondola Transceivers | Transceiver |
| Supermarket Gondola TransceiverUse this transceiver to call the Ballistic Gondola, then follow its arrival and departure signals. | Gondola Transceivers | Transceiver |
| Reckless Gondola TransceiverUse this transceiver to call the Ballistic Gondola, then follow its arrival and departure signals. | Gondola Transceivers | Transceiver |
| Glacial Gondola TransceiverUse this transceiver to call the Ballistic Gondola, then follow its arrival and departure signals. | Gondola Transceivers | Transceiver |
| Storm Hut: west of CommissaryStorm Hut west of Commissary Supermarket. Check its in-raid icon and door before relying on it for shelter. | Shelters | Storm Hut |
| Damaged Emperor Relay: north of Railroad JunctionA Damaged Emperor Relay used during Redirection. Follow its in-game activation state and timer before searching it for an Emperor Beacon. | Emperor Relays | Relay device |
| Damaged Emperor Relay: south of Almatera StationA Damaged Emperor Relay used during Redirection. Follow its in-game activation state and timer before searching it for an Emperor Beacon. | Emperor Relays | Relay device |
| Damaged Emperor Relay: Weather Station approachA Damaged Emperor Relay used during Redirection. Follow its in-game activation state and timer before searching it for an Emperor Beacon. | Emperor Relays | Relay device |
| Damaged Emperor Relay: east of RailyardA Damaged Emperor Relay used during Redirection. Follow its in-game activation state and timer before searching it for an Emperor Beacon. | Emperor Relays | Relay device |
| Damaged Emperor Relay: Transit Tunnel approachA Damaged Emperor Relay used during Redirection. Follow its in-game activation state and timer before searching it for an Emperor Beacon. | Emperor Relays | Relay device |
| Damaged Emperor Relay: Emperor northeast legA Damaged Emperor Relay used during Redirection. Follow its in-game activation state and timer before searching it for an Emperor Beacon. | Emperor Relays | Relay device |
| Damaged Emperor Relay: Emperor east side, northern relayA Damaged Emperor Relay used during Redirection. Follow its in-game activation state and timer before searching it for an Emperor Beacon. | Emperor Relays | Relay device |
| Damaged Emperor Relay: Emperor east side, southern relayA Damaged Emperor Relay used during Redirection. Follow its in-game activation state and timer before searching it for an Emperor Beacon. | Emperor Relays | Relay device |
| Damaged Emperor Relay: Old Town bridge approachA Damaged Emperor Relay used during Redirection. Follow its in-game activation state and timer before searching it for an Emperor Beacon. | Emperor Relays | Relay device |
| Nomad Camp: western approachApproach the Nomad Camp beneath the Railyard from the Transit Tunnel side, then follow the pipe into the camp. | Quest objectives | Western pipe approach |
| Railyard Key room: east stairsAt Controlled Receiving Facility, take the exterior stairs and follow the upper hallway past the stairwell on the right. The locked door beyond it uses the Pendola Pass Railyard Key. | Keys and key rooms | Exterior stairs approach |
| Pendola Pass Train Station KeyThe Pendola Pass Train Station Key opens the locked room at Almatera Station. Approach the middle of the station from the west and enter the reception area. The locked door is on your left. There is a camera behind the approach, so check your surroundings before stopping at the lock. | Keys and key rooms | Named area |
| Pendola Pass Observatory KeyThe Pendola Pass Observatory Key opens a small room inside Cielo Sereno Observatory, north of Railyard. Take the western exterior stairs to the lower platform and enter through the central doorway toward the north. Take the right-hand door, turn immediately left, then follow the passage on the right beyond the control-room section. The locked room is at the far end. | Keys and key rooms | Named area |
| Pendola Pass Old Town KeyThe Pendola Pass Old Town Key opens a basement route among the western houses in the southwest part of Old Town. Find the southern white house and use the narrow entrance between the buildings. Turn left inside to the locked doorway, then descend into the basement. | Keys and key rooms | Named area |
| Emperor Gateway ConduitThe Conduit fits the socket on the Emperor's lower hull, beside the round entrance hatch. Craft it at Workbench I with its blueprint and one of each required Coupler. Treat this as an interior expedition with climbing gear and an extraction plan, not a quick room beside an ordinary loot stop. | Keys and key rooms | Named area |
| Storm HutStorm Huts provide refuge and containers to search when accessible during the freeze, but an ordinary nearby building is a better immediate choice than a long sprint toward a distant hut. | Shelters | Storm Hut |
| Storm HutStorm Huts provide refuge and containers to search when accessible during the freeze, but an ordinary nearby building is a better immediate choice than a long sprint toward a distant hut. | Shelters | Approach |
| Porta BenvenutiPorta Benvenuti lies northwest of Almatera Station, beside the fallen Emperor's northern approach. | Points of interest | POI area |
| Piazza della RupePiazza della Rupe lies in the village area east of the fallen Emperor and west of Commissary Supermarket. | Points of interest | POI area |
| Damaged Emperor Relay: north of Northern TracksFind this relay above the Northern Tracks label. During Redirection, check its activation state and countdown before searching. | Emperor Relays | Relay device |
| Observatory Southwest Storm HutFind this Storm Hut east of Railroad Junction and southwest of Cielo Sereno Observatory. Check the door and local weather before relying on access. Use another accessible enclosed shelter if it is closed. | Shelters | Storm Hut |
New ARC on Pendola Pass
Bully, Skulker and Hydra demand different reactions. Make room to escape the Bully's close pressure, keep track of the Skulker when it changes cover and avoid treating one distracted Hydra gun pair as an opening against the whole turret.
Bully
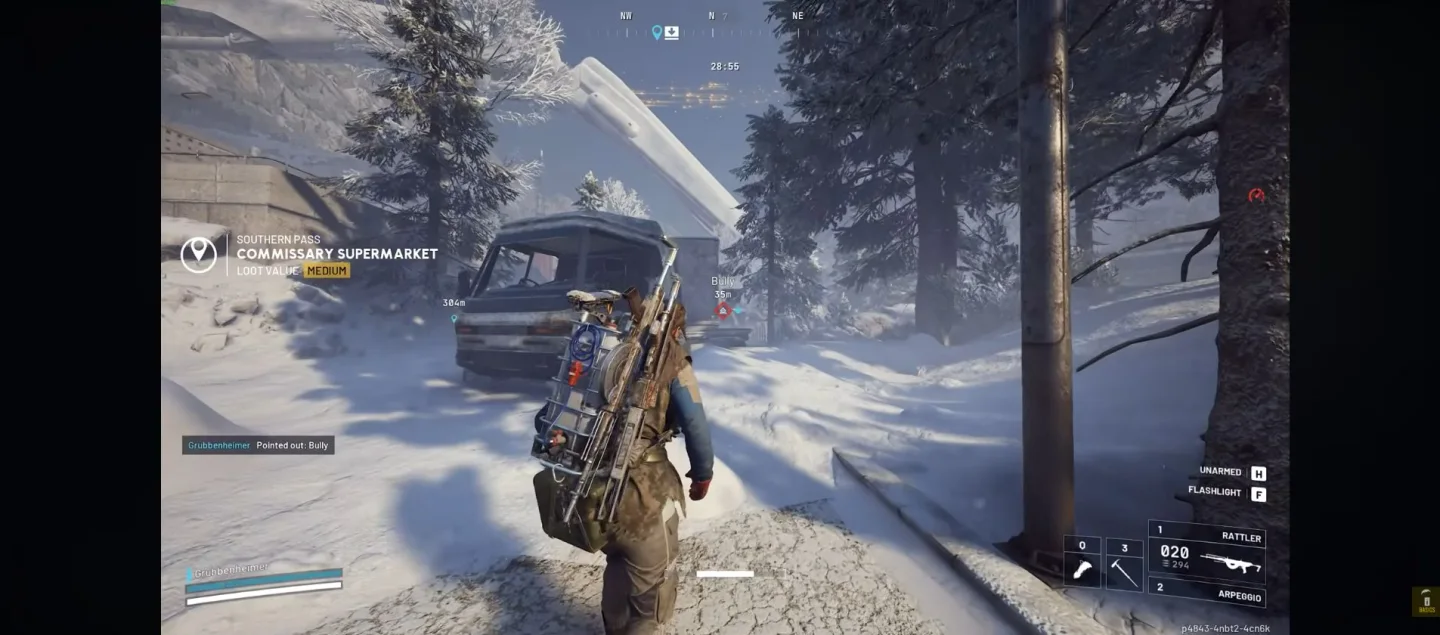
The Bully closes aggressively and keeps pressure on your position. It can stumble into Raiders and knock them down, so leave yourself space to move rather than backing into a dead end. Use cover to interrupt its approach and take your shots without letting the next rush trap you against a wall.
Look for Bullies along the tracks around Almatera Station and Railroad Junction. Treat these as search areas, not guaranteed spawn points.
Skulker
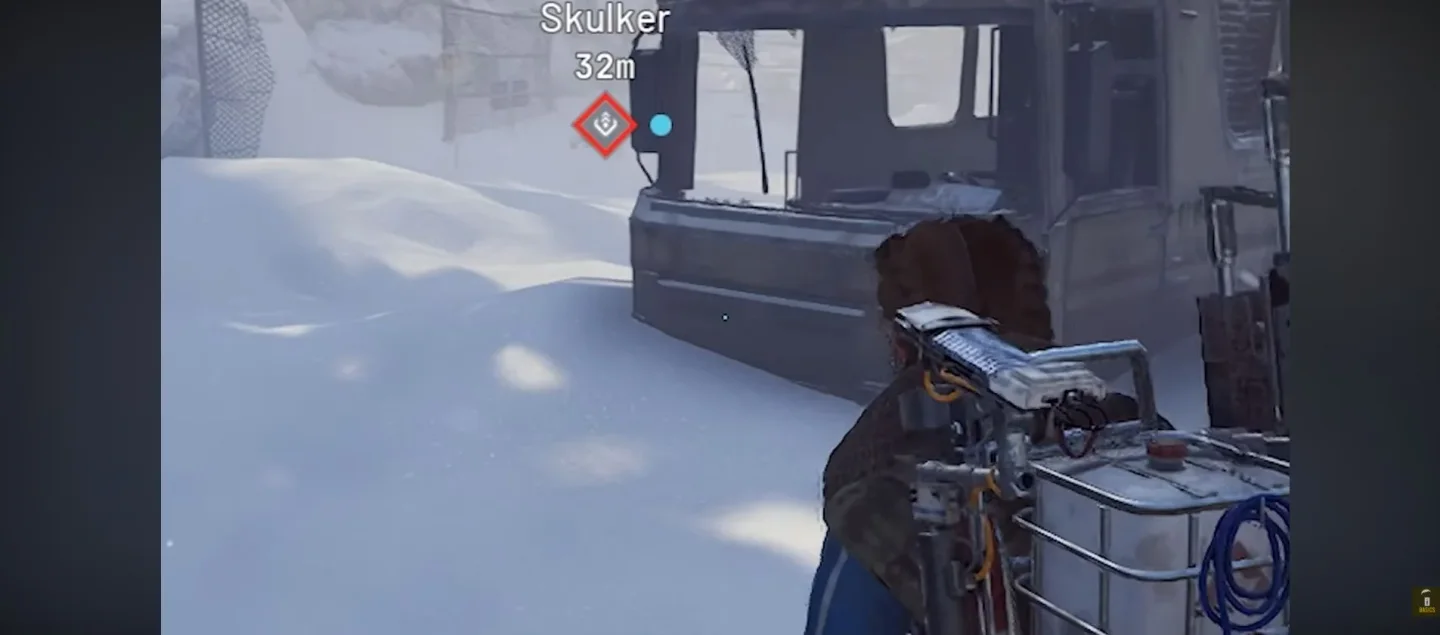
The Skulker is an evasive ranged ambusher. It unfolds to take shots, then changes position and hides behind cover. Watch where it retreats and check your flank before returning to a container or a long interaction. Do not wait for it to reach melee range before treating it as a threat.
Search around the destroyed station at the end of Northern Tracks for Skulkers and Bullies when working on Tracks of the Beast. Neither enemy is guaranteed to be there.
Hydra
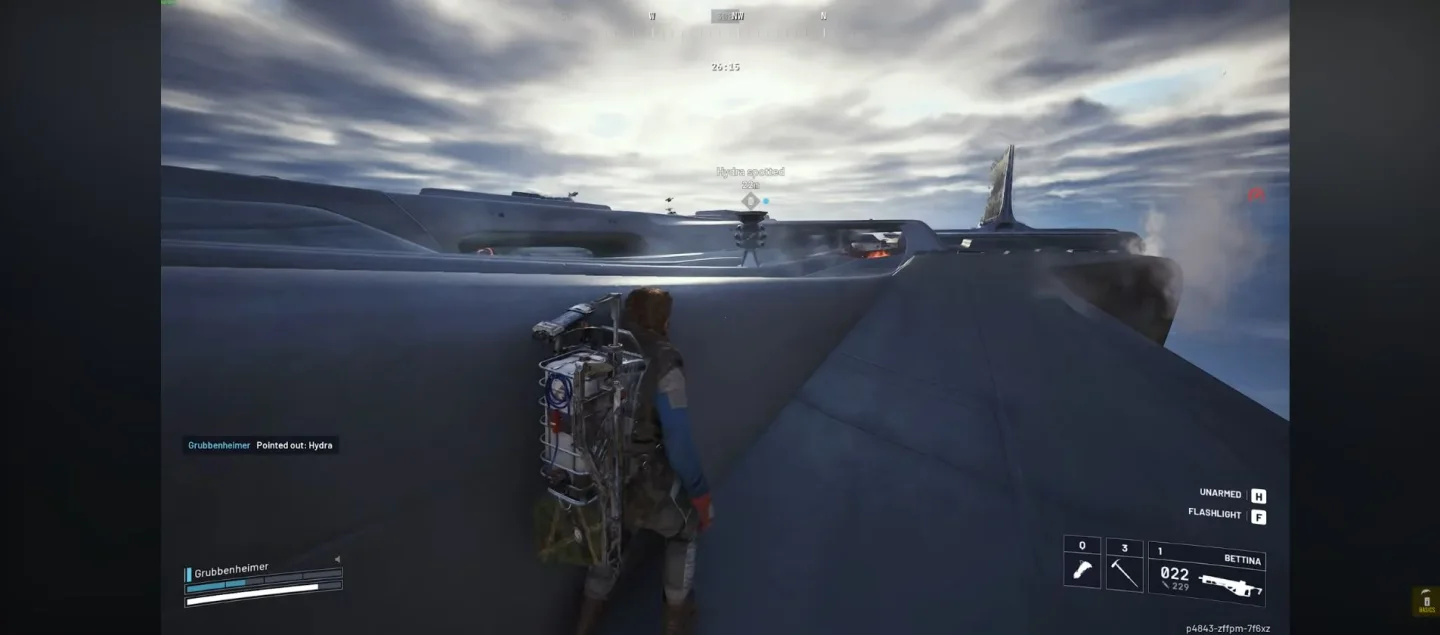
The Frigate's Hydra has three independently targeting gun pairs. It can engage several Raiders at once, so spreading out does not make the rest of the group immune while one person holds its attention. Hydra shots through Cargo-area walls do not deal damage, but exposed fire from the turret remains dangerous. Coordinate movement between exposed sections instead of bunching up at a control panel.
Quests on Pendola Pass
Accept the quests you intend to work on before deploying, then plan around their locations and interaction requirements. The ARC Raiders quest hub helps you keep map exploration separate from the Emperor interior and the full Frigate cargo operation.
- Exploring Pendola Pass. Visit the Observatory control room, patch the tallest Railyard tower's antenna with one Wire and search three containers inside Commissary Supermarket.
- Sizing Things Up. Investigate the fallen Emperor's legs and base, then work through the payload and Coupler task.
- Clean Hands. Use the western pipe to reach Nomad Camp, then follow the quest to the Old Town church, not Old Hamlet.
- Tracks of the Beast. Use Northern Tracks and the Almatera Station area to orient the investigation.
- Belly of the Beast. After Sizing Things Up and Tracks of the Beast, enter the Emperor, investigate its systems, search five containers and obtain an Emperor Modulator inside.
- Bait, Fetch, Blast. Complete one of the Bully objective's alternative methods, rather than treating the whole-machine, head and four-leg options as three mandatory kills.
- Ruins and Reverberations. Return to Cielo Sereno Observatory for the quest's investigation.
Frigate Quests
Boarding the Frigate and Disrupting the Frigate take you onto the operation wherever it is active. Treat boarding as the first stage, not proof that the full sabotage and dropped-cargo route is complete. Plan the latter around its three-person central controls and interact with the four cargo floor posts until all retract before descent.
Before your next deployment, choose whether you are opening the Emperor, completing nearby quests or taking on the Frigate. Pack for that objective, check the raid conditions and leave a Gondola route at the end of the plan.
FAQ
How Do You Get Inside the Emperor on Pendola Pass?
Craft an Emperor Gateway Conduit at Workbench I using its blueprint and one each of the ARC Insulated, Conductive and Plated Couplers. The Reward Pass supplies the finished Conduit at tier 60 as an alternative to crafting. Use it at the lower-hull socket to open the round hatch. Bring climbing gear and obtain the Emperor Modulator inside, rather than treating it as an entry requirement.
How Do You Unlock Pendola Pass?
Pendola Pass unlocks after 25 rounds. That is a rounds requirement, not a Raider-level target. Before planning an Emperor expedition, check that you can select the map, accept the quests you intend to pursue and prepare a separate extraction route for returning with your loot.
How Does the Ballistic Gondola Work?
Call a Ballistic Gondola through a Gondola Transceiver, follow the separate Ballistic Gondola (Incoming) marker to its boarding point and enter an available seat. It carries up to three seated Raiders. Leave time for the approach and boarding, and read the departure countdown in your own raid rather than relying on a remembered timer. If all seats are full, call another Gondola and look for an available seat. To ride outside instead, attach the Grappling Hook toward the red tank before departure, but remember that you remain exposed and can slip off.
What Is a Flash Freeze?
A Flash Freeze is a local cold hazard built into Pendola Pass, not a separate rotating condition. Outdoor exposure damages you, so head into a building or accessible Storm Hut. Watch for the warning siren and red lights. A Storm Hut's main door opens automatically during its local storm and closes afterwards. To leave through the roof, press the manual button inside and climb the yellow ladder through the open hatch. Plan shelter before crossing open ground, and use the weather around you rather than assuming every storm lasts the same time.
Where Is the Best Loot on Pendola Pass?
There is no permanent best-loot route. Dynamic Loot Zones change an area's loot value between raids without changing its underlying loot type. Inspect the areas in your current raid, choose the types that suit your materials or quest needs, and weigh each detour against shelter, travel and extraction time.
Can You Destroy the Frigate?
No. The Frigate is a boarding, sabotage and cargo-looting operation, not a vessel you destroy with weapons. Its full route needs three simultaneous operators at the central controls. For cargo release, interact with the four floor posts until all retract before descent. Reaching the ship or finishing the boarding quest does not complete the full cargo operation.
Plan Your Pendola Pass Raid
Get support for the Emperor route, quest objectives and your return to Speranza.
Map and gameplay images by TroubleChute Basics, ARC Raiders, Nafburger, McBread, PolishMoon, Duality, Nickko Kimiko, Time Sausages Gaming Channel, Jay May, Arekkz Gaming, Crazymrpipz, Epitomy, Sean Martin / PC Gamer.